Showing posts with label build. Show all posts
Showing posts with label build. Show all posts
Thursday, July 28, 2016
How to Install CM13 0 Nightly Android 6 0 1 Marshmallow on Verizon LG G3 VS985 Latest Build

There’s a hell of a lot to like about the LG G3. For a start it was the winner of the TrustedReviews Best Phone Award 2014. Its combination of clever design, excellent camera and top-notch screen made it a cult favourite that deserves to sell by the bucket-load. In a world with Apple’s iPhone 6 and Samsung’s Galaxy S6, though, that’s a tricky feat.
If you are looking to install a new custom ROM then we have made a list of the best Custom ROMs for you.
CyanogenMod 13 [CM13.0] Nightly ROM latest build cm-13.0-20160530-NIGHTLY-vs985.zip is released for Verizon LG G3 VS985
CM13.0 will let LG G3 VS985 users taste the sweetness of Marshmallow 6.0.1 such as the battery saving ‘doze’ functionality and new permissions model, alongside the CM features you’d expect.
Follow our guide below to download the Unofficial CM13 and install it yourself.
View my Flipboard Magazine.
÷ Prerequisites:
•This tutorial is only for installing CyanogenMod 13 [CM13.0] Nightly ROM on Verizon LG G3 VS985.Please do not try on any other LG G3 variants.
•Your phone should be rooted and haveClockworkMod recovery installed from before.
•This tutorial will wipe out all your data.Proceed at your own risk.Perform a Dalvik Cache wipe before proceeding from the recovery mode.
Make sure you backup all your data in your phone before proceeding.
*Disclaimer:
Android Custom ROM fix ® provide various Firmware Updates and Rooting process along with Custom ROM,Modes,file are all belong to their owners/developers. The autor of this site or the developers are not responsible, if you damage or brick your device.Do it on your own risk and follow the instruction properly.
* Important:
Backup important files stored on your device before proceeding with the steps below, so that in case something goes wrong you’ll have backup of all your important files.

÷ How to Install CM13.0 Nightly Android 6.0.1 Marshmallow on Verizon LG G3 VS985 [ Latest Build]
Step 1 – Download CM13.0 Android 6.0.1 Marshmallow and Google Apps for your Verizon LG G3 VS985 to your computer.
Step 2 – Connect and mount your LG G3 VS985 USB memory on your computer using the USB cable.
Step 3 – Now copy/paste the downloaded Android 6.0.1 ROM zip file and Google Appszip files to your SD card. Make sure the files are in the SD card root (not in any folder).
Step 4 – Then turn OFF your phone and disconnect from the USB cable.
Step 5 – Now to get in the Recovery Mode. Switch ON the phone while pressing and holding Volume Up + Home + Power buttons together
Step 6 – Once you are in ClockworkModRecovery, select perform a full data wipe by selecting “wipe data/factory reset”. Use the Power button to select everything while in the Recovery Mode.
Step 7 – Then, perform a cache wipe by selecting “wipe cache partition” .
Step 8 – Now this is optional, but it is recommended to perform a wipe of your dalvik cache as well. You will not get into boot loops or any other errors. From CWM recovery, go to ‘advanced’ and then select “wipe dalvik cache”.
Step 9 – Then go back to the main recovery screen and select “install zip from SD card”.
Step 10 – Now select “choose zip from sdcard”. Using your volume keys, navigate to the Android 6.0.1 ROM zip file that you copied to your SD card and select it using the Power button. Confirm the installation on the next screen and the installation procedure should start now.
Google Apps: Repeat the above step for the Gapps zip file as well and install it on your phone.
Step 11 – After the installation completes, go to “+++++Go Back+++++” and reboot the phone by selecting “reboot system now” from the recovery menu.
Your Verizon LG G3 VS985 will boot now and it might take about 5 minutes to boot on your first time. So, please wait.

That’s it Your LG G3 VS985 should now have CM13.0 Nightly Android 6.0.1 Marshmallow latest build installed on your phone! Go to Settings > About phone to verify.
For More Verizon LG G3 VS985 Brand New Firmware & Custom ROM keep checking AndroidCustomROM Fix ™®
Like this post? PLZ Hit the share buttons below to share this article with your friends on Facebook, Google + and Twitter.
PLZ Follow Us On Flipboard 4 More latest custom ROM fix.
PLZ Use the comment box below to contribute more ideas & Suggestions .
Best Regards.
÷ Prerequisites:
•This tutorial is only for installing CyanogenMod 13 [CM13.0] Nightly ROM on Verizon LG G3 VS985.Please do not try on any other LG G3 variants.
•Your phone should be rooted and haveClockworkMod recovery installed from before.
•This tutorial will wipe out all your data.Proceed at your own risk.Perform a Dalvik Cache wipe before proceeding from the recovery mode.
Make sure you backup all your data in your phone before proceeding.
*Disclaimer:
Android Custom ROM fix ® provide various Firmware Updates and Rooting process along with Custom ROM,Modes,file are all belong to their owners/developers. The autor of this site or the developers are not responsible, if you damage or brick your device.Do it on your own risk and follow the instruction properly.
* Important:
Backup important files stored on your device before proceeding with the steps below, so that in case something goes wrong you’ll have backup of all your important files.
÷ How to Install CM13.0 Nightly Android 6.0.1 Marshmallow on Verizon LG G3 VS985 [ Latest Build]
Step 1 – Download CM13.0 Android 6.0.1 Marshmallow and Google Apps for your Verizon LG G3 VS985 to your computer.
Step 2 – Connect and mount your LG G3 VS985 USB memory on your computer using the USB cable.
Step 3 – Now copy/paste the downloaded Android 6.0.1 ROM zip file and Google Appszip files to your SD card. Make sure the files are in the SD card root (not in any folder).
Step 4 – Then turn OFF your phone and disconnect from the USB cable.
Step 5 – Now to get in the Recovery Mode. Switch ON the phone while pressing and holding Volume Up + Home + Power buttons together
Step 6 – Once you are in ClockworkModRecovery, select perform a full data wipe by selecting “wipe data/factory reset”. Use the Power button to select everything while in the Recovery Mode.
Step 7 – Then, perform a cache wipe by selecting “wipe cache partition” .
Step 8 – Now this is optional, but it is recommended to perform a wipe of your dalvik cache as well. You will not get into boot loops or any other errors. From CWM recovery, go to ‘advanced’ and then select “wipe dalvik cache”.
Step 9 – Then go back to the main recovery screen and select “install zip from SD card”.
Step 10 – Now select “choose zip from sdcard”. Using your volume keys, navigate to the Android 6.0.1 ROM zip file that you copied to your SD card and select it using the Power button. Confirm the installation on the next screen and the installation procedure should start now.
Google Apps: Repeat the above step for the Gapps zip file as well and install it on your phone.
Step 11 – After the installation completes, go to “+++++Go Back+++++” and reboot the phone by selecting “reboot system now” from the recovery menu.
Your Verizon LG G3 VS985 will boot now and it might take about 5 minutes to boot on your first time. So, please wait.
That’s it Your LG G3 VS985 should now have CM13.0 Nightly Android 6.0.1 Marshmallow latest build installed on your phone! Go to Settings > About phone to verify.
For More Verizon LG G3 VS985 Brand New Firmware & Custom ROM keep checking AndroidCustomROM Fix ™®
Like this post? PLZ Hit the share buttons below to share this article with your friends on Facebook, Google + and Twitter.
PLZ Follow Us On Flipboard 4 More latest custom ROM fix.
PLZ Use the comment box below to contribute more ideas & Suggestions .
Best Regards.
Tuesday, July 26, 2016
How to Install CM13 0 Nightly Android 6 0 1 Marshmallow on Huawei Honor 4 4x cherry Latest Build

CyanogenMod 13 [CM13.0] Nightly ROM latest build cm-13.0-20160531-NIGHTLY-cherry.zip is released for Huawei Honor 4/4x cherry.
CM13.0 will let Huawei Honor 4/4x users taste the sweetness of Marshmallow 6.0.1 such as the battery saving ‘doze’ functionality and new permissions model, alongside the CM features you’d expect.
Follow our guide below to download the Unofficial CM13 and install it yourself.
View my Flipboard Magazine.
÷ Prerequisites:
•This tutorial is only for installing CyanogenMod 13 [CM13.0] Nightly ROM on Huawei Honor 4/4x cherry Please do not try on any other Huawei Honor 4 variants.
•Your phone should be rooted and haveClockworkMod recovery installed from before.
•This tutorial will wipe out all your data.Proceed at your own risk.Perform a Dalvik Cache wipe before proceeding from the recovery mode.
Make sure you backup all your data in your phone before proceeding.
*Disclaimer:
Android Custom ROM fix ® provide various Firmware Updates and Rooting process along with Custom ROM,Modes,file are all belong to their owners/developers. The autor of this site or the developers are not responsible, if you damage or brick your device.Do it on your own risk and follow the instruction properly.
* Important:
Backup important files stored on your device before proceeding with the steps below, so that in case something goes wrong you’ll have backup of all your important files.

÷ How to Install CM13.0 Nightly Android 6.0.1 Marshmallow on Huawei Honor 4/4x cherry [ Latest Build]
Step 1 – Download CM13.0 Android 6.0.1 Marshmallow and Google Apps for your Huawei Honor 4/4x cherry to your computer.
Step 2 – Connect and mount your Honor 4/4x cherry USB memory on your computer using the USB cable.
Step 3 – Now copy/paste the downloaded Android 6.0.1 ROM zip file and Google Appszip files to your SD card. Make sure the files are in the SD card root (not in any folder).
Step 4 – Then turn OFF your phone and disconnect from the USB cable.
Step 5 – Now to get in the Recovery Mode. Switch ON the phone while pressing and holding Volume Up + Home + Power buttons together
Step 6 – Once you are in ClockworkModRecovery, select perform a full data wipe by selecting “wipe data/factory reset”. Use the Power button to select everything while in the Recovery Mode.
Step 7 – Then, perform a cache wipe by selecting “wipe cache partition” .
Step 8 – Now this is optional, but it is recommended to perform a wipe of your dalvik cache as well. You will not get into boot loops or any other errors. From CWM recovery, go to ‘advanced’ and then select “wipe dalvik cache”.
Step 9 – Then go back to the main recovery screen and select “install zip from SD card”.
Step 10 – Now select “choose zip from sdcard”. Using your volume keys, navigate to the Android 6.0.1 ROM zip file that you copied to your SD card and select it using the Power button. Confirm the installation on the next screen and the installation procedure should start now.
Google Apps: Repeat the above step for the Gapps zip file as well and install it on your phone.
Step 11 – After the installation completes, go to “+++++Go Back+++++” and reboot the phone by selecting “reboot system now” from the recovery menu.

Your Huawei Honor 4/4x will boot now and it might take about 5 minutes to boot on your first time. So, please wait.
That’s it Your Honor 4/4x should now have CM13.0 Nightly Android 6.0.1 Marshmallow latest build installed on your phone! Go to Settings > About phone to verify.
For More Huawei Honor 4/4x Brand New Firmware & Custom ROM keep checking AndroidCustomROM Fix ™®
Like this post? PLZ Hit the share buttons below to share this article with your friends on Facebook, Google + and Twitter.
PLZ Follow Us On Flipboard 4 More latest custom ROM fix.
PLZ Use the comment box below to contribute more ideas & Suggestions .
Best Regards.
÷ Prerequisites:
•This tutorial is only for installing CyanogenMod 13 [CM13.0] Nightly ROM on Huawei Honor 4/4x cherry Please do not try on any other Huawei Honor 4 variants.
•Your phone should be rooted and haveClockworkMod recovery installed from before.
•This tutorial will wipe out all your data.Proceed at your own risk.Perform a Dalvik Cache wipe before proceeding from the recovery mode.
Make sure you backup all your data in your phone before proceeding.
*Disclaimer:
Android Custom ROM fix ® provide various Firmware Updates and Rooting process along with Custom ROM,Modes,file are all belong to their owners/developers. The autor of this site or the developers are not responsible, if you damage or brick your device.Do it on your own risk and follow the instruction properly.
* Important:
Backup important files stored on your device before proceeding with the steps below, so that in case something goes wrong you’ll have backup of all your important files.
÷ How to Install CM13.0 Nightly Android 6.0.1 Marshmallow on Huawei Honor 4/4x cherry [ Latest Build]
Step 1 – Download CM13.0 Android 6.0.1 Marshmallow and Google Apps for your Huawei Honor 4/4x cherry to your computer.
Step 2 – Connect and mount your Honor 4/4x cherry USB memory on your computer using the USB cable.
Step 3 – Now copy/paste the downloaded Android 6.0.1 ROM zip file and Google Appszip files to your SD card. Make sure the files are in the SD card root (not in any folder).
Step 4 – Then turn OFF your phone and disconnect from the USB cable.
Step 5 – Now to get in the Recovery Mode. Switch ON the phone while pressing and holding Volume Up + Home + Power buttons together
Step 6 – Once you are in ClockworkModRecovery, select perform a full data wipe by selecting “wipe data/factory reset”. Use the Power button to select everything while in the Recovery Mode.
Step 7 – Then, perform a cache wipe by selecting “wipe cache partition” .
Step 8 – Now this is optional, but it is recommended to perform a wipe of your dalvik cache as well. You will not get into boot loops or any other errors. From CWM recovery, go to ‘advanced’ and then select “wipe dalvik cache”.
Step 9 – Then go back to the main recovery screen and select “install zip from SD card”.
Step 10 – Now select “choose zip from sdcard”. Using your volume keys, navigate to the Android 6.0.1 ROM zip file that you copied to your SD card and select it using the Power button. Confirm the installation on the next screen and the installation procedure should start now.
Google Apps: Repeat the above step for the Gapps zip file as well and install it on your phone.
Step 11 – After the installation completes, go to “+++++Go Back+++++” and reboot the phone by selecting “reboot system now” from the recovery menu.
Your Huawei Honor 4/4x will boot now and it might take about 5 minutes to boot on your first time. So, please wait.
That’s it Your Honor 4/4x should now have CM13.0 Nightly Android 6.0.1 Marshmallow latest build installed on your phone! Go to Settings > About phone to verify.
For More Huawei Honor 4/4x Brand New Firmware & Custom ROM keep checking AndroidCustomROM Fix ™®
Like this post? PLZ Hit the share buttons below to share this article with your friends on Facebook, Google + and Twitter.
PLZ Follow Us On Flipboard 4 More latest custom ROM fix.
PLZ Use the comment box below to contribute more ideas & Suggestions .
Best Regards.
How to Update Galaxy S4 Mini Intl Android 6 0 1 Marshmallow CM13 0 Nightly Latest Build
CyanogenMod 13 [CM13.0] Nightly ROM latest build cm-13.0-20160515-NIGHTLY- serranoltexx is released for Samsung Galaxy S4 Mini (Intl).
CM13.0 will let Samsung Galaxy S4 Mini (Intl) users taste the sweetness of Marshmallow 6.0.1 such as the battery saving ‘doze’ functionality and new permissions model, alongside the CM features you’d expect.

Follow our guide below to download the Unofficial CM13 and install it yourself.
View my Flipboard Magazine.
÷ Prerequisites:
•This tutorial is only for installing CyanogenMod 13 [CM13.0] Nightly ROM on Samsung Galaxy S4 Mini (Intl) serranoltexx. . Please do not try on any other Samsung Galaxy S4 Mini variants.
•Your phone should be rooted and haveClockworkMod recovery installed from before.
•Samsung KIES will NOT detect your phone after installing this ROM because it is a custom firmware
•This tutorial will wipe out all your data.Proceed at your own risk.Perform a Dalvik Cache wipe before proceeding from the recovery mode.
Make sure you backup all your data in your phone before proceeding.
*Disclaimer:÷ Prerequisites:
•This tutorial is only for installing CyanogenMod 13 [CM13.0] Nightly ROM on Samsung Galaxy S4 Mini (Intl) serranoltexx. . Please do not try on any other Samsung Galaxy S4 Mini variants.
•Your phone should be rooted and haveClockworkMod recovery installed from before.
•Samsung KIES will NOT detect your phone after installing this ROM because it is a custom firmware
•This tutorial will wipe out all your data.Proceed at your own risk.Perform a Dalvik Cache wipe before proceeding from the recovery mode.
Make sure you backup all your data in your phone before proceeding.
Android Custom ROM fix ® provide various Firmware Updates and Rooting process along with Custom ROM,Modes,file are all belong to their owners/developers. The autor of this site or the developers are not responsible, if you damage or brick your device.Do it on your own risk and follow the instruction properly.
* Important:
Backup important files stored on your device before proceeding with the steps below, so that in case something goes wrong you’ll have backup of all your important files.

÷ How to Update Galaxy S4 Mini (Intl) Android 6.0.1 Marshmallow CM13.0 Nightly.
Step 1 – Download CM13.0 Android 6.0.1 Marshmallow and Google Apps for your CM13.0 Nightly to your computer.
Step 2 – Connect and mount your CM13.0 Nightly USB memory on your computer using the USB cable.
Step 3 – Now copy/paste the downloaded Android 6.0.1 ROM zip file and Google Apps zip files to your SD card. Make sure the files are in the SD card root (not in any folder).
Step 4 – Then turn OFF your phone and disconnect from the USB cable.
Step 5 – Now to get in the Recovery Mode. Switch ON the phone while pressing and holding Volume Up + Home + Power buttons together
Step 6 – Once you are in ClockworkModRecovery, select perform a full data wipe by selecting “wipe data/factory reset”. Use the Power button to select everything while in the Recovery Mode.
Step 7 – Then, perform a cache wipe by selecting “wipe cache partition” .
Step 8 – Now this is optional, but it is recommended to perform a wipe of your dalvik cache as well. You will not get into boot loops or any other errors. From CWM recovery, go to ‘advanced’ and then select “wipe dalvik cache”.
Step 9 – Then go back to the main recovery screen and select “install zip from SD card”.
Step 10 – Now select “choose zip from sdcard”. Using your volume keys, navigate to the Android 6.0.1 ROM zip file that you copied to your SD card and select it using the Power button. Confirm the installation on the next screen and the installation procedure should start now.
Google Apps: Repeat the above step for the Gapps zip file as well and install it on your phone.
Step 11 – After the installation completes, go to “+++++Go Back+++++” and reboot the phone by selecting “reboot system now” from the recovery menu.

Your Samsung Galaxy S4 Mini (Intl) serranoltexx will boot now and it might take about 5 minutes to boot on your first time. So, please wait.
That’s it Your Samsung Galaxy S4 Mini should now have CM13.0 Nightly Android 6.0.1 Marshmallow installed on your phone! Go to Settings > About phone to verify.
For More Samsung Galaxy S4 Mini (Intl) Brand New Firmware & Custom ROM keep checking AndroidCustomROM Fix ™®
Like this post? PLZ Hit the share buttons below to share this article with your friends on Facebook, Google + and Twitter.
PLZ Follow Us On Flipboard 4 More HTC One M9 latest custom ROM fix.
PLZ Use the comment box below to contribute more ideas & Suggestions .
Best Regards.
Monday, July 25, 2016
How to Install CM13 0 Nightly Android 6 0 1 Marshmallow on International LG G4 H815 Latest Build
CyanogenMod 13 [CM13.0] Nightly ROM latest build cm-13.0-20160525-NIGHTLY-h815.zip is released for International LG G4 H815

CM13.0 will let International LG G4 H815 users taste the sweetness of Marshmallow 6.0.1 such as the battery saving ‘doze’ functionality and new permissions model, alongside the CM features you’d expect.
Follow our guide below to download the Unofficial CM13 and install it yourself.
•This tutorial is only for installing CyanogenMod 13 [CM13.0] Nightly ROM on International LG G4 H815 Please do not try on any other LG G4 variants.
•Your phone should be rooted and haveClockworkMod recovery installed from before.
•This tutorial will wipe out all your data.Proceed at your own risk.Perform a Dalvik Cache wipe before proceeding from the recovery mode.
Make sure you backup all your data in your phone before proceeding.
View my Flipboard Magazine.
*Disclaimer:
*Disclaimer:
Android Custom ROM fix ® provide various Firmware Updates and Rooting process along with Custom ROM,Modes,file are all belong to their owners/developers. The autor of this site or the developers are not responsible, if you damage or brick your device.Do it on your own risk and follow the instruction properly.
* Important:
Backup important files stored on your device before proceeding with the steps below, so that in case something goes wrong you’ll have backup of all your important files.

÷ How to Install CM13.0 Nightly Android 6.0.1 Marshmallow on International LG G4 H815 [ Latest Build]
Step 1 – Download CM13.0 Android 6.0.1 Marshmallow and Google Apps for your International LG G4 H815 to your computer.
Step 2 – Connect and mount your LG G4 H815 USB memory on your computer using the USB cable.
Step 3 – Now copy/paste the downloaded Android 6.0.1 ROM zip file and Google Appszip files to your SD card. Make sure the files are in the SD card root (not in any folder).
Step 4 – Then turn OFF your phone and disconnect from the USB cable.
Step 5 – Now to get in the Recovery Mode. Switch ON the phone while pressing and holding Volume Up + Home + Power buttons together
Step 6 – Once you are in ClockworkModRecovery, select perform a full data wipe by selecting “wipe data/factory reset”. Use the Power button to select everything while in the Recovery Mode.
Step 7 – Then, perform a cache wipe by selecting “wipe cache partition” .
Step 8 – Now this is optional, but it is recommended to perform a wipe of your dalvik cache as well. You will not get into boot loops or any other errors. From CWM recovery, go to ‘advanced’ and then select “wipe dalvik cache”.
Step 9 – Then go back to the main recovery screen and select “install zip from SD card”.
Step 10 – Now select “choose zip from sdcard”. Using your volume keys, navigate to the Android 6.0.1 ROM zip file that you copied to your SD card and select it using the Power button. Confirm the installation on the next screen and the installation procedure should start now.
Google Apps: Repeat the above step for the Gapps zip file as well and install it on your phone.
Step 11 – After the installation completes, go to “+++++Go Back+++++” and reboot the phone by selecting “reboot system now” from the recovery menu.

Your LG G4 H815 will boot now and it might take about 5 minutes to boot on your first time. So, please wait.
That’s it Your International LG G4 H815 should now have CM13.0 Nightly Android 6.0.1 Marshmallow latest build installed on your phone! Go to Settings > About phone to verify.
For More LG G4 Brand New Firmware & Custom ROM keep checking AndroidCustomROM Fix ™®
Like this post? PLZ Hit the share buttons below to share this article with your friends on Facebook, Google + and Twitter.
PLZ Follow Us On Flipboard 4 More LG G4 H815 latest custom ROM fix.
PLZ Use the comment box below to contribute more ideas & Suggestions .
Best Regards.
How to Update Galaxy Note II GSM LTE t0lte to Android 6 0 1 Marshmallow CM13 0 Nightly Latest Build

Follow our guide below to download the Unofficial CM13 and install it yourself.
View my Flipboard Magazine.
÷ Prerequisites:
•This tutorial is only for installing CyanogenMod 13 [CM13.0] Nightly ROM on Samsung Galaxy Note II (GSM LTE) t0lte. Please do not try on any other Samsung Galaxy Note II variants.
•Your phone should be rooted and haveClockworkMod recovery installed from before.
•Samsung KIES will NOT detect your phone after installing this ROM because it is a custom firmware
•This tutorial will wipe out all your data.Proceed at your own risk.Perform a Dalvik Cache wipe before proceeding from the recovery mode.
Make sure you backup all your data in your phone before proceeding.
*Disclaimer:
Android Custom ROM fix ® provide various Firmware Updates and Rooting process along with Custom ROM,Modes,file are all belong to their owners/developers. The autor of this site or the developers are not responsible, if you damage or brick your device.Do it on your own risk and follow the instruction properly.
* Important:
Backup important files stored on your device before proceeding with the steps below, so that in case something goes wrong you’ll have backup of all your important files.

÷ How to Update Galaxy Note II (GSM LTE) t0lte to Android 6.0.1 Marshmallow CM13.0 Nightly.
Step 1 – Download CM13.0 Android 6.0.1 Marshmallow and Google Apps for your Galaxy Note II (GSM LTE) to your computer.
Step 2 – Connect and mount your Galaxy Note II (GSM LTE) t0lte USB memory on your computer using the USB cable.
Step 3 – Now copy/paste the downloaded Android 6.0.1 ROM zip file and Google Apps zip files to your SD card. Make sure the files are in the SD card root (not in any folder).
Step 4 – Then turn OFF your phone and disconnect from the USB cable.
Step 5 – Now to get in the Recovery Mode. Switch ON the phone while pressing and holding Volume Up + Home + Power buttons together
Step 6 – Once you are in ClockworkModRecovery, select perform a full data wipe by selecting “wipe data/factory reset”. Use the Power button to select everything while in the Recovery Mode.
Step 7 – Then, perform a cache wipe by selecting “wipe cache partition” .
Step 8 – Now this is optional, but it is recommended to perform a wipe of your dalvik cache as well. You will not get into boot loops or any other errors. From CWM recovery, go to ‘advanced’ and then select “wipe dalvik cache”.
Step 9 – Then go back to the main recovery screen and select “install zip from SD card”.
Step 10 – Now select “choose zip from sdcard”. Using your volume keys, navigate to the Android 6.0.1 ROM zip file that you copied to your SD card and select it using the Power button. Confirm the installation on the next screen and the installation procedure should start now.
Google Apps: Repeat the above step for the Gapps zip file as well and install it on your phone.
Step 11 – After the installation completes, go to “+++++Go Back+++++” and reboot the phone by selecting “reboot system now” from the recovery menu.

Your Samsung Galaxy Note II (GSM LTE) t0lte will boot now and it might take about 5 minutes to boot on your first time. So, please wait.
That’s it Your Samsung Galaxy Note II should now have CM13.0 Nightly Android 6.0.1 Marshmallow installed on your phone! Go to Settings > About phone to verify.
For More Samsung Galaxy Note II Brand New Firmware & Custom ROM keep checking AndroidCustomROM Fix ™®
Like this post? PLZ Hit the share buttons below to share this article with your friends on Facebook, Google + and Twitter.
PLZ Follow Us On Flipboard 4 More HTC One M9 latest custom ROM fix.
PLZ Use the comment box below to contribute more ideas & Suggestions .
Best Regards.
÷ Prerequisites:
•This tutorial is only for installing CyanogenMod 13 [CM13.0] Nightly ROM on Samsung Galaxy Note II (GSM LTE) t0lte. Please do not try on any other Samsung Galaxy Note II variants.
•Your phone should be rooted and haveClockworkMod recovery installed from before.
•Samsung KIES will NOT detect your phone after installing this ROM because it is a custom firmware
•This tutorial will wipe out all your data.Proceed at your own risk.Perform a Dalvik Cache wipe before proceeding from the recovery mode.
Make sure you backup all your data in your phone before proceeding.
*Disclaimer:
Android Custom ROM fix ® provide various Firmware Updates and Rooting process along with Custom ROM,Modes,file are all belong to their owners/developers. The autor of this site or the developers are not responsible, if you damage or brick your device.Do it on your own risk and follow the instruction properly.
* Important:
Backup important files stored on your device before proceeding with the steps below, so that in case something goes wrong you’ll have backup of all your important files.
÷ How to Update Galaxy Note II (GSM LTE) t0lte to Android 6.0.1 Marshmallow CM13.0 Nightly.
Step 1 – Download CM13.0 Android 6.0.1 Marshmallow and Google Apps for your Galaxy Note II (GSM LTE) to your computer.
Step 2 – Connect and mount your Galaxy Note II (GSM LTE) t0lte USB memory on your computer using the USB cable.
Step 3 – Now copy/paste the downloaded Android 6.0.1 ROM zip file and Google Apps zip files to your SD card. Make sure the files are in the SD card root (not in any folder).
Step 4 – Then turn OFF your phone and disconnect from the USB cable.
Step 5 – Now to get in the Recovery Mode. Switch ON the phone while pressing and holding Volume Up + Home + Power buttons together
Step 6 – Once you are in ClockworkModRecovery, select perform a full data wipe by selecting “wipe data/factory reset”. Use the Power button to select everything while in the Recovery Mode.
Step 7 – Then, perform a cache wipe by selecting “wipe cache partition” .
Step 8 – Now this is optional, but it is recommended to perform a wipe of your dalvik cache as well. You will not get into boot loops or any other errors. From CWM recovery, go to ‘advanced’ and then select “wipe dalvik cache”.
Step 9 – Then go back to the main recovery screen and select “install zip from SD card”.
Step 10 – Now select “choose zip from sdcard”. Using your volume keys, navigate to the Android 6.0.1 ROM zip file that you copied to your SD card and select it using the Power button. Confirm the installation on the next screen and the installation procedure should start now.
Google Apps: Repeat the above step for the Gapps zip file as well and install it on your phone.
Step 11 – After the installation completes, go to “+++++Go Back+++++” and reboot the phone by selecting “reboot system now” from the recovery menu.
Your Samsung Galaxy Note II (GSM LTE) t0lte will boot now and it might take about 5 minutes to boot on your first time. So, please wait.
That’s it Your Samsung Galaxy Note II should now have CM13.0 Nightly Android 6.0.1 Marshmallow installed on your phone! Go to Settings > About phone to verify.
For More Samsung Galaxy Note II Brand New Firmware & Custom ROM keep checking AndroidCustomROM Fix ™®
Like this post? PLZ Hit the share buttons below to share this article with your friends on Facebook, Google + and Twitter.
PLZ Follow Us On Flipboard 4 More HTC One M9 latest custom ROM fix.
PLZ Use the comment box below to contribute more ideas & Suggestions .
Best Regards.
Sunday, July 24, 2016
How to Install CM13 0 Nightly Marshmallow 6 0 1 on OnePlus X onyx Latest build
Great News for all OnePlus X users , latest CM13.0 cm-13.0-20160605-NIGHTLY-onyx.zip is available for the device.You can download it from the CyanogenMod site.If you have a OnePlus X, then you can flash this CM13.0 Nightly ROM based on latest Android 6.0.1 Marshmallow using TWRP Recovery.

There are few Marshmallow ROMs available for the device But in our opinion, the best choice is CyanogenMod 13 a.k.a CM 13.0
If you have a OnePlus X, then you can flash any third party custom ROM based on latest Android 6.0.1 Marshmallow by following our guide below.
View my Flipboard Magazine.
÷ Prerequisites:
•This tutorial is only for installing CM13 Android 6.0. Marshmallow on One Plus X (onyx) Please do not try on any other One Plus X variants
•Make sure your device’s bootloader is unlocked.
•Make sure you have a custom recovery (TWRP/CWM) Install On your device.We recommend TWRP Recovery.
*Disclaimer:
Android Custom ROM fix ® provide various Firmware Updates and Rooting process along with Custom ROM,Modes,file are all belong to their owners/developers. The autor of this site or the developers are not responsible, if you damage or brick your device.Do it on your own risk and follow the instruction properly.
* Important:
Backup important files stored on your device before proceeding with the steps below, so that in case something goes wrong you’ll have backup of all your important files.

÷ How to Install CM13.0 Nightly Marshmallow 6.0.1 on OnePlus X (onyx) Latest build.
1- Download Both CM13.0 Nightly and Marshmallow Gapps Zip file .
2- Next, Connect your OnePlus X to Your PC via provided USB cable.
3-Then Copy both downloaded files to the internal memory of your OnePlus device
4- Now reboot your device to Recovery mode.
5-Select “Wipe” from TWRP main menu and do a “Swipe to Factory Reset” on the bottom of the screen.
6- Go back to TWRP main menu, tap on “Install” and select the CM13 .zip file that you transferred to your device in Step 1.
7- After selecting the .zip file, do “Swipe to Confirm Flash” on the bottom of the screen to begin the custom ROM installation process. This may take some time.
8- Once your ROM is successfully flashed, you’ll see “Wipe cache/dalvik” option, select it and then do “Swipe to wipe” on the bottom of the screen.
9-Now flash the Marshmallow Gapps file.
10- Once done, reboot your device from the TWRP main menu.

That’s it! Your One Plus One X should now have CM13.0 Nightly Marshmallow 6.0.1 on your phone! Go to Settings > About phone to verify.
Like this post? PLZ Hit the share buttons below to share this article with your friends on Facebook, Google + and Twitter.
PLZ Follow Us On Flipboard 4 More One Plus One X Latest Updates.
PLZ Use the comment box below to contribute more ideas & Suggestions .
Best Regards.
÷ Prerequisites:
•This tutorial is only for installing CM13 Android 6.0. Marshmallow on One Plus X (onyx) Please do not try on any other One Plus X variants
•Make sure your device’s bootloader is unlocked.
•Make sure you have a custom recovery (TWRP/CWM) Install On your device.We recommend TWRP Recovery.
*Disclaimer:
Android Custom ROM fix ® provide various Firmware Updates and Rooting process along with Custom ROM,Modes,file are all belong to their owners/developers. The autor of this site or the developers are not responsible, if you damage or brick your device.Do it on your own risk and follow the instruction properly.
* Important:
Backup important files stored on your device before proceeding with the steps below, so that in case something goes wrong you’ll have backup of all your important files.
÷ How to Install CM13.0 Nightly Marshmallow 6.0.1 on OnePlus X (onyx) Latest build.
1- Download Both CM13.0 Nightly and Marshmallow Gapps Zip file .
2- Next, Connect your OnePlus X to Your PC via provided USB cable.
3-Then Copy both downloaded files to the internal memory of your OnePlus device
4- Now reboot your device to Recovery mode.
5-Select “Wipe” from TWRP main menu and do a “Swipe to Factory Reset” on the bottom of the screen.
6- Go back to TWRP main menu, tap on “Install” and select the CM13 .zip file that you transferred to your device in Step 1.
7- After selecting the .zip file, do “Swipe to Confirm Flash” on the bottom of the screen to begin the custom ROM installation process. This may take some time.
8- Once your ROM is successfully flashed, you’ll see “Wipe cache/dalvik” option, select it and then do “Swipe to wipe” on the bottom of the screen.
9-Now flash the Marshmallow Gapps file.
10- Once done, reboot your device from the TWRP main menu.
That’s it! Your One Plus One X should now have CM13.0 Nightly Marshmallow 6.0.1 on your phone! Go to Settings > About phone to verify.
Like this post? PLZ Hit the share buttons below to share this article with your friends on Facebook, Google + and Twitter.
PLZ Follow Us On Flipboard 4 More One Plus One X Latest Updates.
PLZ Use the comment box below to contribute more ideas & Suggestions .
Best Regards.
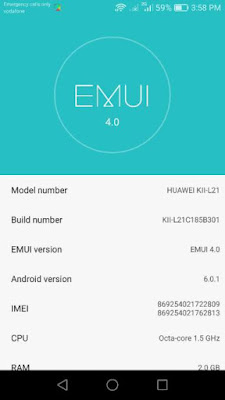
How to Update Honor 5X Kll L21 to Marshmallow 6 0 1 KII L21C185B301 build
If you are still waiting for the Marshmallow OTA update for your Huawei Honor 5X, then we’ve got some good news for you. It’s a download actually, and is of none other then the Marshmallow OTA you are craving for.

Just download the Marshmallow OTA provided below, and then follow the instruction given below to install the OTA update manually.
÷ Firmware Details:
•Model Number: HUAWEI Kll-L21
•Build Number: Kll -L21C185B301
•EMUI Version: EMUI 4.0
• Android version: 6.0.1
• IMEI: 869254021722809
869254021762813
•CPU : Octa- Core1.5 GHz
•RAM: 2.0GB.
View my Flipboard Magazine.
÷ Prerequisites:
•This Update can be installed only on Huawei Honor 5X (Kll-L21)
*Disclaimer:
Android Custom ROM fix ® provide various Firmware Updates and Rooting process along with Custom ROM,Modes,file are all belong to their owners/developers. The autor of this site or the developers are not responsible, if you damage or brick your device.Do it on your own risk and follow the instruction properly.
* Important:
Backup important files stored on your device before proceeding with the steps below, so that in case something goes wrong you’ll have backup of all your important files.
÷ How to Update Honor 5X (Kll-L21) to Marshmallow 6.0.1 KII-L21C185B301 build.
1-Download the Kll-L21 OTA file.
2-Next, create a folder called dload on your device, and transfer the update.zip file to this folder on your Honor 5X.
3- Now, disconnect the device, and go to Settings > Update > Local update.
4- Now, select the update.zip file.
5- Your Honor 5X will verify the update.zip file and install it when everything it wanted to match matches.

That’s it! Your Huawei Honor 5X should now have Marshmallow 6.0.1 on your phone! Go to Settings > About phone to verify.
Like this post? PLZ Hit the share buttons below to share this article with your friends on Facebook, Google + and Twitter.
PLZ Follow Us On Flipboard 4 More Huawei Honor 5X Latest Updates.
PLZ Use the comment box below to contribute more ideas & Suggestions .
Best Regards.
÷ Prerequisites:
•This Update can be installed only on Huawei Honor 5X (Kll-L21)
*Disclaimer:
Android Custom ROM fix ® provide various Firmware Updates and Rooting process along with Custom ROM,Modes,file are all belong to their owners/developers. The autor of this site or the developers are not responsible, if you damage or brick your device.Do it on your own risk and follow the instruction properly.
* Important:
Backup important files stored on your device before proceeding with the steps below, so that in case something goes wrong you’ll have backup of all your important files.
÷ How to Update Honor 5X (Kll-L21) to Marshmallow 6.0.1 KII-L21C185B301 build.
1-Download the Kll-L21 OTA file.
2-Next, create a folder called dload on your device, and transfer the update.zip file to this folder on your Honor 5X.
3- Now, disconnect the device, and go to Settings > Update > Local update.
4- Now, select the update.zip file.
5- Your Honor 5X will verify the update.zip file and install it when everything it wanted to match matches.
That’s it! Your Huawei Honor 5X should now have Marshmallow 6.0.1 on your phone! Go to Settings > About phone to verify.
Like this post? PLZ Hit the share buttons below to share this article with your friends on Facebook, Google + and Twitter.
PLZ Follow Us On Flipboard 4 More Huawei Honor 5X Latest Updates.
PLZ Use the comment box below to contribute more ideas & Suggestions .
Best Regards.
Saturday, July 23, 2016
How to Install CM13 0 Nightly Android 6 0 1 Marshmallow on Galaxy S4 Intl jfltexx Latest Build
The Galaxy S 4 is a solid improvement over the GS3, truly outstanding smartphone, one that offers a best in class features set and the best Samsung device weve ever used.

If you are looking to install a new custom ROM on your Samsung Galaxy S4 (Intl) then we have here as usual the best Custom ROMs for you.
CyanogenMod 13 [CM13.0] Nightly ROM latest build cm-13.0-20160520-NIGHTLY- jfltexx.zip is released for Galaxy S4 (Intl) jfltexx
CM13.0 will let Samsung Galaxy S4 (Intl) jfltexx users taste the sweetness of Marshmallow 6.0.1 such as the battery saving ‘doze’ functionality and new permissions model, alongside the CM features you’d expect.
Follow our guide below to download the Unofficial CM13.0 and install it yourself.
View my Flipboard Magazine.
÷ Prerequisites:
•This tutorial is only for installing CyanogenMod 13 [CM13.0] Nightly ROM on Galaxy S4 (Intl) jfltexx. Please do not try on any other Sansung Galaxy S4 (variants.
•Your phone should be rooted and haveClockworkMod recovery installed from before.
•This tutorial will wipe out all your data.Proceed at your own risk.Perform a Dalvik Cache wipe before proceeding from the recovery mode.
•Make sure you backup all your data in your phone before proceeding.
*Disclaimer:
Android Custom ROM fix ® provide various Firmware Updates and Rooting process along with Custom ROM,Modes,file are all belong to their owners/developers. The autor of this site or the developers are not responsible, if you damage or brick your device.Do it on your own risk and follow the instruction properly.
* Important:
Backup important files stored on your device before proceeding with the steps below, so that in case something goes wrong you’ll have backup of all your important files.

÷ How to Install CM13.0 Nightly Android 6.0.1 Marshmallow on Galaxy S4 (Intl) jfltexx.
Step 1 – Download CM13.0 Android 6.0.1 Marshmallow and Google Apps for your Galaxy S4 to your computer.
Step 2 – Connect and mount your Samsung Galaxy S4 USB memory on your computer using the USB cable.
Step 3 – Now copy/paste the downloaded Android 6.0.1 ROM zip file and Google Appszip files to your SD card. Make sure the files are in the SD card root (not in any folder).
Step 4 – Then turn OFF your phone and disconnect from the USB cable.
Step 5 – Now to get in the Recovery Mode. Switch ON the phone while pressing and holding Volume Up + Home + Power buttons together
Step 6 – Once you are in ClockworkModRecovery, select perform a full data wipe by selecting “wipe data/factory reset”. Use the Power button to select everything while in the Recovery Mode.
Step 7 – Then, perform a cache wipe by selecting “wipe cache partition” .
Step 8 – Now this is optional, but it is recommended to perform a wipe of your dalvik cache as well. You will not get into boot loops or any other errors. From CWM recovery, go to ‘advanced’ and then select “wipe dalvik cache”.
Step 9 – Then go back to the main recovery screen and select “install zip from SD card”.
Step 10 – Now select “choose zip from sdcard”. Using your volume keys, navigate to the Android 6.0.1 ROM zip file that you copied to your SD card and select it using the Power button. Confirm the installation on the next screen and the installation procedure should start now.
Google Apps: Repeat the above step for the Gapps zip file as well and install it on your phone.
Step 11 – After the installation completes, go to “+++++Go Back+++++” and reboot the phone by selecting “reboot system now” from the recovery menu.

Your Galaxy S4 (Intl) jfltexx will boot now and it might take about 5 minutes to boot on your first time. So, please wait.
That’s it Your Galaxy S4 should now have CM13.0 Nightly Android 6.0.1 Marshmallow latest build installed on your phone! Go to Settings > About phone to verify.
For More Samsung Galaxy S4 Brand New Firmware & Custom ROM keep checking AndroidCustomROM Fix ™®
Like this post? PLZ Hit the share buttons below to share this article with your friends on Facebook, Google + and Twitter.
PLZ Follow Us On Flipboard 4 More latest custom ROM fix.
PLZ Use the comment box below to contribute more ideas & Suggestions .
Best Regards.
÷ Prerequisites:
•This tutorial is only for installing CyanogenMod 13 [CM13.0] Nightly ROM on Galaxy S4 (Intl) jfltexx. Please do not try on any other Sansung Galaxy S4 (variants.
•Your phone should be rooted and haveClockworkMod recovery installed from before.
•This tutorial will wipe out all your data.Proceed at your own risk.Perform a Dalvik Cache wipe before proceeding from the recovery mode.
•Make sure you backup all your data in your phone before proceeding.
*Disclaimer:
Android Custom ROM fix ® provide various Firmware Updates and Rooting process along with Custom ROM,Modes,file are all belong to their owners/developers. The autor of this site or the developers are not responsible, if you damage or brick your device.Do it on your own risk and follow the instruction properly.
* Important:
Backup important files stored on your device before proceeding with the steps below, so that in case something goes wrong you’ll have backup of all your important files.
÷ How to Install CM13.0 Nightly Android 6.0.1 Marshmallow on Galaxy S4 (Intl) jfltexx.
Step 1 – Download CM13.0 Android 6.0.1 Marshmallow and Google Apps for your Galaxy S4 to your computer.
Step 2 – Connect and mount your Samsung Galaxy S4 USB memory on your computer using the USB cable.
Step 3 – Now copy/paste the downloaded Android 6.0.1 ROM zip file and Google Appszip files to your SD card. Make sure the files are in the SD card root (not in any folder).
Step 4 – Then turn OFF your phone and disconnect from the USB cable.
Step 5 – Now to get in the Recovery Mode. Switch ON the phone while pressing and holding Volume Up + Home + Power buttons together
Step 6 – Once you are in ClockworkModRecovery, select perform a full data wipe by selecting “wipe data/factory reset”. Use the Power button to select everything while in the Recovery Mode.
Step 7 – Then, perform a cache wipe by selecting “wipe cache partition” .
Step 8 – Now this is optional, but it is recommended to perform a wipe of your dalvik cache as well. You will not get into boot loops or any other errors. From CWM recovery, go to ‘advanced’ and then select “wipe dalvik cache”.
Step 9 – Then go back to the main recovery screen and select “install zip from SD card”.
Step 10 – Now select “choose zip from sdcard”. Using your volume keys, navigate to the Android 6.0.1 ROM zip file that you copied to your SD card and select it using the Power button. Confirm the installation on the next screen and the installation procedure should start now.
Google Apps: Repeat the above step for the Gapps zip file as well and install it on your phone.
Step 11 – After the installation completes, go to “+++++Go Back+++++” and reboot the phone by selecting “reboot system now” from the recovery menu.
Your Galaxy S4 (Intl) jfltexx will boot now and it might take about 5 minutes to boot on your first time. So, please wait.
That’s it Your Galaxy S4 should now have CM13.0 Nightly Android 6.0.1 Marshmallow latest build installed on your phone! Go to Settings > About phone to verify.
For More Samsung Galaxy S4 Brand New Firmware & Custom ROM keep checking AndroidCustomROM Fix ™®
Like this post? PLZ Hit the share buttons below to share this article with your friends on Facebook, Google + and Twitter.
PLZ Follow Us On Flipboard 4 More latest custom ROM fix.
PLZ Use the comment box below to contribute more ideas & Suggestions .
Best Regards.
How to Install CM13 0 Nightly Android 6 0 1 Marshmallow on Xperia Tablet Z Latest Build
If you are looking to install a new custom ROM n your Sony Xperia Tablet Z then we have here as usual the best Custom ROMs for you.

CyanogenMod 13 [CM13.0] Nightly ROM latest cm-13.0-20160611-NIGHTLY-pollux.zip is released for Xperia Tablet Z [ pollux]
CM13.0 will let Moto G (2015) users taste the sweetness of Marshmallow 6.0.1 such as the battery saving ‘doze’ functionality and new permissions model, alongside the CM features you’d expect.
Follow our guide below to download the CM13.0 and install it yourself.
View my Flipboard Magazine.
÷ Prerequisites:
•This tutorial is only for installing CyanogenMod 13 [CM13.0] Nightly ROM on Sony Xperia Tablet Z [ pollux] Please do not try on any other Xperia Tablet Z variants.
•Your phone should be rooted and haveClockworkMod recovery installed from before.
•Sony PC Companion will NOT detect your phone after installing this ROM because it is a custom firmware.
•Bootloader should be unlocked or you will not be able to install this ROM.
•This tutorial will wipe out all your data.Proceed at your own risk.Perform a Dalvik Cache wipe before proceeding from the recovery mode.
•Make sure you backup all your data in your phone before proceeding.
*Disclaimer:
Android Custom ROM fix ® provide various Firmware Updates and Rooting process along with Custom ROM,Modes,file are all belong to their owners/developers. The autor of this site or the developers are not responsible, if you damage or brick your device.Do it on your own risk and follow the instruction properly.
* Important:
Backup important files stored on your device before proceeding with the steps below, so that in case something goes wrong you’ll have backup of all your important files.

÷ How to Install CM13.0 Nightly Android 6.0.1 Marshmallow on Xperia Tablet Z [ Latest Build]
Step 1 – Download CM13.0 Android 6.0.1 Marshmallow and Google Apps for your Xperia Tablet Z [ pollux] to your computer.
Step 2 – Connect and mount your Xperia Tablet Z [ pollux] USB memory on your computer using the USB cable.
Step 3 – Now copy/paste the downloaded Android 6.0.1 ROM zip file and Google Appszip files to your SD card. Make sure the files are in the SD card root (not in any folder).
Step 4 – Then turn OFF your phone and disconnect from the USB cable.
Step 5 – Now to get in the Recovery Mode. Switch ON the phone while pressing and holding Volume Up + Home + Power buttons together
Step 6 – Once you are in ClockworkModRecovery, select perform a full data wipe by selecting “wipe data/factory reset”. Use the Power button to select everything while in the Recovery Mode.
Step 7 – Then, perform a cache wipe by selecting “wipe cache partition” .
Step 8 – Now this is optional, but it is recommended to perform a wipe of your dalvik cache as well. You will not get into boot loops or any other errors. From CWM recovery, go to ‘advanced’ and then select “wipe dalvik cache”.
Step 9 – Then go back to the main recovery screen and select “install zip from SD card”.
Step 10 – Now select “choose zip from sdcard”. Using your volume keys, navigate to the Android 6.0.1 ROM zip file that you copied to your SD card and select it using the Power button. Confirm the installation on the next screen and the installation procedure should start now.
Google Apps: Repeat the above step for the Gapps zip file as well and install it on your phone.
Step 11 – After the installation completes, go to “+++++Go Back+++++” and reboot the phone by selecting “reboot system now” from the recovery menu.

Your Sony Xperia Tablet Z [ pollux] will boot now and it might take about 5 minutes to boot on your first time. So, please wait.
That’s it Your Xperia Tablet Z should now have CM13.0 Nightly Android 6.0.1 Marshmallow latest build installed on your phone! Go to Settings > About phone to verify.
For More Xperia Tablet Z [ pollux] Brand New Firmware & Custom ROM keep checking AndroidCustomROM Fix ™®
Like this post? PLZ Hit the share buttons below to share this article with your friends on Facebook, Google + and Twitter.
PLZ Follow Us On Flipboard 4 More latest custom ROM fix.
PLZ Use the comment box below to contribute more ideas & Suggestions .
Best Regards.
÷ Prerequisites:
•This tutorial is only for installing CyanogenMod 13 [CM13.0] Nightly ROM on Sony Xperia Tablet Z [ pollux] Please do not try on any other Xperia Tablet Z variants.
•Your phone should be rooted and haveClockworkMod recovery installed from before.
•Sony PC Companion will NOT detect your phone after installing this ROM because it is a custom firmware.
•Bootloader should be unlocked or you will not be able to install this ROM.
•This tutorial will wipe out all your data.Proceed at your own risk.Perform a Dalvik Cache wipe before proceeding from the recovery mode.
•Make sure you backup all your data in your phone before proceeding.
*Disclaimer:
Android Custom ROM fix ® provide various Firmware Updates and Rooting process along with Custom ROM,Modes,file are all belong to their owners/developers. The autor of this site or the developers are not responsible, if you damage or brick your device.Do it on your own risk and follow the instruction properly.
* Important:
Backup important files stored on your device before proceeding with the steps below, so that in case something goes wrong you’ll have backup of all your important files.
÷ How to Install CM13.0 Nightly Android 6.0.1 Marshmallow on Xperia Tablet Z [ Latest Build]
Step 1 – Download CM13.0 Android 6.0.1 Marshmallow and Google Apps for your Xperia Tablet Z [ pollux] to your computer.
Step 2 – Connect and mount your Xperia Tablet Z [ pollux] USB memory on your computer using the USB cable.
Step 3 – Now copy/paste the downloaded Android 6.0.1 ROM zip file and Google Appszip files to your SD card. Make sure the files are in the SD card root (not in any folder).
Step 4 – Then turn OFF your phone and disconnect from the USB cable.
Step 5 – Now to get in the Recovery Mode. Switch ON the phone while pressing and holding Volume Up + Home + Power buttons together
Step 6 – Once you are in ClockworkModRecovery, select perform a full data wipe by selecting “wipe data/factory reset”. Use the Power button to select everything while in the Recovery Mode.
Step 7 – Then, perform a cache wipe by selecting “wipe cache partition” .
Step 8 – Now this is optional, but it is recommended to perform a wipe of your dalvik cache as well. You will not get into boot loops or any other errors. From CWM recovery, go to ‘advanced’ and then select “wipe dalvik cache”.
Step 9 – Then go back to the main recovery screen and select “install zip from SD card”.
Step 10 – Now select “choose zip from sdcard”. Using your volume keys, navigate to the Android 6.0.1 ROM zip file that you copied to your SD card and select it using the Power button. Confirm the installation on the next screen and the installation procedure should start now.
Google Apps: Repeat the above step for the Gapps zip file as well and install it on your phone.
Step 11 – After the installation completes, go to “+++++Go Back+++++” and reboot the phone by selecting “reboot system now” from the recovery menu.
Your Sony Xperia Tablet Z [ pollux] will boot now and it might take about 5 minutes to boot on your first time. So, please wait.
That’s it Your Xperia Tablet Z should now have CM13.0 Nightly Android 6.0.1 Marshmallow latest build installed on your phone! Go to Settings > About phone to verify.
For More Xperia Tablet Z [ pollux] Brand New Firmware & Custom ROM keep checking AndroidCustomROM Fix ™®
Like this post? PLZ Hit the share buttons below to share this article with your friends on Facebook, Google + and Twitter.
PLZ Follow Us On Flipboard 4 More latest custom ROM fix.
PLZ Use the comment box below to contribute more ideas & Suggestions .
Best Regards.
How to Install CM13 0 Nightly Android 6 0 1 Marshmallow on US Cellular Galaxy S5 Latest Build
Samsung Galaxy S5 will now largely be remembered as the last of Samsungs flagship phones with a plastic chassis. The handset has a powerful specification and a brilliant screen, but the Galaxy range was starting to suffer from a design point of view, with each yearly update strongly resembling the last model.

If you are looking to install a new custom ROM on your Galaxy S5 (US Cellular) then we have here as usual the best Custom ROMs for you.
CyanogenMod 13 [CM13.0] Nightly ROM latest buildcm-13.0-20160608-NIGHTLY-klteusc.zip is released for Samsung Galaxy S5 (US Cellular) [ klteusc]
CM13.0 will let Galaxy S5 (US Cellular) users taste the sweetness of Marshmallow 6.0.1 such as the battery saving ‘doze’ functionality and new permissions model, alongside the CM features you’d expect.
Follow our guide below to download the Unofficial CM13.0 and install it yourself.
View my Flipboard Magazine.
÷ Prerequisites:
•This tutorial is only for installing CyanogenMod 13 [CM13.0] Nightly ROM on Galaxy S5 (US Cellular) [ klteusc] Please do not try on any other Galaxy S5 variants.
•Your phone should be rooted and haveClockworkMod recovery installed from before.
•This tutorial will wipe out all your data.Proceed at your own risk.Perform a Dalvik Cache wipe before proceeding from the recovery mode.
•Make sure you backup all your data in your phone before proceeding.
*Disclaimer:
Android Custom ROM fix ® provide various Firmware Updates and Rooting process along with Custom ROM,Modes,file are all belong to their owners/developers. The autor of this site or the developers are not responsible, if you damage or brick your device.Do it on your own risk and follow the instruction properly.
* Important:
Backup important files stored on your device before proceeding with the steps below, so that in case something goes wrong you’ll have backup of all your important files.

÷ How to Install CM13.0 Nightly Android 6.0.1 Marshmallow on US Cellular Galaxy S5 [ klteusc]
Step 1 – Download CM13.0 Android 6.0.1 Marshmallow and Google Apps for your Galaxy S5 (US Cellular) [ klteusc] to your computer.
Step 2 – Connect and mount your Galaxy S5 (US Cellular) USB memory on your computer using the USB cable.
Step 3 – Now copy/paste the downloaded Android 6.0.1 ROM zip file and Google Appszip files to your SD card. Make sure the files are in the SD card root (not in any folder).
Step 4 – Then turn OFF your phone and disconnect from the USB cable.
Step 5 – Now to get in the Recovery Mode. Switch ON the phone while pressing and holding Volume Up + Home + Power buttons together
Step 6 – Once you are in ClockworkModRecovery, select perform a full data wipe by selecting “wipe data/factory reset”. Use the Power button to select everything while in the Recovery Mode.
Step 7 – Then, perform a cache wipe by selecting “wipe cache partition” .
Step 8 – Now this is optional, but it is recommended to perform a wipe of your dalvik cache as well. You will not get into boot loops or any other errors. From CWM recovery, go to ‘advanced’ and then select “wipe dalvik cache”.
Step 9 – Then go back to the main recovery screen and select “install zip from SD card”.
Step 10 – Now select “choose zip from sdcard”. Using your volume keys, navigate to the Android 6.0.1 ROM zip file that you copied to your SD card and select it using the Power button. Confirm the installation on the next screen and the installation procedure should start now.
Google Apps: Repeat the above step for the Gapps zip file as well and install it on your phone.
Step 11 – After the installation completes, go to “+++++Go Back+++++” and reboot the phone by selecting “reboot system now” from the recovery menu.

Your Galaxy S5 (US Cellular) [ klteusc] will boot now and it might take about 5 minutes to boot on your first time. So, please wait.
That’s it Your Samsung Galaxy S5 should now have CM13.0 Nightly Android 6.0.1 Marshmallow latest build installed on your phone! Go to Settings > About phone to verify.
For More Samsung Galaxy S5 Brand New Firmware & Custom ROM keep checking AndroidCustomROM Fix ™®
Like this post? PLZ Hit the share buttons below to share this article with your friends on Facebook, Google + and Twitter.
PLZ Follow Us On Flipboard 4 More latest custom ROM fix.
PLZ Use the comment box below to contribute more ideas & Suggestions .
Best Regards.
÷ Prerequisites:
•This tutorial is only for installing CyanogenMod 13 [CM13.0] Nightly ROM on Galaxy S5 (US Cellular) [ klteusc] Please do not try on any other Galaxy S5 variants.
•Your phone should be rooted and haveClockworkMod recovery installed from before.
•This tutorial will wipe out all your data.Proceed at your own risk.Perform a Dalvik Cache wipe before proceeding from the recovery mode.
•Make sure you backup all your data in your phone before proceeding.
*Disclaimer:
Android Custom ROM fix ® provide various Firmware Updates and Rooting process along with Custom ROM,Modes,file are all belong to their owners/developers. The autor of this site or the developers are not responsible, if you damage or brick your device.Do it on your own risk and follow the instruction properly.
* Important:
Backup important files stored on your device before proceeding with the steps below, so that in case something goes wrong you’ll have backup of all your important files.
÷ How to Install CM13.0 Nightly Android 6.0.1 Marshmallow on US Cellular Galaxy S5 [ klteusc]
Step 1 – Download CM13.0 Android 6.0.1 Marshmallow and Google Apps for your Galaxy S5 (US Cellular) [ klteusc] to your computer.
Step 2 – Connect and mount your Galaxy S5 (US Cellular) USB memory on your computer using the USB cable.
Step 3 – Now copy/paste the downloaded Android 6.0.1 ROM zip file and Google Appszip files to your SD card. Make sure the files are in the SD card root (not in any folder).
Step 4 – Then turn OFF your phone and disconnect from the USB cable.
Step 5 – Now to get in the Recovery Mode. Switch ON the phone while pressing and holding Volume Up + Home + Power buttons together
Step 6 – Once you are in ClockworkModRecovery, select perform a full data wipe by selecting “wipe data/factory reset”. Use the Power button to select everything while in the Recovery Mode.
Step 7 – Then, perform a cache wipe by selecting “wipe cache partition” .
Step 8 – Now this is optional, but it is recommended to perform a wipe of your dalvik cache as well. You will not get into boot loops or any other errors. From CWM recovery, go to ‘advanced’ and then select “wipe dalvik cache”.
Step 9 – Then go back to the main recovery screen and select “install zip from SD card”.
Step 10 – Now select “choose zip from sdcard”. Using your volume keys, navigate to the Android 6.0.1 ROM zip file that you copied to your SD card and select it using the Power button. Confirm the installation on the next screen and the installation procedure should start now.
Google Apps: Repeat the above step for the Gapps zip file as well and install it on your phone.
Step 11 – After the installation completes, go to “+++++Go Back+++++” and reboot the phone by selecting “reboot system now” from the recovery menu.
Your Galaxy S5 (US Cellular) [ klteusc] will boot now and it might take about 5 minutes to boot on your first time. So, please wait.
That’s it Your Samsung Galaxy S5 should now have CM13.0 Nightly Android 6.0.1 Marshmallow latest build installed on your phone! Go to Settings > About phone to verify.
For More Samsung Galaxy S5 Brand New Firmware & Custom ROM keep checking AndroidCustomROM Fix ™®
Like this post? PLZ Hit the share buttons below to share this article with your friends on Facebook, Google + and Twitter.
PLZ Follow Us On Flipboard 4 More latest custom ROM fix.
PLZ Use the comment box below to contribute more ideas & Suggestions .
Best Regards.
Friday, July 22, 2016
How to Update Huawei Honor 4X Che2 L11 to Android 6 0 Marshmallow build B506 Europe
Huawei has officially Rolling out Android 6.0 Marshmallow build C432B506 Update for its Honor 4X (Che2-L11) smartphone in Europe. This update is available both via OTA and as a manual download.

Follow our guide below to download the update and install it yourself.
÷ Firmware Details:
- Device: Huawei Honor 4X
- Model: Che2-L11
- Android: v6.0 Marshmallow
- EMUI: 4.0
- Firmware: B506
- Build Number: Che2-L11C432B506a
- Custom Number: CUSTC432D001
- Region: Europe
- Release Date: 13.05.2016
- Status: Official (stable)
- Type: Full firmware image
- File Name: Che2-L11_Firmware_Android 6.0_EMUI 4.0_C432B506a_Finland_Poland_Estonia_Lithuania_Latvia_Channel-Others.zip
View my Flipboard Magazine.
÷ Prerequisites:
•This firmware will work on the Che2-L11 variant of Honor 4C with European (C432) branding.
*Disclaimer:
Android Custom ROM fix ® provide various Firmware Updates and Rooting process along with Custom ROM,Modes,file are all belong to their owners/developers. The autor of this site or the developers are not responsible, if you damage or brick your device.Do it on your own risk and follow the instruction properly.
* Important:
Backup important files stored on your device before proceeding with the steps below, so that in case something goes wrong you’ll have backup of all your important files.

÷ How to Update Huawei Honor 4X (Che2-L11) to Android 6.0 Marshmallow build B506 [ Europe]
1- Download Android 6.0 Marshmallow build C432B506 Extract the Zip package.
2- Copy the dload folder to the external microSD card.
3- Take a full backup of your data and export it to the external memory.
4- Turn your phone off.
5- Next, open the dialer and type *#*#2846579#*#*
6- In the menu go to Software upgrade > SD Card Upgrade and confirm the installation.

That’s it! Your Huawei Honor 4X (Che2-L11) should now have Marshmallow 6.0. on your phone! Go to Settings > About phone to verify.
Like this post? PLZ Hit the share buttons below to share this article with your friends on Facebook, Google + and Twitter.
PLZ Follow Us On Flipboard 4 More Huawei Honor 4X (Che2-L11) Latest Updates.
PLZ Use the comment box below to contribute more ideas & Suggestions .
Best Regards.
÷ Prerequisites:
•This firmware will work on the Che2-L11 variant of Honor 4C with European (C432) branding.
*Disclaimer:
Android Custom ROM fix ® provide various Firmware Updates and Rooting process along with Custom ROM,Modes,file are all belong to their owners/developers. The autor of this site or the developers are not responsible, if you damage or brick your device.Do it on your own risk and follow the instruction properly.
* Important:
Backup important files stored on your device before proceeding with the steps below, so that in case something goes wrong you’ll have backup of all your important files.
÷ How to Update Huawei Honor 4X (Che2-L11) to Android 6.0 Marshmallow build B506 [ Europe]
1- Download Android 6.0 Marshmallow build C432B506 Extract the Zip package.
2- Copy the dload folder to the external microSD card.
3- Take a full backup of your data and export it to the external memory.
4- Turn your phone off.
5- Next, open the dialer and type *#*#2846579#*#*
6- In the menu go to Software upgrade > SD Card Upgrade and confirm the installation.
That’s it! Your Huawei Honor 4X (Che2-L11) should now have Marshmallow 6.0. on your phone! Go to Settings > About phone to verify.
Like this post? PLZ Hit the share buttons below to share this article with your friends on Facebook, Google + and Twitter.
PLZ Follow Us On Flipboard 4 More Huawei Honor 4X (Che2-L11) Latest Updates.
PLZ Use the comment box below to contribute more ideas & Suggestions .
Best Regards.
How to Install CM13 0 Nightly Android 6 0 1 Marshmallow on Huawei Ascend Mate 2 Latest build

If you are looking to install a new custom ROM on your Huawei Ascend Mate 2 , you can find here the best Custom ROMs for you.
CyanogenMod 13 [CM13.0] Nightly ROM latest build cm-13.0-20160520-NIGHTLY-osprey.zip is released for Huawei Ascend Mate 2 (mt2).
CM13.0 will let Huawei Ascend Mate 2 users taste the sweetness of Marshmallow 6.0.1 such as the battery saving ‘doze’ functionality and new permissions model, alongside the CM features you’d expect.
Follow our guide below to download the Unofficial CM13 and install it yourself.
View my Flipboard Magazine.
÷ Prerequisites:
•This tutorial is only for installing CyanogenMod 13 [CM13.0] Nightly ROM on Huawei Ascend Mate 2 (mt2) Please do not try on any other Huawei Ascend Mate variants.
•Your phone should be rooted and haveClockworkMod recovery installed from before.
•This tutorial will wipe out all your data.Proceed at your own risk.Perform a Dalvik Cache wipe before proceeding from the recovery mode.
Make sure you backup all your data in your phone before proceeding.
*Disclaimer:
Android Custom ROM fix ® provide various Firmware Updates and Rooting process along with Custom ROM,Modes,file are all belong to their owners/developers. The autor of this site or the developers are not responsible, if you damage or brick your device.Do it on your own risk and follow the instruction properly.
* Important:
Backup important files stored on your device before proceeding with the steps below, so that in case something goes wrong you’ll have backup of all your important files.

÷ How to Install CM13.0 Nightly Android 6.0.1 Marshmallow on Huawei Ascend Mate 2 [ Latest build]
Step 1 – Download CM13.0 Android 6.0.1 Marshmallow and Google Apps for your Huawei Ascend Mate 2 to your computer.
Step 2 – Connect and mount your Huawei Ascend Mate 2 USB memory on your computer using the USB cable.
Step 3 – Now copy/paste the downloaded Android 6.0.1 ROM zip file and Google Appszip files to your SD card. Make sure the files are in the SD card root (not in any folder).
Step 4 – Then turn OFF your phone and disconnect from the USB cable.
Step 5 – Now to get in the Recovery Mode. Switch ON the phone while pressing and holding Volume Up + Home + Power buttons together
Step 6 – Once you are in ClockworkModRecovery, select perform a full data wipe by selecting “wipe data/factory reset”. Use the Power button to select everything while in the Recovery Mode.
Step 7 – Then, perform a cache wipe by selecting “wipe cache partition” .
Step 8 – Now this is optional, but it is recommended to perform a wipe of your dalvik cache as well. You will not get into boot loops or any other errors. From CWM recovery, go to ‘advanced’ and then select “wipe dalvik cache”.
Step 9 – Then go back to the main recovery screen and select “install zip from SD card”.
Step 10 – Now select “choose zip from sdcard”. Using your volume keys, navigate to the Android 6.0.1 ROM zip file that you copied to your SD card and select it using the Power button. Confirm the installation on the next screen and the installation procedure should start now.
Google Apps: Repeat the above step for the Gapps zip file as well and install it on your phone.
Step 11 – After the installation completes, go to “+++++Go Back+++++” and reboot the phone by selecting “reboot system now” from the recovery menu.
Your Huawei Ascend Mate 2 will boot now and it might take about 5 minutes to boot on your first time. So, please wait.

That’s it Your Huawei Ascend Mate 2 should now have CM13.0 Nightly Android 6.0.1 Marshmallow latest build installed on your phone! Go to Settings > About phone to verify.
For More Huawei Ascend Mate 2 Brand New Firmware & Custom ROM keep checking AndroidCustomROM Fix ™®
Like this post? PLZ Hit the share buttons below to share this article with your friends on Facebook, Google + and Twitter.
PLZ Follow Us On Flipboard 4 More Huawei Ascend Mate 2 latest custom ROM fix.
PLZ Use the comment box below to contribute more ideas & Suggestions .
Best Regards.
÷ Prerequisites:
•This tutorial is only for installing CyanogenMod 13 [CM13.0] Nightly ROM on Huawei Ascend Mate 2 (mt2) Please do not try on any other Huawei Ascend Mate variants.
•Your phone should be rooted and haveClockworkMod recovery installed from before.
•This tutorial will wipe out all your data.Proceed at your own risk.Perform a Dalvik Cache wipe before proceeding from the recovery mode.
Make sure you backup all your data in your phone before proceeding.
*Disclaimer:
Android Custom ROM fix ® provide various Firmware Updates and Rooting process along with Custom ROM,Modes,file are all belong to their owners/developers. The autor of this site or the developers are not responsible, if you damage or brick your device.Do it on your own risk and follow the instruction properly.
* Important:
Backup important files stored on your device before proceeding with the steps below, so that in case something goes wrong you’ll have backup of all your important files.
÷ How to Install CM13.0 Nightly Android 6.0.1 Marshmallow on Huawei Ascend Mate 2 [ Latest build]
Step 1 – Download CM13.0 Android 6.0.1 Marshmallow and Google Apps for your Huawei Ascend Mate 2 to your computer.
Step 2 – Connect and mount your Huawei Ascend Mate 2 USB memory on your computer using the USB cable.
Step 3 – Now copy/paste the downloaded Android 6.0.1 ROM zip file and Google Appszip files to your SD card. Make sure the files are in the SD card root (not in any folder).
Step 4 – Then turn OFF your phone and disconnect from the USB cable.
Step 5 – Now to get in the Recovery Mode. Switch ON the phone while pressing and holding Volume Up + Home + Power buttons together
Step 6 – Once you are in ClockworkModRecovery, select perform a full data wipe by selecting “wipe data/factory reset”. Use the Power button to select everything while in the Recovery Mode.
Step 7 – Then, perform a cache wipe by selecting “wipe cache partition” .
Step 8 – Now this is optional, but it is recommended to perform a wipe of your dalvik cache as well. You will not get into boot loops or any other errors. From CWM recovery, go to ‘advanced’ and then select “wipe dalvik cache”.
Step 9 – Then go back to the main recovery screen and select “install zip from SD card”.
Step 10 – Now select “choose zip from sdcard”. Using your volume keys, navigate to the Android 6.0.1 ROM zip file that you copied to your SD card and select it using the Power button. Confirm the installation on the next screen and the installation procedure should start now.
Google Apps: Repeat the above step for the Gapps zip file as well and install it on your phone.
Step 11 – After the installation completes, go to “+++++Go Back+++++” and reboot the phone by selecting “reboot system now” from the recovery menu.
Your Huawei Ascend Mate 2 will boot now and it might take about 5 minutes to boot on your first time. So, please wait.
That’s it Your Huawei Ascend Mate 2 should now have CM13.0 Nightly Android 6.0.1 Marshmallow latest build installed on your phone! Go to Settings > About phone to verify.
For More Huawei Ascend Mate 2 Brand New Firmware & Custom ROM keep checking AndroidCustomROM Fix ™®
Like this post? PLZ Hit the share buttons below to share this article with your friends on Facebook, Google + and Twitter.
PLZ Follow Us On Flipboard 4 More Huawei Ascend Mate 2 latest custom ROM fix.
PLZ Use the comment box below to contribute more ideas & Suggestions .
Best Regards.
Thursday, July 21, 2016
How to Install CM13 0 Nightly Android 6 0 1 Marshmallow on HTC One 2014 Dual SIM Latest Build

The HTC One was one of our favorite smartphones of 2013 which you can put two SIM and remains an object of desire for many aspiring Android owners.
If you are looking to install a new custom ROM on your HTC One 2014 Dual SIM (m8d) then we have here as usual the best Custom ROMs for you.
CM13.0 will let HTC One 2014 Dual SIM users taste the sweetness of Marshmallow 6.0.1 such as the battery saving ‘doze’ functionality and new permissions model, alongside the CM features you’d expect.
Follow our guide below to download the Unofficial CM13.0 and install it yourself.
View my Flipboard Magazine.
÷ Prerequisites:
•This tutorial is only for installing CyanogenMod 13 [CM13.0] Nightly ROM on HTC One 2014 Dual SIM Please do not try on any other HTC One variants.
•Your phone should be rooted and haveClockworkMod recovery installed from before.
•This tutorial will wipe out all your data.Proceed at your own risk.Perform a Dalvik Cache wipe before proceeding from the recovery mode.
Make sure you backup all your data in your phone before proceeding.

*Disclaimer:
Android Custom ROM fix ® provide various Firmware Updates and Rooting process along with Custom ROM,Modes,file are all belong to their owners/developers. The autor of this site or the developers are not responsible, if you damage or brick your device.Do it on your own risk and follow the instruction properly.
* Important:
Backup important files stored on your device before proceeding with the steps below, so that in case something goes wrong you’ll have backup of all your important files.
÷ How to Install CM13.0 Nightly Android 6.0.1 Marshmallow on HTC One 2014 Dual SIM.
Step 1 – Download CM13.0 Android 6.0.1 Marshmallow and Google Apps for your HTC One 2014 Dual SIM to your computer.
Step 2 – Connect and mount your HTC One 2014 Dual SIM USB memory on your computer using the USB cable.
Step 3 – Now copy/paste the downloaded Android 6.0.1 ROM zip file and Google Appszip files to your SD card. Make sure the files are in the SD card root (not in any folder).
Step 4 – Then turn OFF your phone and disconnect from the USB cable.
Step 5 – Now to get in the Recovery Mode. Switch ON the phone while pressing and holding Volume Up + Home + Power buttons together
Step 6 – Once you are in ClockworkModRecovery, select perform a full data wipe by selecting “wipe data/factory reset”. Use the Power button to select everything while in the Recovery Mode.
Step 7 – Then, perform a cache wipe by selecting “wipe cache partition” .
Step 8 – Now this is optional, but it is recommended to perform a wipe of your dalvik cache as well. You will not get into boot loops or any other errors. From CWM recovery, go to ‘advanced’ and then select “wipe dalvik cache”.
Step 9 – Then go back to the main recovery screen and select “install zip from SD card”.
Step 10 – Now select “choose zip from sdcard”. Using your volume keys, navigate to the Android 6.0.1 ROM zip file that you copied to your SD card and select it using the Power button. Confirm the installation on the next screen and the installation procedure should start now.
Google Apps: Repeat the above step for the Gapps zip file as well and install it on your phone.
Step 11 – After the installation completes, go to “+++++Go Back+++++” and reboot the phone by selecting “reboot system now” from the recovery menu.
Your HTC One 2014 Dual SIM will boot now and it might take about 5 minutes to boot on your first time. So, please wait.
That’s it Your HTC One 2014 Dual SIM should now have CM13.0 Nightly Android 6.0.1 Marshmallow latest build installed on your phone! Go to Settings > About phone to verify.

For More HTC One 2014 Dual SIM Brand New Firmware & Custom ROM keep checking AndroidCustomROM Fix ™®
Like this post? PLZ Hit the share buttons below to share this article with your friends on Facebook, Google + and Twitter.
PLZ Follow Us On Flipboard 4 More HTC One latest custom ROM fix.
PLZ Use the comment box below to contribute more ideas & Suggestions .
Best Regards.
÷ Prerequisites:
•This tutorial is only for installing CyanogenMod 13 [CM13.0] Nightly ROM on HTC One 2014 Dual SIM Please do not try on any other HTC One variants.
•Your phone should be rooted and haveClockworkMod recovery installed from before.
•This tutorial will wipe out all your data.Proceed at your own risk.Perform a Dalvik Cache wipe before proceeding from the recovery mode.
Make sure you backup all your data in your phone before proceeding.
*Disclaimer:
Android Custom ROM fix ® provide various Firmware Updates and Rooting process along with Custom ROM,Modes,file are all belong to their owners/developers. The autor of this site or the developers are not responsible, if you damage or brick your device.Do it on your own risk and follow the instruction properly.
* Important:
Backup important files stored on your device before proceeding with the steps below, so that in case something goes wrong you’ll have backup of all your important files.
÷ How to Install CM13.0 Nightly Android 6.0.1 Marshmallow on HTC One 2014 Dual SIM.
Step 1 – Download CM13.0 Android 6.0.1 Marshmallow and Google Apps for your HTC One 2014 Dual SIM to your computer.
Step 2 – Connect and mount your HTC One 2014 Dual SIM USB memory on your computer using the USB cable.
Step 3 – Now copy/paste the downloaded Android 6.0.1 ROM zip file and Google Appszip files to your SD card. Make sure the files are in the SD card root (not in any folder).
Step 4 – Then turn OFF your phone and disconnect from the USB cable.
Step 5 – Now to get in the Recovery Mode. Switch ON the phone while pressing and holding Volume Up + Home + Power buttons together
Step 6 – Once you are in ClockworkModRecovery, select perform a full data wipe by selecting “wipe data/factory reset”. Use the Power button to select everything while in the Recovery Mode.
Step 7 – Then, perform a cache wipe by selecting “wipe cache partition” .
Step 8 – Now this is optional, but it is recommended to perform a wipe of your dalvik cache as well. You will not get into boot loops or any other errors. From CWM recovery, go to ‘advanced’ and then select “wipe dalvik cache”.
Step 9 – Then go back to the main recovery screen and select “install zip from SD card”.
Step 10 – Now select “choose zip from sdcard”. Using your volume keys, navigate to the Android 6.0.1 ROM zip file that you copied to your SD card and select it using the Power button. Confirm the installation on the next screen and the installation procedure should start now.
Google Apps: Repeat the above step for the Gapps zip file as well and install it on your phone.
Step 11 – After the installation completes, go to “+++++Go Back+++++” and reboot the phone by selecting “reboot system now” from the recovery menu.
Your HTC One 2014 Dual SIM will boot now and it might take about 5 minutes to boot on your first time. So, please wait.
That’s it Your HTC One 2014 Dual SIM should now have CM13.0 Nightly Android 6.0.1 Marshmallow latest build installed on your phone! Go to Settings > About phone to verify.
For More HTC One 2014 Dual SIM Brand New Firmware & Custom ROM keep checking AndroidCustomROM Fix ™®
Like this post? PLZ Hit the share buttons below to share this article with your friends on Facebook, Google + and Twitter.
PLZ Follow Us On Flipboard 4 More HTC One latest custom ROM fix.
PLZ Use the comment box below to contribute more ideas & Suggestions .
Best Regards.
Subscribe to:
Posts (Atom)