Showing posts with label htc. Show all posts
Showing posts with label htc. Show all posts
Thursday, July 28, 2016
How to Update HTC One M9 to Android 6 0 1 Marshmallow S Team ROM
HTC One (M9) S.Team custom ROM comes with tons of new features and is based on Android 6.0.1 Marshmallow. A quick list of the main features in S.Team is given below and we are sure you’d love to use this on your HTC One M9:

•World’s first Android 6.0.1 Sense for M9
World’s first Sense 8GP for M9, fully ported from HTC 10 framework including Blutooth and Wi-Fi drivers
•Latest HTC 10 2016-05-01 Android Security Patch (including 32 and 64 bit mode)
•Newer and faster dex2oat module from MOB30H (HTC 10 is MMB29M)
•Extraordinary HTC Boomsound with Dolby, merged with third-party controller, Dolby Audio EQ control besides original Theater and Music modes. Fully based on HTC drivers, pressing back button won’t kill it. (PS: S.Team ROM is not compatible with other third-party audio effects)
•Full M9 kernel in S.Team Tools. (Sense setttings)
•Dual Sense UI in S.Team Tools. (Sense8&8GP)
•HTC PnpMgr & S.Team SocMgr. (S.Team Tools)
•Standardized driver (HTC 10).
•Fixed battery capacity of 2850 mAh.
View my Flipboard Magazine.
÷ Prerequisites:
•This tutorial is only for installing Android 6.0.1 S.Team ROM on HTC One M9. Please do not try on any other One M9 variants.
•Your phone should have a custom recovery installed in order to install this S.Team ROM on your phone.
•We will be using TWRP Recovery for this tutorial.
•Bootloader should be unlocked.
•This tutorial will wipe out all your data. Make sure you backup all your data in your phone before proceeding.
•Perform a Dalvik Cache wipe before proceeding from the Recovery Mode.
*Disclaimer:
Android Custom ROM fix ® provide various Firmware Updates and Rooting process along with Custom ROM,Modes,file are all belong to their owners/developers. The autor of this site or the developers are not responsible, if you damage or brick your device.Do it on your own risk and follow the instruction properly.
* Important:
Backup important files stored on your device before proceeding with the steps below, so that in case something goes wrong you’ll have backup of all your important files.

÷ How to Update HTC One (M9) to Android 6.0.1 Marshmallow S.Team ROM:
Step 1 – Download Android 6.0.1 S.Team ROM for One M9 to your computer and extract boot.img from the zip file separately. Download Google Apps as well.
Step 2 – Connect and mount your One M9 USB memory to your computer using the USB cable.
Step 3 – Now copy/paste the downloaded Android 6.0.1 ROM zip and Google Apps zip files to your phone memory / SD card. Make sure the file is in the phone memory / SD card root (not in any folder).
Step 4 – Copy/paste the boot.img file to android-sdk-windowsplatform-tools directory.
Step 5 – Then turn OFF your phone and disconnect from the USB cable.
Step 6 – Now to get in the Bootloader/Fastboot Mode. Turn ON the phone while pressing and holding the Volume Down + Power buttons.
Step 7 – Once in the Fastboot mode (on your phone), navigate to android-sdk-windowsplatform-tools directory (on your computer) and open Command Prompt (Shift + Right-click > Open Command Prompt).
Step 8 – Type the following command and press Enter.
fastboot flash boot boot.img
Step 9 – Then, type the following command and press Enter.
fastboot reboot
Step 10 – Follow the navigation instructions on the screen. Select BOOTLOADER and then go to RECOVERY.
Step 11 – Once you are in TWRP Recovery, perform a full data wipe by tapping on the ‘Wipe’ button. Then swipe on the “Swipe to Factory Reset” option at the bottom.
Step 12 – Now go back to the main menu and then tap on the ‘Install’ button. From the list, choose the ZIP file that you copied to your phone memory in Step 3.
Step 13 – Confirm installation on the next screen by swiping on the “Swipe to Confirm Flash” option. The installation procedure should start now.
Step 14 – Once the installation is completed.
Google Apps: Repeat the above step for the Gapps zip file as well and install it on your phone.
Step 15 – Tap on the “Wipe cache/dalvik” button if you get into any boot loops or other issues.
Step 16 – You can now reboot your phone by selecting the “Reboot System” button.

Your HTC One M9 will boot now and it might take about 5 minutes to boot on your first time after flashing a new ROM. So, please wait.
That’s it! Your HTC One M9 should now have Android 6.0.1 S.Team Marshmallow custom ROM installed on your phone! Go to Settings > About phone to verify.
For More HTC one M9 latest Updates Keep Checking Android Custom ROM Fix™®
Like this post? PLZ Hit the share buttons below to share this article with your friends on Facebook, Google + and Twitter.
PLZ Follow Us On Flipboard 4 More Latest Updates.
PLZ Use the comment box below to contribute more ideas & Suggestions .
Best Regards.
÷ Prerequisites:
•This tutorial is only for installing Android 6.0.1 S.Team ROM on HTC One M9. Please do not try on any other One M9 variants.
•Your phone should have a custom recovery installed in order to install this S.Team ROM on your phone.
•We will be using TWRP Recovery for this tutorial.
•Bootloader should be unlocked.
•This tutorial will wipe out all your data. Make sure you backup all your data in your phone before proceeding.
•Perform a Dalvik Cache wipe before proceeding from the Recovery Mode.
*Disclaimer:
Android Custom ROM fix ® provide various Firmware Updates and Rooting process along with Custom ROM,Modes,file are all belong to their owners/developers. The autor of this site or the developers are not responsible, if you damage or brick your device.Do it on your own risk and follow the instruction properly.
* Important:
Backup important files stored on your device before proceeding with the steps below, so that in case something goes wrong you’ll have backup of all your important files.
÷ How to Update HTC One (M9) to Android 6.0.1 Marshmallow S.Team ROM:
Step 1 – Download Android 6.0.1 S.Team ROM for One M9 to your computer and extract boot.img from the zip file separately. Download Google Apps as well.
Step 2 – Connect and mount your One M9 USB memory to your computer using the USB cable.
Step 3 – Now copy/paste the downloaded Android 6.0.1 ROM zip and Google Apps zip files to your phone memory / SD card. Make sure the file is in the phone memory / SD card root (not in any folder).
Step 4 – Copy/paste the boot.img file to android-sdk-windowsplatform-tools directory.
Step 5 – Then turn OFF your phone and disconnect from the USB cable.
Step 6 – Now to get in the Bootloader/Fastboot Mode. Turn ON the phone while pressing and holding the Volume Down + Power buttons.
Step 7 – Once in the Fastboot mode (on your phone), navigate to android-sdk-windowsplatform-tools directory (on your computer) and open Command Prompt (Shift + Right-click > Open Command Prompt).
Step 8 – Type the following command and press Enter.
fastboot flash boot boot.img
Step 9 – Then, type the following command and press Enter.
fastboot reboot
Step 10 – Follow the navigation instructions on the screen. Select BOOTLOADER and then go to RECOVERY.
Step 11 – Once you are in TWRP Recovery, perform a full data wipe by tapping on the ‘Wipe’ button. Then swipe on the “Swipe to Factory Reset” option at the bottom.
Step 12 – Now go back to the main menu and then tap on the ‘Install’ button. From the list, choose the ZIP file that you copied to your phone memory in Step 3.
Step 13 – Confirm installation on the next screen by swiping on the “Swipe to Confirm Flash” option. The installation procedure should start now.
Step 14 – Once the installation is completed.
Google Apps: Repeat the above step for the Gapps zip file as well and install it on your phone.
Step 15 – Tap on the “Wipe cache/dalvik” button if you get into any boot loops or other issues.
Step 16 – You can now reboot your phone by selecting the “Reboot System” button.
Your HTC One M9 will boot now and it might take about 5 minutes to boot on your first time after flashing a new ROM. So, please wait.
That’s it! Your HTC One M9 should now have Android 6.0.1 S.Team Marshmallow custom ROM installed on your phone! Go to Settings > About phone to verify.
For More HTC one M9 latest Updates Keep Checking Android Custom ROM Fix™®
Like this post? PLZ Hit the share buttons below to share this article with your friends on Facebook, Google + and Twitter.
PLZ Follow Us On Flipboard 4 More Latest Updates.
PLZ Use the comment box below to contribute more ideas & Suggestions .
Best Regards.

How to Change HTC Android Device IMEI without PC Complete How to
For some years, the need to changing Android devices IMEI is becoming necessary in Nigeria. I believe you already know the reason why Android devices IMEI is being changed if you are reading this article.
So far, we have discussed so many methods that can be used to changing different Android devices IMEI. Some methods are straight forward and simple while some are not.
In this tutorial, I discuss a simpler method of changing all HTC androids IMEI. With this tutorial, you no longer need to use the Fastboot command line to write IMEI on HTC androids.

NOTE: with this method, most HTC Android devices whose IMEI seemed not changeable can be changed.
I have successfully changed and written HTC One V, One X and HTC One M8 IMEI using this method.
Disclaimer:
Changing of IMEI is illegal in some countries and this publication is ONLY for tutorials purposes therefore; you are solely responsible for your actions.
2. Xposed installer: you need to have Xposed Installer installed on your HTC android device. You may download Xposed Installer here.
3. IMEI Changer: you may download the IMEI changer from Play Store here.
The IMEI Changer linked above is the specific IMEI Changer needed for this method to work because it is an Xposed module.
2. Click on Framework, then click on install/update.
3. When it is successfully updated, reboot your device.
4. Install IMEI changer.
5- Open xposed Installer and click on modules. From the list, select and tick IMEI changer then, click on the IMEI Changer from within the Xposed Installer to lunch IMEI changer.
7. Generate your blackberry IMEI and input it in the space provided and click Apply.
8. Reboot your device and dial *#06# to confirm that your IMEI was successfully changed.
NOTE:
Please be informed that Xposed Installer bricks some android devices. I advised you not to proceed with this guide if you DO NOT have custom recovery flashed on your Samsung android device. Learn how to flash custom recovery on Samsung android devices here.
Good luck.
If you have any questions, use the comment box below. Also, dont forget to comment if this method works for you.
So far, we have discussed so many methods that can be used to changing different Android devices IMEI. Some methods are straight forward and simple while some are not.
In this tutorial, I discuss a simpler method of changing all HTC androids IMEI. With this tutorial, you no longer need to use the Fastboot command line to write IMEI on HTC androids.
NOTE: with this method, most HTC Android devices whose IMEI seemed not changeable can be changed.
I have successfully changed and written HTC One V, One X and HTC One M8 IMEI using this method.
Disclaimer:
Changing of IMEI is illegal in some countries and this publication is ONLY for tutorials purposes therefore; you are solely responsible for your actions.
Requirements for Changing your HTC Android IMEI
1. ROOT Access: your HTC Android device must be rooted to successfully change the IMEI using the guides explained here.2. Xposed installer: you need to have Xposed Installer installed on your HTC android device. You may download Xposed Installer here.
3. IMEI Changer: you may download the IMEI changer from Play Store here.
The IMEI Changer linked above is the specific IMEI Changer needed for this method to work because it is an Xposed module.
Guides for Changing your HTC Android IMEI
1. Install Xposed installer and launch it.2. Click on Framework, then click on install/update.
3. When it is successfully updated, reboot your device.
4. Install IMEI changer.
5- Open xposed Installer and click on modules. From the list, select and tick IMEI changer then, click on the IMEI Changer from within the Xposed Installer to lunch IMEI changer.
7. Generate your blackberry IMEI and input it in the space provided and click Apply.
8. Reboot your device and dial *#06# to confirm that your IMEI was successfully changed.
NOTE:
Please be informed that Xposed Installer bricks some android devices. I advised you not to proceed with this guide if you DO NOT have custom recovery flashed on your Samsung android device. Learn how to flash custom recovery on Samsung android devices here.
Good luck.
If you have any questions, use the comment box below. Also, dont forget to comment if this method works for you.
| Click here to SUBSCRIBE to this Blog to Receive future updates.. |
Wednesday, July 27, 2016
How to Install Android 6 0 1 Marshmallow Bad Boyz Sense 8 V1 0 ROM on Sprint HTC 10 2PS6400
According to XDA member OMJ, Android 6.0.1 Marshmallow Bad Boyz Sense 8 V1.0 custom ROM is now available for Sprint HTC 10 2PS6400.

÷ Features:
-added SystemUI Tuner (to activate, open QS, long press settings cog)
-added DoubleTap to sleep in the status bar
-added Right corner pulldown QS
-added MIUI battery indicator (activated in tweaks app)
-added Traffic indicator (activated in tweaks app)
-removed power saver notification
-removed GPS icon
•Prism mods
-added 5x6 app drawer
-added landscape (activated in tweaks app)
•Misc mods
-added SuperSU 2.72 (dm-verity disabled, forced encryption)
-added Bad Boyz Tweaks app
-added Bad Boyz Modz App
-added Bad Boyz bootup/shutdown blackout animation, thx schmeggy929!
-added APM
-added Multiuser support
-added animation tweaks
-added default Dev options menu
-added init.d support
-added tether/hotspot support
-added Auto-Start Manager (settings/security)
-disabled adb icon
-disabled NFC icon
-disabled sig checks
-debloated ROM
ADDED
Code:
-added ROMdB Dev Tool
-added BB Tweaks App
-added BB Modz App
-added aLogcat
-added Faceboot plugin
-added Instagram plugin
-added HTC Gallery
-added HTC Music
-added HtcCarGps
-added missing widgets:
-CalculatorWidget, HtcAutoRotateWidget, HtcBackgroundDataWidget, HtcProfilesWidget,
-HtcRingtoneWidget, HtcScreenBrightnessWidget, HtcScreenTimeoutWidget, HtcSyncWidget
-HtcBtWidget, HtcCalendarWidgets, HtcContactWidgets, HtcHotspotWidget, HtcMobileNetworkWidget
-HtcMusicWidget, HtcWiFiWidget, HtcDataRoamingWidget, HtcDataStripWidget...
View my Flipboard Magazine.
*Disclaimer:
Android Custom ROM fix ® provide various Firmware Updates and Rooting process along with Custom ROM,Modes,file are all belong to their owners/developers. The autor of this site or the developers are not responsible, if you damage or brick your device.Do it on your own risk and follow the instruction properly.
* Important:
Backup important files stored on your device before proceeding with the steps below, so that in case something goes wrong you’ll have backup of all your important files.
ROM Download & Installation via here.

For More HTC 10 latest updates keep checking AndroidCustomROM Fix ™®
Like this post? PLZ Hit the share buttons below to share this article with your friends on Facebook, Google + and Twitter.
PLZ Follow Us On Flipboard 4 More Latest Updates.
PLZ Use the comment box below to contribute more ideas & Suggestions .
Best Regards.
*Disclaimer:
Android Custom ROM fix ® provide various Firmware Updates and Rooting process along with Custom ROM,Modes,file are all belong to their owners/developers. The autor of this site or the developers are not responsible, if you damage or brick your device.Do it on your own risk and follow the instruction properly.
* Important:
Backup important files stored on your device before proceeding with the steps below, so that in case something goes wrong you’ll have backup of all your important files.
ROM Download & Installation via here.
For More HTC 10 latest updates keep checking AndroidCustomROM Fix ™®
Like this post? PLZ Hit the share buttons below to share this article with your friends on Facebook, Google + and Twitter.
PLZ Follow Us On Flipboard 4 More Latest Updates.
PLZ Use the comment box below to contribute more ideas & Suggestions .
Best Regards.
Download Android Jelly Bean 4 1 1 stock firmware for HTC Proto T329T smartphone

Download Android Jelly Bean 4.1.1 stock firmware for HTC Proto T329T smartphone from here or from here. Download previous firmware from here. Download another HTC firmware from here.
Firmware details
Archive name: HTC_T329T_4.1.1_20160217
Image: HTC_T329T_SJJL_ROM_20160217YL
Archive file size: 351 MB
Model: HTC Proto T329T smartphone
Platform: Qualcomm Snapdragon S4 MSM822
Build number: 2.18.1403.1 CL180667 release-keys
Caution: Please do not update firmware unless you know what you are doing, you really want it or it is absolutely necessary. Firmware updates may occasionally have bad results, like bricking your device, temporarily or permanently. The firmware update process is done entirely at your own risk. Before attempting to update the firmware, back up your data.
Don’t miss any of our future video tutorials, follow us on Youtube. Like us on Facebook. Add us in your circles on Google+. Watch our photo albums on Flickr. Subscribe now to our newsletter.
Don’t miss any of our future video tutorials, follow us on Youtube. Like us on Facebook. Add us in your circles on Google+. Watch our photo albums on Flickr. Subscribe now to our newsletter.
How to Install TWRP 3 0 2 Custom Recovery on HTC 10
HTC 10 Owners can now install latest TWRP 3.0.2 custom recovery on their smartphones by following the detailed tutorial given below.
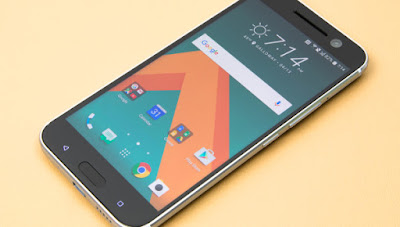
TWRP 3.0.2 custom recovery will also allow you to easily gain root access as well. HTC 10 can be easily installed with TWRP 3.0.2 using our detailed guide which is listed right below. You can now easily install TWRP Touch Recovery on HTC 10 using our tutorial.
TWRP 3.0.2 custom recovery will also allow you to easily gain root access as well. HTC 10 can be easily installed with TWRP 3.0.2 using our detailed guide which is listed right below. You can now easily install TWRP Touch Recovery on HTC 10 using our tutorial.
View my Flipboard Magazine.
÷ Prerequisites:
•This TWRP Recovery tutorial is only for unlocked HTC 10. Please don’t try this on any other variants of the phone.
•Make sure you backup all your data in your phone before proceeding.
•This will void your warranty.
•HTC Sync should be installed with full working ADB/Fastboot before performing the tutorial.
•Bootloader should be unlocked.
*Disclaimer:
Android Custom ROM fix ® provide various Firmware Updates and Rooting process along with Custom ROM,Modes,file are all belong to their owners/developers. The autor of this site or the developers are not responsible, if you damage or brick your device.Do it on your own risk and follow the instruction properly.
* Important:
Backup important files stored on your device before proceeding with the steps below, so that in case something goes wrong you’ll have backup of all your important files.
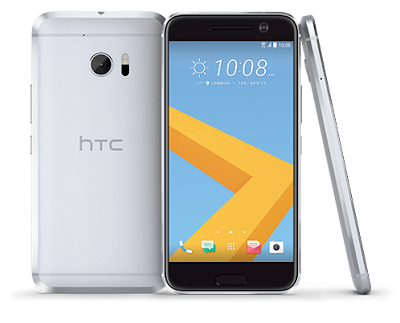
÷ How to Install TWRP 3.0.2 Custom Recovery on HTC 10.
Step 1 – Make sure ADB and Fastboot is configured on your PC.
Step 2 – Connect HTC 10 to your PC with a USB cable and install ADB drivers.
Step 3 – Download TWRP (twrp-3.0.2-4-pme.img) and copy/paste it in the android-sdk-windowsplatform-tools directory.
Step 4 – Go to Fastboot/Bootloader mode now. How? Navigate to android-sdk-windowsplatform-tools directory and open Command Prompt (Shift + Right-click > Open Command Prompt).
Step 5 – Type in the following command and press Enter.
adb reboot bootloader
Step 6 – HTC 10 will switch OFF and then boot into the Fastboot Mode. Once the drivers are installed, proceed below.
NOTE: Alternatively, you can also enter Fastboot Mode by switching OFF your phone first. Then turn it ON by holding Volume Down + Power buttons together.
Step 7 – Then type the following command and press Enter.
fastboot flash recovery twrp-3.0.2-4-pme.img
Step 8 – Once completed, choose RECOVERY from the Fastboot menu and enter Recovery Mode. Navigate up and down using the volume keys.
Step 9 – If you see TWRP Recovery, then everything so far has been successfully performed and custom recovery is installed.
Step 10 – Since everything is going on well, you can go back to your normal phone by rebooting HTC 10. Select “reboot system now” from the recovery menu. The phone will boot now.
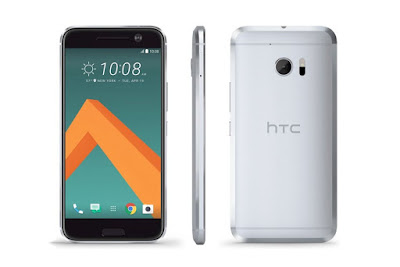
That’s it. Your HTC 10 has now been updated with a custom recovery like TWRP Recovery and is fully working on your phone.
How to access Recovery Mode? Turn OFF your phone. Switch ON your phone again by holding Volume Up + Power buttons together and you will be taken directly to the TWRP Touch Recovery menu.
For More HTC 10 Updates Keep Checking Android Custom ROM Fix ™
Like this post? PLZ Hit the share buttons below to share this article with your friends on Facebook, Google + and Twitter.
PLZ Follow Us On Flipboard 4 More Latest Updates.
PLZ Use the comment box below to contribute more ideas & Suggestions .
Best Regards.
÷ Prerequisites:
•This TWRP Recovery tutorial is only for unlocked HTC 10. Please don’t try this on any other variants of the phone.
•Make sure you backup all your data in your phone before proceeding.
•This will void your warranty.
•HTC Sync should be installed with full working ADB/Fastboot before performing the tutorial.
•Bootloader should be unlocked.
*Disclaimer:
Android Custom ROM fix ® provide various Firmware Updates and Rooting process along with Custom ROM,Modes,file are all belong to their owners/developers. The autor of this site or the developers are not responsible, if you damage or brick your device.Do it on your own risk and follow the instruction properly.
* Important:
Backup important files stored on your device before proceeding with the steps below, so that in case something goes wrong you’ll have backup of all your important files.
÷ How to Install TWRP 3.0.2 Custom Recovery on HTC 10.
Step 1 – Make sure ADB and Fastboot is configured on your PC.
Step 2 – Connect HTC 10 to your PC with a USB cable and install ADB drivers.
Step 3 – Download TWRP (twrp-3.0.2-4-pme.img) and copy/paste it in the android-sdk-windowsplatform-tools directory.
Step 4 – Go to Fastboot/Bootloader mode now. How? Navigate to android-sdk-windowsplatform-tools directory and open Command Prompt (Shift + Right-click > Open Command Prompt).
Step 5 – Type in the following command and press Enter.
adb reboot bootloader
Step 6 – HTC 10 will switch OFF and then boot into the Fastboot Mode. Once the drivers are installed, proceed below.
NOTE: Alternatively, you can also enter Fastboot Mode by switching OFF your phone first. Then turn it ON by holding Volume Down + Power buttons together.
Step 7 – Then type the following command and press Enter.
fastboot flash recovery twrp-3.0.2-4-pme.img
Step 8 – Once completed, choose RECOVERY from the Fastboot menu and enter Recovery Mode. Navigate up and down using the volume keys.
Step 9 – If you see TWRP Recovery, then everything so far has been successfully performed and custom recovery is installed.
Step 10 – Since everything is going on well, you can go back to your normal phone by rebooting HTC 10. Select “reboot system now” from the recovery menu. The phone will boot now.
That’s it. Your HTC 10 has now been updated with a custom recovery like TWRP Recovery and is fully working on your phone.
How to access Recovery Mode? Turn OFF your phone. Switch ON your phone again by holding Volume Up + Power buttons together and you will be taken directly to the TWRP Touch Recovery menu.
For More HTC 10 Updates Keep Checking Android Custom ROM Fix ™
Like this post? PLZ Hit the share buttons below to share this article with your friends on Facebook, Google + and Twitter.
PLZ Follow Us On Flipboard 4 More Latest Updates.
PLZ Use the comment box below to contribute more ideas & Suggestions .
Best Regards.
Tuesday, July 26, 2016
How to Install CM13 0 Nightly Android 6 0 1 Marshmallow on Verizon HTC One M9 himawl
CyanogenMod 13 [CM13.0] Nightly ROM latest build cm-13.0-20160515-NIGHTLY-himawl is released for Verizon HTC One M9 ( himawl). CM13.0 will let HTC One M9 users taste the sweetness of Marshmallow 6.0.1 such as the battery saving ‘doze’ functionality and new permissions model, alongside the CM features you’d expect.

Follow our guide below to download the Unofficial CM13 and install it yourself.
View my Flipboard Magazine.
÷ Prerequisites:
•This tutorial is only for installing CyanogenMod 13 [CM13.0] Nightly ROM on Verizon HTC One M9 ( himawl). Please do not try on any other HTC One M9 variants.
•Your phone should be rooted and haveClockworkMod recovery installed from before.
•This tutorial will wipe out all your data.Proceed at your own risk.Perform a Dalvik Cache wipe before proceeding from the recovery mode.
Make sure you backup all your data in your phone before proceeding.
*Disclaimer:
Android Custom ROM fix ® provide various Firmware Updates and Rooting process along with Custom ROM,Modes,file are all belong to their owners/developers. The autor of this site or the developers are not responsible, if you damage or brick your device.Do it on your own risk and follow the instruction properly.
* Important:
Backup important files stored on your device before proceeding with the steps below, so that in case something goes wrong you’ll have backup of all your important files.

÷ How to Install CM13.0 Nightly Android 6.0.1 Marshmallow on Verizon HTC One M9 ( himawl)
Step 1 – Download CM13.0 Android 6.0.1 Marshmallow and Google Apps for your Verizon HTC One M9 ( himawl) to your computer.
Step 2 – Connect and mount your Verizon HTC One M9 ( himawl) USB memory on your computer using the USB cable.
Step 3 – Now copy/paste the downloaded Android 6.0.1 ROM zip file and Google Appszip files to your SD card. Make sure the files are in the SD card root (not in any folder).
Step 4 – Then turn OFF your phone and disconnect from the USB cable.
Step 5 – Now to get in the Recovery Mode. Switch ON the phone while pressing and holding Volume Up + Home + Power buttons together
Step 6 – Once you are in ClockworkModRecovery, select perform a full data wipe by selecting “wipe data/factory reset”. Use the Power button to select everything while in the Recovery Mode.
Step 7 – Then, perform a cache wipe by selecting “wipe cache partition” .
Step 8 – Now this is optional, but it is recommended to perform a wipe of your dalvik cache as well. You will not get into boot loops or any other errors. From CWM recovery, go to ‘advanced’ and then select “wipe dalvik cache”.
Step 9 – Then go back to the main recovery screen and select “install zip from SD card”.
Step 10 – Now select “choose zip from sdcard”. Using your volume keys, navigate to the Android 6.0.1 ROM zip file that you copied to your SD card and select it using the Power button. Confirm the installation on the next screen and the installation procedure should start now.
Google Apps: Repeat the above step for the Gapps zip file as well and install it on your phone.
Step 11 – After the installation completes, go to “+++++Go Back+++++” and reboot the phone by selecting “reboot system now” from the recovery menu.

Your Verizon HTC One M9 ( himawl) will boot now and it might take about 5 minutes to boot on your first time. So, please wait.
That’s it Your Verizon HTC One M9 ( himawl) should now have CM13.0 Nightly Android 6.0.1 Marshmallow installed on your phone! Go to Settings > About phone to verify.
For more HTC One M9 Brand New Firmware & Custom ROM keep checking AndroidCustomROM Fix ™®
Like this post? PLZ Hit the share buttons below to share this article with your friends on Facebook, Google + and Twitter.
PLZ Follow Us On Flipboard 4 More HTC One M9 latest custom ROM fix.
PLZ Use the comment box below to contribute more ideas & Suggestions .
Best Regards.
÷ Prerequisites:
•This tutorial is only for installing CyanogenMod 13 [CM13.0] Nightly ROM on Verizon HTC One M9 ( himawl). Please do not try on any other HTC One M9 variants.
•Your phone should be rooted and haveClockworkMod recovery installed from before.
•This tutorial will wipe out all your data.Proceed at your own risk.Perform a Dalvik Cache wipe before proceeding from the recovery mode.
Make sure you backup all your data in your phone before proceeding.
*Disclaimer:
Android Custom ROM fix ® provide various Firmware Updates and Rooting process along with Custom ROM,Modes,file are all belong to their owners/developers. The autor of this site or the developers are not responsible, if you damage or brick your device.Do it on your own risk and follow the instruction properly.
* Important:
Backup important files stored on your device before proceeding with the steps below, so that in case something goes wrong you’ll have backup of all your important files.
÷ How to Install CM13.0 Nightly Android 6.0.1 Marshmallow on Verizon HTC One M9 ( himawl)
Step 1 – Download CM13.0 Android 6.0.1 Marshmallow and Google Apps for your Verizon HTC One M9 ( himawl) to your computer.
Step 2 – Connect and mount your Verizon HTC One M9 ( himawl) USB memory on your computer using the USB cable.
Step 3 – Now copy/paste the downloaded Android 6.0.1 ROM zip file and Google Appszip files to your SD card. Make sure the files are in the SD card root (not in any folder).
Step 4 – Then turn OFF your phone and disconnect from the USB cable.
Step 5 – Now to get in the Recovery Mode. Switch ON the phone while pressing and holding Volume Up + Home + Power buttons together
Step 6 – Once you are in ClockworkModRecovery, select perform a full data wipe by selecting “wipe data/factory reset”. Use the Power button to select everything while in the Recovery Mode.
Step 7 – Then, perform a cache wipe by selecting “wipe cache partition” .
Step 8 – Now this is optional, but it is recommended to perform a wipe of your dalvik cache as well. You will not get into boot loops or any other errors. From CWM recovery, go to ‘advanced’ and then select “wipe dalvik cache”.
Step 9 – Then go back to the main recovery screen and select “install zip from SD card”.
Step 10 – Now select “choose zip from sdcard”. Using your volume keys, navigate to the Android 6.0.1 ROM zip file that you copied to your SD card and select it using the Power button. Confirm the installation on the next screen and the installation procedure should start now.
Google Apps: Repeat the above step for the Gapps zip file as well and install it on your phone.
Step 11 – After the installation completes, go to “+++++Go Back+++++” and reboot the phone by selecting “reboot system now” from the recovery menu.
Your Verizon HTC One M9 ( himawl) will boot now and it might take about 5 minutes to boot on your first time. So, please wait.
That’s it Your Verizon HTC One M9 ( himawl) should now have CM13.0 Nightly Android 6.0.1 Marshmallow installed on your phone! Go to Settings > About phone to verify.
For more HTC One M9 Brand New Firmware & Custom ROM keep checking AndroidCustomROM Fix ™®
Like this post? PLZ Hit the share buttons below to share this article with your friends on Facebook, Google + and Twitter.
PLZ Follow Us On Flipboard 4 More HTC One M9 latest custom ROM fix.
PLZ Use the comment box below to contribute more ideas & Suggestions .
Best Regards.
Friday, July 22, 2016
How to Root HTC 10 Easily on Marshmallow 6 0 1
SuperSU is one of our favourite rooting package as it comes with all the binaries needed to gain root access on your HTC 10 Android phone. Even the SuperSU app has more features than SuperUser. Other than this rooting tutorial, you might also want to install a custom recovery for installing custom ROMs on your phone.

Don’t worry we are going to share step by step guide to safely How to Root your HTC 10 Easily on Marshmallow 6.0.1.
View my Flipboard Magazine.
÷ Prerequisites:
• HTC 10 bootloader should be unlocked.
•TWRP Recovery should already be installed on your HTC 10.
•As mentioned previously, all firmwares are supported.
•Make a Nandroid backup of your previous phone set up before proceeding – for just in case anything goes wrong.
*Disclaimer:÷ Prerequisites:
• HTC 10 bootloader should be unlocked.
•TWRP Recovery should already be installed on your HTC 10.
•As mentioned previously, all firmwares are supported.
•Make a Nandroid backup of your previous phone set up before proceeding – for just in case anything goes wrong.
Android Custom ROM fix ® provide various Firmware Updates and Rooting process along with Custom ROM,Modes,file are all belong to their owners/developers. The autor of this site or the developers are not responsible, if you damage or brick your device.Do it on your own risk and follow the instruction properly.
* Important:
Backup important files stored on your device before proceeding with the steps below, so that in case something goes wrong you’ll have backup of all your important files.

÷ How to Root HTC 10 Easily on Marshmallow 6.0.1:
Step 1 – Download SuperSU v2.74 (BETA-SuperSU-v2.74-2-20160519174328.zip) for HTC 10 on your PC.
Step 2 – Connect and mount your HTC 10 USB memory on your computer using the USB cable.
Step 3 – Now copy/paste the BETA-SuperSU-v2.74-2-20160519174328.zip file to your SD card. Make sure the file is in the SD card root (not in any folder).
Step 4 – Enter TWRP Custom recovery by typing the following command. (Phone should be connected and USB debugging enabled.)
adb reboot recovery.
Step 5 – In TWRP recovery, scroll down to “flash zip from SD card” and press the power button to select it.
Step 6 – Press the Power button again and select “choose zip from sdcard”.
Step 7 – Now using your volume keys, navigate to BETA-SuperSU-v2.74-2-20160519174328.zip and select it using the Power button. Confirm the installation on the next screen and the installation procedure should start now.
Step 8 – After the installation completes, go to “+++++Go Back” and reboot the phone by selecting “reboot system now” from the Recovery menu. The phone will boot now and it might take about 5 minutes to boot on your first time. So, please wait.

That’s it! Your HTC 10 is now rooted! Check for the SuperSU app in your apps list to verify.
For More HTC 10 Firmware & UpdatesKeep Checking AndroidCustomROM Fix ™®
Like this post? PLZ Hit the share buttons below to share this article with your friends on Facebook, Google + and Twitter.
PLZ Follow Us On Flipboard 4 More Latest Updates.
PLZ Use the comment box below to contribute more ideas & Suggestions .
Best Regards.
Thursday, July 21, 2016
How to Install CM13 0 Nightly Android 6 0 1 Marshmallow on HTC One 2014 Dual SIM Latest Build

The HTC One was one of our favorite smartphones of 2013 which you can put two SIM and remains an object of desire for many aspiring Android owners.
If you are looking to install a new custom ROM on your HTC One 2014 Dual SIM (m8d) then we have here as usual the best Custom ROMs for you.
CM13.0 will let HTC One 2014 Dual SIM users taste the sweetness of Marshmallow 6.0.1 such as the battery saving ‘doze’ functionality and new permissions model, alongside the CM features you’d expect.
Follow our guide below to download the Unofficial CM13.0 and install it yourself.
View my Flipboard Magazine.
÷ Prerequisites:
•This tutorial is only for installing CyanogenMod 13 [CM13.0] Nightly ROM on HTC One 2014 Dual SIM Please do not try on any other HTC One variants.
•Your phone should be rooted and haveClockworkMod recovery installed from before.
•This tutorial will wipe out all your data.Proceed at your own risk.Perform a Dalvik Cache wipe before proceeding from the recovery mode.
Make sure you backup all your data in your phone before proceeding.

*Disclaimer:
Android Custom ROM fix ® provide various Firmware Updates and Rooting process along with Custom ROM,Modes,file are all belong to their owners/developers. The autor of this site or the developers are not responsible, if you damage or brick your device.Do it on your own risk and follow the instruction properly.
* Important:
Backup important files stored on your device before proceeding with the steps below, so that in case something goes wrong you’ll have backup of all your important files.
÷ How to Install CM13.0 Nightly Android 6.0.1 Marshmallow on HTC One 2014 Dual SIM.
Step 1 – Download CM13.0 Android 6.0.1 Marshmallow and Google Apps for your HTC One 2014 Dual SIM to your computer.
Step 2 – Connect and mount your HTC One 2014 Dual SIM USB memory on your computer using the USB cable.
Step 3 – Now copy/paste the downloaded Android 6.0.1 ROM zip file and Google Appszip files to your SD card. Make sure the files are in the SD card root (not in any folder).
Step 4 – Then turn OFF your phone and disconnect from the USB cable.
Step 5 – Now to get in the Recovery Mode. Switch ON the phone while pressing and holding Volume Up + Home + Power buttons together
Step 6 – Once you are in ClockworkModRecovery, select perform a full data wipe by selecting “wipe data/factory reset”. Use the Power button to select everything while in the Recovery Mode.
Step 7 – Then, perform a cache wipe by selecting “wipe cache partition” .
Step 8 – Now this is optional, but it is recommended to perform a wipe of your dalvik cache as well. You will not get into boot loops or any other errors. From CWM recovery, go to ‘advanced’ and then select “wipe dalvik cache”.
Step 9 – Then go back to the main recovery screen and select “install zip from SD card”.
Step 10 – Now select “choose zip from sdcard”. Using your volume keys, navigate to the Android 6.0.1 ROM zip file that you copied to your SD card and select it using the Power button. Confirm the installation on the next screen and the installation procedure should start now.
Google Apps: Repeat the above step for the Gapps zip file as well and install it on your phone.
Step 11 – After the installation completes, go to “+++++Go Back+++++” and reboot the phone by selecting “reboot system now” from the recovery menu.
Your HTC One 2014 Dual SIM will boot now and it might take about 5 minutes to boot on your first time. So, please wait.
That’s it Your HTC One 2014 Dual SIM should now have CM13.0 Nightly Android 6.0.1 Marshmallow latest build installed on your phone! Go to Settings > About phone to verify.

For More HTC One 2014 Dual SIM Brand New Firmware & Custom ROM keep checking AndroidCustomROM Fix ™®
Like this post? PLZ Hit the share buttons below to share this article with your friends on Facebook, Google + and Twitter.
PLZ Follow Us On Flipboard 4 More HTC One latest custom ROM fix.
PLZ Use the comment box below to contribute more ideas & Suggestions .
Best Regards.
÷ Prerequisites:
•This tutorial is only for installing CyanogenMod 13 [CM13.0] Nightly ROM on HTC One 2014 Dual SIM Please do not try on any other HTC One variants.
•Your phone should be rooted and haveClockworkMod recovery installed from before.
•This tutorial will wipe out all your data.Proceed at your own risk.Perform a Dalvik Cache wipe before proceeding from the recovery mode.
Make sure you backup all your data in your phone before proceeding.
*Disclaimer:
Android Custom ROM fix ® provide various Firmware Updates and Rooting process along with Custom ROM,Modes,file are all belong to their owners/developers. The autor of this site or the developers are not responsible, if you damage or brick your device.Do it on your own risk and follow the instruction properly.
* Important:
Backup important files stored on your device before proceeding with the steps below, so that in case something goes wrong you’ll have backup of all your important files.
÷ How to Install CM13.0 Nightly Android 6.0.1 Marshmallow on HTC One 2014 Dual SIM.
Step 1 – Download CM13.0 Android 6.0.1 Marshmallow and Google Apps for your HTC One 2014 Dual SIM to your computer.
Step 2 – Connect and mount your HTC One 2014 Dual SIM USB memory on your computer using the USB cable.
Step 3 – Now copy/paste the downloaded Android 6.0.1 ROM zip file and Google Appszip files to your SD card. Make sure the files are in the SD card root (not in any folder).
Step 4 – Then turn OFF your phone and disconnect from the USB cable.
Step 5 – Now to get in the Recovery Mode. Switch ON the phone while pressing and holding Volume Up + Home + Power buttons together
Step 6 – Once you are in ClockworkModRecovery, select perform a full data wipe by selecting “wipe data/factory reset”. Use the Power button to select everything while in the Recovery Mode.
Step 7 – Then, perform a cache wipe by selecting “wipe cache partition” .
Step 8 – Now this is optional, but it is recommended to perform a wipe of your dalvik cache as well. You will not get into boot loops or any other errors. From CWM recovery, go to ‘advanced’ and then select “wipe dalvik cache”.
Step 9 – Then go back to the main recovery screen and select “install zip from SD card”.
Step 10 – Now select “choose zip from sdcard”. Using your volume keys, navigate to the Android 6.0.1 ROM zip file that you copied to your SD card and select it using the Power button. Confirm the installation on the next screen and the installation procedure should start now.
Google Apps: Repeat the above step for the Gapps zip file as well and install it on your phone.
Step 11 – After the installation completes, go to “+++++Go Back+++++” and reboot the phone by selecting “reboot system now” from the recovery menu.
Your HTC One 2014 Dual SIM will boot now and it might take about 5 minutes to boot on your first time. So, please wait.
That’s it Your HTC One 2014 Dual SIM should now have CM13.0 Nightly Android 6.0.1 Marshmallow latest build installed on your phone! Go to Settings > About phone to verify.
For More HTC One 2014 Dual SIM Brand New Firmware & Custom ROM keep checking AndroidCustomROM Fix ™®
Like this post? PLZ Hit the share buttons below to share this article with your friends on Facebook, Google + and Twitter.
PLZ Follow Us On Flipboard 4 More HTC One latest custom ROM fix.
PLZ Use the comment box below to contribute more ideas & Suggestions .
Best Regards.
How to Update HTC One M8 to Android 6 0 1 Marshmallow JAZZ ROM Deodexed Fast Stable
HTC One M8 JAZZ custom ROM comes with tons of new features and is based on Android 6.0.1 Marshmallow. A quick list of the main features in JAZZ is given below and we are sure you’d love to use this on your HTC One M8:

Android 6.0.1 Marshmallow.
Deodexed.
Modded.
Fast & Stable
Smooth...
Android 6.0.1 Marshmallow.
Deodexed.
Modded.
Fast & Stable
Smooth...
View my Flipboard Magazine.
÷ Prerequisites:
•This tutorial is only for installing Android 6.0.1 JAZZ ROM on HTC One M8. Please do not try on any other One M8 variants.
•Your phone should have a custom recovery installed in order to install this JAZZ ROM on your phone.
•We will be using TWRP Recovery for this tutorial.
•Bootloader should be unlocked.
•This tutorial will wipe out all your data. Make sure you backup all your data in your phone before proceeding.
•Perform a Dalvik Cache wipe before proceeding from the Recovery Mode.
*Disclaimer:
Android Custom ROM fix ® provide various Firmware Updates and Rooting process along with Custom ROM,Modes,file are all belong to their owners/developers. The autor of this site or the developers are not responsible, if you damage or brick your device.Do it on your own risk and follow the instruction properly.
* Important:
Backup important files stored on your device before proceeding with the steps below, so that in case something goes wrong you’ll have backup of all your important files.

÷ How to Update HTC One (M8) to Android 6.0.1 Marshmallow JAZZ ROM [ Deodexed/ Fast & Stable].
Step 1 – Download Android 6.0.1 JAZZ ROM for One M8 to your computer and extract boot.img from the zip file separately.
Step 2 – Connect and mount your One M8 USB memory to your computer using the USB cable.
Step 3 – Now copy/paste the downloaded Android 6.0.1 ROM zip file to your phone memory / SD card. Make sure the file is in the phone memory / SD card root (not in any folder).
Step 4 – Copy/paste the boot.img file to android-sdk-windowsplatform-tools directory.
Step 5 – Then turn OFF your phone and disconnect from the USB cable.
Step 6 – Now to get in the Bootloader/Fastboot Mode. Turn ON the phone while pressing and holding the Volume Down + Power buttons.
Step 7 – Once in the Fastboot mode (on your phone), navigate to android-sdk-windowsplatform-tools directory (on your computer) and open Command Prompt (Shift + Right-click > Open Command Prompt).
Step 8 – Type the following command and press Enter.
fastboot flash boot boot.img
Step 9 – Then, type the following command and press Enter.
fastboot reboot
Step 10 – Follow the navigation instructions on the screen. Select BOOTLOADER and then go to RECOVERY.
Step 11 – Once you are in TWRP Recovery, perform a full data wipe by tapping on the ‘Wipe’ button. Then swipe on the “Swipe to Factory Reset” option at the bottom.
Step 12 – Now go back to the main menu and then tap on the ‘Install’ button. From the list, choose the ZIP file that you copied to your phone memory in Step 3.
Step 13 – Confirm installation on the next screen by swiping on the “Swipe to Confirm Flash” option. The installation procedure should start now.
Step 14 – Once the installation is completed.
Step 15 – Tap on the “Wipe cache/dalvik” button if you get into any boot loops or other issues.
Step 16 – You can now reboot your phone by selecting the “Reboot System” button.

Your HTC One M8 will boot now and it might take about 5 minutes to boot on your first time after flashing a new ROM. So, please wait.
That’s it! Your HTC One M8 should now have Android 6.0.1 JAZZ Marshmallow custom ROM installed on your phone! Go to Settings > About phone to verify.
For More HTC One (M8) Updates Keep Checking Android Custom ROM Fix ™®
Like this post? PLZ Hit the share buttons below to share this article with your friends on Facebook, Google + and Twitter.
PLZ Follow Us On Flipboard 4 More Latest Updates.
PLZ Use the comment box below to contribute more ideas & Suggestions .
Best Regards.
÷ Prerequisites:
•This tutorial is only for installing Android 6.0.1 JAZZ ROM on HTC One M8. Please do not try on any other One M8 variants.
•Your phone should have a custom recovery installed in order to install this JAZZ ROM on your phone.
•We will be using TWRP Recovery for this tutorial.
•Bootloader should be unlocked.
•This tutorial will wipe out all your data. Make sure you backup all your data in your phone before proceeding.
•Perform a Dalvik Cache wipe before proceeding from the Recovery Mode.
*Disclaimer:
Android Custom ROM fix ® provide various Firmware Updates and Rooting process along with Custom ROM,Modes,file are all belong to their owners/developers. The autor of this site or the developers are not responsible, if you damage or brick your device.Do it on your own risk and follow the instruction properly.
* Important:
Backup important files stored on your device before proceeding with the steps below, so that in case something goes wrong you’ll have backup of all your important files.
÷ How to Update HTC One (M8) to Android 6.0.1 Marshmallow JAZZ ROM [ Deodexed/ Fast & Stable].
Step 1 – Download Android 6.0.1 JAZZ ROM for One M8 to your computer and extract boot.img from the zip file separately.
Step 2 – Connect and mount your One M8 USB memory to your computer using the USB cable.
Step 3 – Now copy/paste the downloaded Android 6.0.1 ROM zip file to your phone memory / SD card. Make sure the file is in the phone memory / SD card root (not in any folder).
Step 4 – Copy/paste the boot.img file to android-sdk-windowsplatform-tools directory.
Step 5 – Then turn OFF your phone and disconnect from the USB cable.
Step 6 – Now to get in the Bootloader/Fastboot Mode. Turn ON the phone while pressing and holding the Volume Down + Power buttons.
Step 7 – Once in the Fastboot mode (on your phone), navigate to android-sdk-windowsplatform-tools directory (on your computer) and open Command Prompt (Shift + Right-click > Open Command Prompt).
Step 8 – Type the following command and press Enter.
fastboot flash boot boot.img
Step 9 – Then, type the following command and press Enter.
fastboot reboot
Step 10 – Follow the navigation instructions on the screen. Select BOOTLOADER and then go to RECOVERY.
Step 11 – Once you are in TWRP Recovery, perform a full data wipe by tapping on the ‘Wipe’ button. Then swipe on the “Swipe to Factory Reset” option at the bottom.
Step 12 – Now go back to the main menu and then tap on the ‘Install’ button. From the list, choose the ZIP file that you copied to your phone memory in Step 3.
Step 13 – Confirm installation on the next screen by swiping on the “Swipe to Confirm Flash” option. The installation procedure should start now.
Step 14 – Once the installation is completed.
Step 15 – Tap on the “Wipe cache/dalvik” button if you get into any boot loops or other issues.
Step 16 – You can now reboot your phone by selecting the “Reboot System” button.
Your HTC One M8 will boot now and it might take about 5 minutes to boot on your first time after flashing a new ROM. So, please wait.
That’s it! Your HTC One M8 should now have Android 6.0.1 JAZZ Marshmallow custom ROM installed on your phone! Go to Settings > About phone to verify.
For More HTC One (M8) Updates Keep Checking Android Custom ROM Fix ™®
Like this post? PLZ Hit the share buttons below to share this article with your friends on Facebook, Google + and Twitter.
PLZ Follow Us On Flipboard 4 More Latest Updates.
PLZ Use the comment box below to contribute more ideas & Suggestions .
Best Regards.
Tuesday, July 19, 2016
How to Install Android 6 0 1 Marshmallow LeeDroid V1 0 1 on HTC 10 Rooted with the latest SuperSU 2 71
According to XDA member LeeDroid, Android 6.0.1 Marshmallow LeeDroid V1.0.1 [ 1.30.401.1] ROM Is now available for HTC 10.
LeeDroid V1.0.1 Custom ROM will let HTC 10 users taste the sweetness of Marshmallow 6.0.1 on HTC 10 [pme].

÷ ROM Features:
Android 6.0.1 .
HTC Sense 8 .
Rooted with the latest SuperSU 2.71 thanks to @Chainfire .
De-odexed .
Zip-aligned . i
nit.d & su.d support .
Disable error reporting .
Cleaned up bloat .
BusyBox installed .
SQlite3 support .
Bash and Nano shell support .
External SD write permissions .
Removed lots of HTC logging junk .
Package Signature Checking Disabled .
Clear cache at boot time .
Lots of configuration changes and speed enhancements .
Improved battery vs. Stock builds .
Android Logo font pack (Selectable in settings) . Ambient display / Doze Support .
Advanced Power Menu - Reboot, Recovery, Bootloader & Safe Mode .
Improved battery stats .
SystemUI Tuner - long press settings icon in pull down to enable .
LeeDrOiD custom build trickery .
LeeDrOiD wallpapers .
System clean-ups .
Custom LeeDrOiD Locales & Language support . And lots more........
Aroma
Exchange mail admin hack . Remove Google & misc apps . Center status-bar clock . Default Tweaks toggles
LeeDroid V1.0.1 Custom ROM will let HTC 10 users taste the sweetness of Marshmallow 6.0.1 on HTC 10 [pme].
÷ ROM Features:
Android 6.0.1 .
HTC Sense 8 .
Rooted with the latest SuperSU 2.71 thanks to @Chainfire .
De-odexed .
Zip-aligned . i
nit.d & su.d support .
Disable error reporting .
Cleaned up bloat .
BusyBox installed .
SQlite3 support .
Bash and Nano shell support .
External SD write permissions .
Removed lots of HTC logging junk .
Package Signature Checking Disabled .
Clear cache at boot time .
Lots of configuration changes and speed enhancements .
Improved battery vs. Stock builds .
Android Logo font pack (Selectable in settings) . Ambient display / Doze Support .
Advanced Power Menu - Reboot, Recovery, Bootloader & Safe Mode .
Improved battery stats .
SystemUI Tuner - long press settings icon in pull down to enable .
LeeDrOiD custom build trickery .
LeeDrOiD wallpapers .
System clean-ups .
Custom LeeDrOiD Locales & Language support . And lots more........
Aroma
Exchange mail admin hack . Remove Google & misc apps . Center status-bar clock . Default Tweaks toggles
÷ LeeDrOiD Tweaks:
. Prism landscape . Infinite apps in folders . China Sense . Quick settings quick pull-down from top right corner . Dual Traffic Indicator (Data) . Traffic Indicator colour wheel selection . China Sense Recent Apps . Display 4G for LTE . Double tap status bar to sleep . Long press power for flashlight shortcut when screen off . Toggle boot audio . Set default app installation location
. Toggle fast dormancy . Optional Nav Bar to replace soft keys . Custom Nav Bar Size . Volume keys to control keyboard cursor . Toggle boot audio . Toggle HTC Pnp manager . Launch Marshmallow Land (Hidden MM Game) . Notification toggles - MTP, ADB, Heads Up, Power Save, HTC Sync . flash LED while charging . AM/PM large, small or hidden . Launch SystemUI Tuner . Squared caller photo . Ambient display & tunables . Haptic feedback intensity . Fix Permissions . Zipalign apks . mount system RO/RW . Wipe battery stats
. Wipe Cache . Wipe Dalvik Cache . Trim Partitions and more!

÷ Supported Languages:
English, Czech, German, Espanol, French, Italian, Dutch, Polish, Russian, Norwegian, Korean, Greek, Turkish, Swedish, Danish, Portuguese, Finnish, Thai, Korean, Vietnamese, Chinese, Japanese, Portuguese, Croatian & More
Known Issues
None - you tell me!
. Prism landscape . Infinite apps in folders . China Sense . Quick settings quick pull-down from top right corner . Dual Traffic Indicator (Data) . Traffic Indicator colour wheel selection . China Sense Recent Apps . Display 4G for LTE . Double tap status bar to sleep . Long press power for flashlight shortcut when screen off . Toggle boot audio . Set default app installation location
. Toggle fast dormancy . Optional Nav Bar to replace soft keys . Custom Nav Bar Size . Volume keys to control keyboard cursor . Toggle boot audio . Toggle HTC Pnp manager . Launch Marshmallow Land (Hidden MM Game) . Notification toggles - MTP, ADB, Heads Up, Power Save, HTC Sync . flash LED while charging . AM/PM large, small or hidden . Launch SystemUI Tuner . Squared caller photo . Ambient display & tunables . Haptic feedback intensity . Fix Permissions . Zipalign apks . mount system RO/RW . Wipe battery stats
. Wipe Cache . Wipe Dalvik Cache . Trim Partitions and more!
÷ Supported Languages:
English, Czech, German, Espanol, French, Italian, Dutch, Polish, Russian, Norwegian, Korean, Greek, Turkish, Swedish, Danish, Portuguese, Finnish, Thai, Korean, Vietnamese, Chinese, Japanese, Portuguese, Croatian & More
Known Issues
None - you tell me!
View my Flipboard Magazine.
*Disclaimer:
Android Custom ROM fix ® provide various Firmware Updates and Rooting process along with Custom ROM,Modes,file are all belong to their owners/developers. The autor of this site or the developers are not responsible, if you damage or brick your device.Do it on your own risk and follow the instruction properly.
* Important:
Backup important files stored on your device before proceeding with the steps below, so that in case something goes wrong you’ll have backup of all your important files.
Installation instructions & more Via here.

Like this post? PLZ Hit the share buttons below to share this article with your friends on Facebook, Google + and Twitter.
PLZ Follow Us On Flipboard 4 More HTC 10 latest updates.
PLZ Use the comment box below to contribute more ideas & Suggestions .
Best Regards.
*Disclaimer:
Android Custom ROM fix ® provide various Firmware Updates and Rooting process along with Custom ROM,Modes,file are all belong to their owners/developers. The autor of this site or the developers are not responsible, if you damage or brick your device.Do it on your own risk and follow the instruction properly.
* Important:
Backup important files stored on your device before proceeding with the steps below, so that in case something goes wrong you’ll have backup of all your important files.
Installation instructions & more Via here.
Like this post? PLZ Hit the share buttons below to share this article with your friends on Facebook, Google + and Twitter.
PLZ Follow Us On Flipboard 4 More HTC 10 latest updates.
PLZ Use the comment box below to contribute more ideas & Suggestions .
Best Regards.
How to Install Android 6 0 1 Marshmallow Rooted WOLLA ROM on HTC One M8
HTC One M8 WOLLA custom ROM comes with tons of new features and is based on Android 6.0.1 Marshmallow. A quick list of the main features in WOLLA is given below and we are sure you’d love to use this on your HTC One M8:

Android Version: M – 6.0.1 Official
Firmware base: 6.12.401.4
Rom Version: WOLLA v6.0
Rooted with SuperSU
Zip-aligned on boot
SQLite optimization on boot
System R/W
Skydragon Kernel Rooted
Aroma Installer...
View my Flipboard Magazine.
÷ Prerequisites:
•This tutorial is only for installing Android 6.0.1 WOLLA ROM on HTC One M8. Please do not try on any other One M8 variants.
•Your phone should have a custom recovery installed in order to install this WOLLA ROM on your phone.
•We will be using TWRP Recovery for this tutorial.
•Bootloader should be unlocked.
•This tutorial will wipe out all your data. Make sure you backup all your data in your phone before proceeding.
•Perform a Dalvik Cache wipe before proceeding from the Recovery Mode.
*Disclaimer:
Android Custom ROM fix ® provide various Firmware Updates and Rooting process along with Custom ROM,Modes,file are all belong to their owners/developers. The autor of this site or the developers are not responsible, if you damage or brick your device.Do it on your own risk and follow the instruction properly.
* Important:
Backup important files stored on your device before proceeding with the steps below, so that in case something goes wrong you’ll have backup of all your important files.

÷ How to Install Android 6.0.1 Marshmallow Rooted WOLLA ROM on HTC One (M8) :
Step 1 – Download Android 6.0.1 WOLLA ROM for One M8 to your computer and extract boot.img from the zip file separately.
Step 2 – Connect and mount your One M8 USB memory to your computer using the USB cable.
Step 3 – Now copy/paste the downloaded Android 6.0.1 ROM zip file to your phone memory / SD card. Make sure the file is in the phone memory / SD card root (not in any folder).
Step 4 – Copy/paste the boot.img file to android-sdk-windowsplatform-tools directory.
Step 5 – Then turn OFF your phone and disconnect from the USB cable.
Step 6 – Now to get in the Bootloader/Fastboot Mode. Turn ON the phone while pressing and holding the Volume Down + Power buttons.
Step 7 – Once in the Fastboot mode (on your phone), navigate to android-sdk-windowsplatform-tools directory (on your computer) and open Command Prompt (Shift + Right-click > Open Command Prompt).
Step 8 – Type the following command and press Enter.
fastboot flash boot boot.img
Step 9 – Then, type the following command and press Enter.
fastboot reboot
Step 10 – Follow the navigation instructions on the screen. Select BOOTLOADER and then go to RECOVERY.
Step 11 – Once you are in TWRP Recovery, perform a full data wipe by tapping on the ‘Wipe’ button. Then swipe on the “Swipe to Factory Reset” option at the bottom.
Step 12 – Now go back to the main menu and then tap on the ‘Install’ button. From the list, choose the ZIP file that you copied to your phone memory in Step 3.
Step 13 – Confirm installation on the next screen by swiping on the “Swipe to Confirm Flash” option. The installation procedure should start now.
Step 14 – Once the installation is completed.
Step 15 – Tap on the “Wipe cache/dalvik” button if you get into any boot loops or other issues.
Step 16 – You can now reboot your phone by selecting the “Reboot System” button.

Your HTC One M8 will boot now and it might take about 5 minutes to boot on your first time after flashing a new ROM. So, please wait.
That’s it! Your HTC One M8 should now have Android 6.0.1 WOLLA Marshmallow custom ROM installed on your phone! Go to Settings > About phone to verify.
For More HTC One M8 Firmware & Custom ROM Keep Checking AndroidCustomROM Fix ™®
Like this post? PLZ Hit the share buttons below to share this article with your friends on Facebook, Google + and Twitter.
PLZ Follow Us On Flipboard 4 More Latest Updates.
PLZ Use the comment box below to contribute more ideas & Suggestions .
Best Regards.
÷ Prerequisites:
•This tutorial is only for installing Android 6.0.1 WOLLA ROM on HTC One M8. Please do not try on any other One M8 variants.
•Your phone should have a custom recovery installed in order to install this WOLLA ROM on your phone.
•We will be using TWRP Recovery for this tutorial.
•Bootloader should be unlocked.
•This tutorial will wipe out all your data. Make sure you backup all your data in your phone before proceeding.
•Perform a Dalvik Cache wipe before proceeding from the Recovery Mode.
*Disclaimer:
Android Custom ROM fix ® provide various Firmware Updates and Rooting process along with Custom ROM,Modes,file are all belong to their owners/developers. The autor of this site or the developers are not responsible, if you damage or brick your device.Do it on your own risk and follow the instruction properly.
* Important:
Backup important files stored on your device before proceeding with the steps below, so that in case something goes wrong you’ll have backup of all your important files.
÷ How to Install Android 6.0.1 Marshmallow Rooted WOLLA ROM on HTC One (M8) :
Step 1 – Download Android 6.0.1 WOLLA ROM for One M8 to your computer and extract boot.img from the zip file separately.
Step 2 – Connect and mount your One M8 USB memory to your computer using the USB cable.
Step 3 – Now copy/paste the downloaded Android 6.0.1 ROM zip file to your phone memory / SD card. Make sure the file is in the phone memory / SD card root (not in any folder).
Step 4 – Copy/paste the boot.img file to android-sdk-windowsplatform-tools directory.
Step 5 – Then turn OFF your phone and disconnect from the USB cable.
Step 6 – Now to get in the Bootloader/Fastboot Mode. Turn ON the phone while pressing and holding the Volume Down + Power buttons.
Step 7 – Once in the Fastboot mode (on your phone), navigate to android-sdk-windowsplatform-tools directory (on your computer) and open Command Prompt (Shift + Right-click > Open Command Prompt).
Step 8 – Type the following command and press Enter.
fastboot flash boot boot.img
Step 9 – Then, type the following command and press Enter.
fastboot reboot
Step 10 – Follow the navigation instructions on the screen. Select BOOTLOADER and then go to RECOVERY.
Step 11 – Once you are in TWRP Recovery, perform a full data wipe by tapping on the ‘Wipe’ button. Then swipe on the “Swipe to Factory Reset” option at the bottom.
Step 12 – Now go back to the main menu and then tap on the ‘Install’ button. From the list, choose the ZIP file that you copied to your phone memory in Step 3.
Step 13 – Confirm installation on the next screen by swiping on the “Swipe to Confirm Flash” option. The installation procedure should start now.
Step 14 – Once the installation is completed.
Step 15 – Tap on the “Wipe cache/dalvik” button if you get into any boot loops or other issues.
Step 16 – You can now reboot your phone by selecting the “Reboot System” button.
Your HTC One M8 will boot now and it might take about 5 minutes to boot on your first time after flashing a new ROM. So, please wait.
That’s it! Your HTC One M8 should now have Android 6.0.1 WOLLA Marshmallow custom ROM installed on your phone! Go to Settings > About phone to verify.
For More HTC One M8 Firmware & Custom ROM Keep Checking AndroidCustomROM Fix ™®
Like this post? PLZ Hit the share buttons below to share this article with your friends on Facebook, Google + and Twitter.
PLZ Follow Us On Flipboard 4 More Latest Updates.
PLZ Use the comment box below to contribute more ideas & Suggestions .
Best Regards.
How to Install CM13 0 Nightly Android 6 0 1 Marshmallow on HTC Desire 816 Dual SIM latest build
HTC Desire 816 Dual SIM a5dwg CM13.0 (CyanogenMod 13 Marshmallow) ROM latest build cm-13.0-20160530-NIGHTLY-a5dwg.zip has now arrived.

If you are looking to install a new custom ROM then we think that CM13.0 is the best Custom ROMs for you.
CM13.0 will let HTC Desire 816 Dual SIM users taste the sweetness of Marshmallow 6.0.1 such as the battery saving ‘doze’ functionality and new permissions model, alongside the CM features you’d expect.
Follow our guide below to download the Unofficial CM13 and install it yourself.
View my Flipboard Magazine.
÷ Prerequisites:
•This tutorial is only for installing CyanogenMod 13 [CM13.0] Nightly ROM on HTC Desire 816 Dual SIM a5dwg. Please do not try on any other HTC Desire variants.
•Your phone should be rooted and haveClockworkMod recovery installed from before.
•This tutorial will wipe out all your data.Proceed at your own risk.Perform a Dalvik Cache wipe before proceeding from the recovery mode.
Make sure you backup all your data in your phone before proceeding.
*Disclaimer:
Android Custom ROM fix ® provide various Firmware Updates and Rooting process along with Custom ROM,Modes,file are all belong to their owners/developers. The autor of this site or the developers are not responsible, if you damage or brick your device.Do it on your own risk and follow the instruction properly.
* Important:
Backup important files stored on your device before proceeding with the steps below, so that in case something goes wrong you’ll have backup of all your important files.

÷ How to Install CM13.0 Nightly Android 6.0.1 Marshmallow on HTC Desire 816 Dual SIM [latest build]
Step 1 – Download CM13.0 Android 6.0.1 Marshmallow and Google Apps for your HTC Desire 816 Dual SIM to your computer.
Step 2 – Connect and mount your HTC Desire 816 Dual SIM USB memory on your computer using the USB cable.
Step 3 – Now copy/paste the downloaded Android 6.0.1 ROM zip file and Google Appszip files to your SD card. Make sure the files are in the SD card root (not in any folder).
Step 4 – Then turn OFF your phone and disconnect from the USB cable.
Step 5 – Now to get in the Recovery Mode. Switch ON the phone while pressing and holding Volume Up + Home + Power buttons together
Step 6 – Once you are in ClockworkModRecovery, select perform a full data wipe by selecting “wipe data/factory reset”. Use the Power button to select everything while in the Recovery Mode.
Step 7 – Then, perform a cache wipe by selecting “wipe cache partition” .
Step 8 – Now this is optional, but it is recommended to perform a wipe of your dalvik cache as well. You will not get into boot loops or any other errors. From CWM recovery, go to ‘advanced’ and then select “wipe dalvik cache”.
Step 9 – Then go back to the main recovery screen and select “install zip from SD card”.
Step 10 – Now select “choose zip from sdcard”. Using your volume keys, navigate to the Android 6.0.1 ROM zip file that you copied to your SD card and select it using the Power button. Confirm the installation on the next screen and the installation procedure should start now.
Google Apps: Repeat the above step for the Gapps zip file as well and install it on your phone.
Step 11 – After the installation completes, go to “+++++Go Back+++++” and reboot the phone by selecting “reboot system now” from the recovery menu.

Your HTC Desire 816 Dual SIM will boot now and it might take about 5 minutes to boot on your first time. So, please wait.
That’s it Your HTC Desire 816 Dual SIM should now have CM13.0 Nightly Android 6.0.1 Marshmallow latest build installed on your phone! Go to Settings > About phone to verify.
For More HTC Desire 816 Dual SIM Brand New Firmware & Custom ROM keep checking AndroidCustomROM Fix ™®
Like this post? PLZ Hit the share buttons below to share this article with your friends on Facebook, Google + and Twitter.
PLZ Follow Us On Flipboard 4 More HTC Desire 816 Dual SIM latest custom ROM fix.
PLZ Use the comment box below to contribute more ideas & Suggestions .
Best Regards.
÷ Prerequisites:
•This tutorial is only for installing CyanogenMod 13 [CM13.0] Nightly ROM on HTC Desire 816 Dual SIM a5dwg. Please do not try on any other HTC Desire variants.
•Your phone should be rooted and haveClockworkMod recovery installed from before.
•This tutorial will wipe out all your data.Proceed at your own risk.Perform a Dalvik Cache wipe before proceeding from the recovery mode.
Make sure you backup all your data in your phone before proceeding.
*Disclaimer:
Android Custom ROM fix ® provide various Firmware Updates and Rooting process along with Custom ROM,Modes,file are all belong to their owners/developers. The autor of this site or the developers are not responsible, if you damage or brick your device.Do it on your own risk and follow the instruction properly.
* Important:
Backup important files stored on your device before proceeding with the steps below, so that in case something goes wrong you’ll have backup of all your important files.
÷ How to Install CM13.0 Nightly Android 6.0.1 Marshmallow on HTC Desire 816 Dual SIM [latest build]
Step 1 – Download CM13.0 Android 6.0.1 Marshmallow and Google Apps for your HTC Desire 816 Dual SIM to your computer.
Step 2 – Connect and mount your HTC Desire 816 Dual SIM USB memory on your computer using the USB cable.
Step 3 – Now copy/paste the downloaded Android 6.0.1 ROM zip file and Google Appszip files to your SD card. Make sure the files are in the SD card root (not in any folder).
Step 4 – Then turn OFF your phone and disconnect from the USB cable.
Step 5 – Now to get in the Recovery Mode. Switch ON the phone while pressing and holding Volume Up + Home + Power buttons together
Step 6 – Once you are in ClockworkModRecovery, select perform a full data wipe by selecting “wipe data/factory reset”. Use the Power button to select everything while in the Recovery Mode.
Step 7 – Then, perform a cache wipe by selecting “wipe cache partition” .
Step 8 – Now this is optional, but it is recommended to perform a wipe of your dalvik cache as well. You will not get into boot loops or any other errors. From CWM recovery, go to ‘advanced’ and then select “wipe dalvik cache”.
Step 9 – Then go back to the main recovery screen and select “install zip from SD card”.
Step 10 – Now select “choose zip from sdcard”. Using your volume keys, navigate to the Android 6.0.1 ROM zip file that you copied to your SD card and select it using the Power button. Confirm the installation on the next screen and the installation procedure should start now.
Google Apps: Repeat the above step for the Gapps zip file as well and install it on your phone.
Step 11 – After the installation completes, go to “+++++Go Back+++++” and reboot the phone by selecting “reboot system now” from the recovery menu.
Your HTC Desire 816 Dual SIM will boot now and it might take about 5 minutes to boot on your first time. So, please wait.
That’s it Your HTC Desire 816 Dual SIM should now have CM13.0 Nightly Android 6.0.1 Marshmallow latest build installed on your phone! Go to Settings > About phone to verify.
For More HTC Desire 816 Dual SIM Brand New Firmware & Custom ROM keep checking AndroidCustomROM Fix ™®
Like this post? PLZ Hit the share buttons below to share this article with your friends on Facebook, Google + and Twitter.
PLZ Follow Us On Flipboard 4 More HTC Desire 816 Dual SIM latest custom ROM fix.
PLZ Use the comment box below to contribute more ideas & Suggestions .
Best Regards.
Subscribe to:
Posts (Atom)