Showing posts with label android. Show all posts
Showing posts with label android. Show all posts
Friday, July 29, 2016
Acerca da atualização do Android 4 4 2 para os Devices Xperia 2013

Bom pessoal criei este post mais foi por aviso aos usuários de Xperias lançados em 2013 como o Xperia ZQ/SP. Indo direto ao ponto, vi vários usuários reclamando de bugs, travamentos, falhas, reboots do nada, falha na câmera, e a diminuição da duração da bateria, vi isto no Fórum da XDA Developers, e em outros blogs sobre Android, inclusive blogs brasileiros. Bom minha recomendação seria não atualizar para o Kitkat já que houveram tantas reclamações. Porém se você quer saber o que mudou, ou simplesmente atualizar por atualizar mesmo, isto fica a seu critério. Bom eu posso dar certeza de uma coisa apenas: A duração da bateria vai diminuir sim e muito, isto ocorreu no meu Z1 após ter atualizado para a Kitkat, e no Z Ultra do meu irmão também ocorreu essa queda de duração quando foi pra Kitkat.
E outro detalhe essa queda da vida da bateria ocorreu em quase todos os devices Sony (cerca de 98%) que receberam o Android 4.4.2. Bom deve ser corrigido quando a Google lançar o 4.4.3, mas por enquanto temos essa situação. Dito isso eu deixo a pergunta para vocês leitores do site: "Atualizar ou não atualizar, eis a questão".
Obrigado a quem leu este post.
By AbnerEC
Download Android ICS 4 0 4 stock firmware for ZTE U807 Smartphone

Download Android ICS stock firmware for ZTE U807 Smartphone from here or from here. Download previous firmware from here. Download another ZTE firmware from here.
Firmware details
Archives? ZTE_U807_4.0.4_20160302
Image: ZTE_U807_SJJL_ROM_20160302D
Archives? ZTE_U807_4.0.4_20160302
Image: ZTE_U807_SJJL_ROM_20160302D
Model? ZTE U807 Smartphone
Image file size: 175 MB
Platform: Mediatek MT6517A
Build number: P117A11-user 4.0.4 IMM76D eng.root.20130418.143716 release-keys
Caution: Please do not update firmware unless you know what you are doing, you really want it or it is absolutely necessary. Firmware updates may occasionally have bad results, like bricking your device, temporarily or permanently. The firmware update process is done entirely at your own risk. Before attempting to update the firmware, back up your data.
Don’t miss any of our future video tutorials, follow us on Youtube. Like us on Facebook. Add us in your circles on Google+. Watch our photo albums on Flickr. Subscribe now to our newsletter.
Download latest Android Lollipop 5 1 1 stock firmware for Ugoos UM3 TV Box

Download latest Android Lollipop 5.1.1 stock firmware for Ugoos UM3 TV Box from here, here or from here. Download previous firmware from here.
Glad to announce to you what now you can try our new firmware based on Android 5.1. We would appreciate if you tell us about the bugs that you find in the firmware. Also, we will be happy to hear your suggestions for modifying the firmware, which you think would be helpful. Together we can make our devices more usefull for us.
Glad to announce to you what now you can try our new firmware based on Android 5.1. We would appreciate if you tell us about the bugs that you find in the firmware. Also, we will be happy to hear your suggestions for modifying the firmware, which you think would be helpful. Together we can make our devices more usefull for us.
Firmware details
Archive? UM3_3.0 .6
Image: um3_3.0.6.img
FW version: 5.0.00
Archive? UM3_3.0 .6
Image: um3_3.0.6.img
Model: Ugoos UM3 TV Box
Firmware: Android Lollipop 5.1.1 stock
Archive size: 463 MB
Build number: UT3S-userdebug 5.1.1 LMY48G eng.avagetto.20160523.084714 release-keys
SDK version: RK30_ANDROID5.1.1-SDK-v1.00.00
Platform: Rockchip RK3288Firmware: Android Lollipop 5.1.1 stock
Archive size: 463 MB
Build number: UT3S-userdebug 5.1.1 LMY48G eng.avagetto.20160523.084714 release-keys
SDK version: RK30_ANDROID5.1.1-SDK-v1.00.00
FW version: 5.0.00
Boot version: 2.19
Model number: UGOOS-UT3S
Inside archive: firmware + DriverAssitant_v4.3 + AndroidTool v2.3 + ugoos_firmware_upgrade_guide
How to flash this firmware
1. If it first time, you need to install drivers use DriverAssitant or manual when connecting device
2. Run AndroidTool.exe
3. Switch to "Upgrade Firmware" tab
4. Press button "Firmware" and select update image (Example: "ut3_3.0.6.img")
5. Connect device to PC via USB OTG port (full guide by connecting you can find in "ugoos_firmware_upgrade_guide")
6. Press "Upgrade" button
Main changes of version 3.0.6 (23/05/2016) from previous version:
1. Fixed bugs with usb-card mount/unmount.
2. Added exfat support
3. Added Gamepad settings and axes simulation
4. Added TvSettings
5. Replaced Rockchip Filemanager, added Ugoos Filemanager
6. Changed processing logic of Daydream (Screensaver) and Sleep timers.
7. Fixed bug with wakeup after sleep. Now device is not going to the suspend mode
8. Added Cast Receiver app. You can share video to the box from YouTube app on your mobile phone
9. Improved Hardware monitor:
- Added icons
- added Network activity
- added CPU load activity
10. Added screen rotation support
11. Fixed time zone for multi-window mode
12. Updated UgoosLauncher
We already announce some details about the most important improvements and changes:
- Gamepad settings – let you customize your gamepad control settings
- Ugoos File Manager – our new step for making Ugoos TV Boxes more convenient for remote controllers.
- TV Settings - application developed by Google special for Android TV
However, this is not all the news:
Daydream and Sleep Logic. Now we separate setting timer for screensaver and for sleep features. You can set only daydream or sleep or both and set appropriate time. Also you can start it from menu via choosing special menu item. Run Daydream: Settings – Display - Daydream.
TV Settings. We created new icons for TV settings menu in order to reach all Ugoos settings quicker. For most frequent-using Ugoos settings, we redraw pages according to TV settings menu style.
Exfat support. Many users asked about this feature for android 5.1, because it was very useful in 4.4-based firmwares. Now you can use attached hard drives and usb flash drives in exfat file system, share files using built-in Ugoos File server and perform other related tasks.
Screen rotation. Screen rotation feature let use TV Box for a wider amount of non-casual tasks. It becomes more convenient for displaying different types of information. New function let you choose screen positions with five different settings. Forced orientation for all applications added for both vertical (portrait) and horizontal types. Run screen rotation: Settings – Display – Screen rotation
Gamepad settings. We already share details about this new Ugoos feature. In addition, we add one more setting little bit later and didn’t announce about it before. Now you get an ability to simulate axes moves using keyboard. Now you can choose a keyboard in device profile and appoint moves on the buttons you used to for particular gaming experience. Run Gamepad settings: Settings – Ugoos settings – System – Gamepad Settings.
Hardware Monitor. We added new icons with activity visualization, so now you can choose if you want to display only icons or icons and text values also. Added network activity and CPU load activity. Run Hardware Monitor: Settings – Ugoos Settings - System – HW Monitor.


Caution: Please do not update firmware unless you know what you are doing, you really want it or it is absolutely necessary. Firmware updates may occasionally have bad results, like bricking your device, temporarily or permanently. The firmware update process is done entirely at your own risk. Before attempting to update the firmware, back up your data.
Don’t miss any of our future video tutorials, follow us on Youtube. Like us on Facebook. Add us in your circles on Google+. Watch our photo albums on Flickr. Subscribe now to our newsletter.
Model number: UGOOS-UT3S
Inside archive: firmware + DriverAssitant_v4.3 + AndroidTool v2.3 + ugoos_firmware_upgrade_guide
How to flash this firmware
1. If it first time, you need to install drivers use DriverAssitant or manual when connecting device
2. Run AndroidTool.exe
3. Switch to "Upgrade Firmware" tab
4. Press button "Firmware" and select update image (Example: "ut3_3.0.6.img")
5. Connect device to PC via USB OTG port (full guide by connecting you can find in "ugoos_firmware_upgrade_guide")
6. Press "Upgrade" button
Main changes of version 3.0.6 (23/05/2016) from previous version:
1. Fixed bugs with usb-card mount/unmount.
2. Added exfat support
3. Added Gamepad settings and axes simulation
4. Added TvSettings
5. Replaced Rockchip Filemanager, added Ugoos Filemanager
6. Changed processing logic of Daydream (Screensaver) and Sleep timers.
7. Fixed bug with wakeup after sleep. Now device is not going to the suspend mode
8. Added Cast Receiver app. You can share video to the box from YouTube app on your mobile phone
9. Improved Hardware monitor:
- Added icons
- added Network activity
- added CPU load activity
10. Added screen rotation support
11. Fixed time zone for multi-window mode
12. Updated UgoosLauncher
We already announce some details about the most important improvements and changes:
- Gamepad settings – let you customize your gamepad control settings
- Ugoos File Manager – our new step for making Ugoos TV Boxes more convenient for remote controllers.
- TV Settings - application developed by Google special for Android TV
However, this is not all the news:
Daydream and Sleep Logic. Now we separate setting timer for screensaver and for sleep features. You can set only daydream or sleep or both and set appropriate time. Also you can start it from menu via choosing special menu item. Run Daydream: Settings – Display - Daydream.
TV Settings. We created new icons for TV settings menu in order to reach all Ugoos settings quicker. For most frequent-using Ugoos settings, we redraw pages according to TV settings menu style.
Exfat support. Many users asked about this feature for android 5.1, because it was very useful in 4.4-based firmwares. Now you can use attached hard drives and usb flash drives in exfat file system, share files using built-in Ugoos File server and perform other related tasks.
Screen rotation. Screen rotation feature let use TV Box for a wider amount of non-casual tasks. It becomes more convenient for displaying different types of information. New function let you choose screen positions with five different settings. Forced orientation for all applications added for both vertical (portrait) and horizontal types. Run screen rotation: Settings – Display – Screen rotation
Gamepad settings. We already share details about this new Ugoos feature. In addition, we add one more setting little bit later and didn’t announce about it before. Now you get an ability to simulate axes moves using keyboard. Now you can choose a keyboard in device profile and appoint moves on the buttons you used to for particular gaming experience. Run Gamepad settings: Settings – Ugoos settings – System – Gamepad Settings.
Hardware Monitor. We added new icons with activity visualization, so now you can choose if you want to display only icons or icons and text values also. Added network activity and CPU load activity. Run Hardware Monitor: Settings – Ugoos Settings - System – HW Monitor.
Caution: Please do not update firmware unless you know what you are doing, you really want it or it is absolutely necessary. Firmware updates may occasionally have bad results, like bricking your device, temporarily or permanently. The firmware update process is done entirely at your own risk. Before attempting to update the firmware, back up your data.
Don’t miss any of our future video tutorials, follow us on Youtube. Like us on Facebook. Add us in your circles on Google+. Watch our photo albums on Flickr. Subscribe now to our newsletter.
Baixar Stock Rom Original de Fabrica para Galaxy Note 3 LTE SM N9005 Android 4 4 2 Kitkat

Download Stock Rom / Firmware para Galaxy Note 3 LTE SM-N9005
Data da Atualização...........................Setembro de 2014
Modelo................................................SM-N9005
Região................................................Brasil
Idioma.................................................Multi Linguagem
Versão do Android..............................4.4.2 kit kat
Procedimento de Instalação...............Flash Pelo Odin
Tamanho........................................... 1.37
Downloads
Mega
Google Drive
Créditos
SamMobile
Atenção
Nós do Stock Rom não nos responsabilizamos por quaisquer danos causados nos dispositivos.
A responsabilidade é inteiramente do usuário.
Para mais informações, leia os Termos do site AQUI.
Termos de Busca
Baixar firmware oficial para Galaxy Note 3 LTE SM-N9005 Como atualizar Galaxy Note 3 LTE SM-N9005
Rom original e oficial para Galaxy Note 3 LTE SM-N9005 Rom Brasileira para Galaxy Note 3 LTE SM-N9005
Download Rom Stock para Galaxy Note 3 LTE SM-N9005 limpa, sem vinculo ou logo de operadora.
Possibilidade de reviver ou ressuscitar seu . Possibilidade de resolver loop ou boot infinito do Galaxy Note 3 LTE SM-N9005
liga e só fica na tela ou logo da Galaxy Note 3 LTE SM-N9005só fica na tela de apresentação ou tela de inicio.
Pode flashear essa rom do Galaxy Note 3 LTE SM-N9005 para resolver esses problemas
Cherry Mobile FlareLiteQuad Android 4 4 2 kitkat Pac File Rom
Model Brand : CherryMobile
Model Device: FlareLiteQuad
AndrVersion : 4.4.2
BaseBand CPU: SP7731GEA
CompileDate : 1426844225
Project Ver : Cherry_Flare Lite Quad_V1_150320
Model Ext : Q894
Download Rom
Download Flasher
Flashing of any smart Phones or Feature Phone is not always safe. Kindly read our disclaimer, before proceeding or else you can getting any problems towards.
Disclaimer: Flashing a firmware is not without any risks.
If you dont do it properly, you might render your phone inoperable.
If you decide to proceed we wont be liable to whatever might get wrong "neither we could provide technical support" just leave a comment or contact us on our google mail.
Factory Firmware Code:
SP7731GEA_FlareLiteQuad_4.4.2_Cherry_Flare_Lite_Quad_V1_150320
Password: FlareLiteQuadbyJHUNpanabO
How to Install Android 6 0 Marshmallow CM13 Nightly on LG G3 F400
Android 6.0. Marshmallow CyanogenMod 13 [CM13] Nightly ROM is released for Korean LG G3 F400 . CM13 will let F400 users taste the sweetness of Marshmallow 6.0.on LG G F400.

Follow our guide below to download the CM13 Nightly and install it yourself.
Follow our guide below to download the CM13 Nightly and install it yourself.
View my Flipboard Magazine.
÷ Prerequisites:
•This tutorial is only for installing Android 6.0. Marshmallow CM13 Nightly ROM on LG G3 F400. Please do not try on any other LG G3 variants.
•Your phone should be rooted and haveClockworkMod recovery installed from before.
•This tutorial will wipe out all your data.Proceed at your own risk.Perform a Dalvik Cache wipe before proceeding from the recovery mode.
Make sure you backup all your data in your phone before proceeding.
*Disclaimer:
Android Custom ROM fix ® provide various Firmware Updates and Rooting process along with Custom ROM,Modes,file are all belong to their owners/developers. The autor of this site or the developers are not responsible, if you damage or brick your device.Do it on your own risk and follow the instruction properly.
* Important:
Backup important files stored on your device before proceeding with the steps below, so that in case something goes wrong you’ll have backup of all your important files.

÷ How to Install Android 6.0. Marshmallow CM13 Nightly on LG G3 F400.
Step 1 – Download CM13 Nightly Android 6.0. Marshmallow and Google Apps for your LG G3 F400 to your computer.
Step 2 – Connect and mount your LG G3 F400. USB memory on your computer using the USB cable.
Step 3 – Now copy/paste the downloaded Android 6.0. ROM zip file and Google Appszip files to your SD card. Make sure the files are in the SD card root (not in any folder).
Step 4 – Then turn OFF your phone and disconnect from the USB cable.
Step 5 – Now to get in the Recovery Mode. Switch ON the phone while pressing and holding Volume Up + Home + Power buttons together
Step 6 – Once you are in ClockworkModRecovery, select perform a full data wipe by selecting “wipe data/factory reset”. Use the Power button to select everything while in the Recovery Mode.
Step 7 – Then, perform a cache wipe by selecting “wipe cache partition” .
Step 8 – Now this is optional, but it is recommended to perform a wipe of your dalvik cache as well. You will not get into boot loops or any other errors. From CWM recovery, go to ‘advanced’ and then select “wipe dalvik cache”.
Step 9 – Then go back to the main recovery screen and select “install zip from SD card”.
Step 10 – Now select “choose zip from sdcard”. Using your volume keys, navigate to the Android 6.0.1 ROM zip file that you copied to your SD card and select it using the Power button. Confirm the installation on the next screen and the installation procedure should start now.
Google Apps: Repeat the above step for the Gapps zip file as well and install it on your phone.
Step 11 – After the installation completes, go to “+++++Go Back+++++” and reboot the phone by selecting “reboot system now” from the recovery menu.

Your LG G3 F400 will boot now and it might take about 5 minutes to boot on your first time. So, please wait.
That’s it! Your LG G3 F400 should now have CM13 Nightly Android 6.0. Marshmallow installed on your phone! Go to Settings > About phone to verify.
Like this post? PLZ Hit the share buttons below to share this article with your friends on Facebook, Google + and Twitter.
PLZ Follow Us On Flipboard 4 More LG G3 latest custom ROM fix.
PLZ Use the comment box below to contribute more ideas & Suggestions .
Best Regards.
÷ Prerequisites:
•This tutorial is only for installing Android 6.0. Marshmallow CM13 Nightly ROM on LG G3 F400. Please do not try on any other LG G3 variants.
•Your phone should be rooted and haveClockworkMod recovery installed from before.
•This tutorial will wipe out all your data.Proceed at your own risk.Perform a Dalvik Cache wipe before proceeding from the recovery mode.
Make sure you backup all your data in your phone before proceeding.
*Disclaimer:
Android Custom ROM fix ® provide various Firmware Updates and Rooting process along with Custom ROM,Modes,file are all belong to their owners/developers. The autor of this site or the developers are not responsible, if you damage or brick your device.Do it on your own risk and follow the instruction properly.
* Important:
Backup important files stored on your device before proceeding with the steps below, so that in case something goes wrong you’ll have backup of all your important files.
÷ How to Install Android 6.0. Marshmallow CM13 Nightly on LG G3 F400.
Step 1 – Download CM13 Nightly Android 6.0. Marshmallow and Google Apps for your LG G3 F400 to your computer.
Step 2 – Connect and mount your LG G3 F400. USB memory on your computer using the USB cable.
Step 3 – Now copy/paste the downloaded Android 6.0. ROM zip file and Google Appszip files to your SD card. Make sure the files are in the SD card root (not in any folder).
Step 4 – Then turn OFF your phone and disconnect from the USB cable.
Step 5 – Now to get in the Recovery Mode. Switch ON the phone while pressing and holding Volume Up + Home + Power buttons together
Step 6 – Once you are in ClockworkModRecovery, select perform a full data wipe by selecting “wipe data/factory reset”. Use the Power button to select everything while in the Recovery Mode.
Step 7 – Then, perform a cache wipe by selecting “wipe cache partition” .
Step 8 – Now this is optional, but it is recommended to perform a wipe of your dalvik cache as well. You will not get into boot loops or any other errors. From CWM recovery, go to ‘advanced’ and then select “wipe dalvik cache”.
Step 9 – Then go back to the main recovery screen and select “install zip from SD card”.
Step 10 – Now select “choose zip from sdcard”. Using your volume keys, navigate to the Android 6.0.1 ROM zip file that you copied to your SD card and select it using the Power button. Confirm the installation on the next screen and the installation procedure should start now.
Google Apps: Repeat the above step for the Gapps zip file as well and install it on your phone.
Step 11 – After the installation completes, go to “+++++Go Back+++++” and reboot the phone by selecting “reboot system now” from the recovery menu.
Your LG G3 F400 will boot now and it might take about 5 minutes to boot on your first time. So, please wait.
That’s it! Your LG G3 F400 should now have CM13 Nightly Android 6.0. Marshmallow installed on your phone! Go to Settings > About phone to verify.
Like this post? PLZ Hit the share buttons below to share this article with your friends on Facebook, Google + and Twitter.
PLZ Follow Us On Flipboard 4 More LG G3 latest custom ROM fix.
PLZ Use the comment box below to contribute more ideas & Suggestions .
Best Regards.
Download latest Android Lollipop 5 1 stock firmware for HomTom HT7 smartphone

Download latest Android Lollipop 5.1 stock firmware for HomTom HT7 smartphone from here, here or from here. Download OTA update firmware from here (59 MB). Download another HomTom firmware from here.
Firmware details
Archive? HOMTOM HT7 Android 5.1 1GB 8GB MTK6580A Smartphone Firmware
Firmware: Android Lollipop 5.1 stock
Project: br6580_weg_l
Firmware details
Archive? HOMTOM HT7 Android 5.1 1GB 8GB MTK6580A Smartphone Firmware
Firmware: Android Lollipop 5.1 stock
Model: HomTom HT7 smartphone
Image file size: 537 MB
Platform: Mediatek MT6580Image file size: 537 MB
Project: br6580_weg_l
Config_version: V1.1.2
BPLGUInfoCustomAppSrcP_MT6580_S00_MOLY_WR8_W1449_MD_WG_MP_V23_1_wg_n
Inside archive: firmware + SP_Flash_Tool_exe_Windows_v5.1520.00.000
BPLGUInfoCustomAppSrcP_MT6580_S00_MOLY_WR8_W1449_MD_WG_MP_V23_1_wg_n
Inside archive: firmware + SP_Flash_Tool_exe_Windows_v5.1520.00.000
Caution: Please do not update firmware unless you know what you are doing, you really want it or it is absolutely necessary. Firmware updates may occasionally have bad results, like bricking your device, temporarily or permanently. The firmware update process is done entirely at your own risk. Before attempting to update the firmware, back up your data.
Don’t miss any of our future video tutorials, follow us on Youtube. Like us on Facebook. Add us in your circles on Google+. Watch our photo albums on Flickr. Subscribe now to our newsletter. Biggest firmware download center.
Download latest Android KitKat 4 4 stock firmware for Jackleo Tank JL552 smartphone

Download latest Android KitKat 4.4 stock firmware for Jackleo Tank JL552 smartphone from here, here or from here. More details about Jackleo Tank JL552 smartphone you will find in this article. Download another Jackleo firmware from here.
Firmware details
Firmware?20151109_Tank_JL552
Model? Jackleo Tank JL552 smartphone
Image file size: 545 MB
Platform: Mediatek MT6582
Project: vanzo82_cwet_kk
Config_version: V1.1.1
Firmware?20151109_Tank_JL552
Model? Jackleo Tank JL552 smartphone
Image file size: 545 MB
Platform: Mediatek MT6582
Project: vanzo82_cwet_kk
Config_version: V1.1.1
Caution: Please do not update firmware unless you know what you are doing, you really want it or it is absolutely necessary. Firmware updates may occasionally have bad results, like bricking your device, temporarily or permanently. The firmware update process is done entirely at your own risk. Before attempting to update the firmware, back up your data.
Don’t miss any of our future video tutorials, follow us on Youtube. Like us on Facebook. Add us in your circles on Google+. Watch our photo albums on Flickr. Subscribe now to our newsletter.
Don’t miss any of our future video tutorials, follow us on Youtube. Like us on Facebook. Add us in your circles on Google+. Watch our photo albums on Flickr. Subscribe now to our newsletter.
Thursday, July 28, 2016
Download Android Marshmallow 6 0 1 stock firmware for Octopus A83 F1 tablet

Download Android Marshmallow 6.0.1 stock firmware for Octopus A83 F1 tablet from here or here.
Firmware details
Archive: BT1010_ANDROID6.0_20160509
Image: sun8iw6p1_android_bt1010_uart0.img
Archive file size: 259 MB
Platform: Allwinner A83 / UltraOcta-A83
Build number: octopus_bt1010-eng 6.0.1 MMB29M 20160503 test-keys
FW version: v6.0rc4
Pixels: 800 x 1280
Style: Octopus A83 F1
Company: Allwinner
Caution: Please do not update firmware unless you know what you are doing, you really want it or it is absolutely necessary. Firmware updates may occasionally have bad results, like bricking your device, temporarily or permanently. The firmware update process is done entirely at your own risk. Before attempting to update the firmware, back up your data.
Don’t miss any of our future video tutorials, follow us on Youtube. Like us on Facebook. Add us in your circles on Google+. Watch our photo albums on Flickr. Subscribe now to our newsletter.
How to Install CM13 0 Nightly Android 6 0 1 Marshmallow on Moto G 2015 Osprey
CyanogenMod 13 [CM13.0] Nightly ROM latest build cm-13.0-20160520-NIGHTLY-osprey.zip is released for Moto G (2015) osprey.

CM13.0 will let Moto G (2015) users taste the sweetness of Marshmallow 6.0.1 such as the battery saving ‘doze’ functionality and new permissions model, alongside the CM features you’d expect.
Follow our guide below to download the Unofficial CM13 and install it yourself.
View my Flipboard Magazine.
÷ Prerequisites:
•This tutorial is only for installing CyanogenMod 13 [CM13.0] Nightly ROM on Moto G (2015) Osprey Please do not try on any other Moto G variants.
•Your phone should be rooted and haveClockworkMod recovery installed from before.
•This tutorial will wipe out all your data.Proceed at your own risk.Perform a Dalvik Cache wipe before proceeding from the recovery mode.
Make sure you backup all your data in your phone before proceeding.
*Disclaimer:
Android Custom ROM fix ® provide various Firmware Updates and Rooting process along with Custom ROM,Modes,file are all belong to their owners/developers. The autor of this site or the developers are not responsible, if you damage or brick your device.Do it on your own risk and follow the instruction properly.
* Important:
Backup important files stored on your device before proceeding with the steps below, so that in case something goes wrong you’ll have backup of all your important files.

÷ How to Install CM13.0 Nightly Android 6.0.1 Marshmallow on Moto G (2015) Osprey.
Step 1 – Download CM13.0 Android 6.0.1 Marshmallow and Google Apps for your Moto G (2015) to your computer.
Step 2 – Connect and mount your Moto G (2015) USB memory on your computer using the USB cable.
Step 3 – Now copy/paste the downloaded Android 6.0.1 ROM zip file and Google Appszip files to your SD card. Make sure the files are in the SD card root (not in any folder).
Step 4 – Then turn OFF your phone and disconnect from the USB cable.
Step 5 – Now to get in the Recovery Mode. Switch ON the phone while pressing and holding Volume Up + Home + Power buttons together
Step 6 – Once you are in ClockworkModRecovery, select perform a full data wipe by selecting “wipe data/factory reset”. Use the Power button to select everything while in the Recovery Mode.
Step 7 – Then, perform a cache wipe by selecting “wipe cache partition” .
Step 8 – Now this is optional, but it is recommended to perform a wipe of your dalvik cache as well. You will not get into boot loops or any other errors. From CWM recovery, go to ‘advanced’ and then select “wipe dalvik cache”.
Step 9 – Then go back to the main recovery screen and select “install zip from SD card”.
Step 10 – Now select “choose zip from sdcard”. Using your volume keys, navigate to the Android 6.0.1 ROM zip file that you copied to your SD card and select it using the Power button. Confirm the installation on the next screen and the installation procedure should start now.
Google Apps: Repeat the above step for the Gapps zip file as well and install it on your phone.
Step 11 – After the installation completes, go to “+++++Go Back+++++” and reboot the phone by selecting “reboot system now” from the recovery menu.

Your Moto G (2015) will boot now and it might take about 5 minutes to boot on your first time. So, please wait.
That’s it Your Moto G (2015) should now have CM13.0 Nightly Android 6.0.1 Marshmallow latest build installed on your phone! Go to Settings > About phone to verify.
For More Moto G (2015) Firmware & Custom ROM keep checking AndroidCustomROM Fix ™®
Like this post? PLZ Hit the share buttons below to share this article with your friends on Facebook, Google + and Twitter.
PLZ Follow Us On Flipboard 4 More HTC One M9 latest custom ROM fix.
PLZ Use the comment box below to contribute more ideas & Suggestions .
Best Regards.
÷ Prerequisites:
•This tutorial is only for installing CyanogenMod 13 [CM13.0] Nightly ROM on Moto G (2015) Osprey Please do not try on any other Moto G variants.
•Your phone should be rooted and haveClockworkMod recovery installed from before.
•This tutorial will wipe out all your data.Proceed at your own risk.Perform a Dalvik Cache wipe before proceeding from the recovery mode.
Make sure you backup all your data in your phone before proceeding.
*Disclaimer:
Android Custom ROM fix ® provide various Firmware Updates and Rooting process along with Custom ROM,Modes,file are all belong to their owners/developers. The autor of this site or the developers are not responsible, if you damage or brick your device.Do it on your own risk and follow the instruction properly.
* Important:
Backup important files stored on your device before proceeding with the steps below, so that in case something goes wrong you’ll have backup of all your important files.
÷ How to Install CM13.0 Nightly Android 6.0.1 Marshmallow on Moto G (2015) Osprey.
Step 1 – Download CM13.0 Android 6.0.1 Marshmallow and Google Apps for your Moto G (2015) to your computer.
Step 2 – Connect and mount your Moto G (2015) USB memory on your computer using the USB cable.
Step 3 – Now copy/paste the downloaded Android 6.0.1 ROM zip file and Google Appszip files to your SD card. Make sure the files are in the SD card root (not in any folder).
Step 4 – Then turn OFF your phone and disconnect from the USB cable.
Step 5 – Now to get in the Recovery Mode. Switch ON the phone while pressing and holding Volume Up + Home + Power buttons together
Step 6 – Once you are in ClockworkModRecovery, select perform a full data wipe by selecting “wipe data/factory reset”. Use the Power button to select everything while in the Recovery Mode.
Step 7 – Then, perform a cache wipe by selecting “wipe cache partition” .
Step 8 – Now this is optional, but it is recommended to perform a wipe of your dalvik cache as well. You will not get into boot loops or any other errors. From CWM recovery, go to ‘advanced’ and then select “wipe dalvik cache”.
Step 9 – Then go back to the main recovery screen and select “install zip from SD card”.
Step 10 – Now select “choose zip from sdcard”. Using your volume keys, navigate to the Android 6.0.1 ROM zip file that you copied to your SD card and select it using the Power button. Confirm the installation on the next screen and the installation procedure should start now.
Google Apps: Repeat the above step for the Gapps zip file as well and install it on your phone.
Step 11 – After the installation completes, go to “+++++Go Back+++++” and reboot the phone by selecting “reboot system now” from the recovery menu.
Your Moto G (2015) will boot now and it might take about 5 minutes to boot on your first time. So, please wait.
That’s it Your Moto G (2015) should now have CM13.0 Nightly Android 6.0.1 Marshmallow latest build installed on your phone! Go to Settings > About phone to verify.
For More Moto G (2015) Firmware & Custom ROM keep checking AndroidCustomROM Fix ™®
Like this post? PLZ Hit the share buttons below to share this article with your friends on Facebook, Google + and Twitter.
PLZ Follow Us On Flipboard 4 More HTC One M9 latest custom ROM fix.
PLZ Use the comment box below to contribute more ideas & Suggestions .
Best Regards.
How to Install CM13 0 Nightly Android 6 0 1 Marshmallow on OnePlusOne bacon
CyanogenMod 13 [CM13.0] Nightly ROM latest build cm-13.0-20160515-NIGHTLY-bacon is released for Verizon HTC One M9 ( himawl). CM13.0 will let OnePlusOne ( bacon) users taste the sweetness of Marshmallow 6.0.1 such as the battery saving ‘doze’ functionality and new permissions model, alongside the CM features you’d expect.

Follow our guide below to download the Unofficial CM13 and install it yourself.
View my Flipboard Magazine.
÷ Prerequisites:
•This tutorial is only for installing CyanogenMod 13 [CM13.0] Nightly ROM on OnePlusOne ( bacon) . Please do not try on any other OnePlusOne variants.
•Your phone should be rooted and haveClockworkMod recovery installed from before.
•This tutorial will wipe out all your data.Proceed at your own risk.Perform a Dalvik Cache wipe before proceeding from the recovery mode.
Make sure you backup all your data in your phone before proceeding.
*Disclaimer:
Android Custom ROM fix ® provide various Firmware Updates and Rooting process along with Custom ROM,Modes,file are all belong to their owners/developers. The autor of this site or the developers are not responsible, if you damage or brick your device.Do it on your own risk and follow the instruction properly.
* Important:
Backup important files stored on your device before proceeding with the steps below, so that in case something goes wrong you’ll have backup of all your important files.

÷ How to Install CM13.0 Nightly Android 6.0.1 Marshmallow on OnePlusOne ( bacon).
Step 1 – Download CM13.0 Android 6.0.1 Marshmallow and Google Apps for your OnePlusOne ( bacon) to your computer.
Step 2 – Connect and mount your OnePlusOne ( bacon) USB memory on your computer using the USB cable.
Step 3 – Now copy/paste the downloaded Android 6.0.1 ROM zip file and Google Appszip files to your SD card. Make sure the files are in the SD card root (not in any folder).
Step 4 – Then turn OFF your phone and disconnect from the USB cable.
Step 5 – Now to get in the Recovery Mode. Switch ON the phone while pressing and holding Volume Up + Home + Power buttons together
Step 6 – Once you are in ClockworkModRecovery, select perform a full data wipe by selecting “wipe data/factory reset”. Use the Power button to select everything while in the Recovery Mode.
Step 7 – Then, perform a cache wipe by selecting “wipe cache partition” .
Step 8 – Now this is optional, but it is recommended to perform a wipe of your dalvik cache as well. You will not get into boot loops or any other errors. From CWM recovery, go to ‘advanced’ and then select “wipe dalvik cache”.
Step 9 – Then go back to the main recovery screen and select “install zip from SD card”.
Step 10 – Now select “choose zip from sdcard”. Using your volume keys, navigate to the Android 6.0.1 ROM zip file that you copied to your SD card and select it using the Power button. Confirm the installation on the next screen and the installation procedure should start now.
Google Apps: Repeat the above step for the Gapps zip file as well and install it on your phone.
Step 11 – After the installation completes, go to “+++++Go Back+++++” and reboot the phone by selecting “reboot system now” from the recovery menu.

Your OnePlusOne ( bacon) will boot now and it might take about 5 minutes to boot on your first time. So, please wait.
That’s it YourOnePlusOne ( bacon) should now have CM13.0 Nightly Android 6.0.1 Marshmallow installed on your phone! Go to Settings > About phone to verify.
For more OnePlusOne Brand New Firmware & Custom ROM keep checking AndroidCustomROM Fix ™®
Like this post? PLZ Hit the share buttons below to share this article with your friends on Facebook, Google + and Twitter.
PLZ Follow Us On Flipboard 4 MoreOnePlusOne latest custom ROM fix.
PLZ Use the comment box below to contribute more ideas & Suggestions .
Best Regards.
÷ Prerequisites:
•This tutorial is only for installing CyanogenMod 13 [CM13.0] Nightly ROM on OnePlusOne ( bacon) . Please do not try on any other OnePlusOne variants.
•Your phone should be rooted and haveClockworkMod recovery installed from before.
•This tutorial will wipe out all your data.Proceed at your own risk.Perform a Dalvik Cache wipe before proceeding from the recovery mode.
Make sure you backup all your data in your phone before proceeding.
*Disclaimer:
Android Custom ROM fix ® provide various Firmware Updates and Rooting process along with Custom ROM,Modes,file are all belong to their owners/developers. The autor of this site or the developers are not responsible, if you damage or brick your device.Do it on your own risk and follow the instruction properly.
* Important:
Backup important files stored on your device before proceeding with the steps below, so that in case something goes wrong you’ll have backup of all your important files.
÷ How to Install CM13.0 Nightly Android 6.0.1 Marshmallow on OnePlusOne ( bacon).
Step 1 – Download CM13.0 Android 6.0.1 Marshmallow and Google Apps for your OnePlusOne ( bacon) to your computer.
Step 2 – Connect and mount your OnePlusOne ( bacon) USB memory on your computer using the USB cable.
Step 3 – Now copy/paste the downloaded Android 6.0.1 ROM zip file and Google Appszip files to your SD card. Make sure the files are in the SD card root (not in any folder).
Step 4 – Then turn OFF your phone and disconnect from the USB cable.
Step 5 – Now to get in the Recovery Mode. Switch ON the phone while pressing and holding Volume Up + Home + Power buttons together
Step 6 – Once you are in ClockworkModRecovery, select perform a full data wipe by selecting “wipe data/factory reset”. Use the Power button to select everything while in the Recovery Mode.
Step 7 – Then, perform a cache wipe by selecting “wipe cache partition” .
Step 8 – Now this is optional, but it is recommended to perform a wipe of your dalvik cache as well. You will not get into boot loops or any other errors. From CWM recovery, go to ‘advanced’ and then select “wipe dalvik cache”.
Step 9 – Then go back to the main recovery screen and select “install zip from SD card”.
Step 10 – Now select “choose zip from sdcard”. Using your volume keys, navigate to the Android 6.0.1 ROM zip file that you copied to your SD card and select it using the Power button. Confirm the installation on the next screen and the installation procedure should start now.
Google Apps: Repeat the above step for the Gapps zip file as well and install it on your phone.
Step 11 – After the installation completes, go to “+++++Go Back+++++” and reboot the phone by selecting “reboot system now” from the recovery menu.
Your OnePlusOne ( bacon) will boot now and it might take about 5 minutes to boot on your first time. So, please wait.
That’s it YourOnePlusOne ( bacon) should now have CM13.0 Nightly Android 6.0.1 Marshmallow installed on your phone! Go to Settings > About phone to verify.
For more OnePlusOne Brand New Firmware & Custom ROM keep checking AndroidCustomROM Fix ™®
Like this post? PLZ Hit the share buttons below to share this article with your friends on Facebook, Google + and Twitter.
PLZ Follow Us On Flipboard 4 MoreOnePlusOne latest custom ROM fix.
PLZ Use the comment box below to contribute more ideas & Suggestions .
Best Regards.
Como ativar a opção Opções de Desenvolvedor no Android 4 2 ou superior

Pessoal que acompanha o nosso site, estou postando um pequeno tutorial em vídeo de como ativar a "Opções de Desenvolvedor" no Android 4.2 ou superior. Lembrando que pode não servir para todas as marcas e modelos que tenham o sistema. A opção está oculta pois a Google teve vários relatos de bugs por causa do uso incorreto das opções dentro deste menu. Mas eu depois de mexericar, eu descobri como ativar de novo. Acabei dizendo no vídeo que servia em todos os modelos e marcas, mas eu testei no Moto G e não serviu. Então fiquem a vontade para testar e deixe nos comentários os resultados.
Vídeo abaixo :
Créditos do vídeo, da edição e do tutorial:
by AbnerEC
Download Rom Stock Oficial Sony XPERIA E Dual C1604 C1605 Android 4 1 1 ou 4 0 4 Firmware

Neste Post será possivel instalar o novo Android 4.1.1 para o seu telefone XPERIA E dual C1605 ou C1604 que é atualmente o firmware 11.3.A.2.1 e Também instalar o Android 4.0.4 que é atualmente o firmware 11.1.A.0.68.
Para Instalar a Rom, use este método aqui.
Downloads
Rom 4.1.1 - 11.3.A.2.1 Modelo C1605 [Internacional]
Rom 4.1.1 - 11.3.A.2.1 Modelo C1604 [Original do Brasil]
Rom 4.0.4 - 11.1.A.0.68 [Brasil e Internacional]
(Créditos blogdoxperiaedual)
(créditos: Jefferson Baptista)
Rom 4.1.1 - 11.3.A.2.1 Modelo C1604 [Original do Brasil]
Rom 4.0.4 - 11.1.A.0.68 [Brasil e Internacional]
(Créditos blogdoxperiaedual)
(créditos: Jefferson Baptista)
Tags:
Como instalar o Android 4.0 no Xperia E Dual Downgrade Voltar
Como instalar o Jelly Bean no Xperia E Dual Sim
Tutorial Jelly Bean 4.1 no Xperia E
Baixar Rom Android 4.1 para Xperia E Dual C1605
Download Baixar Android Original Jelly Bean Xperia E Dual
Concertar Xperia E Dual com Rom Stock
Guide How to Flash Stock ROM on Android OPPO JOY 3 to Fix a Bootloop Stuck Removing Malware
[Guide] How to Flash Stock ROM on Android OPPO JOY 3 to Fix a Bootloop, Stuck, Removing Malware.
Flash Stock ROM on Android OPPO JOY 3. This guide will help you to Flash Stock ROM on Android OPPO JOY 3 Smartphone. By flashing your Android phone you can get something new on your phone, such as new experience to use latest update of Stock ROM, or new installed Stock ROM after your phone died or bootloop, and much more. Before we proceed to flash this Android OPPO JOY 3 Smartphone, let we know what is detail specification of this Android smartphone.OPPO JOY 3 was released On 2015, August. And OPPO JOY 3 is the smartphone that comes with 4,5 Inches IPS LCD capacitive touchscreen, 16M colors, Run on Android OS, v4.4 (KitKat) - ColorOS 2.0 UI as it Operating System and supported with Mediatek MT6582 Chipset, Quad-core 1.3 GHz Cortex-A7 CPU, GPU Mali-400MP2, combined with 1 GB of RAM as their engine. And you can enjoy exciting 5 MP on main camera, and 2 MP on secondary camera.
Now, we start to flash Stock ROM on Android OPPO JOY 3 Smartphone. Just follow this guide below carefully. take your own risk, a damage or broken phone by following this tutorial is not our responsibility.
Guide Flash Stock ROM OPPO JOY 3.
Before you flash OPPO JOY 3 you must read this instruction carefully, so. you can get best result at the end of your flash.
Preparation.
- Make sure you have enough battery capacity on your OPPO JOY 3. Its recomended you have at least 80% of battery capacity.
- Always backup your important file (contact, music, video, app) that stored on OPPO JOY 3,
- Prepare the Memory Card / SD Card which has a V-Gen Brand. For some reason OPPO JOY 3 does not recognized besides V-Gen Memory card.
- Then download OPPO JOY 3 Stock ROM.
- Oppo JOY 3
- Once download finish, now copy Stock ROM from computer to the phone memory or SD Card. but note that you copy this ROM at outside not to the public folder for easy finding. (if you download ROM Via PC)
- But, Stock ROM can be download directly from yourAndroid phone. And you must have a good and stable internet connection for it, such as Wi-Fi connection.
- Rom download directly from the Android phone located in the File Manager / phone / download.
http://assorted.downloads.oppo.com/firmware/A11w/A11wEX_11.A.06_OTA_INT_006_all_151022.zip
Flashing Stock ROM.
- To start flashing Stock ROM on OPPO JOY 3 you must enter Recovery Mode. how to do it ?
- Press and Hold Power Button + Volume Down.
- Then you will see menu like this picture. You can select English
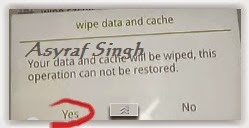
- Select Wipe data and cache by pressing the power button. for Up and down choice, use the volume keys Up / Down, on the next Popup screen select Wipe your data cache to make faster process.
- If appears confirmation you can select : "YES"
- Then you will bring to previous menu, and you can select Install form sd.
- Now you will see 2 options. From mobile phone storage & form SD,.
- Previously you have copy firmware file on SD Card, So. now you must select From SD. and now you can see your Firmware file name on this screen.(Stock rom name is similar as shown on the picture below)
- Select this file name using Power Button
- For Up or Down navigation you can use volume Up and Down Button.
- Then you will see a confirmation page, and you can select yes to proceed this flash on OPPO JOY 3
- Just wait the process finish updating system, and your OPPO JOY 3 will ask to you to reboot the device.
- Now you have finished flash Stock ROM on Android OPPO JOY 3 Smartphone.
 |
| Flash Bootloop OPPO JOY 3 |
 |
| Flash Bootloop OPPO JOY 3 |
 |
| Flash Bootloop OPPO JOY 3 |
 |
| Flash Bootloop OPPO JOY 3 |
 |
| Flash Bootloop OPPO JOY 3 |
 |
| Flash Bootloop OPPO JOY 3 |
 |
| Flash Bootloop OPPO JOY 3 |
 |
| Flash Bootloop OPPO JOY 3 |
Download latest Android Lollipop 5 1 1 Stock Firmware for Huawei Honor 4A SCL TL00 smartphone

Download latest Android Lollipop 5.1.1 Stock Firmware for Huawei Honor 4A SCL-TL00 smartphone from here or here.
Firmware details
Archive: Huawei_4A(SCL-TL00)_2_5.1.1_E?_base_20151016
Archive size: 960 MB
Image: prog_emmc_firehose_8909_ddr-jm.mbn
Model: Huawei Honor 4A SCL-TL00 smartphone
Platform: Qualcomm Snapdragon 210 MSM8909
Platform: Qualcomm Snapdragon 210 MSM8909
Caution: Please do not update firmware unless you know what you are doing, you really want it or it is absolutely necessary. Firmware updates may occasionally have bad results, like bricking your device, temporarily or permanently. The firmware update process is done entirely at your own risk. Before attempting to update the firmware, back up your data.
Don’t miss any of our future video tutorials, follow us on Youtube. Like us on Facebook. Add us in your circles on Google+. Watch our photo albums on Flickr. Subscribe now to our newsletter.
Don’t miss any of our future video tutorials, follow us on Youtube. Like us on Facebook. Add us in your circles on Google+. Watch our photo albums on Flickr. Subscribe now to our newsletter.
Subscribe to:
Posts (Atom)