Showing posts with label how. Show all posts
Showing posts with label how. Show all posts
Friday, July 29, 2016
How to Install Android 6 0 Marshmallow CM13 Nightly on LG G3 F400
Android 6.0. Marshmallow CyanogenMod 13 [CM13] Nightly ROM is released for Korean LG G3 F400 . CM13 will let F400 users taste the sweetness of Marshmallow 6.0.on LG G F400.

Follow our guide below to download the CM13 Nightly and install it yourself.
Follow our guide below to download the CM13 Nightly and install it yourself.
View my Flipboard Magazine.
÷ Prerequisites:
•This tutorial is only for installing Android 6.0. Marshmallow CM13 Nightly ROM on LG G3 F400. Please do not try on any other LG G3 variants.
•Your phone should be rooted and haveClockworkMod recovery installed from before.
•This tutorial will wipe out all your data.Proceed at your own risk.Perform a Dalvik Cache wipe before proceeding from the recovery mode.
Make sure you backup all your data in your phone before proceeding.
*Disclaimer:
Android Custom ROM fix ® provide various Firmware Updates and Rooting process along with Custom ROM,Modes,file are all belong to their owners/developers. The autor of this site or the developers are not responsible, if you damage or brick your device.Do it on your own risk and follow the instruction properly.
* Important:
Backup important files stored on your device before proceeding with the steps below, so that in case something goes wrong you’ll have backup of all your important files.

÷ How to Install Android 6.0. Marshmallow CM13 Nightly on LG G3 F400.
Step 1 – Download CM13 Nightly Android 6.0. Marshmallow and Google Apps for your LG G3 F400 to your computer.
Step 2 – Connect and mount your LG G3 F400. USB memory on your computer using the USB cable.
Step 3 – Now copy/paste the downloaded Android 6.0. ROM zip file and Google Appszip files to your SD card. Make sure the files are in the SD card root (not in any folder).
Step 4 – Then turn OFF your phone and disconnect from the USB cable.
Step 5 – Now to get in the Recovery Mode. Switch ON the phone while pressing and holding Volume Up + Home + Power buttons together
Step 6 – Once you are in ClockworkModRecovery, select perform a full data wipe by selecting “wipe data/factory reset”. Use the Power button to select everything while in the Recovery Mode.
Step 7 – Then, perform a cache wipe by selecting “wipe cache partition” .
Step 8 – Now this is optional, but it is recommended to perform a wipe of your dalvik cache as well. You will not get into boot loops or any other errors. From CWM recovery, go to ‘advanced’ and then select “wipe dalvik cache”.
Step 9 – Then go back to the main recovery screen and select “install zip from SD card”.
Step 10 – Now select “choose zip from sdcard”. Using your volume keys, navigate to the Android 6.0.1 ROM zip file that you copied to your SD card and select it using the Power button. Confirm the installation on the next screen and the installation procedure should start now.
Google Apps: Repeat the above step for the Gapps zip file as well and install it on your phone.
Step 11 – After the installation completes, go to “+++++Go Back+++++” and reboot the phone by selecting “reboot system now” from the recovery menu.

Your LG G3 F400 will boot now and it might take about 5 minutes to boot on your first time. So, please wait.
That’s it! Your LG G3 F400 should now have CM13 Nightly Android 6.0. Marshmallow installed on your phone! Go to Settings > About phone to verify.
Like this post? PLZ Hit the share buttons below to share this article with your friends on Facebook, Google + and Twitter.
PLZ Follow Us On Flipboard 4 More LG G3 latest custom ROM fix.
PLZ Use the comment box below to contribute more ideas & Suggestions .
Best Regards.
÷ Prerequisites:
•This tutorial is only for installing Android 6.0. Marshmallow CM13 Nightly ROM on LG G3 F400. Please do not try on any other LG G3 variants.
•Your phone should be rooted and haveClockworkMod recovery installed from before.
•This tutorial will wipe out all your data.Proceed at your own risk.Perform a Dalvik Cache wipe before proceeding from the recovery mode.
Make sure you backup all your data in your phone before proceeding.
*Disclaimer:
Android Custom ROM fix ® provide various Firmware Updates and Rooting process along with Custom ROM,Modes,file are all belong to their owners/developers. The autor of this site or the developers are not responsible, if you damage or brick your device.Do it on your own risk and follow the instruction properly.
* Important:
Backup important files stored on your device before proceeding with the steps below, so that in case something goes wrong you’ll have backup of all your important files.
÷ How to Install Android 6.0. Marshmallow CM13 Nightly on LG G3 F400.
Step 1 – Download CM13 Nightly Android 6.0. Marshmallow and Google Apps for your LG G3 F400 to your computer.
Step 2 – Connect and mount your LG G3 F400. USB memory on your computer using the USB cable.
Step 3 – Now copy/paste the downloaded Android 6.0. ROM zip file and Google Appszip files to your SD card. Make sure the files are in the SD card root (not in any folder).
Step 4 – Then turn OFF your phone and disconnect from the USB cable.
Step 5 – Now to get in the Recovery Mode. Switch ON the phone while pressing and holding Volume Up + Home + Power buttons together
Step 6 – Once you are in ClockworkModRecovery, select perform a full data wipe by selecting “wipe data/factory reset”. Use the Power button to select everything while in the Recovery Mode.
Step 7 – Then, perform a cache wipe by selecting “wipe cache partition” .
Step 8 – Now this is optional, but it is recommended to perform a wipe of your dalvik cache as well. You will not get into boot loops or any other errors. From CWM recovery, go to ‘advanced’ and then select “wipe dalvik cache”.
Step 9 – Then go back to the main recovery screen and select “install zip from SD card”.
Step 10 – Now select “choose zip from sdcard”. Using your volume keys, navigate to the Android 6.0.1 ROM zip file that you copied to your SD card and select it using the Power button. Confirm the installation on the next screen and the installation procedure should start now.
Google Apps: Repeat the above step for the Gapps zip file as well and install it on your phone.
Step 11 – After the installation completes, go to “+++++Go Back+++++” and reboot the phone by selecting “reboot system now” from the recovery menu.
Your LG G3 F400 will boot now and it might take about 5 minutes to boot on your first time. So, please wait.
That’s it! Your LG G3 F400 should now have CM13 Nightly Android 6.0. Marshmallow installed on your phone! Go to Settings > About phone to verify.
Like this post? PLZ Hit the share buttons below to share this article with your friends on Facebook, Google + and Twitter.
PLZ Follow Us On Flipboard 4 More LG G3 latest custom ROM fix.
PLZ Use the comment box below to contribute more ideas & Suggestions .
Best Regards.
How To Transfer MTN Megabytes From One MTN Sim To Another
So many have been looking for a way to transfer their Mb but do not how to do it,This simple tutorial will show you how to transfer Megabytes from one Mtn line to another just like the way Airtel users normally transfer their own.
How Can I Transfer Megabytes To Another MTN line?
Make sure you have enough Megabytes on your MTN line if not you will get an error message.
 Dial *131*2# then choose ‘Register Data Service’. by click on Answer then Press 1, Once you choose that, a text will be sent to you that you have successfully registered on Mtn services and your default pin is ‘0000’. Just follow the instruction their and change your pin.
 - Click on Data Share
- Add Beneficiary
- Enter Beneficiaries Number
- Enter the amount of Megabytes you want to transfer.
That’s it. [?]
NOTE: Should in case you get an invalid pin in the process of doing this, try it again as it may be a temporary network problem.Hope this information helps?
If it works for you, dont forget to Comment here and remember to Click Share/Like buttons for the benefit of others.
If you enjoyed this post and wish to be informed whenever a new post is published, then make sure you Subscribe to our regular Email Updates!
Guide How to Manually Install ADB Driver For OPPO on Windows Computer
[Guide] How to Manually Install ADB Driver For OPPO on Windows Computer.
Install ADB Driver. This guide will show you how to to Manually Install ADB Driver For OPPO on Windows Computer. By installing ADB Driver for OPPO smartphone it will enable you to connect your OPPO Smartphone and tablets to the windows computer without installing any software. So you can easly transfer all data between them. This is a simple step that you can follow by yourself. On this guide we use a computer run on Windows 7.
How To Install OPPO ADB Driver ?
- To start this guide, please download the ADB driver here
- Once download complet, extract it on your computer.
- For example you can extract on;
- D:adb
- Now, click start
- Then right click computer.
- And select Properties

Install ADB Driver For OPPO - Then you will open this window, and click Advanced System Settings

Install ADB Driver For OPPO - Now you will see the new window, and click Advanced tab

Install ADB Driver For OPPO - Then click Environments Variables..
- This will open the environments variables window.

Install ADB Driver For OPPO - Now, Scroll down the slide bar of "System variables" to find the variable "Path" then double click it.

Install ADB Driver For OPPO - Once you double click the variable Path, you will see this window.

Install ADB Driver For OPPO - Then, Copy the path of your unzipped folder for example "D:adbadbtools4.2" and paste it to the "Variable value" field and separate the path with existing path with a ";"

Install ADB Driver For OPPO - Then click OK to save changes
- Now, your OPPO Smartphone device is already connect to the windows computer.
- finish.


How to Root Galaxy Note 4 N910F on Official Marshmallow 6 0 1 XXU1DPD3 Update
Samsung Galaxy Note 4 N910F users can now Root XXU1DPD3 Android 6.0.1 Marshmallow firmware. Just recently we saw Samsung finally release the much awaited Marshmallow update to Note 4.

Don’t worry we are going to share step by step guide to safely How to Root your Galaxy Note 4 N910F on Official Marshmallow 6.0.1 XXU1DPD3 Update:
Don’t worry we are going to share step by step guide to safely How to Root your Galaxy Note 4 N910F on Official Marshmallow 6.0.1 XXU1DPD3 Update:
View my Flipboard Magazine.
÷ Prerequisites:
•This root method tutorial is only for Samsung Galaxy Note 4 SM-N910F. Please do not try on any other Galaxy Note 4 LTE variants.
•Make sure you backup all your data in your phone before proceeding as a precaution.
•Your Note 4 should be on an official firmware by Samsung, not a custom ROM.
•Your phone should be on XXU1DPD3 Android 6.0.1 firmware.
*Disclaimer:
Android Custom ROM fix ® provide various Firmware Updates and Rooting process along with Custom ROM,Modes,file are all belong to their owners/developers. The autor of this site or the developers are not responsible, if you damage or brick your device.Do it on your own risk and follow the instruction properly.
* Important:
Backup important files stored on your device before proceeding with the steps below, so that in case something goes wrong you’ll have backup of all your important files.

÷ How to Root Galaxy Note 4 N910F on Official Marshmallow 6.0.1 XXU1DPD3 Update:
Step 1 – Download CF-Auto-Root Android 6.0.1 Package for Samsung Note 4 to your computer and extract the zip file.
Step 2 – Download ODIN v3.09 which will help you to root Android 6.0.1 on Samsung Galaxy Note 4 N910F.
Step 3 – Switch OFF your phone. Now go to Download Mode. How? Press and hold the Volume Down + Home buttons together, and then press the Power button till you see the construction Android robot and a triangle. Press Power again to confirm to enter into Download Mode.
Step 4 – Make sure you have your Samsung Galaxy Note 4 USB drivers installed on your computer.
Step 5 – Open ODIN on your computer. Connect your phone to your computer while your phone is in the Download Mode.
Step 6 – If your phone is connected successfully, one of the ID:COM boxes will turn yellow with the COM port number. This step might take some time.
Step 7 – Now select the file that you have to flash/install on your phone. This file will be found from the extracted file in Step 1.
Click on ‘AP’ and select the file CF-Auto-Root-trlte-trltexx-smN910F.zip
Step 8 – In ODIN, check the Auto Reboot and F. Reset Time options, if not already.
Step 9 – Now click on the Start button in ODIN. Installation process will start and would take a few minutes to complete.
Step 10 – After the installation is completed, your phone will reboot into Recovery Mode automatically and install the root package / files. Your ID:COM box will also turn green.
Step 11 – After you see the home screen, unplug your phone from the computer.
NOTE: Sometimes the device does NOT boot into Recovery Mode automatically (as given in Step 10) and root your device. If that happens, do the entire procedure again.
OPTIONAL: Still not rooted? Once again perform the entire tutorial, but make sure in ODIN, the “Auto Reboot” option is NOT checked. Then after installation (Step 10), do the following:
Step 11 – Pull out the battery to turn OFF the phone forcefully.
Step 12 – Now boot (turn ON your phone) with Volume Up + Home + Power buttons to go directly into Recovery Mode manually. This will start the install process of rooting your phone.

That’s it. Your Galaxy Note 4 has now been rooted on Android 6.0.1 Marshmallow with CF-Auto-Root package. Check for the SuperSU app in your apps list to verify.
Like this post? PLZ Hit the share buttons below to share this article with your friends on Facebook, Google + and Twitter.
PLZ Follow Us On Flipboard 4 More Samsung Galaxy Note 4 latest updates.
PLZ Use the comment box below to contribute more ideas & Suggestions .
Best Regards.
÷ Prerequisites:
•This root method tutorial is only for Samsung Galaxy Note 4 SM-N910F. Please do not try on any other Galaxy Note 4 LTE variants.
•Make sure you backup all your data in your phone before proceeding as a precaution.
•Your Note 4 should be on an official firmware by Samsung, not a custom ROM.
•Your phone should be on XXU1DPD3 Android 6.0.1 firmware.
*Disclaimer:
Android Custom ROM fix ® provide various Firmware Updates and Rooting process along with Custom ROM,Modes,file are all belong to their owners/developers. The autor of this site or the developers are not responsible, if you damage or brick your device.Do it on your own risk and follow the instruction properly.
* Important:
Backup important files stored on your device before proceeding with the steps below, so that in case something goes wrong you’ll have backup of all your important files.
÷ How to Root Galaxy Note 4 N910F on Official Marshmallow 6.0.1 XXU1DPD3 Update:
Step 1 – Download CF-Auto-Root Android 6.0.1 Package for Samsung Note 4 to your computer and extract the zip file.
Step 2 – Download ODIN v3.09 which will help you to root Android 6.0.1 on Samsung Galaxy Note 4 N910F.
Step 3 – Switch OFF your phone. Now go to Download Mode. How? Press and hold the Volume Down + Home buttons together, and then press the Power button till you see the construction Android robot and a triangle. Press Power again to confirm to enter into Download Mode.
Step 4 – Make sure you have your Samsung Galaxy Note 4 USB drivers installed on your computer.
Step 5 – Open ODIN on your computer. Connect your phone to your computer while your phone is in the Download Mode.
Step 6 – If your phone is connected successfully, one of the ID:COM boxes will turn yellow with the COM port number. This step might take some time.
Step 7 – Now select the file that you have to flash/install on your phone. This file will be found from the extracted file in Step 1.
Click on ‘AP’ and select the file CF-Auto-Root-trlte-trltexx-smN910F.zip
Step 8 – In ODIN, check the Auto Reboot and F. Reset Time options, if not already.
Step 9 – Now click on the Start button in ODIN. Installation process will start and would take a few minutes to complete.
Step 10 – After the installation is completed, your phone will reboot into Recovery Mode automatically and install the root package / files. Your ID:COM box will also turn green.
Step 11 – After you see the home screen, unplug your phone from the computer.
NOTE: Sometimes the device does NOT boot into Recovery Mode automatically (as given in Step 10) and root your device. If that happens, do the entire procedure again.
OPTIONAL: Still not rooted? Once again perform the entire tutorial, but make sure in ODIN, the “Auto Reboot” option is NOT checked. Then after installation (Step 10), do the following:
Step 11 – Pull out the battery to turn OFF the phone forcefully.
Step 12 – Now boot (turn ON your phone) with Volume Up + Home + Power buttons to go directly into Recovery Mode manually. This will start the install process of rooting your phone.
That’s it. Your Galaxy Note 4 has now been rooted on Android 6.0.1 Marshmallow with CF-Auto-Root package. Check for the SuperSU app in your apps list to verify.
Like this post? PLZ Hit the share buttons below to share this article with your friends on Facebook, Google + and Twitter.
PLZ Follow Us On Flipboard 4 More Samsung Galaxy Note 4 latest updates.
PLZ Use the comment box below to contribute more ideas & Suggestions .
Best Regards.
Earn 50 On AdF ly for Shortening URL How To
“Wow! I made some money online.” This was my reaction when I made few cents within a day using AdF.ly. So many people thinks that making money online is not possible or its just a scam,my brother, I think you dont know your way about it. AdF.ly is one of the ways I made some cool cash online and below am going to explain what this program is all about and how you can earn so much from it.
What is an AdF.ly
Adf.ly is website that pays you money every time someone clicks on your shortened Adf.ly links.
Still Confused? Let me Explain.
Adf.ly is an URL shortening service similar to Bit.ly.
- You input a link on AdF.ly. For example “google.com”
- AdF.ly shortens it and gives you a links “https://adf.ly/PNDe3”
- You share the shortened link anywhere on the web.
- Someone clicks on your link i.e. on “https://adf.ly/PNDe3”
There is twist now. Before redirecting to “google.com” adf.ly will show an ad to your visitor. He had to see the advertisement for at least 5 seconds and then he can continue to your link i.e. “google.com”.
How AdF.ly works?
However I have provided you an overview of the working of AdF.ly, there are some questions left why adf.ly pays you and how adf.ly itself make money. To make it more clear let us take an example. Think of an advertiser who wants to sell his product or promote his online business. So he want more visitors to see his business or buy his product: AdF.ly is the solution for the advertiser. Lets check out the complete working of AdF.ly:
- Advertiser pays money to Adfly to show his website to visitors of any specific country or the whole world. Let’s say advertiser paid $2 for 1000 visits.
- Adfly takes a cut. Let’s say Adfly takes $0.4.
- Adfly shows the advertisement (of advertisers business or product) for 5 seconds when a visitor clicks on publisher’s links. Publisher gets rest of $1.6 for 1000 visits on his link.
Now you have the complete idea of the working of AdF.ly. Let’s turn to the question “Is AdF.ly a scam?”
How do I Promote AdF.ly Links?
Thats quite easy, below are some good places you can share your links tp and get a very good conversion:
- Facebook: Millions of people use facebook everyday and its the best way to post and publish your links.
- Twitter: Get some followers on twitter and share your links so that they can click on it.
- Post on forums: This is the aspect i love the most, why? because I use it the most. I create a trending topic in forums and I will just embed my links in that post.
- Create a Website or blog:You can make a free website (blog or free google site) and post your url links on the website with your content (Just change your outgoing links to adf.ly links or you can also use their website entry script or full page script).
Adf.ly: Legit or Scam?
Adf.ly is not a scam; there are several points that prove it.
- It was started on 2009. It is six years now as of 2015. Only legit sites can live for so much of time.
- According to Alexa, Adfly is among the top 100 websites of the world. Can you ever think of a scam site in the top 100 websites of the world?
- It has more than 2 million users registered which prove that adf.ly a famous and legit site.
- They always pay on time.
- And the payment proof paid to me by Adf.ly below, proves it to be legit.

Now you should be eager to know more about Adf.ly so let’s continue and check out its pros and cons.
Payment Methods
Minimum payout is only $5; this means as soon as you will make $5 you can withdraw it.
Payment Methods are:
- Paypal
- Payoneer (Bank Transfer)
- Payoneer (Prepaid Card)
- Payza
Adf.ly also provides daily payments as soon you will meet the following requirements:
- Withdrawal Account Set
- Paid once in monthly payment
- Account longer than one month
- Account details not changed in last 72 hours
- Cashout limit reached: $5
Thursday, July 28, 2016
Format pendrive using cmd – How to guide
Formatting is a valuable and essential tool when dealing with any type of storage disk and can help to solve a lot of errors and headaches. But what do you do if your USB flash drive needs to be formatted but, every time you try through the property menus it comes up with an error, or won’t even recognise the drive properly at all. Don’t despair because here is something you can do.
Format pendrive using cmd is a common process that may need to be undertaken quite frequently, but unless you have gone through this procedure before it can be a mine field. The last thing you want is to finish the process and end up with an unusable pendrive . Here is a quick step by step guide to Format pendrive using cmd
Step 2. Once you are in your desktop insert Pendrive into USB port Please note: if you know the letters associated with your disk locations or can use a utility such as disk part to list this information then skip steps 3 and 4
Step 3. Go into my computer (accessible from the start menu or desktop) and look down the navigation panel on the left hand side, this lists down to the popular and root menu folders and locations on your computer.
Step 4. Your Pendrive should be listed in one of these locations, it may be referred to by brand, as portable storage or something similar. Next to this label will be a letter,
for example “G: removable storage device ” if the device does not show up you may need to test the port to find the letter with another USB device. This letter needs to be written down or remembered in order to complete this process.
Step 5. Go to the windows start menu, click start or the Windows symbol depending on your edition of Windows, then click run.
Step 6. Type cmd into the run dialog box and click OK, this is to start the command prompt window from which you will be able to choose your format style and name your drive.
Step 8. The G in this instance refers to our example Pendrive location, instead you would enter the letter that you remembered or wrote down from the my computer side panel
After you have typed the above command press enter.
Step 9. Here, you will be asked to press enter again and then to give a name for your drive. Follow these prompts then click on enter again.
You have completed the process of Formating pendrive using cmd; go back into my computer to check that the formatting has been completed successfully.
Format pendrive using cmd is a common process that may need to be undertaken quite frequently, but unless you have gone through this procedure before it can be a mine field. The last thing you want is to finish the process and end up with an unusable pendrive . Here is a quick step by step guide to Format pendrive using cmd
Steps to Format pendrive using cmd
This guide formats your flash drive as FAT32, to format as NTFS simply substitute the term in the command box. FAT32 is the recommended formatting style by this guide but many do prefer NTFS. Follow the Below steps to Format an unformatable Pendrive.
Step 1. Turn on computer as normal Step 2. Once you are in your desktop insert Pendrive into USB port Please note: if you know the letters associated with your disk locations or can use a utility such as disk part to list this information then skip steps 3 and 4
Step 3. Go into my computer (accessible from the start menu or desktop) and look down the navigation panel on the left hand side, this lists down to the popular and root menu folders and locations on your computer.
Step 4. Your Pendrive should be listed in one of these locations, it may be referred to by brand, as portable storage or something similar. Next to this label will be a letter,
for example “G: removable storage device ” if the device does not show up you may need to test the port to find the letter with another USB device. This letter needs to be written down or remembered in order to complete this process.
Step 5. Go to the windows start menu, click start or the Windows symbol depending on your edition of Windows, then click run.
Step 6. Type cmd into the run dialog box and click OK, this is to start the command prompt window from which you will be able to choose your format style and name your drive.
Step 7. Then the command prompt window is opened and you will need to type ” Format G: ”
After you have typed the above command press enter.
Step 9. Here, you will be asked to press enter again and then to give a name for your drive. Follow these prompts then click on enter again.
You have completed the process of Formating pendrive using cmd; go back into my computer to check that the formatting has been completed successfully.
How to Install CM13 0 Nightly Android 6 0 1 Marshmallow on Moto G 2015 Osprey
CyanogenMod 13 [CM13.0] Nightly ROM latest build cm-13.0-20160520-NIGHTLY-osprey.zip is released for Moto G (2015) osprey.

CM13.0 will let Moto G (2015) users taste the sweetness of Marshmallow 6.0.1 such as the battery saving ‘doze’ functionality and new permissions model, alongside the CM features you’d expect.
Follow our guide below to download the Unofficial CM13 and install it yourself.
View my Flipboard Magazine.
÷ Prerequisites:
•This tutorial is only for installing CyanogenMod 13 [CM13.0] Nightly ROM on Moto G (2015) Osprey Please do not try on any other Moto G variants.
•Your phone should be rooted and haveClockworkMod recovery installed from before.
•This tutorial will wipe out all your data.Proceed at your own risk.Perform a Dalvik Cache wipe before proceeding from the recovery mode.
Make sure you backup all your data in your phone before proceeding.
*Disclaimer:
Android Custom ROM fix ® provide various Firmware Updates and Rooting process along with Custom ROM,Modes,file are all belong to their owners/developers. The autor of this site or the developers are not responsible, if you damage or brick your device.Do it on your own risk and follow the instruction properly.
* Important:
Backup important files stored on your device before proceeding with the steps below, so that in case something goes wrong you’ll have backup of all your important files.

÷ How to Install CM13.0 Nightly Android 6.0.1 Marshmallow on Moto G (2015) Osprey.
Step 1 – Download CM13.0 Android 6.0.1 Marshmallow and Google Apps for your Moto G (2015) to your computer.
Step 2 – Connect and mount your Moto G (2015) USB memory on your computer using the USB cable.
Step 3 – Now copy/paste the downloaded Android 6.0.1 ROM zip file and Google Appszip files to your SD card. Make sure the files are in the SD card root (not in any folder).
Step 4 – Then turn OFF your phone and disconnect from the USB cable.
Step 5 – Now to get in the Recovery Mode. Switch ON the phone while pressing and holding Volume Up + Home + Power buttons together
Step 6 – Once you are in ClockworkModRecovery, select perform a full data wipe by selecting “wipe data/factory reset”. Use the Power button to select everything while in the Recovery Mode.
Step 7 – Then, perform a cache wipe by selecting “wipe cache partition” .
Step 8 – Now this is optional, but it is recommended to perform a wipe of your dalvik cache as well. You will not get into boot loops or any other errors. From CWM recovery, go to ‘advanced’ and then select “wipe dalvik cache”.
Step 9 – Then go back to the main recovery screen and select “install zip from SD card”.
Step 10 – Now select “choose zip from sdcard”. Using your volume keys, navigate to the Android 6.0.1 ROM zip file that you copied to your SD card and select it using the Power button. Confirm the installation on the next screen and the installation procedure should start now.
Google Apps: Repeat the above step for the Gapps zip file as well and install it on your phone.
Step 11 – After the installation completes, go to “+++++Go Back+++++” and reboot the phone by selecting “reboot system now” from the recovery menu.

Your Moto G (2015) will boot now and it might take about 5 minutes to boot on your first time. So, please wait.
That’s it Your Moto G (2015) should now have CM13.0 Nightly Android 6.0.1 Marshmallow latest build installed on your phone! Go to Settings > About phone to verify.
For More Moto G (2015) Firmware & Custom ROM keep checking AndroidCustomROM Fix ™®
Like this post? PLZ Hit the share buttons below to share this article with your friends on Facebook, Google + and Twitter.
PLZ Follow Us On Flipboard 4 More HTC One M9 latest custom ROM fix.
PLZ Use the comment box below to contribute more ideas & Suggestions .
Best Regards.
÷ Prerequisites:
•This tutorial is only for installing CyanogenMod 13 [CM13.0] Nightly ROM on Moto G (2015) Osprey Please do not try on any other Moto G variants.
•Your phone should be rooted and haveClockworkMod recovery installed from before.
•This tutorial will wipe out all your data.Proceed at your own risk.Perform a Dalvik Cache wipe before proceeding from the recovery mode.
Make sure you backup all your data in your phone before proceeding.
*Disclaimer:
Android Custom ROM fix ® provide various Firmware Updates and Rooting process along with Custom ROM,Modes,file are all belong to their owners/developers. The autor of this site or the developers are not responsible, if you damage or brick your device.Do it on your own risk and follow the instruction properly.
* Important:
Backup important files stored on your device before proceeding with the steps below, so that in case something goes wrong you’ll have backup of all your important files.
÷ How to Install CM13.0 Nightly Android 6.0.1 Marshmallow on Moto G (2015) Osprey.
Step 1 – Download CM13.0 Android 6.0.1 Marshmallow and Google Apps for your Moto G (2015) to your computer.
Step 2 – Connect and mount your Moto G (2015) USB memory on your computer using the USB cable.
Step 3 – Now copy/paste the downloaded Android 6.0.1 ROM zip file and Google Appszip files to your SD card. Make sure the files are in the SD card root (not in any folder).
Step 4 – Then turn OFF your phone and disconnect from the USB cable.
Step 5 – Now to get in the Recovery Mode. Switch ON the phone while pressing and holding Volume Up + Home + Power buttons together
Step 6 – Once you are in ClockworkModRecovery, select perform a full data wipe by selecting “wipe data/factory reset”. Use the Power button to select everything while in the Recovery Mode.
Step 7 – Then, perform a cache wipe by selecting “wipe cache partition” .
Step 8 – Now this is optional, but it is recommended to perform a wipe of your dalvik cache as well. You will not get into boot loops or any other errors. From CWM recovery, go to ‘advanced’ and then select “wipe dalvik cache”.
Step 9 – Then go back to the main recovery screen and select “install zip from SD card”.
Step 10 – Now select “choose zip from sdcard”. Using your volume keys, navigate to the Android 6.0.1 ROM zip file that you copied to your SD card and select it using the Power button. Confirm the installation on the next screen and the installation procedure should start now.
Google Apps: Repeat the above step for the Gapps zip file as well and install it on your phone.
Step 11 – After the installation completes, go to “+++++Go Back+++++” and reboot the phone by selecting “reboot system now” from the recovery menu.
Your Moto G (2015) will boot now and it might take about 5 minutes to boot on your first time. So, please wait.
That’s it Your Moto G (2015) should now have CM13.0 Nightly Android 6.0.1 Marshmallow latest build installed on your phone! Go to Settings > About phone to verify.
For More Moto G (2015) Firmware & Custom ROM keep checking AndroidCustomROM Fix ™®
Like this post? PLZ Hit the share buttons below to share this article with your friends on Facebook, Google + and Twitter.
PLZ Follow Us On Flipboard 4 More HTC One M9 latest custom ROM fix.
PLZ Use the comment box below to contribute more ideas & Suggestions .
Best Regards.
How to Install CM13 0 Nightly Android 6 0 1 Marshmallow on OnePlusOne bacon
CyanogenMod 13 [CM13.0] Nightly ROM latest build cm-13.0-20160515-NIGHTLY-bacon is released for Verizon HTC One M9 ( himawl). CM13.0 will let OnePlusOne ( bacon) users taste the sweetness of Marshmallow 6.0.1 such as the battery saving ‘doze’ functionality and new permissions model, alongside the CM features you’d expect.

Follow our guide below to download the Unofficial CM13 and install it yourself.
View my Flipboard Magazine.
÷ Prerequisites:
•This tutorial is only for installing CyanogenMod 13 [CM13.0] Nightly ROM on OnePlusOne ( bacon) . Please do not try on any other OnePlusOne variants.
•Your phone should be rooted and haveClockworkMod recovery installed from before.
•This tutorial will wipe out all your data.Proceed at your own risk.Perform a Dalvik Cache wipe before proceeding from the recovery mode.
Make sure you backup all your data in your phone before proceeding.
*Disclaimer:
Android Custom ROM fix ® provide various Firmware Updates and Rooting process along with Custom ROM,Modes,file are all belong to their owners/developers. The autor of this site or the developers are not responsible, if you damage or brick your device.Do it on your own risk and follow the instruction properly.
* Important:
Backup important files stored on your device before proceeding with the steps below, so that in case something goes wrong you’ll have backup of all your important files.

÷ How to Install CM13.0 Nightly Android 6.0.1 Marshmallow on OnePlusOne ( bacon).
Step 1 – Download CM13.0 Android 6.0.1 Marshmallow and Google Apps for your OnePlusOne ( bacon) to your computer.
Step 2 – Connect and mount your OnePlusOne ( bacon) USB memory on your computer using the USB cable.
Step 3 – Now copy/paste the downloaded Android 6.0.1 ROM zip file and Google Appszip files to your SD card. Make sure the files are in the SD card root (not in any folder).
Step 4 – Then turn OFF your phone and disconnect from the USB cable.
Step 5 – Now to get in the Recovery Mode. Switch ON the phone while pressing and holding Volume Up + Home + Power buttons together
Step 6 – Once you are in ClockworkModRecovery, select perform a full data wipe by selecting “wipe data/factory reset”. Use the Power button to select everything while in the Recovery Mode.
Step 7 – Then, perform a cache wipe by selecting “wipe cache partition” .
Step 8 – Now this is optional, but it is recommended to perform a wipe of your dalvik cache as well. You will not get into boot loops or any other errors. From CWM recovery, go to ‘advanced’ and then select “wipe dalvik cache”.
Step 9 – Then go back to the main recovery screen and select “install zip from SD card”.
Step 10 – Now select “choose zip from sdcard”. Using your volume keys, navigate to the Android 6.0.1 ROM zip file that you copied to your SD card and select it using the Power button. Confirm the installation on the next screen and the installation procedure should start now.
Google Apps: Repeat the above step for the Gapps zip file as well and install it on your phone.
Step 11 – After the installation completes, go to “+++++Go Back+++++” and reboot the phone by selecting “reboot system now” from the recovery menu.

Your OnePlusOne ( bacon) will boot now and it might take about 5 minutes to boot on your first time. So, please wait.
That’s it YourOnePlusOne ( bacon) should now have CM13.0 Nightly Android 6.0.1 Marshmallow installed on your phone! Go to Settings > About phone to verify.
For more OnePlusOne Brand New Firmware & Custom ROM keep checking AndroidCustomROM Fix ™®
Like this post? PLZ Hit the share buttons below to share this article with your friends on Facebook, Google + and Twitter.
PLZ Follow Us On Flipboard 4 MoreOnePlusOne latest custom ROM fix.
PLZ Use the comment box below to contribute more ideas & Suggestions .
Best Regards.
÷ Prerequisites:
•This tutorial is only for installing CyanogenMod 13 [CM13.0] Nightly ROM on OnePlusOne ( bacon) . Please do not try on any other OnePlusOne variants.
•Your phone should be rooted and haveClockworkMod recovery installed from before.
•This tutorial will wipe out all your data.Proceed at your own risk.Perform a Dalvik Cache wipe before proceeding from the recovery mode.
Make sure you backup all your data in your phone before proceeding.
*Disclaimer:
Android Custom ROM fix ® provide various Firmware Updates and Rooting process along with Custom ROM,Modes,file are all belong to their owners/developers. The autor of this site or the developers are not responsible, if you damage or brick your device.Do it on your own risk and follow the instruction properly.
* Important:
Backup important files stored on your device before proceeding with the steps below, so that in case something goes wrong you’ll have backup of all your important files.
÷ How to Install CM13.0 Nightly Android 6.0.1 Marshmallow on OnePlusOne ( bacon).
Step 1 – Download CM13.0 Android 6.0.1 Marshmallow and Google Apps for your OnePlusOne ( bacon) to your computer.
Step 2 – Connect and mount your OnePlusOne ( bacon) USB memory on your computer using the USB cable.
Step 3 – Now copy/paste the downloaded Android 6.0.1 ROM zip file and Google Appszip files to your SD card. Make sure the files are in the SD card root (not in any folder).
Step 4 – Then turn OFF your phone and disconnect from the USB cable.
Step 5 – Now to get in the Recovery Mode. Switch ON the phone while pressing and holding Volume Up + Home + Power buttons together
Step 6 – Once you are in ClockworkModRecovery, select perform a full data wipe by selecting “wipe data/factory reset”. Use the Power button to select everything while in the Recovery Mode.
Step 7 – Then, perform a cache wipe by selecting “wipe cache partition” .
Step 8 – Now this is optional, but it is recommended to perform a wipe of your dalvik cache as well. You will not get into boot loops or any other errors. From CWM recovery, go to ‘advanced’ and then select “wipe dalvik cache”.
Step 9 – Then go back to the main recovery screen and select “install zip from SD card”.
Step 10 – Now select “choose zip from sdcard”. Using your volume keys, navigate to the Android 6.0.1 ROM zip file that you copied to your SD card and select it using the Power button. Confirm the installation on the next screen and the installation procedure should start now.
Google Apps: Repeat the above step for the Gapps zip file as well and install it on your phone.
Step 11 – After the installation completes, go to “+++++Go Back+++++” and reboot the phone by selecting “reboot system now” from the recovery menu.
Your OnePlusOne ( bacon) will boot now and it might take about 5 minutes to boot on your first time. So, please wait.
That’s it YourOnePlusOne ( bacon) should now have CM13.0 Nightly Android 6.0.1 Marshmallow installed on your phone! Go to Settings > About phone to verify.
For more OnePlusOne Brand New Firmware & Custom ROM keep checking AndroidCustomROM Fix ™®
Like this post? PLZ Hit the share buttons below to share this article with your friends on Facebook, Google + and Twitter.
PLZ Follow Us On Flipboard 4 MoreOnePlusOne latest custom ROM fix.
PLZ Use the comment box below to contribute more ideas & Suggestions .
Best Regards.
Guide How to Flash Stock ROM on Android OPPO JOY 3 to Fix a Bootloop Stuck Removing Malware
[Guide] How to Flash Stock ROM on Android OPPO JOY 3 to Fix a Bootloop, Stuck, Removing Malware.
Flash Stock ROM on Android OPPO JOY 3. This guide will help you to Flash Stock ROM on Android OPPO JOY 3 Smartphone. By flashing your Android phone you can get something new on your phone, such as new experience to use latest update of Stock ROM, or new installed Stock ROM after your phone died or bootloop, and much more. Before we proceed to flash this Android OPPO JOY 3 Smartphone, let we know what is detail specification of this Android smartphone.OPPO JOY 3 was released On 2015, August. And OPPO JOY 3 is the smartphone that comes with 4,5 Inches IPS LCD capacitive touchscreen, 16M colors, Run on Android OS, v4.4 (KitKat) - ColorOS 2.0 UI as it Operating System and supported with Mediatek MT6582 Chipset, Quad-core 1.3 GHz Cortex-A7 CPU, GPU Mali-400MP2, combined with 1 GB of RAM as their engine. And you can enjoy exciting 5 MP on main camera, and 2 MP on secondary camera.
Now, we start to flash Stock ROM on Android OPPO JOY 3 Smartphone. Just follow this guide below carefully. take your own risk, a damage or broken phone by following this tutorial is not our responsibility.
Guide Flash Stock ROM OPPO JOY 3.
Before you flash OPPO JOY 3 you must read this instruction carefully, so. you can get best result at the end of your flash.
Preparation.
- Make sure you have enough battery capacity on your OPPO JOY 3. Its recomended you have at least 80% of battery capacity.
- Always backup your important file (contact, music, video, app) that stored on OPPO JOY 3,
- Prepare the Memory Card / SD Card which has a V-Gen Brand. For some reason OPPO JOY 3 does not recognized besides V-Gen Memory card.
- Then download OPPO JOY 3 Stock ROM.
- Oppo JOY 3
- Once download finish, now copy Stock ROM from computer to the phone memory or SD Card. but note that you copy this ROM at outside not to the public folder for easy finding. (if you download ROM Via PC)
- But, Stock ROM can be download directly from yourAndroid phone. And you must have a good and stable internet connection for it, such as Wi-Fi connection.
- Rom download directly from the Android phone located in the File Manager / phone / download.
http://assorted.downloads.oppo.com/firmware/A11w/A11wEX_11.A.06_OTA_INT_006_all_151022.zip
Flashing Stock ROM.
- To start flashing Stock ROM on OPPO JOY 3 you must enter Recovery Mode. how to do it ?
- Press and Hold Power Button + Volume Down.
- Then you will see menu like this picture. You can select English
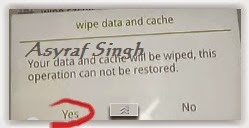
- Select Wipe data and cache by pressing the power button. for Up and down choice, use the volume keys Up / Down, on the next Popup screen select Wipe your data cache to make faster process.
- If appears confirmation you can select : "YES"
- Then you will bring to previous menu, and you can select Install form sd.
- Now you will see 2 options. From mobile phone storage & form SD,.
- Previously you have copy firmware file on SD Card, So. now you must select From SD. and now you can see your Firmware file name on this screen.(Stock rom name is similar as shown on the picture below)
- Select this file name using Power Button
- For Up or Down navigation you can use volume Up and Down Button.
- Then you will see a confirmation page, and you can select yes to proceed this flash on OPPO JOY 3
- Just wait the process finish updating system, and your OPPO JOY 3 will ask to you to reboot the device.
- Now you have finished flash Stock ROM on Android OPPO JOY 3 Smartphone.
 |
| Flash Bootloop OPPO JOY 3 |
 |
| Flash Bootloop OPPO JOY 3 |
 |
| Flash Bootloop OPPO JOY 3 |
 |
| Flash Bootloop OPPO JOY 3 |
 |
| Flash Bootloop OPPO JOY 3 |
 |
| Flash Bootloop OPPO JOY 3 |
 |
| Flash Bootloop OPPO JOY 3 |
 |
| Flash Bootloop OPPO JOY 3 |
How To Install Vcom MTK Preloader Driver for all MTK Android Phones
The need to install Vcom Drivers for MTK devices can be essential whenever you want to fix your MTK device either you want to upgrade or need to UnBrick your device.
Whatever may be your reasons to install VCOM drivers it can be done in two ways but i will share with you the simplest method to achieve this task.Download the Drivers from the Link Provided below.

How To Install Vcom (MTK Preloader) Driver for all MTK Android Phones
Run it as Administrator and it should show you a screen that looks like the one above.
Click on “Install this driver software anyway”
DOWNLOAD VCOM DRIVERS HERE:
Download Vcom Driver for windows 32BIT
Download Vcom Drivers for windows 64BIT
Guide How to Install TWRP Recovery and Root Android Lenovo Vibe K5 K5 Plus
[Guide] How to Install TWRP Recovery and Root Android Lenovo Vibe K5 | K5 Plus.
Install TWRP Recovery and Root Vibe Lenovo K5. This guide will show you how to Install TWRP Recovery and Root Android Lenovo Vibe K5 | K5 Plus. If you want root the Lenovo Vibe K5 or K5 plus you must install TWRP Recovery first on this device. We know that TWRP is custom recovery image for Android-based devices, and this recovery provided GUI interface or with touchscreen enabled, by using TWRP we allows users to install third-party firmware and backup the current system. therefore, TWRP often installed when rooting Android smartphone devices.
Lenovo Vibe K5 is the smartphone released on February, 2016. with 5,0 Inchi IPS capacitive touchscreen, 16M colors, work on Android OS, v5.1 (Lollipop), and supported with Quad-core 1.5 GHz Cortex-A53 & quad-core 1.2 GHz Cortex-A53 CPU, Qualcomm MSM8929 Snapdragon 415 chipset, Adreno 405 GPU, combined with 2 GB of RAM, 13 MP on primary camera and 5 MP on secondary camera.
Lenovo Vibe K5 is the smartphone released on February, 2016. with 5,0 Inchi IPS capacitive touchscreen, 16M colors, work on Android OS, v5.1 (Lollipop), and supported with Quad-core 1.5 GHz Cortex-A53 & quad-core 1.2 GHz Cortex-A53 CPU, Qualcomm MSM8929 Snapdragon 415 chipset, Adreno 405 GPU, combined with 2 GB of RAM, 13 MP on primary camera and 5 MP on secondary camera.
Install TWRP on Lenovo Vibe K5.
Here is the guide started. Now follow all step carefully.
- Make sure Minimal ADB and fastboot installed on your compuer. you can see this guide.
- Make sure your battery is not empty or at least has 70% of battery capacity.
- Now, switch on your Lenovo Vibe K5.
- Then enable the Developer Options.
- Go to Setting -> About Phone -> Phone Information -> tap 7 times at Build Number,
- Then, Enable USB Debugging
- Go to Settings -> Developer -> USB Debugging
- Now, Enable OEM unlock.
- Go to Settings -> Developer -> Unlock OEM
- Make sure driver for Lenovo Vibe K5 installed correctly on your computer, you can find the driver that come on the CD cell partition
- Now, connect your Lenovo Vibe K5 to the computer using original USB cable.
- Then, Download the TWRP recovery, and copy it to the folder where adb is installed on your computer.
- Download link
- Cretaed by Shreps
- TWRP version : 3.0.2.0
- File name : twrp-k5-3.0.2-r1_shreps.img
- Open a command prompt from within your fastboot folder.
- To start this command prompt just hold shift + right click, select open command prompt here.

Run ADB on computer - Now type,
- adb devices
- This command used to confirm the connection between Lenovo Vibe K5 and the computer.
- Once the connection confirmed. Now type.
- adb reboot bootloader
- If you want to temporarily boot this recovery type ,
- fastboot boot TWRP-k5-3.0.2-r1_shreps.img
- If you want to permanently flash it, type ;
- fastboot flash recovery TWRP-k5-3.0.2-r1_shreps.img
- Finish.
Root on Lenovo Vibe K5.
- This step will show you how to root Lenovo Vibe K5
- To start it, you must Download the ZIP file SuperSU v2.46
- Then save it in the micro SD card.
- Now turn off your Lenovo Vibe K5.
- Then enter to recovery mode.
- Press and hold Power Button and Volume Up button
- Then follow instruction appear on screen.
- Select recovery to install SuperSu from SD Card.
How to Install Android 6 0 1 Marshmallow ResurrectionRemix M v5 6 9 on OnePlus One A0001 bacon
According to XDA Member varund7726, Android 6.0.1 Marshmallow ResurrectionRemix M v5.6.9 ROM is available for One Plus One A0001[ bacon].

÷ ROM Features:
Features:-
Based On Latest Google Android 6.0.1 Release
Based On Cyanogenmod 13 Sources
RR Customizations:-
-Navigation Bar
-Enable/Disable Navbar
-Navbar Button Customization
-Navbar Slim Dim
-Animate Dim
-Dim Timeout Duration
-Dim Alpha
-Double Tap To sleep navbar
-Navigation Bar left/Right handed mode Switch for landscape
-Statusbar
-Brightness Slider
-Enable/Disable Show Notification Count
-SuperUser Indicator Switch
-Double Tap To sleep Statusbar
-Carrier Label
-Carrier Label Switch
-Carrier label Colour
-Carrier Label Size
-Clock Customizations
-Time & date
-Clock Colour
-Day & date Toogle
-Center/Right/Left Clock Choice
-Date Format
-Clock Font Styles
-Battery
-Battery Bar customization
-Battery Icon Customization(circle/landscape/Potrait and more)
-Battery % Text
-Network Traffic Indicator
-Network Traffic Arrows Switch
-Incoming/OutGoing Traffic
-Network traffic Color
-Statusbar RR Logo
-RR logo Color
-StatusBar Weather
-Weather Color
-Weather Position(left/right)
-Weather Style
-Weather Size
-Animations
-Toast Animations
-ListView Animations
-System Animations
-Gestures
-Gestures Anywhere Feature
-3 Finger Swipe Screenshot Gesture
-App Circle Bar
-Choose apps in AppSidebar
-Trigger Width
-Trigger Hieght
-Trigger Position
-App Sidebar
-Choose apps in App circle
-Trigger Width
-Trigger Hieght
-Trigger Position
-Pie
-Pie Trigger(left ,Right ,Bottom)
-Pie Targets
-Pie Colors
-More Pie Features
-Recents Panel
-Clear All button Switch
-Clear All Tasks Switch
-Clear All Button Location(Top right,Top Left,Top Center,Bottom Left,Bottom Right,Bottom Center)
-Recents Search Bar
-Full Screen Recents
-Slim Recents
-OmniSwitch
-Cclock Widget
-CLock And Alarm Customizations
-Weather Panel Customizations
-Calender Events
-LockScreen
-Lockscreen Bottom Shortcuts
-Lockscreen General Shorcuts
-100+ Icons for Shortcuts
-Double Tap to Sleep Lockscreen
-Lockscreen Media Art/Enable Disable
-Quick PIN/Patter Unlock
-LockScreen Blur
-Lockscreen Blur Intensity
-LockScreen Wallpaper
-Lockscreen Weather Widget
-Lockscreen Icons Color
-Quick Settings Draggable Tiles
-Customizable Tiles
-Show Two Main Tiles Per Row
-Dyanamic Tiles Adjustment
-Notification Drawer
-Weather Display Switch
-LongPress Toogles to Enter Settings
-Disable Immersive Mode Messages
-Force Expand Notification
-Task Manager Switch
-Time Contextual Header(HD,Modern,Poly)
-Quick PullDown Switch
-Buttons
-Backlight Timer
-Backlight Strength
-Advanced Reboot Menu
-Power Menu Customizations
-Power Off
-Reboot(Recovery, Bootloader, Hot Reboot)
-ScreenShot
-Power Menu End Calls Switch
-Restart SystemUI
-Airplane Mode
-ScreenRecord
-On the Go Mode
-Sound Panel
And Much more...
Follow our guide below to download the Unofficial CM13 and install it yourself.
÷ Prerequisites:
•This tutorial is only for installing Android 6.0.1 ResurrectionRemix M v5.6.9 on One Plus One A0001[ bacon]. Please do not try on any other One Plus One variants.
•Your phone should be rooted and haveClockworkMod recovery installed from before.
•This tutorial will wipe out all your data.Proceed at your own risk.Perform a Dalvik Cache wipe before proceeding from the recovery mode.
•Make sure you backup all your data in your phone before proceeding.
View my Flipboard Magazine.
*Disclaimer:
Android Custom ROM fix ® provide various Firmware Updates and Rooting process along with Custom ROM,Modes,file are all belong to their owners/developers. The autor of this site or the developers are not responsible, if you damage or brick your device.Do it on your own risk and follow the instruction properly.
* Important:
Backup important files stored on your device before proceeding with the steps below, so that in case something goes wrong you’ll have backup of all your important files.

÷ How to Install Android 6.0.1 Marshmallow ResurrectionRemix M v5.6.9 on One Plus One A0001[ bacon].
Step 1 – Download ResurrectionRemix M v5.6.9 Android 6.0.1 Marshmallow and Google Apps for your.One Plus One A0001[ bacon] to your computer.
Step 2 – Connect and mount your One Plus One USB memory on your computer using the USB cable.
Step 3 – Now copy/paste the downloaded Android 6.0.1 ROM zip file and Google Appszip files to your SD card. Make sure the files are in the SD card root (not in any folder).
Step 4 – Then turn OFF your phone and disconnect from the USB cable.
Step 5 – Now to get in the Recovery Mode. Switch ON the phone while pressing and holding Volume Up + Home + Power buttons together
Step 6 – Once you are in ClockworkModRecovery, select perform a full data wipe by selecting “wipe data/factory reset”. Use the Power button to select everything while in the Recovery Mode.
Step 7 – Then, perform a cache wipe by selecting “wipe cache partition” .
Step 8 – Now this is optional, but it is recommended to perform a wipe of your dalvik cache as well. You will not get into boot loops or any other errors. From CWM recovery, go to ‘advanced’ and then select “wipe dalvik cache”.
Step 9 – Then go back to the main recovery screen and select “install zip from SD card”.
Step 10 – Now select “choose zip from sdcard”. Using your volume keys, navigate to the Android 6.0.1 ROM zip file that you copied to your SD card and select it using the Power button. Confirm the installation on the next screen and the installation procedure should start now.
Google Apps: Repeat the above step for the Gapps zip file as well and install it on your phone.
Step 11 – After the installation completes, go to “+++++Go Back+++++” and reboot the phone by selecting “reboot system now” from the recovery menu.

Your One Plus One A0001[ bacon] will boot now and it might take about 5 minutes to boot on your first time. So, please wait.
That’s it Your One Plus One A0001[ bacon] should now have ResurrectionRemix M v5.6.9 Android 6.0.1 Marshmallow installed on your phone! Go to Settings > About phone to verify.
Via: XDA
For More One Plus One Brand New Firmware & Custom ROM keep checking AndroidCustomROM Fix ™®
Like this post? PLZ Hit the share buttons below to share this article with your friends on Facebook, Google + and Twitter.
PLZ Follow Us On Flipboard 4 More latest custom ROM fix.
PLZ Use the comment box below to contribute more ideas & Suggestions .
Best Regards.
<
*Disclaimer:
Android Custom ROM fix ® provide various Firmware Updates and Rooting process along with Custom ROM,Modes,file are all belong to their owners/developers. The autor of this site or the developers are not responsible, if you damage or brick your device.Do it on your own risk and follow the instruction properly.
* Important:
Backup important files stored on your device before proceeding with the steps below, so that in case something goes wrong you’ll have backup of all your important files.
÷ How to Install Android 6.0.1 Marshmallow ResurrectionRemix M v5.6.9 on One Plus One A0001[ bacon].
Step 1 – Download ResurrectionRemix M v5.6.9 Android 6.0.1 Marshmallow and Google Apps for your.One Plus One A0001[ bacon] to your computer.
Step 2 – Connect and mount your One Plus One USB memory on your computer using the USB cable.
Step 3 – Now copy/paste the downloaded Android 6.0.1 ROM zip file and Google Appszip files to your SD card. Make sure the files are in the SD card root (not in any folder).
Step 4 – Then turn OFF your phone and disconnect from the USB cable.
Step 5 – Now to get in the Recovery Mode. Switch ON the phone while pressing and holding Volume Up + Home + Power buttons together
Step 6 – Once you are in ClockworkModRecovery, select perform a full data wipe by selecting “wipe data/factory reset”. Use the Power button to select everything while in the Recovery Mode.
Step 7 – Then, perform a cache wipe by selecting “wipe cache partition” .
Step 8 – Now this is optional, but it is recommended to perform a wipe of your dalvik cache as well. You will not get into boot loops or any other errors. From CWM recovery, go to ‘advanced’ and then select “wipe dalvik cache”.
Step 9 – Then go back to the main recovery screen and select “install zip from SD card”.
Step 10 – Now select “choose zip from sdcard”. Using your volume keys, navigate to the Android 6.0.1 ROM zip file that you copied to your SD card and select it using the Power button. Confirm the installation on the next screen and the installation procedure should start now.
Google Apps: Repeat the above step for the Gapps zip file as well and install it on your phone.
Step 11 – After the installation completes, go to “+++++Go Back+++++” and reboot the phone by selecting “reboot system now” from the recovery menu.
Your One Plus One A0001[ bacon] will boot now and it might take about 5 minutes to boot on your first time. So, please wait.
That’s it Your One Plus One A0001[ bacon] should now have ResurrectionRemix M v5.6.9 Android 6.0.1 Marshmallow installed on your phone! Go to Settings > About phone to verify.
Via: XDA
For More One Plus One Brand New Firmware & Custom ROM keep checking AndroidCustomROM Fix ™®
Like this post? PLZ Hit the share buttons below to share this article with your friends on Facebook, Google + and Twitter.
PLZ Follow Us On Flipboard 4 More latest custom ROM fix.
PLZ Use the comment box below to contribute more ideas & Suggestions .
Best Regards.
<
How to Install CM13 0 Nightly Android 6 0 1 Marshmallow on Verizon LG G3 VS985 Latest Build

There’s a hell of a lot to like about the LG G3. For a start it was the winner of the TrustedReviews Best Phone Award 2014. Its combination of clever design, excellent camera and top-notch screen made it a cult favourite that deserves to sell by the bucket-load. In a world with Apple’s iPhone 6 and Samsung’s Galaxy S6, though, that’s a tricky feat.
If you are looking to install a new custom ROM then we have made a list of the best Custom ROMs for you.
CyanogenMod 13 [CM13.0] Nightly ROM latest build cm-13.0-20160530-NIGHTLY-vs985.zip is released for Verizon LG G3 VS985
CM13.0 will let LG G3 VS985 users taste the sweetness of Marshmallow 6.0.1 such as the battery saving ‘doze’ functionality and new permissions model, alongside the CM features you’d expect.
Follow our guide below to download the Unofficial CM13 and install it yourself.
View my Flipboard Magazine.
÷ Prerequisites:
•This tutorial is only for installing CyanogenMod 13 [CM13.0] Nightly ROM on Verizon LG G3 VS985.Please do not try on any other LG G3 variants.
•Your phone should be rooted and haveClockworkMod recovery installed from before.
•This tutorial will wipe out all your data.Proceed at your own risk.Perform a Dalvik Cache wipe before proceeding from the recovery mode.
Make sure you backup all your data in your phone before proceeding.
*Disclaimer:
Android Custom ROM fix ® provide various Firmware Updates and Rooting process along with Custom ROM,Modes,file are all belong to their owners/developers. The autor of this site or the developers are not responsible, if you damage or brick your device.Do it on your own risk and follow the instruction properly.
* Important:
Backup important files stored on your device before proceeding with the steps below, so that in case something goes wrong you’ll have backup of all your important files.

÷ How to Install CM13.0 Nightly Android 6.0.1 Marshmallow on Verizon LG G3 VS985 [ Latest Build]
Step 1 – Download CM13.0 Android 6.0.1 Marshmallow and Google Apps for your Verizon LG G3 VS985 to your computer.
Step 2 – Connect and mount your LG G3 VS985 USB memory on your computer using the USB cable.
Step 3 – Now copy/paste the downloaded Android 6.0.1 ROM zip file and Google Appszip files to your SD card. Make sure the files are in the SD card root (not in any folder).
Step 4 – Then turn OFF your phone and disconnect from the USB cable.
Step 5 – Now to get in the Recovery Mode. Switch ON the phone while pressing and holding Volume Up + Home + Power buttons together
Step 6 – Once you are in ClockworkModRecovery, select perform a full data wipe by selecting “wipe data/factory reset”. Use the Power button to select everything while in the Recovery Mode.
Step 7 – Then, perform a cache wipe by selecting “wipe cache partition” .
Step 8 – Now this is optional, but it is recommended to perform a wipe of your dalvik cache as well. You will not get into boot loops or any other errors. From CWM recovery, go to ‘advanced’ and then select “wipe dalvik cache”.
Step 9 – Then go back to the main recovery screen and select “install zip from SD card”.
Step 10 – Now select “choose zip from sdcard”. Using your volume keys, navigate to the Android 6.0.1 ROM zip file that you copied to your SD card and select it using the Power button. Confirm the installation on the next screen and the installation procedure should start now.
Google Apps: Repeat the above step for the Gapps zip file as well and install it on your phone.
Step 11 – After the installation completes, go to “+++++Go Back+++++” and reboot the phone by selecting “reboot system now” from the recovery menu.
Your Verizon LG G3 VS985 will boot now and it might take about 5 minutes to boot on your first time. So, please wait.

That’s it Your LG G3 VS985 should now have CM13.0 Nightly Android 6.0.1 Marshmallow latest build installed on your phone! Go to Settings > About phone to verify.
For More Verizon LG G3 VS985 Brand New Firmware & Custom ROM keep checking AndroidCustomROM Fix ™®
Like this post? PLZ Hit the share buttons below to share this article with your friends on Facebook, Google + and Twitter.
PLZ Follow Us On Flipboard 4 More latest custom ROM fix.
PLZ Use the comment box below to contribute more ideas & Suggestions .
Best Regards.
÷ Prerequisites:
•This tutorial is only for installing CyanogenMod 13 [CM13.0] Nightly ROM on Verizon LG G3 VS985.Please do not try on any other LG G3 variants.
•Your phone should be rooted and haveClockworkMod recovery installed from before.
•This tutorial will wipe out all your data.Proceed at your own risk.Perform a Dalvik Cache wipe before proceeding from the recovery mode.
Make sure you backup all your data in your phone before proceeding.
*Disclaimer:
Android Custom ROM fix ® provide various Firmware Updates and Rooting process along with Custom ROM,Modes,file are all belong to their owners/developers. The autor of this site or the developers are not responsible, if you damage or brick your device.Do it on your own risk and follow the instruction properly.
* Important:
Backup important files stored on your device before proceeding with the steps below, so that in case something goes wrong you’ll have backup of all your important files.
÷ How to Install CM13.0 Nightly Android 6.0.1 Marshmallow on Verizon LG G3 VS985 [ Latest Build]
Step 1 – Download CM13.0 Android 6.0.1 Marshmallow and Google Apps for your Verizon LG G3 VS985 to your computer.
Step 2 – Connect and mount your LG G3 VS985 USB memory on your computer using the USB cable.
Step 3 – Now copy/paste the downloaded Android 6.0.1 ROM zip file and Google Appszip files to your SD card. Make sure the files are in the SD card root (not in any folder).
Step 4 – Then turn OFF your phone and disconnect from the USB cable.
Step 5 – Now to get in the Recovery Mode. Switch ON the phone while pressing and holding Volume Up + Home + Power buttons together
Step 6 – Once you are in ClockworkModRecovery, select perform a full data wipe by selecting “wipe data/factory reset”. Use the Power button to select everything while in the Recovery Mode.
Step 7 – Then, perform a cache wipe by selecting “wipe cache partition” .
Step 8 – Now this is optional, but it is recommended to perform a wipe of your dalvik cache as well. You will not get into boot loops or any other errors. From CWM recovery, go to ‘advanced’ and then select “wipe dalvik cache”.
Step 9 – Then go back to the main recovery screen and select “install zip from SD card”.
Step 10 – Now select “choose zip from sdcard”. Using your volume keys, navigate to the Android 6.0.1 ROM zip file that you copied to your SD card and select it using the Power button. Confirm the installation on the next screen and the installation procedure should start now.
Google Apps: Repeat the above step for the Gapps zip file as well and install it on your phone.
Step 11 – After the installation completes, go to “+++++Go Back+++++” and reboot the phone by selecting “reboot system now” from the recovery menu.
Your Verizon LG G3 VS985 will boot now and it might take about 5 minutes to boot on your first time. So, please wait.
That’s it Your LG G3 VS985 should now have CM13.0 Nightly Android 6.0.1 Marshmallow latest build installed on your phone! Go to Settings > About phone to verify.
For More Verizon LG G3 VS985 Brand New Firmware & Custom ROM keep checking AndroidCustomROM Fix ™®
Like this post? PLZ Hit the share buttons below to share this article with your friends on Facebook, Google + and Twitter.
PLZ Follow Us On Flipboard 4 More latest custom ROM fix.
PLZ Use the comment box below to contribute more ideas & Suggestions .
Best Regards.
Subscribe to:
Posts (Atom)