Showing posts with label huawei. Show all posts
Showing posts with label huawei. Show all posts
Thursday, July 28, 2016
Download latest Android Lollipop 5 1 1 Stock Firmware for Huawei Honor 4A SCL TL00 smartphone

Download latest Android Lollipop 5.1.1 Stock Firmware for Huawei Honor 4A SCL-TL00 smartphone from here or here.
Firmware details
Archive: Huawei_4A(SCL-TL00)_2_5.1.1_E?_base_20151016
Archive size: 960 MB
Image: prog_emmc_firehose_8909_ddr-jm.mbn
Model: Huawei Honor 4A SCL-TL00 smartphone
Platform: Qualcomm Snapdragon 210 MSM8909
Platform: Qualcomm Snapdragon 210 MSM8909
Caution: Please do not update firmware unless you know what you are doing, you really want it or it is absolutely necessary. Firmware updates may occasionally have bad results, like bricking your device, temporarily or permanently. The firmware update process is done entirely at your own risk. Before attempting to update the firmware, back up your data.
Don’t miss any of our future video tutorials, follow us on Youtube. Like us on Facebook. Add us in your circles on Google+. Watch our photo albums on Flickr. Subscribe now to our newsletter.
Don’t miss any of our future video tutorials, follow us on Youtube. Like us on Facebook. Add us in your circles on Google+. Watch our photo albums on Flickr. Subscribe now to our newsletter.

Wednesday, July 27, 2016
How to Update Huawei Nexus 6P to Android N NPD35K Developer Preview 3 Factory Image
Android N Developer Preview Beta is now available for the Nexus 5X, Nexus 6P, Nexus 6, and Nexus 9 phones and tablets. These are the major changes in Developer Preview Beta release of Android N, as per Google:

The latest Android N Developer Preview Beta NPD35K is the next upcoming major firmware release by Google. It brings some new features like multi-window mode, an enhanced doze mode, a revamped Settings screen and a quick toggle in the notifications panel. Other changes include improved notifications, improved multitasking and app switching, dark mode etc.
Don’t worry we are going to share step by step guide to safely Update your Huawei Nexus 6P to Android N NPD35K Developer Preview 3 Factory Image
The latest Android N Developer Preview Beta NPD35K is the next upcoming major firmware release by Google. It brings some new features like multi-window mode, an enhanced doze mode, a revamped Settings screen and a quick toggle in the notifications panel. Other changes include improved notifications, improved multitasking and app switching, dark mode etc.
Don’t worry we are going to share step by step guide to safely Update your Huawei Nexus 6P to Android N NPD35K Developer Preview 3 Factory Image
View my Flipboard Magazine.
÷ Prerequisites:
•This tutorial is only for Huawei Nexus 6P and we are not sure if it will work on the other variants of the Nexus 6P on other carriers.
•Your phone can be on any previous Android version or even on a custom ROM. It doesn’t matter at all. This tutorial will still work for installing Android N Developer Preview Beta.
*Disclaimer:
Android Custom ROM fix ® provide various Firmware Updates and Rooting process along with Custom ROM,Modes,file are all belong to their owners/developers. The autor of this site or the developers are not responsible, if you damage or brick your device.Do it on your own risk and follow the instruction properly.
* Important:
Backup important files stored on your device before proceeding with the steps below, so that in case something goes wrong you’ll have backup of all your important files.

÷ How to Update Huawei Nexus 6P to Android N NPD35K Developer Preview 3 Factory Image
Step 1 – Download Android N Factory Image (angler-npc56p-preview-85ffc1b1.tgz) for Nexus 6P on your PC, if you haven’t already.
Step 2 – Connect your Nexus 6P to your computer using the USB cable.
Step 3 – Please make sure Fastboot is configured and properly installed on your computer.
Step 4 – Turn OFF your phone.
Step 5 – Get into the Fastboot/Bootloader Mode on your phone. Turn ON the phone while pressing and holding the Volume Up + Volume Down + Power buttons till you see the Fastboot menu and START on top.
Step 6 – Now extract the downloaded file anywhere in your computer. Go to the folder angler-NPD35K and then copy/paste all the files to your Fastboot directory.
Note: If you followed our tutorial on setting up Fastboot on your computer, there is a 99% chance your Fastboot directory will be the platform-tools folder in your Android SDK directory.
Step 7 – From the factory image files in your Fastboot directory, do the following depending which OS you are on:
•On Windows: Run the file “flash-all.bat”.
•On Mac: Run the file “flash-all.sh” using Terminal.
•On Linux: Run the file “flash-all.sh”.
Step 8 – That’s pretty much that you had to do for flashing the stock factory image on your Nexus 6P. Now wait and watch as the process is completed — or follow the on-screen instructions on your phone if in case you have to unlock the bootloader.
Step 9 – After the installation completes, the phone will boot now and it might take about 5 minutes to boot on your first time. So, please wait with patience!

That’s it! Your Nexus 6P should now have the official Android N NPD35K Developer Preview Beta software update installed on your phone using the stock factory image from Google! Go to Settings >About phone to verify.
For More Nexus 6P latest updates Keep Checking AndroidCustomROM Fix ™®
Like this post? PLZ Hit the share buttons below to share this article with your friends on Facebook, Google + and Twitter.
PLZ Follow Us On Flipboard 4 More Latest Updates.
PLZ Use the comment box below to contribute more ideas & Suggestions .
Best Regards.
÷ Prerequisites:
•This tutorial is only for Huawei Nexus 6P and we are not sure if it will work on the other variants of the Nexus 6P on other carriers.
•Your phone can be on any previous Android version or even on a custom ROM. It doesn’t matter at all. This tutorial will still work for installing Android N Developer Preview Beta.
*Disclaimer:
Android Custom ROM fix ® provide various Firmware Updates and Rooting process along with Custom ROM,Modes,file are all belong to their owners/developers. The autor of this site or the developers are not responsible, if you damage or brick your device.Do it on your own risk and follow the instruction properly.
* Important:
Backup important files stored on your device before proceeding with the steps below, so that in case something goes wrong you’ll have backup of all your important files.
÷ How to Update Huawei Nexus 6P to Android N NPD35K Developer Preview 3 Factory Image
Step 1 – Download Android N Factory Image (angler-npc56p-preview-85ffc1b1.tgz) for Nexus 6P on your PC, if you haven’t already.
Step 2 – Connect your Nexus 6P to your computer using the USB cable.
Step 3 – Please make sure Fastboot is configured and properly installed on your computer.
Step 4 – Turn OFF your phone.
Step 5 – Get into the Fastboot/Bootloader Mode on your phone. Turn ON the phone while pressing and holding the Volume Up + Volume Down + Power buttons till you see the Fastboot menu and START on top.
Step 6 – Now extract the downloaded file anywhere in your computer. Go to the folder angler-NPD35K and then copy/paste all the files to your Fastboot directory.
Note: If you followed our tutorial on setting up Fastboot on your computer, there is a 99% chance your Fastboot directory will be the platform-tools folder in your Android SDK directory.
Step 7 – From the factory image files in your Fastboot directory, do the following depending which OS you are on:
•On Windows: Run the file “flash-all.bat”.
•On Mac: Run the file “flash-all.sh” using Terminal.
•On Linux: Run the file “flash-all.sh”.
Step 8 – That’s pretty much that you had to do for flashing the stock factory image on your Nexus 6P. Now wait and watch as the process is completed — or follow the on-screen instructions on your phone if in case you have to unlock the bootloader.
Step 9 – After the installation completes, the phone will boot now and it might take about 5 minutes to boot on your first time. So, please wait with patience!
That’s it! Your Nexus 6P should now have the official Android N NPD35K Developer Preview Beta software update installed on your phone using the stock factory image from Google! Go to Settings >About phone to verify.
For More Nexus 6P latest updates Keep Checking AndroidCustomROM Fix ™®
Like this post? PLZ Hit the share buttons below to share this article with your friends on Facebook, Google + and Twitter.
PLZ Follow Us On Flipboard 4 More Latest Updates.
PLZ Use the comment box below to contribute more ideas & Suggestions .
Best Regards.
Tuesday, July 26, 2016
How to Install CM13 0 Nightly Android 6 0 1 Marshmallow on Huawei Honor 4 4x cherry Latest Build

CyanogenMod 13 [CM13.0] Nightly ROM latest build cm-13.0-20160531-NIGHTLY-cherry.zip is released for Huawei Honor 4/4x cherry.
CM13.0 will let Huawei Honor 4/4x users taste the sweetness of Marshmallow 6.0.1 such as the battery saving ‘doze’ functionality and new permissions model, alongside the CM features you’d expect.
Follow our guide below to download the Unofficial CM13 and install it yourself.
View my Flipboard Magazine.
÷ Prerequisites:
•This tutorial is only for installing CyanogenMod 13 [CM13.0] Nightly ROM on Huawei Honor 4/4x cherry Please do not try on any other Huawei Honor 4 variants.
•Your phone should be rooted and haveClockworkMod recovery installed from before.
•This tutorial will wipe out all your data.Proceed at your own risk.Perform a Dalvik Cache wipe before proceeding from the recovery mode.
Make sure you backup all your data in your phone before proceeding.
*Disclaimer:
Android Custom ROM fix ® provide various Firmware Updates and Rooting process along with Custom ROM,Modes,file are all belong to their owners/developers. The autor of this site or the developers are not responsible, if you damage or brick your device.Do it on your own risk and follow the instruction properly.
* Important:
Backup important files stored on your device before proceeding with the steps below, so that in case something goes wrong you’ll have backup of all your important files.

÷ How to Install CM13.0 Nightly Android 6.0.1 Marshmallow on Huawei Honor 4/4x cherry [ Latest Build]
Step 1 – Download CM13.0 Android 6.0.1 Marshmallow and Google Apps for your Huawei Honor 4/4x cherry to your computer.
Step 2 – Connect and mount your Honor 4/4x cherry USB memory on your computer using the USB cable.
Step 3 – Now copy/paste the downloaded Android 6.0.1 ROM zip file and Google Appszip files to your SD card. Make sure the files are in the SD card root (not in any folder).
Step 4 – Then turn OFF your phone and disconnect from the USB cable.
Step 5 – Now to get in the Recovery Mode. Switch ON the phone while pressing and holding Volume Up + Home + Power buttons together
Step 6 – Once you are in ClockworkModRecovery, select perform a full data wipe by selecting “wipe data/factory reset”. Use the Power button to select everything while in the Recovery Mode.
Step 7 – Then, perform a cache wipe by selecting “wipe cache partition” .
Step 8 – Now this is optional, but it is recommended to perform a wipe of your dalvik cache as well. You will not get into boot loops or any other errors. From CWM recovery, go to ‘advanced’ and then select “wipe dalvik cache”.
Step 9 – Then go back to the main recovery screen and select “install zip from SD card”.
Step 10 – Now select “choose zip from sdcard”. Using your volume keys, navigate to the Android 6.0.1 ROM zip file that you copied to your SD card and select it using the Power button. Confirm the installation on the next screen and the installation procedure should start now.
Google Apps: Repeat the above step for the Gapps zip file as well and install it on your phone.
Step 11 – After the installation completes, go to “+++++Go Back+++++” and reboot the phone by selecting “reboot system now” from the recovery menu.

Your Huawei Honor 4/4x will boot now and it might take about 5 minutes to boot on your first time. So, please wait.
That’s it Your Honor 4/4x should now have CM13.0 Nightly Android 6.0.1 Marshmallow latest build installed on your phone! Go to Settings > About phone to verify.
For More Huawei Honor 4/4x Brand New Firmware & Custom ROM keep checking AndroidCustomROM Fix ™®
Like this post? PLZ Hit the share buttons below to share this article with your friends on Facebook, Google + and Twitter.
PLZ Follow Us On Flipboard 4 More latest custom ROM fix.
PLZ Use the comment box below to contribute more ideas & Suggestions .
Best Regards.
÷ Prerequisites:
•This tutorial is only for installing CyanogenMod 13 [CM13.0] Nightly ROM on Huawei Honor 4/4x cherry Please do not try on any other Huawei Honor 4 variants.
•Your phone should be rooted and haveClockworkMod recovery installed from before.
•This tutorial will wipe out all your data.Proceed at your own risk.Perform a Dalvik Cache wipe before proceeding from the recovery mode.
Make sure you backup all your data in your phone before proceeding.
*Disclaimer:
Android Custom ROM fix ® provide various Firmware Updates and Rooting process along with Custom ROM,Modes,file are all belong to their owners/developers. The autor of this site or the developers are not responsible, if you damage or brick your device.Do it on your own risk and follow the instruction properly.
* Important:
Backup important files stored on your device before proceeding with the steps below, so that in case something goes wrong you’ll have backup of all your important files.
÷ How to Install CM13.0 Nightly Android 6.0.1 Marshmallow on Huawei Honor 4/4x cherry [ Latest Build]
Step 1 – Download CM13.0 Android 6.0.1 Marshmallow and Google Apps for your Huawei Honor 4/4x cherry to your computer.
Step 2 – Connect and mount your Honor 4/4x cherry USB memory on your computer using the USB cable.
Step 3 – Now copy/paste the downloaded Android 6.0.1 ROM zip file and Google Appszip files to your SD card. Make sure the files are in the SD card root (not in any folder).
Step 4 – Then turn OFF your phone and disconnect from the USB cable.
Step 5 – Now to get in the Recovery Mode. Switch ON the phone while pressing and holding Volume Up + Home + Power buttons together
Step 6 – Once you are in ClockworkModRecovery, select perform a full data wipe by selecting “wipe data/factory reset”. Use the Power button to select everything while in the Recovery Mode.
Step 7 – Then, perform a cache wipe by selecting “wipe cache partition” .
Step 8 – Now this is optional, but it is recommended to perform a wipe of your dalvik cache as well. You will not get into boot loops or any other errors. From CWM recovery, go to ‘advanced’ and then select “wipe dalvik cache”.
Step 9 – Then go back to the main recovery screen and select “install zip from SD card”.
Step 10 – Now select “choose zip from sdcard”. Using your volume keys, navigate to the Android 6.0.1 ROM zip file that you copied to your SD card and select it using the Power button. Confirm the installation on the next screen and the installation procedure should start now.
Google Apps: Repeat the above step for the Gapps zip file as well and install it on your phone.
Step 11 – After the installation completes, go to “+++++Go Back+++++” and reboot the phone by selecting “reboot system now” from the recovery menu.
Your Huawei Honor 4/4x will boot now and it might take about 5 minutes to boot on your first time. So, please wait.
That’s it Your Honor 4/4x should now have CM13.0 Nightly Android 6.0.1 Marshmallow latest build installed on your phone! Go to Settings > About phone to verify.
For More Huawei Honor 4/4x Brand New Firmware & Custom ROM keep checking AndroidCustomROM Fix ™®
Like this post? PLZ Hit the share buttons below to share this article with your friends on Facebook, Google + and Twitter.
PLZ Follow Us On Flipboard 4 More latest custom ROM fix.
PLZ Use the comment box below to contribute more ideas & Suggestions .
Best Regards.
Monday, July 25, 2016
How to Update Huawei G8 GX8 to Official B340 Marshmallow 6 0 1 Firmware Europe
Huawei G8 RIO-L01 Official B340 Android 6.0.1 Marshmallow Update Is rolling out now & available for Download.
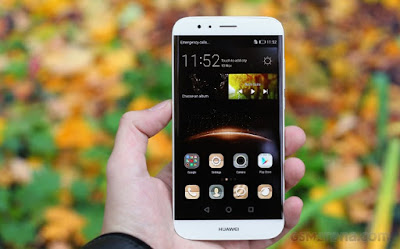
Follow our guide below to download the update and install it yourself.
View my Flipboard Magazine.
÷ Prerequisites:
The following firmware builds can be upgraded to this version of Marshmallow:
•RIO-L01C432B180
•RIO-L01C432B301
*Disclaimer:÷ Firmware Details:
- Device: Huawei G8 (Huawei GX8)
- Model: RIO-L01
- Android: v6.0.1 Marshmallow
- EMUI: 4.0
- Firmware: B340
- Build Number: RIO-L01C432B340
- Custom Number: CUSTC432D001
- Region: Europe
- Country: Lithuania
- Release Date: 17.05.2016
- Status: Official (stable)
- Type: Full firmware image
- File Name: Huawei_GX8_Firmware_RIO-L01_Android 6.0.1_EMUI 3.1_C432B340CUSTC432D001_Belgium_France_Germany_Italy_Portugal_Estonia_Latvia_Lithuania_Channel-Others.zip
÷ Prerequisites:
The following firmware builds can be upgraded to this version of Marshmallow:
•RIO-L01C432B180
•RIO-L01C432B301
Android Custom ROM fix ® provide various Firmware Updates and Rooting process along with Custom ROM,Modes,file are all belong to their owners/developers. The autor of this site or the developers are not responsible, if you damage or brick your device.Do it on your own risk and follow the instruction properly.
* Important:
Backup important files stored on your device before proceeding with the steps below, so that in case something goes wrong you’ll have backup of all your important files.

How to Update Manually Huawei G8 (GX8) to Official B340 Marshmallow 6.0.1 Firmware [Europe]
1 Download Huawei G8 (GX8) B340 Marshmallow Firmware [Europe] & Extract the Zip package.
2-You’ll get a dload folder containing Update.app.
3- Copy the dload folder to the external microSD card.
4- Open the dialler and enter *#*#2846579#*#*
In the Project Menu, go to Software upgrade > SD Card Upgrade and start the installation.

That’s it! Your Huawei G8 (GX8) should now have official Marshmallow 6.0.1 on your phone! Go to Settings > About phone to verify.
For More Huawei G8 Firmware Keep Checking Android Custom ROM Fix ™©
Like this post? PLZ Hit the share buttons below to share this article with your friends on Facebook, Google + and Twitter.
PLZ Follow Us On Flipboard 4 More Latest Updates.
PLZ Use the comment box below to contribute more ideas & Suggestions .
Best Regards.
How to Update Huawei Ascend G8 GX8 to CM13 Android 6 0 1 Marshmallow
According to XDA member surdu-petru , Android 6.0.1 Marshmallow CyanogenMod 13 [CM13] unofficial ROM is released for Huawei Ascend G8 [GX8]. CM13 will let GX8 users taste the sweetness of Marshmallow 6.0.1 on Huawei Ascend G8 [GX8]
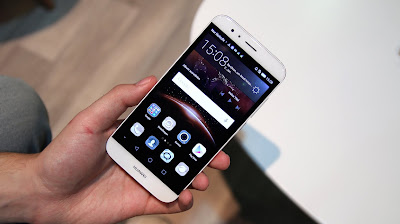
Follow our guide below to download the Unofficial CM13 and install it yourself.
Follow our guide below to download the Unofficial CM13 and install it yourself.
View my Flipboard Magazine.
÷ Prerequisites:
•This tutorial is only for installing Android 6.0.1 Marshmallow Unofficial CM13 ROM on Huawei Ascend G8 [GX8] Please do not try on any other Huawei Ascend variants.
•Your phone should be rooted and haveClockworkMod recovery installed from before.
•This tutorial will wipe out all your data.Proceed at your own risk.Perform a Dalvik Cache wipe before proceeding from the recovery mode.
Make sure you backup all your data in your phone before proceeding.
*Disclaimer:
Android Custom ROM fix ® provide various Firmware Updates and Rooting process along with Custom ROM,Modes,file are all belong to their owners/developers. The autor of this site or the developers are not responsible, if you damage or brick your device.Do it on your own risk and follow the instruction properly.
* Important:
Backup important files stored on your device before proceeding with the steps below, so that in case something goes wrong you’ll have backup of all your important files.

÷ How to Install CM13 Android 6.0.1 Marshmallow on Huawei Ascend G8 [GX8].
Step 1 – Download CM13 Android 6.0.1 Marshmallow and Google Apps for your Huawei Ascend G8 [GX8] to your computer.
Step 2 – Connect and mount your Huawei Ascend G8 [GX8] USB memory on your computer using the USB cable.
Step 3 – Now copy/paste the downloaded Android 6.0.1 ROM zip file and Google Appszip files to your SD card. Make sure the files are in the SD card root (not in any folder).
Step 4 – Then turn OFF your phone and disconnect from the USB cable.
Step 5 – Now to get in the Recovery Mode. Switch ON the phone while pressing and holding Volume Up + Home + Power buttons together
Step 6 – Once you are in ClockworkModRecovery, select perform a full data wipe by selecting “wipe data/factory reset”. Use the Power button to select everything while in the Recovery Mode.
Step 7 – Then, perform a cache wipe by selecting “wipe cache partition” .
Step 8 – Now this is optional, but it is recommended to perform a wipe of your dalvik cache as well. You will not get into boot loops or any other errors. From CWM recovery, go to ‘advanced’ and then select “wipe dalvik cache”.
Step 9 – Then go back to the main recovery screen and select “install zip from SD card”.
Step 10 – Now select “choose zip from sdcard”. Using your volume keys, navigate to the Android 6.0.1 ROM zip file that you copied to your SD card and select it using the Power button. Confirm the installation on the next screen and the installation procedure should start now.
Google Apps: Repeat the above step for the Gapps zip file as well and install it on your phone.
Step 11 – After the installation completes, go to “+++++Go Back+++++” and reboot the phone by selecting “reboot system now” from the recovery menu.

Your Huawei Ascend G8 [GX8] will boot now and it might take about 5 minutes to boot on your first time. So, please wait.
That’s it! Your Huawei Ascend G8 [GX8] should now have unofficial CM13 Android 6.0.1 Marshmallow installed on your phone! Go to Settings > About phone to verify.
Like this post? PLZ Hit the share buttons below to share this article with your friends on Facebook, Google + and Twitter.
PLZ Follow Us On Flipboard 4 More Huawei Ascend G8 [GX8] latest custom ROM fix.
PLZ Use the comment box below to contribute more ideas & Suggestions .
Best Regards.
÷ Prerequisites:
•This tutorial is only for installing Android 6.0.1 Marshmallow Unofficial CM13 ROM on Huawei Ascend G8 [GX8] Please do not try on any other Huawei Ascend variants.
•Your phone should be rooted and haveClockworkMod recovery installed from before.
•This tutorial will wipe out all your data.Proceed at your own risk.Perform a Dalvik Cache wipe before proceeding from the recovery mode.
Make sure you backup all your data in your phone before proceeding.
*Disclaimer:
Android Custom ROM fix ® provide various Firmware Updates and Rooting process along with Custom ROM,Modes,file are all belong to their owners/developers. The autor of this site or the developers are not responsible, if you damage or brick your device.Do it on your own risk and follow the instruction properly.
* Important:
Backup important files stored on your device before proceeding with the steps below, so that in case something goes wrong you’ll have backup of all your important files.
÷ How to Install CM13 Android 6.0.1 Marshmallow on Huawei Ascend G8 [GX8].
Step 1 – Download CM13 Android 6.0.1 Marshmallow and Google Apps for your Huawei Ascend G8 [GX8] to your computer.
Step 2 – Connect and mount your Huawei Ascend G8 [GX8] USB memory on your computer using the USB cable.
Step 3 – Now copy/paste the downloaded Android 6.0.1 ROM zip file and Google Appszip files to your SD card. Make sure the files are in the SD card root (not in any folder).
Step 4 – Then turn OFF your phone and disconnect from the USB cable.
Step 5 – Now to get in the Recovery Mode. Switch ON the phone while pressing and holding Volume Up + Home + Power buttons together
Step 6 – Once you are in ClockworkModRecovery, select perform a full data wipe by selecting “wipe data/factory reset”. Use the Power button to select everything while in the Recovery Mode.
Step 7 – Then, perform a cache wipe by selecting “wipe cache partition” .
Step 8 – Now this is optional, but it is recommended to perform a wipe of your dalvik cache as well. You will not get into boot loops or any other errors. From CWM recovery, go to ‘advanced’ and then select “wipe dalvik cache”.
Step 9 – Then go back to the main recovery screen and select “install zip from SD card”.
Step 10 – Now select “choose zip from sdcard”. Using your volume keys, navigate to the Android 6.0.1 ROM zip file that you copied to your SD card and select it using the Power button. Confirm the installation on the next screen and the installation procedure should start now.
Google Apps: Repeat the above step for the Gapps zip file as well and install it on your phone.
Step 11 – After the installation completes, go to “+++++Go Back+++++” and reboot the phone by selecting “reboot system now” from the recovery menu.
Your Huawei Ascend G8 [GX8] will boot now and it might take about 5 minutes to boot on your first time. So, please wait.
That’s it! Your Huawei Ascend G8 [GX8] should now have unofficial CM13 Android 6.0.1 Marshmallow installed on your phone! Go to Settings > About phone to verify.
Like this post? PLZ Hit the share buttons below to share this article with your friends on Facebook, Google + and Twitter.
PLZ Follow Us On Flipboard 4 More Huawei Ascend G8 [GX8] latest custom ROM fix.
PLZ Use the comment box below to contribute more ideas & Suggestions .
Best Regards.
Friday, July 22, 2016
How to Update Huawei Honor 4X Che2 L11 to Android 6 0 Marshmallow build B506 Europe
Huawei has officially Rolling out Android 6.0 Marshmallow build C432B506 Update for its Honor 4X (Che2-L11) smartphone in Europe. This update is available both via OTA and as a manual download.

Follow our guide below to download the update and install it yourself.
÷ Firmware Details:
- Device: Huawei Honor 4X
- Model: Che2-L11
- Android: v6.0 Marshmallow
- EMUI: 4.0
- Firmware: B506
- Build Number: Che2-L11C432B506a
- Custom Number: CUSTC432D001
- Region: Europe
- Release Date: 13.05.2016
- Status: Official (stable)
- Type: Full firmware image
- File Name: Che2-L11_Firmware_Android 6.0_EMUI 4.0_C432B506a_Finland_Poland_Estonia_Lithuania_Latvia_Channel-Others.zip
View my Flipboard Magazine.
÷ Prerequisites:
•This firmware will work on the Che2-L11 variant of Honor 4C with European (C432) branding.
*Disclaimer:
Android Custom ROM fix ® provide various Firmware Updates and Rooting process along with Custom ROM,Modes,file are all belong to their owners/developers. The autor of this site or the developers are not responsible, if you damage or brick your device.Do it on your own risk and follow the instruction properly.
* Important:
Backup important files stored on your device before proceeding with the steps below, so that in case something goes wrong you’ll have backup of all your important files.

÷ How to Update Huawei Honor 4X (Che2-L11) to Android 6.0 Marshmallow build B506 [ Europe]
1- Download Android 6.0 Marshmallow build C432B506 Extract the Zip package.
2- Copy the dload folder to the external microSD card.
3- Take a full backup of your data and export it to the external memory.
4- Turn your phone off.
5- Next, open the dialer and type *#*#2846579#*#*
6- In the menu go to Software upgrade > SD Card Upgrade and confirm the installation.

That’s it! Your Huawei Honor 4X (Che2-L11) should now have Marshmallow 6.0. on your phone! Go to Settings > About phone to verify.
Like this post? PLZ Hit the share buttons below to share this article with your friends on Facebook, Google + and Twitter.
PLZ Follow Us On Flipboard 4 More Huawei Honor 4X (Che2-L11) Latest Updates.
PLZ Use the comment box below to contribute more ideas & Suggestions .
Best Regards.
÷ Prerequisites:
•This firmware will work on the Che2-L11 variant of Honor 4C with European (C432) branding.
*Disclaimer:
Android Custom ROM fix ® provide various Firmware Updates and Rooting process along with Custom ROM,Modes,file are all belong to their owners/developers. The autor of this site or the developers are not responsible, if you damage or brick your device.Do it on your own risk and follow the instruction properly.
* Important:
Backup important files stored on your device before proceeding with the steps below, so that in case something goes wrong you’ll have backup of all your important files.
÷ How to Update Huawei Honor 4X (Che2-L11) to Android 6.0 Marshmallow build B506 [ Europe]
1- Download Android 6.0 Marshmallow build C432B506 Extract the Zip package.
2- Copy the dload folder to the external microSD card.
3- Take a full backup of your data and export it to the external memory.
4- Turn your phone off.
5- Next, open the dialer and type *#*#2846579#*#*
6- In the menu go to Software upgrade > SD Card Upgrade and confirm the installation.
That’s it! Your Huawei Honor 4X (Che2-L11) should now have Marshmallow 6.0. on your phone! Go to Settings > About phone to verify.
Like this post? PLZ Hit the share buttons below to share this article with your friends on Facebook, Google + and Twitter.
PLZ Follow Us On Flipboard 4 More Huawei Honor 4X (Che2-L11) Latest Updates.
PLZ Use the comment box below to contribute more ideas & Suggestions .
Best Regards.
How to Install CM13 0 Nightly Android 6 0 1 Marshmallow on Huawei Ascend Mate 2 Latest build

If you are looking to install a new custom ROM on your Huawei Ascend Mate 2 , you can find here the best Custom ROMs for you.
CyanogenMod 13 [CM13.0] Nightly ROM latest build cm-13.0-20160520-NIGHTLY-osprey.zip is released for Huawei Ascend Mate 2 (mt2).
CM13.0 will let Huawei Ascend Mate 2 users taste the sweetness of Marshmallow 6.0.1 such as the battery saving ‘doze’ functionality and new permissions model, alongside the CM features you’d expect.
Follow our guide below to download the Unofficial CM13 and install it yourself.
View my Flipboard Magazine.
÷ Prerequisites:
•This tutorial is only for installing CyanogenMod 13 [CM13.0] Nightly ROM on Huawei Ascend Mate 2 (mt2) Please do not try on any other Huawei Ascend Mate variants.
•Your phone should be rooted and haveClockworkMod recovery installed from before.
•This tutorial will wipe out all your data.Proceed at your own risk.Perform a Dalvik Cache wipe before proceeding from the recovery mode.
Make sure you backup all your data in your phone before proceeding.
*Disclaimer:
Android Custom ROM fix ® provide various Firmware Updates and Rooting process along with Custom ROM,Modes,file are all belong to their owners/developers. The autor of this site or the developers are not responsible, if you damage or brick your device.Do it on your own risk and follow the instruction properly.
* Important:
Backup important files stored on your device before proceeding with the steps below, so that in case something goes wrong you’ll have backup of all your important files.

÷ How to Install CM13.0 Nightly Android 6.0.1 Marshmallow on Huawei Ascend Mate 2 [ Latest build]
Step 1 – Download CM13.0 Android 6.0.1 Marshmallow and Google Apps for your Huawei Ascend Mate 2 to your computer.
Step 2 – Connect and mount your Huawei Ascend Mate 2 USB memory on your computer using the USB cable.
Step 3 – Now copy/paste the downloaded Android 6.0.1 ROM zip file and Google Appszip files to your SD card. Make sure the files are in the SD card root (not in any folder).
Step 4 – Then turn OFF your phone and disconnect from the USB cable.
Step 5 – Now to get in the Recovery Mode. Switch ON the phone while pressing and holding Volume Up + Home + Power buttons together
Step 6 – Once you are in ClockworkModRecovery, select perform a full data wipe by selecting “wipe data/factory reset”. Use the Power button to select everything while in the Recovery Mode.
Step 7 – Then, perform a cache wipe by selecting “wipe cache partition” .
Step 8 – Now this is optional, but it is recommended to perform a wipe of your dalvik cache as well. You will not get into boot loops or any other errors. From CWM recovery, go to ‘advanced’ and then select “wipe dalvik cache”.
Step 9 – Then go back to the main recovery screen and select “install zip from SD card”.
Step 10 – Now select “choose zip from sdcard”. Using your volume keys, navigate to the Android 6.0.1 ROM zip file that you copied to your SD card and select it using the Power button. Confirm the installation on the next screen and the installation procedure should start now.
Google Apps: Repeat the above step for the Gapps zip file as well and install it on your phone.
Step 11 – After the installation completes, go to “+++++Go Back+++++” and reboot the phone by selecting “reboot system now” from the recovery menu.
Your Huawei Ascend Mate 2 will boot now and it might take about 5 minutes to boot on your first time. So, please wait.

That’s it Your Huawei Ascend Mate 2 should now have CM13.0 Nightly Android 6.0.1 Marshmallow latest build installed on your phone! Go to Settings > About phone to verify.
For More Huawei Ascend Mate 2 Brand New Firmware & Custom ROM keep checking AndroidCustomROM Fix ™®
Like this post? PLZ Hit the share buttons below to share this article with your friends on Facebook, Google + and Twitter.
PLZ Follow Us On Flipboard 4 More Huawei Ascend Mate 2 latest custom ROM fix.
PLZ Use the comment box below to contribute more ideas & Suggestions .
Best Regards.
÷ Prerequisites:
•This tutorial is only for installing CyanogenMod 13 [CM13.0] Nightly ROM on Huawei Ascend Mate 2 (mt2) Please do not try on any other Huawei Ascend Mate variants.
•Your phone should be rooted and haveClockworkMod recovery installed from before.
•This tutorial will wipe out all your data.Proceed at your own risk.Perform a Dalvik Cache wipe before proceeding from the recovery mode.
Make sure you backup all your data in your phone before proceeding.
*Disclaimer:
Android Custom ROM fix ® provide various Firmware Updates and Rooting process along with Custom ROM,Modes,file are all belong to their owners/developers. The autor of this site or the developers are not responsible, if you damage or brick your device.Do it on your own risk and follow the instruction properly.
* Important:
Backup important files stored on your device before proceeding with the steps below, so that in case something goes wrong you’ll have backup of all your important files.
÷ How to Install CM13.0 Nightly Android 6.0.1 Marshmallow on Huawei Ascend Mate 2 [ Latest build]
Step 1 – Download CM13.0 Android 6.0.1 Marshmallow and Google Apps for your Huawei Ascend Mate 2 to your computer.
Step 2 – Connect and mount your Huawei Ascend Mate 2 USB memory on your computer using the USB cable.
Step 3 – Now copy/paste the downloaded Android 6.0.1 ROM zip file and Google Appszip files to your SD card. Make sure the files are in the SD card root (not in any folder).
Step 4 – Then turn OFF your phone and disconnect from the USB cable.
Step 5 – Now to get in the Recovery Mode. Switch ON the phone while pressing and holding Volume Up + Home + Power buttons together
Step 6 – Once you are in ClockworkModRecovery, select perform a full data wipe by selecting “wipe data/factory reset”. Use the Power button to select everything while in the Recovery Mode.
Step 7 – Then, perform a cache wipe by selecting “wipe cache partition” .
Step 8 – Now this is optional, but it is recommended to perform a wipe of your dalvik cache as well. You will not get into boot loops or any other errors. From CWM recovery, go to ‘advanced’ and then select “wipe dalvik cache”.
Step 9 – Then go back to the main recovery screen and select “install zip from SD card”.
Step 10 – Now select “choose zip from sdcard”. Using your volume keys, navigate to the Android 6.0.1 ROM zip file that you copied to your SD card and select it using the Power button. Confirm the installation on the next screen and the installation procedure should start now.
Google Apps: Repeat the above step for the Gapps zip file as well and install it on your phone.
Step 11 – After the installation completes, go to “+++++Go Back+++++” and reboot the phone by selecting “reboot system now” from the recovery menu.
Your Huawei Ascend Mate 2 will boot now and it might take about 5 minutes to boot on your first time. So, please wait.
That’s it Your Huawei Ascend Mate 2 should now have CM13.0 Nightly Android 6.0.1 Marshmallow latest build installed on your phone! Go to Settings > About phone to verify.
For More Huawei Ascend Mate 2 Brand New Firmware & Custom ROM keep checking AndroidCustomROM Fix ™®
Like this post? PLZ Hit the share buttons below to share this article with your friends on Facebook, Google + and Twitter.
PLZ Follow Us On Flipboard 4 More Huawei Ascend Mate 2 latest custom ROM fix.
PLZ Use the comment box below to contribute more ideas & Suggestions .
Best Regards.
Wednesday, July 20, 2016
How to Root Huawei Honor Holly
If you are here, you have definitely been looking for a way to root your Huawei Holly which is exactly what I discuss here.
I will keep this guide as brief, simple and understandable as possible. Just make sure you carefully follow the step by step guides given so that you may be able to root your Huawei Holly successfully.

How to Root Huawei Holly: Step by Step Guide
1. Download the root tools whose download link is given below.
Huawei Holly Root Tools Download Link
In the file, I have contained all the tools needed to root your Huawei Holly.
2. Extract the downloaded file into a folder on your PC.
3. Now, install the app and drivers contained in the folder in the following sequence. [ Important! ]
1. ADB Installer 1.4.2
2. Handset_WinDriver_1.00.00.31
3. DriverAutoInstaller_v1.1236.00
4. iRoot 1.7.9.10454
4. Connect your Huawei Holly via a compatible USB cable to the PC and choose to connect as USB Storage.
NOTE:
1. It is very important that you use a compatible USB CABLE. In my case, I used a factory-cable by Samsung before I could get it to work. You may use Huawei own cable or any other USB 3.0 cable.
2. Do not mount as storage else your SD Card will become inaccessible and the root operation will fail.
5. Enable USB Debugging on the device.
6. Open the iRoot app and let it detect your phone. Make sure you have an active internet connection on the PC, so that it can download the drivers and install it automatically.
7. After that, the iRoot will install 3 Chinese apps on your phone. Do not do anything with it, let it complete on its own.
8. All things being equal, you will see the green Root button appear on your PC. Click on it.
9. Make sure that your phone has enough battery charge to complete the rooting operation and that you have reliable power supply on your PC.
Any interruption after you click the Root button in iRoot can make your phone unusable. So take huge precautions during the process. (Youve been warned now)
10. This may last a few minutes depending on the speed of your Internet connection. The phone will restart as soon as the process is complete. The progress bar is also displayed on iRoot.
11. On successful operation, iRoot will display the success notification and by now, your Huawei Holly is rooted.

Congratulations! Your Huawei Holly has now been successfully rooted.
Extra Steps:
1. Although, iRoot has installed its own Root Manager, you may decide to install SuperSU or Super User from Play Store and replace iRoot root manager with it.
2. If you wish to uninstall the Apps installed on your Huawei Holly by iRoot, you may do so by installing Root Cleaner on your phone and use it to uninstall those apps.
3. Remember to update your SU Binaries when you install SuperSU or Super User to better help you manage the root privilege on the phone.
If this piece of info was useful to you, please share to help others.
Tuesday, July 19, 2016
How to Update Huawei P8 Lite ALE L02 to Final Stable Android 6 0 Marshmallow B530 Firmware Asia
Huawei P8 Lite (ALE-L02) final stable Android 6.0 Marshmallow B530 update now available in Asian Pacific countries.

Don’t worry we are going to share step by step guide to safely your Update Huawei P8 Lite (ALE-L02) to Final Stable Android 6.0 Marshmallow B530 Firmware.
Don’t worry we are going to share step by step guide to safely your Update Huawei P8 Lite (ALE-L02) to Final Stable Android 6.0 Marshmallow B530 Firmware.
View my Flipboard Magazine.
÷ Prerequisites:
•This Update can be installed on devices Running one of this build:
-ALE-L02C636B150
-ALE-L02C636B522
•Make sure you have the stock recovery on your device and the system .
*Disclaimer:
Android Custom ROM fix ® provide various Firmware Updates and Rooting process along with Custom ROM,Modes,file are all belong to their owners/developers. The autor of this site or the developers are not responsible, if you damage or brick your device.Do it on your own risk and follow the instruction properly.
* Important:
Backup important files stored on your device before proceeding with the steps below, so that in case something goes wrong you’ll have backup of all your important files.
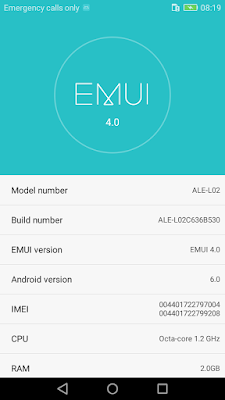
÷ How to Update Huawei P8 Lite (ALE-L02) to Final Stable Android 6.0 Marshmallow B530 Firmware [Asia ]
1- Download B530 Firmware & Unzip the downloaded firmware package.
2- Copy the extracted dload folder to the external microSD card.
3- Take a full backup using the native utility or HiSuite.
4- Turn your device off.
5- Reboot by holding Vol down + Vol up + Power for a couple of seconds to initiate the upgrade.

That’s it! Your Huawei P8 Lite (ALE-L02) should now have Marshmallow 6.0 on your phone! Go to Settings > About phone to verify.
Like this post? PLZ Hit the share buttons below to share this article with your friends on Facebook, Google + and Twitter.
PLZ Follow Us On Flipboard 4 More Huawei P8 Lite (ALE-L02) Latest Updates.
PLZ Use the comment box below to contribute more ideas & Suggestions .
Best Regards.
÷ Firmware Details:
- Device: Huawei P8 Lite
- Model: ALE-L02
- Android: v6.0 Marshmallow
- EMUI: 4.0
- Firmware: B530
- Build Number: ALE-L02C636B530
- Region: Asia Pacific
- Country: Thailand
- Release Date: 16.05.2016
- Status: Official
- Type: Full firmware image
- File name: P8 Lite_Firmware_ALE-L02_Andriod 6.0_EMUI 4.0_C636B530_Taiwan (Province of China)_Thailand.zip
÷ Prerequisites:
•This Update can be installed on devices Running one of this build:
-ALE-L02C636B150
-ALE-L02C636B522
•Make sure you have the stock recovery on your device and the system .
*Disclaimer:
Android Custom ROM fix ® provide various Firmware Updates and Rooting process along with Custom ROM,Modes,file are all belong to their owners/developers. The autor of this site or the developers are not responsible, if you damage or brick your device.Do it on your own risk and follow the instruction properly.
* Important:
Backup important files stored on your device before proceeding with the steps below, so that in case something goes wrong you’ll have backup of all your important files.
÷ How to Update Huawei P8 Lite (ALE-L02) to Final Stable Android 6.0 Marshmallow B530 Firmware [Asia ]
1- Download B530 Firmware & Unzip the downloaded firmware package.
2- Copy the extracted dload folder to the external microSD card.
3- Take a full backup using the native utility or HiSuite.
4- Turn your device off.
5- Reboot by holding Vol down + Vol up + Power for a couple of seconds to initiate the upgrade.
That’s it! Your Huawei P8 Lite (ALE-L02) should now have Marshmallow 6.0 on your phone! Go to Settings > About phone to verify.
Like this post? PLZ Hit the share buttons below to share this article with your friends on Facebook, Google + and Twitter.
PLZ Follow Us On Flipboard 4 More Huawei P8 Lite (ALE-L02) Latest Updates.
PLZ Use the comment box below to contribute more ideas & Suggestions .
Best Regards.
Monday, July 18, 2016
How to Root Huawei Nexus 6P on Android N Developer Preview 3 NPD35K
Android N Developer Preview Beta is now available for the Nexus 5X, Nexus 6P, Nexus 6, and Nexus 9 phones and tablets. These are the major changes in Developer Preview Beta release of Android N, as per Google.

The latest Android N Developer Preview Beta NPD35K is the next upcoming major firmware release by Google. It brings some new features like multi-window mode, an enhanced doze mode, a revamped Settings screen and a quick toggle in the notifications panel. Other changes include improved notifications, improved multitasking and app switching, dark mode etc...
Meanwhile, you can Root your Nexus 6P on latest Android N Developer Preview 3 NPD35K.
Don’t worry we are going to share step by step guide to safely Root your Nexus 6P on latest Android N Developer Preview 3 NPD35K Factory Image.
The latest Android N Developer Preview Beta NPD35K is the next upcoming major firmware release by Google. It brings some new features like multi-window mode, an enhanced doze mode, a revamped Settings screen and a quick toggle in the notifications panel. Other changes include improved notifications, improved multitasking and app switching, dark mode etc...
Meanwhile, you can Root your Nexus 6P on latest Android N Developer Preview 3 NPD35K.
Don’t worry we are going to share step by step guide to safely Root your Nexus 6P on latest Android N Developer Preview 3 NPD35K Factory Image.
View my Flipboard Magazine.
÷ Prerequisites:
•This root method is only for Android N (NPD35K) installed on Nexus 6P and I am not sure if it will work on the other variants of the Nexus 6P on other carriers.
•Your Nexus 6P bootloader should be unlocked.
Nexus 6P should be on Android N NPD35K software version.
•Make a Nandroid backup of your previous phone set up before proceeding – for just in case anything goes wrong.
*Disclaimer:
Android Custom ROM fix ® provide various Firmware Updates and Rooting process along with Custom ROM,Modes,file are all belong to their owners/developers. The autor of this site or the developers are not responsible, if you damage or brick your device.Do it on your own risk and follow the instruction properly.
* Important:
Backup important files stored on your device before proceeding with the steps below, so that in case something goes wrong you’ll have backup of all your important files.

÷ How to Root Huawei Nexus 6P on Android N Developer Preview 3 NPD35K :
Step 1 – Download Android SDK from the Android Developers website and install. Also set it up with downloading platform-tools and USB drivers package in SDK.
Step 2 – Enable USB Debugging mode in your Nexus 6P.
Step 3 – Download Fastboot from the following links depending on your OS and extract it in android-sdk-windowsplatform-tools directory. Create directory if not already there.
Windows: Download here!
Mac: Download here!
Linux: Download here!
NOTE: Skip Steps 1, 2, 3 if you already have them.
Step 4 – Download SuperSU v2.71 for Nexus 6P on your PC, if you haven’t already.
Step 5 – Connect and mount your Nexus 6P USB memory on your computer using the USB cable.
Step 6 – Now copy/paste the BETA-SuperSU-v2.71-20160331103524.zip file to your SD card. Make sure the file is in the SD card / internal storage root (not in any folder).
Step 7 – Then turn OFF your phone.
Step 8 – twrp-2.8.7.0-angler.img and save it to your android-sdk-windowsplatform-tools directory on your computer.
Step 9 – Now go into Fastboot/Bootloader Mode on Nexus 6P. How? Press Volume Down + Power keys for a few seconds till you see some text on the screen. This is Bootloader Mode.
Step 10 – Navigate to android-sdk-windowsplatform-tools directory and open Command Prompt (Shift + Right-click > Open Command Prompt).
Step 11 – Type in the following command and press Enter.
fastboot flash recovery twrp-2.8.7.0-angler.img
Step 12 – Once completed, choose RECOVERY from the Fastboot menu and enter Recovery Mode.
Step 13 – In ClockworkMod recovery, scroll down to “flash zip from SD card” and press the power button to select it.
Step 14 – Press the Power button again and select “choose zip from sdcard”.
Step 15 – Now using your volume keys, navigate to BETA-SuperSU-v2.71-20160331103524.zip and select it using the Power button. Confirm the installation on the next screen and the installation procedure should start now.
Step 16 – After the installation completes, go to “+++++Go Back” and reboot the phone by selecting “reboot system now” from the Recovery menu. The phone will boot now and it might take about 5 minutes to boot on your first time. So, please wait.

That’s it! Your Nexus 6P is now rooted on Android N Developer Preview 3 firmware on your phone! Check for the SuperSU app in your apps list to verify.
For More Nexus 6P Firmware, Custom ROM ect... Keep Checking Android Custom ROM Fix ™®
Like this post? PLZ Hit the share buttons below to share this article with your friends on Facebook, Google + and Twitter.
PLZ Follow Us On Flipboard 4 More Latest Updates.
PLZ Use the comment box below to contribute more ideas & Suggestions .
Best Regards.
÷ Prerequisites:
•This root method is only for Android N (NPD35K) installed on Nexus 6P and I am not sure if it will work on the other variants of the Nexus 6P on other carriers.
•Your Nexus 6P bootloader should be unlocked.
Nexus 6P should be on Android N NPD35K software version.
•Make a Nandroid backup of your previous phone set up before proceeding – for just in case anything goes wrong.
*Disclaimer:
Android Custom ROM fix ® provide various Firmware Updates and Rooting process along with Custom ROM,Modes,file are all belong to their owners/developers. The autor of this site or the developers are not responsible, if you damage or brick your device.Do it on your own risk and follow the instruction properly.
* Important:
Backup important files stored on your device before proceeding with the steps below, so that in case something goes wrong you’ll have backup of all your important files.
÷ How to Root Huawei Nexus 6P on Android N Developer Preview 3 NPD35K :
Step 1 – Download Android SDK from the Android Developers website and install. Also set it up with downloading platform-tools and USB drivers package in SDK.
Step 2 – Enable USB Debugging mode in your Nexus 6P.
Step 3 – Download Fastboot from the following links depending on your OS and extract it in android-sdk-windowsplatform-tools directory. Create directory if not already there.
Windows: Download here!
Mac: Download here!
Linux: Download here!
NOTE: Skip Steps 1, 2, 3 if you already have them.
Step 4 – Download SuperSU v2.71 for Nexus 6P on your PC, if you haven’t already.
Step 5 – Connect and mount your Nexus 6P USB memory on your computer using the USB cable.
Step 6 – Now copy/paste the BETA-SuperSU-v2.71-20160331103524.zip file to your SD card. Make sure the file is in the SD card / internal storage root (not in any folder).
Step 7 – Then turn OFF your phone.
Step 8 – twrp-2.8.7.0-angler.img and save it to your android-sdk-windowsplatform-tools directory on your computer.
Step 9 – Now go into Fastboot/Bootloader Mode on Nexus 6P. How? Press Volume Down + Power keys for a few seconds till you see some text on the screen. This is Bootloader Mode.
Step 10 – Navigate to android-sdk-windowsplatform-tools directory and open Command Prompt (Shift + Right-click > Open Command Prompt).
Step 11 – Type in the following command and press Enter.
fastboot flash recovery twrp-2.8.7.0-angler.img
Step 12 – Once completed, choose RECOVERY from the Fastboot menu and enter Recovery Mode.
Step 13 – In ClockworkMod recovery, scroll down to “flash zip from SD card” and press the power button to select it.
Step 14 – Press the Power button again and select “choose zip from sdcard”.
Step 15 – Now using your volume keys, navigate to BETA-SuperSU-v2.71-20160331103524.zip and select it using the Power button. Confirm the installation on the next screen and the installation procedure should start now.
Step 16 – After the installation completes, go to “+++++Go Back” and reboot the phone by selecting “reboot system now” from the Recovery menu. The phone will boot now and it might take about 5 minutes to boot on your first time. So, please wait.
That’s it! Your Nexus 6P is now rooted on Android N Developer Preview 3 firmware on your phone! Check for the SuperSU app in your apps list to verify.
For More Nexus 6P Firmware, Custom ROM ect... Keep Checking Android Custom ROM Fix ™®
Like this post? PLZ Hit the share buttons below to share this article with your friends on Facebook, Google + and Twitter.
PLZ Follow Us On Flipboard 4 More Latest Updates.
PLZ Use the comment box below to contribute more ideas & Suggestions .
Best Regards.
Sunday, July 17, 2016
How to Update Huawei Honor 4X Che2 L11 to Marshmallows 6 0 B510 Firmware
Huawei Honor 4X Che2-L11 Android 6.0 Marshmallow update (C636B510) is now finally available in Asian Pacific countries like Malaysia, Lao, Sri Lanka, Nepal and Bangladesh too.

Don’t worry we are going to share step by step guide to safely Update your Huawei Honor 4X Che2-L11 to Marshmallows 6.0 B510 Firmware.
View my Flipboard Magazine.
÷ Prerequisites:
•Your Honor 4X Che2-L11 should be on Che2-L11C636B330 (Lollipop) without any mods.
*Disclaimer:
Android Custom ROM fix ® provide various Firmware Updates and Rooting process along with Custom ROM,Modes,file are all belong to their owners/developers. The autor of this site or the developers are not responsible, if you damage or brick your device.Do it on your own risk and follow the instruction properly.
* Important:
Backup important files stored on your device before proceeding with the steps below, so that in case something goes wrong you’ll have backup of all your important files.

÷ How to Update Huawei Honor 4X Che2-L11 to Marshmallows 6.0 B510 Firmware :
1- Download B510 Firmware & Unzip the firmware package.
2-Copy the dload folder folder to the external microSD card.
3- Back up your important data using Huawei’s app.
4- Turn your phone off.
5- Reboot by holding Vol up + Vol down + Power for a few seconds to start the upgrade.

That’s it! Your Huawei Honor 4X Che2-L11should now have Marshmallow 6.0. B510 Firmware on your phone! Go to Settings > About phone to verify.
Like this post? PLZ Hit the share buttons below to share this article with your friends on Facebook, Google + and Twitter.
PLZ Follow Us On Flipboard 4 More Huawei Honor 4X Latest Updates.
PLZ Use the comment box below to contribute more ideas & Suggestions .
Best Regards.
÷ Firmware Details:
- Device: Huawei Honor 4X
- Model: Che2-L11
- Android: v5.1 Lollipop
- EMUI: 3.1
- Firmware: B330
- Build: Che2-L11C636B330
- Region: Asia Pacific
- Date: 25.10.2015
- Code: 05012WRS
- Status: Official Release
- Type: Full firmware image
- File Name: Che2-L11C636B330_Firmware_Myanmar_Hong Kong(China)_Bangladesh_Lao People’s Democratic Republic_Nepal_Viet Nam_Philippines_Channel-Others_Android 5.1_EMUI 3.1_05012WRS.zip
÷ Prerequisites:
•Your Honor 4X Che2-L11 should be on Che2-L11C636B330 (Lollipop) without any mods.
*Disclaimer:
Android Custom ROM fix ® provide various Firmware Updates and Rooting process along with Custom ROM,Modes,file are all belong to their owners/developers. The autor of this site or the developers are not responsible, if you damage or brick your device.Do it on your own risk and follow the instruction properly.
* Important:
Backup important files stored on your device before proceeding with the steps below, so that in case something goes wrong you’ll have backup of all your important files.
÷ How to Update Huawei Honor 4X Che2-L11 to Marshmallows 6.0 B510 Firmware :
1- Download B510 Firmware & Unzip the firmware package.
2-Copy the dload folder folder to the external microSD card.
3- Back up your important data using Huawei’s app.
4- Turn your phone off.
5- Reboot by holding Vol up + Vol down + Power for a few seconds to start the upgrade.
That’s it! Your Huawei Honor 4X Che2-L11should now have Marshmallow 6.0. B510 Firmware on your phone! Go to Settings > About phone to verify.
Like this post? PLZ Hit the share buttons below to share this article with your friends on Facebook, Google + and Twitter.
PLZ Follow Us On Flipboard 4 More Huawei Honor 4X Latest Updates.
PLZ Use the comment box below to contribute more ideas & Suggestions .
Best Regards.
Subscribe to:
Posts (Atom)