Showing posts with label fix. Show all posts
Showing posts with label fix. Show all posts
Thursday, July 28, 2016
Guide How to Flash Stock ROM on Android OPPO JOY 3 to Fix a Bootloop Stuck Removing Malware
[Guide] How to Flash Stock ROM on Android OPPO JOY 3 to Fix a Bootloop, Stuck, Removing Malware.
Flash Stock ROM on Android OPPO JOY 3. This guide will help you to Flash Stock ROM on Android OPPO JOY 3 Smartphone. By flashing your Android phone you can get something new on your phone, such as new experience to use latest update of Stock ROM, or new installed Stock ROM after your phone died or bootloop, and much more. Before we proceed to flash this Android OPPO JOY 3 Smartphone, let we know what is detail specification of this Android smartphone.OPPO JOY 3 was released On 2015, August. And OPPO JOY 3 is the smartphone that comes with 4,5 Inches IPS LCD capacitive touchscreen, 16M colors, Run on Android OS, v4.4 (KitKat) - ColorOS 2.0 UI as it Operating System and supported with Mediatek MT6582 Chipset, Quad-core 1.3 GHz Cortex-A7 CPU, GPU Mali-400MP2, combined with 1 GB of RAM as their engine. And you can enjoy exciting 5 MP on main camera, and 2 MP on secondary camera.
Now, we start to flash Stock ROM on Android OPPO JOY 3 Smartphone. Just follow this guide below carefully. take your own risk, a damage or broken phone by following this tutorial is not our responsibility.
Guide Flash Stock ROM OPPO JOY 3.
Before you flash OPPO JOY 3 you must read this instruction carefully, so. you can get best result at the end of your flash.
Preparation.
- Make sure you have enough battery capacity on your OPPO JOY 3. Its recomended you have at least 80% of battery capacity.
- Always backup your important file (contact, music, video, app) that stored on OPPO JOY 3,
- Prepare the Memory Card / SD Card which has a V-Gen Brand. For some reason OPPO JOY 3 does not recognized besides V-Gen Memory card.
- Then download OPPO JOY 3 Stock ROM.
- Oppo JOY 3
- Once download finish, now copy Stock ROM from computer to the phone memory or SD Card. but note that you copy this ROM at outside not to the public folder for easy finding. (if you download ROM Via PC)
- But, Stock ROM can be download directly from yourAndroid phone. And you must have a good and stable internet connection for it, such as Wi-Fi connection.
- Rom download directly from the Android phone located in the File Manager / phone / download.
http://assorted.downloads.oppo.com/firmware/A11w/A11wEX_11.A.06_OTA_INT_006_all_151022.zip
Flashing Stock ROM.
- To start flashing Stock ROM on OPPO JOY 3 you must enter Recovery Mode. how to do it ?
- Press and Hold Power Button + Volume Down.
- Then you will see menu like this picture. You can select English
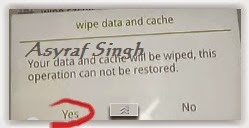
- Select Wipe data and cache by pressing the power button. for Up and down choice, use the volume keys Up / Down, on the next Popup screen select Wipe your data cache to make faster process.
- If appears confirmation you can select : "YES"
- Then you will bring to previous menu, and you can select Install form sd.
- Now you will see 2 options. From mobile phone storage & form SD,.
- Previously you have copy firmware file on SD Card, So. now you must select From SD. and now you can see your Firmware file name on this screen.(Stock rom name is similar as shown on the picture below)
- Select this file name using Power Button
- For Up or Down navigation you can use volume Up and Down Button.
- Then you will see a confirmation page, and you can select yes to proceed this flash on OPPO JOY 3
- Just wait the process finish updating system, and your OPPO JOY 3 will ask to you to reboot the device.
- Now you have finished flash Stock ROM on Android OPPO JOY 3 Smartphone.
 |
| Flash Bootloop OPPO JOY 3 |
 |
| Flash Bootloop OPPO JOY 3 |
 |
| Flash Bootloop OPPO JOY 3 |
 |
| Flash Bootloop OPPO JOY 3 |
 |
| Flash Bootloop OPPO JOY 3 |
 |
| Flash Bootloop OPPO JOY 3 |
 |
| Flash Bootloop OPPO JOY 3 |
 |
| Flash Bootloop OPPO JOY 3 |

Guide How to Flash Microsoft Lumia Devices To Upgrade or Fix Bootloop
[Guide] How to Flash Microsoft Lumia Devices To Upgrade or Fix Bootloop.
Flash Microsoft Lumia Devices. This guide will show you How to Flash Microsoft Lumia Devices To Upgrade or Fix Bootloop. You can follow this guide by read all instructions carefully, and we can not be responsible if a software damage occurs from the Microsoft Lumia device or the Nokia Lumia device by the utilization of my guide. Thanks for DilanChd from xda for this usefull tutorial.
What you need to start this guide ?
- A computer or laptop run on Microsoft Windows Operating System. You can run Windows 7 / Windows 8 / Windows 8.1 / Windows 10.
- Original USB cable to connect your Microsoft Lumia device to the computer or laptop.
- Always backup all data and file stored on your Microsoft Lumia device (recommended).
- A Microsoft Lumia device incorporating Microsoft Windows Phone 8, Microsoft Windows Phone 8.1 or Microsoft Windows 10 Mobile as operating system.
- At least 10 GB free space on computer disk.
- Download Windows device recovery tool software, this tool is called WindowsDeviceRecoveryTool3.3.31.exe.
How to install Windows Device Recovery Tool.
- Once WindowsDeviceRecoveryTool3.3.31.exe successfully downloaded, now you can excecute this file,
- Then you will see a new window appear on your screen.
- Now, From this window, click on the Install button.

installing device recovery tool - flash lumia - Then you will see User Account Control windows appears on computer screen. you can click Yes, and this window will closed

installing device recovery tool - flash lumia - Then the process will return to the installation of Windows Device Recovery Tool.
- Just wait for second for this installation process until finish. This process will download all necessery program for your

installing device recovery tool - flash lumia - Then click Next.
- Thick on I accept the terms in Liccense Agreement and click Next.
- Then click Install
- If youve finished the installation process, you should see this windows appear.

installing device recovery tool - flash lumia - Once this step being finished, now you can go to the next step.


Download 64 Bit Checker & Determine the OS Architecture.
- You can download 64Bit Checker Here.
- This tool used to check which OS architecture used by your computer or laptop
- Now, Execute the 64bitChecker1.5.0.exe file.
- Now, you will see the 64bit checker window appear on screen.

64 bit checker - From this window, we know what is the OS architecture we use. and this information will be useful later for the Installation package part.

Download Lumia Firmware.
- To download Microsoft Lumia Firmware you can go to this website.
- For further instruction how to download Lumia Firmware, you can visit this link.
How To Install Package ?.
- To install the package on Microsoft Lumia, you must connect your Microsoft Lumia device to the computer.
- Then open command prompt in administrator mode.
- Now, copy and paste this command below.
- For 32Bit Windows OS Architecture.
- cd "%ProgramFiles%Microsoft Care SuiteWindows Device Recovery Tool"
- For 64Bit Windows OS Architecture.
- cd "%ProgramFiles(x86)%Microsoft Care SuiteWindows Device Recovery Tool"
- Then, Copy and modify the
- thor2 -mode vpl -vplfile "%HomePath%DesktopPackagex.vpl" command, where x is the name of the VPL file previously downloaded.
- Once the modify is done, now copy and paste your modify command to the command prompt.
- Then press Enter button on computer keyboard.
- Now, the installation package is started, just wait until finished.
- Then, Copy and paste the thor2 -mode rnd -bootnormalmode command to the command prompt to reboot your Microsoft Lumia device normaly.
- Done,
Tuesday, July 26, 2016
How to Fix Galaxy S6 Deep Sleep Issue On Android 6 x x Marshmallow
Deep Sleep is a feature employed in the Android 6.0 Marshmallow. This feature is intended to maximize the power (battery) usage of the Android 6.0 Marshmallow however, if you have Samsung Galaxy S6 and S6 Edge thats rooted and running Android 6.0 Marshmallow, you are probably having issues with the Deep Sleep feature.
This Deep Sleep features issues eventually results in noticeable power (battery) drainage on the device.
If youre actually suffering from this, here is a good news for you; Chain Fire has noticed this and had taken it into consideration. This among other issues have given cause for the release of the later Chain Fire SuperSU release. This SuperSU release, version 2.66 fixes several bugs which include the correction of the Deep Sleep issues.
HOW TO FIX Galaxy S6 BATTERY DRAIN ISSUE BY INSTALLING SUPERSU ON IT
Although, the v2.66 version of SuperSU by Chain Fire is now downloadable on the Play Store, the Deep Sleep issue cannot be corrected by simply downloading and running this app from the Play Store. How then can you correct the battery drain of your Samsung Galaxy S6? You need to flash the complete update SU Script on your Samsung Galaxy S6 using any custom recovery but, preferably, TWRP Recovery.
HOW TO FLASH TWRP RECOVERY ON SAMSUNG Galaxy S6
1. Download TWRP recovery for S6 Marshmallow from here.
2. Download SuperSU v2.66 from here. Its compressed in a zip file. Don’t unzip it at all.
3. If you do not have it already, download Odin v3.10.7 from here.
4. Move the files to your PC. (1) Extract the TWRP Recovery file on your PC to get the .tar file format which is flashable using ODIN. (2) Do not touch the SuperSU. Just put that in the root of your SD Card on the phone.
5. Put your Samsung S6 in download mode.
7. Click BL and select the Extracted .tar TWRP Recovery file and then, click Start.
8. Wait for the operation to complete and then, boot the phone to recovery. Remember that you should now have TWRP recovery installed.
9. Select ‘Install’ and choose SuperSU v2.66 file and flash it and reboot the phone.
This Deep Sleep features issues eventually results in noticeable power (battery) drainage on the device.
If youre actually suffering from this, here is a good news for you; Chain Fire has noticed this and had taken it into consideration. This among other issues have given cause for the release of the later Chain Fire SuperSU release. This SuperSU release, version 2.66 fixes several bugs which include the correction of the Deep Sleep issues.
 |
| Galaxy S6 | |
HOW TO FIX Galaxy S6 BATTERY DRAIN ISSUE BY INSTALLING SUPERSU ON IT
Although, the v2.66 version of SuperSU by Chain Fire is now downloadable on the Play Store, the Deep Sleep issue cannot be corrected by simply downloading and running this app from the Play Store. How then can you correct the battery drain of your Samsung Galaxy S6? You need to flash the complete update SU Script on your Samsung Galaxy S6 using any custom recovery but, preferably, TWRP Recovery.
HOW TO FLASH TWRP RECOVERY ON SAMSUNG Galaxy S6
1. Download TWRP recovery for S6 Marshmallow from here.
2. Download SuperSU v2.66 from here. Its compressed in a zip file. Don’t unzip it at all.
3. If you do not have it already, download Odin v3.10.7 from here.
4. Move the files to your PC. (1) Extract the TWRP Recovery file on your PC to get the .tar file format which is flashable using ODIN. (2) Do not touch the SuperSU. Just put that in the root of your SD Card on the phone.
5. Put your Samsung S6 in download mode.
How to Put Samsung S6 Into Download Mode- Put off the phone.6. Connect your phone to the PC using USB Cable and then, Lunch ODIN.
- Press Volume Down + Home Button + Power Button together until a screen appears.
- Press the Volume Up once to confirmit. Pronto! Your SAMSUNG S6 is now in Download Mode.
7. Click BL and select the Extracted .tar TWRP Recovery file and then, click Start.
8. Wait for the operation to complete and then, boot the phone to recovery. Remember that you should now have TWRP recovery installed.
9. Select ‘Install’ and choose SuperSU v2.66 file and flash it and reboot the phone.
NOTE:You should boot the phone straight to recovery immediately after flashing the TWRP Recovery using ODIN otherwise, the Samsung Stock Recovery will overwrite the Custom Recovery and you will have to repeat the process again.Now your Marshmallow Samsung Galaxy S6 is rooted running on the latest version of SuperSU with deep sleep fix.
Monday, July 25, 2016
Guide How to Flash Stock ROM on Android OPPO N1 MINI to Fix a Bootloop
[Guide] How to Flash Stock ROM on Android OPPO N1 MINI to Fix a Bootloop.
Flash Stock ROM on Android OPPO N1 MINI. This guide will help you to Flash Stock ROM on Android OPPO N1 MINI Smartphone. By flashing your Android phone you can get something new on your phone, such as new experience to use latest update of Stock ROM, or new installed Stock ROM after your phone died or bootloop, and much more. Before we proceed to flash this Android OPPO N1 MINI Smartphone, let we know what is detail specification of this Android smartphone. OPPO N1 MINI was released On 2014, August. And OPPO N1 MINI is the smartphone that comes with 5.0 Inches IPS LCD capacitive touchscreen, 16M colors, Run on Android OS, v4.3 (Jelly Bean) - ColorOS 1,4 UI as it Operating System and supported with Qualcomm Snapdragon 400 Chipset, Quad-core 1.6 GHz Cortex-A7 CPU, GPU Adreno 305, combined with 2 GB of RAM as their engine. And you can enjoy exciting 13 MP on main camera, and 13 MP on secondary camera.
Now, we start to flash Stock ROM on Android OPPO N1 MINI Smartphone. Just follow this guide below carefully. take your own risk, a damage or broken phone by following this tutorial is not our responsibility.
Guide Flash Stock ROM OPPO N1 MINI.
Before you flash OPPO N1 MINI you must read this instruction carefully, so. you can get best result at the end of your flash.
Preparation.
- Make sure you have enough battery capacity on your OPPO N1 MINI. Its recomended you have at least 80% of battery capacity.
- Always backup your important file (contact, music, video, app) that stored on OPPO N1 MINI,
- Prepare the Memory Card / SD Card which has a V-Gen Brand. For some reason OPPO N1 MINI does not recognized besides V-Gen Memory card.
- Then download OPPO N1 MINI Stock ROM.
- Oppo N1 MINI
- Once download finish, now copy Stock ROM from computer to the phone memory or SD Card. but note that you copy this ROM at outside not to the public folder for easy finding. (if you download ROM Via PC)
- But, Stock ROM can be download directly from yourAndroid phone. And you must have a good and stable internet connection for it, such as Wi-Fi connection.
- Rom download directly from the Android phone located in the File Manager / phone / download.
http://assorted.downloads.oppo.com/firmware/N5116%26N5111/N1mini_11_A.11_INT_150322_OTA_011_all.zip
Flashing Stock ROM.
- To start flashing Stock ROM on OPPO N1 MINI you must enter Recovery Mode. how to do it ?
- Press and Hold Power Button + Volume Down.
- Then you will see menu like this picture. You can select English
- Select Wipe data and cache by pressing the power button. for Up and down choice, use the volume keys Up / Down, on the next Popup screen select Wipe your data cache to make faster process.
- If appears confirmation you can select : "YES"
- Then you will bring to previous menu, and you can select Install form sd.
- Now you will see 2 options. From mobile phone storage & form SD,.
- Previously you have copy firmware file on SD Card, So. now you must select From SD. and now you can see your Firmware file name on this screen.(Stock rom name is similar as shown on the picture below)
- Select this file name using Power Button
- For Up or Down navigation you can use volume Up and Down Button.
- Then you will see a confirmation page, and you can select yes to proceed this flash on OPPO N1 MINI
- Just wait the process finish updating system, and your OPPO N1 MINI will ask to you to reboot the device.
- Now you have finished flash Stock ROM on Android OPPO N1 MINI Smartphone.
|
| Flash Bootloop OPPO N1 MINI |
|
| Flash Bootloop OPPO N1 MINI |
|
| Flash Bootloop OPPO N1 MINI |
|
| Flash Bootloop OPPO N1 MINI |
|
| Flash Bootloop OPPO N1 MINI |
|
| Flash Bootloop OPPO N1 MINI |
|
| Flash Bootloop OPPO N1 MINI |
|
| Flash Bootloop OPPO N1 MINI |
Guide How to Flash Stock ROM on Android OPPO FIND 5 MINI R827 to Fix a Bootloop Removing Malware Stuck
[Guide] How to Flash Stock ROM on Android OPPO FIND 5 MINI R827 to Fix a Bootloop, Removing Malware, Stuck.
Flash Stock ROM on Android OPPO FIND 5 MINI R827. This guide will help you to Flash Stock ROM on Android OPPO FIND 5 MINI R827 Smartphone. By flashing your Android phone you can get something new on your phone, such as new experience to use latest update of Stock ROM, or new installed Stock ROM after your phone died or bootloop, and much more. Before we proceed to flash this Android OPPO FIND 5 MINI R827 Smartphone, let we know what is detail specification of this Android smartphone. OPPO FIND 5 MINI R827 was released On 2014, January. And OPPO FIND 5 MINI R827 is the smartphone that comes with 4,7 Inches IPS LCD capacitive touchscreen, 16M colors, Run on Android OS, v4.2.2 (Jelly Bean) - ColorOS UI as it Operating System and supported with Mediatek MT6582M Chipset, Quad-core 1.3 GHz Cortex-A7 CPU, GPU Mali-400MP2, combined with 1 GB of RAM as their engine. And you can enjoy exciting 8 MP on main camera, and 2 MP on secondary camera.
Now, we start to flash Stock ROM on Android OPPO FIND 5 MINI R827 Smartphone. Just follow this guide below carefully. take your own risk, a damage or broken phone by following this tutorial is not our responsibility.
Guide Flash Stock ROM OPPO FIND 5 MINI R827.
Before you flash OPPO FIND 5 MINI R827 you must read this instruction carefully, so. you can get best result at the end of your flash.
Preparation.
- Make sure you have enough battery capacity on your OPPO FIND 5 MINI R827. Its recomended you have at least 80% of battery capacity.
- Always backup your important file (contact, music, video, app) that stored on OPPO FIND 5 MINI R827,
- Prepare the Memory Card / SD Card which has a V-Gen Brand. For some reason OPPO FIND 5 MINI R827 does not recognized besides V-Gen Memory card.
- Then download OPPO FIND 5 MINI R827 Stock ROM.
- Oppo FIND 5 MINI R827
- Once download finish, now copy Stock ROM from computer to the phone memory or SD Card. but note that you copy this ROM at outside not to the public folder for easy finding. (if you download ROM Via PC)
- But, Stock ROM can be download directly from yourAndroid phone. And you must have a good and stable internet connection for it, such as Wi-Fi connection.
- Rom download directly from the Android phone located in the File Manager / phone / download.
http://assorted.downloads.oppo.com/firmware/R827/R827_11.A.15_OTA_INT_015_all_151111.zip
Flashing Stock ROM.
- To start flashing Stock ROM on OPPO FIND 5 MINI R827 you must enter Recovery Mode. how to do it ?
- Press and Hold Power Button + Volume Down.
- Then you will see menu like this picture. You can select English
- Select Wipe data and cache by pressing the power button. for Up and down choice, use the volume keys Up / Down, on the next Popup screen select Wipe your data cache to make faster process.
- If appears confirmation you can select : "YES"
- Then you will bring to previous menu, and you can select Install form sd.
- Now you will see 2 options. From mobile phone storage & form SD,.
- Previously you have copy firmware file on SD Card, So. now you must select From SD. and now you can see your Firmware file name on this screen.(Stock rom name is similar as shown on the picture below)
- Select this file name using Power Button
- For Up or Down navigation you can use volume Up and Down Button.
- Then you will see a confirmation page, and you can select yes to proceed this flash on OPPO FIND 5 MINI R827
- Just wait the process finish updating system, and your OPPO FIND 5 MINI R827 will ask to you to reboot the device.
- Now you have finished flash Stock ROM on Android OPPO FIND 5 MINI R827 Smartphone.
|
| Flash Bootloop OPPO FIND 5 MINI R827 |
|
| Flash Bootloop OPPO FIND 5 MINI R827 |
|
| Flash Bootloop OPPO FIND 5 MINI R827 |
|
| Flash Bootloop OPPO FIND 5 MINI R827 |
|
| Flash Bootloop OPPO FIND 5 MINI R827 |
|
| Flash Bootloop OPPO FIND 5 MINI R827 |
|
| Flash Bootloop OPPO FIND 5 MINI R827 |
|
| Flash Bootloop OPPO FIND 5 MINI R827 |
Sunday, July 24, 2016
Guide How to Flash Stock ROM on Android OPPO N1 to Fix a Bootloop
[Guide] How to Flash Stock ROM on Android OPPO N1 to Fix a Bootloop.
Flash Stock ROM on Android OPPO N1. This guide will help you to Flash Stock ROM on Android OPPO N1 Smartphone. By flashing your Android phone you can get something new on your phone, such as new experience to use latest update of Stock ROM, or new installed Stock ROM after your phone died or bootloop, and much more. Before we proceed to flash this Android OPPO N1 Smartphone, let we know what is detail specification of this Android smartphone.OPPO N1 was released On 2013, October. And OPPO N1 is the smartphone that comes with 5.9 Inches IPS LCD capacitive touchscreen, 16M colors, Run on Android OS, v4.2 (Jelly Bean) - ColorOS UI as it Operating System and supported with Qualcomm Snapdragon 600 Chipset, Quad-core 1.7 GHz Krait 300 CPU, GPU Adreno 320, combined with 2 GB of RAM as their engine. And you can enjoy exciting 13 MP on main camera, and 13 MP on secondary camera.
Now, we start to flash Stock ROM on Android OPPO N1 Smartphone. Just follow this guide below carefully. take your own risk, a damage or broken phone by following this tutorial is not our responsibility.
Guide Flash Stock ROM OPPO N1.
Before you flash OPPO N1 you must read this instruction carefully, so. you can get best result at the end of your flash.
Preparation.
- Make sure you have enough battery capacity on your OPPO N1. Its recomended you have at least 80% of battery capacity.
- Always backup your important file (contact, music, video, app) that stored on OPPO N1,
- Prepare the Memory Card / SD Card which has a V-Gen Brand. For some reason OPPO N1 does not recognized besides V-Gen Memory card.
- Then download OPPO N1 Stock ROM.
- Oppo N1
- Once download finish, now copy Stock ROM from computer to the phone memory or SD Card. but note that you copy this ROM at outside not to the public folder for easy finding. (if you download ROM Via PC)
- But, Stock ROM can be download directly from yourAndroid phone. And you must have a good and stable internet connection for it, such as Wi-Fi connection.
- Rom download directly from the Android phone located in the File Manager / phone / download.
http://assorted.downloads.oppo.com/firmware/N1/N1_12.A.13_OTA_INT_013_all_svn5986.zip
Flashing Stock ROM.
- To start flashing Stock ROM on OPPO N1 you must enter Recovery Mode. how to do it ?
- Press and Hold Power Button + Volume Down.
- Then you will see menu like this picture. You can select English
- Select Wipe data and cache by pressing the power button. for Up and down choice, use the volume keys Up / Down, on the next Popup screen select Wipe your data cache to make faster process.
- If appears confirmation you can select : "YES"
- Then you will bring to previous menu, and you can select Install form sd.
- Now you will see 2 options. From mobile phone storage & form SD,.
- Previously you have copy firmware file on SD Card, So. now you must select From SD. and now you can see your Firmware file name on this screen.(Stock rom name is similar as shown on the picture below)
- Select this file name using Power Button
- For Up or Down navigation you can use volume Up and Down Button.
- Then you will see a confirmation page, and you can select yes to proceed this flash on OPPO N1
- Just wait the process finish updating system, and your OPPO N1 will ask to you to reboot the device.
- Now you have finished flash Stock ROM on Android OPPO N1 Smartphone.
|
| Flash Bootloop OPPO N1 |
|
| Flash Bootloop OPPO N1 |
|
| Flash Bootloop OPPO N1 |
|
| Flash Bootloop OPPO N1 |
|
| Flash Bootloop OPPO N1 |
|
| Flash Bootloop OPPO N1 |
|
| Flash Bootloop OPPO N1 |
|
| Flash Bootloop OPPO N1 |
Saturday, July 23, 2016
Guide How to Flash Stock ROM on Android OPPO R2001 YOYO to Fix a Bootloop Removing Malware Stuck
[Guide] How to Flash Stock ROM on Android OPPO R2001 YOYO to Fix a Bootloop, Removing Malware, Stuck.
Flash Stock ROM on Android OPPO R2001 YOYO. This guide will help you to Flash Stock ROM on Android OPPO R2001 YOYO Smartphone. By flashing your Android phone you can get something new on your phone, such as new experience to use latest update of Stock ROM, or new installed Stock ROM after your phone died or bootloop, and much more. Before we proceed to flash this Android OPPO R2001 YOYO Smartphone, let we know what is detail specification of this Android smartphone.OPPO R2001 YOYO was released On 2014, May. And OPPO R2001 YOYO is the smartphone that comes with 4,7 Inches IPS LCD capacitive touchscreen, 16M colors, Run on Android OS, v4.2.1 (Jelly Bean) - ColorOSUI as it Operating System and supported with Mediatek MT6582M Chipset, Quad-core 1.3 GHz Cortex-A7 CPU, GPU Mali-400MP2, combined with 1 GB of RAM as their engine. And you can enjoy exciting 5 MP on main camera, and 2 MP on secondary camera.
Now, we start to flash Stock ROM on Android OPPO R2001 YOYO Smartphone. Just follow this guide below carefully. take your own risk, a damage or broken phone by following this tutorial is not our responsibility.
Guide Flash Stock ROM OPPO R2001 YOYO.
Before you flash OPPO R2001 YOYO you must read this instruction carefully, so. you can get best result at the end of your flash.
Preparation.
- Make sure you have enough battery capacity on your OPPO R2001 YOYO. Its recomended you have at least 80% of battery capacity.
- Always backup your important file (contact, music, video, app) that stored on OPPO R2001 YOYO,
- Prepare the Memory Card / SD Card which has a V-Gen Brand. For some reason OPPO R2001 YOYO does not recognized besides V-Gen Memory card.
- Then download OPPO R2001 YOYO Stock ROM.
- Oppo R2001 YOYO
- Once download finish, now copy Stock ROM from computer to the phone memory or SD Card. but note that you copy this ROM at outside not to the public folder for easy finding. (if you download ROM Via PC)
- But, Stock ROM can be download directly from yourAndroid phone. And you must have a good and stable internet connection for it, such as Wi-Fi connection.
- Rom download directly from the Android phone located in the File Manager / phone / download.
http://assorted.downloads.oppo.com/firmware/R2001/R2001_11.A.14_OTA_INT_014_all_151016.zip
Flashing Stock ROM.
- To start flashing Stock ROM on OPPO R2001 YOYO you must enter Recovery Mode. how to do it ?
- Press and Hold Power Button + Volume Down.
- Then you will see menu like this picture. You can select English
- Select Wipe data and cache by pressing the power button. for Up and down choice, use the volume keys Up / Down, on the next Popup screen select Wipe your data cache to make faster process.
- If appears confirmation you can select : "YES"
- Then you will bring to previous menu, and you can select Install form sd.
- Now you will see 2 options. From mobile phone storage & form SD,.
- Previously you have copy firmware file on SD Card, So. now you must select From SD. and now you can see your Firmware file name on this screen.(Stock rom name is similar as shown on the picture below)
- Select this file name using Power Button
- For Up or Down navigation you can use volume Up and Down Button.
- Then you will see a confirmation page, and you can select yes to proceed this flash on OPPO R2001 YOYO
- Just wait the process finish updating system, and your OPPO R2001 YOYO will ask to you to reboot the device.
- Now you have finished flash Stock ROM on Android OPPO R2001 YOYO Smartphone.
|
| Flash Bootloop OPPO R2001 YOYO |
|
| Flash Bootloop OPPO R2001 YOYO |
|
| Flash Bootloop OPPO R2001 YOYO |
|
| Flash Bootloop OPPO R2001 YOYO |
|
| Flash Bootloop OPPO R2001 YOYO |
|
| Flash Bootloop OPPO R2001 YOYO |
|
| Flash Bootloop OPPO R2001 YOYO |
|
| Flash Bootloop OPPO R2001 YOYO |
How to Fix Bad iOS 9 Battery Life
A phone with very bad battery life can be frustrating to the user because he/she wont be able to enjoy it fro long before it drains. Apple’s iOS 9 update continues to cause battery life problems for many iPhone, iPad and iPod touch users. With those problems in mind, we show you how to fix bad iOS 9 battery life on iOS 9.0, iOS 9.1, iOS 9.2, and iOS 9.2.1.
The iOS 9 update is here and it delivers some big time improvements to all devices capable of running iOS 8.
That list includes devices like the iPhone 6 and iPhone 5s but also the iPhone 4s, the iPad 2, and the original iPad mini.

Apple’s iOS 9 update brings a ton of new features and fixes to the table but according to early adopters, it also brings some problems. Battery life issues also appear to be affecting those that have downloaded Apple’s iOS 9.2 update and its new iOS 9.2.1 update. This isn’t surprising.
Abnormal battery drain is a common iOS problem and it always seems to show up, en masse, right after an iOS release.
iOS updates aren’t supposed to have a negative effect on overall battery life on the iPhone, iPad and iPod touch. And with Apple touting an iOS 9 battery life boost, I am not surprised to see people expressing their frustration.
How to Fix Bad iOS 9 Battery Life
I want to help you solve your bad iOS 9 battery life issues.
This guide delivers help to get better battery life on all versions of the iPhone, iPad and iPod touch capable of running iOS 9, iOS 9.0.1, iOS 9.0.2, iOS 9.1, iOS 9.2, and the iOS 9.2.1 update.
You should keep some of these tips and fixes stored in your memory bank. Battery life problems can strike your device at any time so you’ll always want to be prepared.
Look Into Your Apps
If you’re noticing strange battery drain on your iPhone, iPad or iPod touch, the first thing you’ll want to do is take a long hard look at your applications. While you might want to blame Apple for your problems, there’s a good chance that it’s a third-party application hogging your resources.
To start digging into your app performance, you’ll want to go into Settings > Battery and get familiar with the Battery Usage tool and the changes that Apple’s made in iOS 9. The tool will show you which apps are eating up the most battery but it will now show you when they’re eating up the most battery.
The tool will show you what apps have been using the most power over a 24 hour span and it also shows you what’s been eating your phone or tablets battery life over a longer span of time. If you tap on the little clock there, you’ll also be able to pull up a breakdown that shows you exactly when they’re eating up the most battery.

Some apps will drain battery the most when the screen is on and some might zap your power when the screen is off.
If you see something odd, you’ll want to first try updating the application (assuming it has good reviews). Developers have been rolling out iOS 9 support updates in recent days and there’s a good chance your apps have updates.
If that doesn’t help, try reinstalling it or uninstalling it completely to see if your overall iPhone or iPad battery life improves some.
Start Using Low Power Mode
iOS 9 comes with a brand new feature that will help you conserve iPhone battery life when you need it most.

The new Low Power Mode in iOS 9 allows users to stretch out the last 10-20% of battery life significantly longer without flipping a bunch of switches manually.
Simply go to Settings > Battery > Low Power Mode > On and the iPhone will limit many items you used to need to control manually. This can add several hours of actual use to your iPhone.
Turn On Airplane Mode
If you’re noticing battery drain, it might be because you’re in an area with spotty cellular service. If you are, your device will work extra hard to try and find a signal and that could cause your battery life to start draining rapidly.
To combat this, flip your device into Low Power Mode or Airplane Mode. Airplane Mode can be found at the top of Settings and it will kill all of your connections. If you’ve flown any time in the past five years, you’ve probably used it.
With Airplane Mode turned on, your phone won’t be searching for a better signal or any nearby connections. Just make sure to flip it off when you’re back in an area with better service.
Disable iCloud Keychain
This is a potential fix that’s been passed down over the years and there’s a chance it might work for you after installing iOS 9.
Try disabling iCloud Keychain if you don’t use it. iPhone and iPad users have reported a bump to battery life after turning it off and there’s a chance you could see some improvements.
To disable iCloud Keychain on your device, you’ll need to go into Settings > iCloud > Keychain > Toggle iCloud Keychain off. You can always flip the feature back on if you determine that there’s no connection between it and the battery drain on your device.
Limit Background App Refresh
If you don’t need your apps to automatically refresh in the background, you might want to try disabling the Background App Refresh feature that comes standard with iOS.
Background app refresh is handy is you want your applications to show the latest data whenever you open them but in our experience its proven to be a resource hog. If you have it on, apps will work in the background and that can be a catalyst for bad battery life.

Go to Settings > General > Background App Refresh > Turn it off for each app that is using too much power. It’s a tedious process but it could help.
You can also turn the feature off completely if you don’t want to go through your list of applications one by one.
Manage Your Display
Get a handle on your display.
Apple’s iPhone, iPad and iPod touch use an array of sensors and one of those sensors adjusts the screen automatically in certain lighting environments. Sometimes the sensor works to perfection. Sometimes it doesn’t.
If you’re noticing strange iOS 9 battery drain, try shutting auto brightness off. To make this happen, go into Settings > Display & Brightness > Auto-Brightness > Off. Once it’s shut off, you’ll have to adjust the screen brightness manually.
iOS 9’s Control Center offers quick access to an auto brightness toggle. To pull it up, swipe up from the bottom of your screen.
Restart Your iPhone or iPad
You should also try restarting your iPhone, iPad or iPod touch.
If you don’t know how to do this, hold down the power button for a few seconds and swipe to shut the device down. Hold down the power button again to boot the device back up.
If that doesn’t help, you can also try a hard reset. To do that, hold down the home button and the power button for about 10 seconds. The device will restart it self. As a reminder, this will not remove any of your data.
Reset All Settings
The above fixes include changes to your habits and some smaller tweaks. The fixes listed below are more drastic measures.

The first step to take is a reset on all of your device’s settings. To do this, go to Settings > General > Reset > Reset All Settings and then enter your passcode when the prompt appears.
The reset process could take five minutes or so and once it’s done, it will restore your settings to their factory defaults. Make sure you have Wi-Fi passwords handy because your phone or tablet will forget them. And as a reminder, this will not delete any of your files.
Downgrade to iOS 9.0.1
For a limited time, you can drop back down to iOS 9.0.2. To do that, take a look at our guide to downgrading.
This loophole won’t stay open forever so you’ll want to make your move sooner rather than later. Apple typically signs off on older updates for one to two weeks before pulling the cord.
Restore the iOS 9 Update
If none of this works, you can try a restore on your iPhone or iPad. This should only be used as a last resort because it erases everything on your device and could take awhile to complete depending on how many files you have on your device.
You can try restoring from your backup after the iOS 9 update. If your iOS 9 battery life issues return after the restore, you will want to try this method again without restoring from the backup. Here’s how to do this on an iPhone, iPad or iPod touch:
- Plug in and backup to the computer or to iCloud.
- Turn off Find My iPhone – Settings -> iCloud -> Find my iPhone -> Off.
- In iTunes Click Restore.
- Follow the prompts and the iPhone will reinstall iOS 9 from scratch.
- When it completes click Restore from Backup to put your information back on the iPhone or Choose to set up as a new iPhone.
This could take anywhere from 20 minutes to an hour to complete so make sure you set aside some time to do it in a quiet place without any distractions.
Take Your Device In
If nothing here works, it’s time to take your iPhone or iPad into an Apple Store to have a Genius run some diagnostics.
You could have a bloated battery, you could have something else. If your device is still under warranty, they might even offer you a replacement.
I Hope this works fine for you... Sharing is caring, do share these tips with your friends.
NEED FURTHER ASSISTANCE? Whatsapp:+2348106847913.
Subscribe to:
Posts (Atom)