Showing posts with label 3. Show all posts
Showing posts with label 3. Show all posts
Friday, July 29, 2016
Baixar Stock Rom Original de Fabrica para Galaxy Note 3 LTE SM N9005 Android 4 4 2 Kitkat

Download Stock Rom / Firmware para Galaxy Note 3 LTE SM-N9005
Data da Atualização...........................Setembro de 2014
Modelo................................................SM-N9005
Região................................................Brasil
Idioma.................................................Multi Linguagem
Versão do Android..............................4.4.2 kit kat
Procedimento de Instalação...............Flash Pelo Odin
Tamanho........................................... 1.37
Downloads
Mega
Google Drive
Créditos
SamMobile
Atenção
Nós do Stock Rom não nos responsabilizamos por quaisquer danos causados nos dispositivos.
A responsabilidade é inteiramente do usuário.
Para mais informações, leia os Termos do site AQUI.
Termos de Busca
Baixar firmware oficial para Galaxy Note 3 LTE SM-N9005 Como atualizar Galaxy Note 3 LTE SM-N9005
Rom original e oficial para Galaxy Note 3 LTE SM-N9005 Rom Brasileira para Galaxy Note 3 LTE SM-N9005
Download Rom Stock para Galaxy Note 3 LTE SM-N9005 limpa, sem vinculo ou logo de operadora.
Possibilidade de reviver ou ressuscitar seu . Possibilidade de resolver loop ou boot infinito do Galaxy Note 3 LTE SM-N9005
liga e só fica na tela ou logo da Galaxy Note 3 LTE SM-N9005só fica na tela de apresentação ou tela de inicio.
Pode flashear essa rom do Galaxy Note 3 LTE SM-N9005 para resolver esses problemas
Thursday, July 28, 2016
Guide How to Flash Stock ROM on Android OPPO JOY 3 to Fix a Bootloop Stuck Removing Malware
[Guide] How to Flash Stock ROM on Android OPPO JOY 3 to Fix a Bootloop, Stuck, Removing Malware.
Flash Stock ROM on Android OPPO JOY 3. This guide will help you to Flash Stock ROM on Android OPPO JOY 3 Smartphone. By flashing your Android phone you can get something new on your phone, such as new experience to use latest update of Stock ROM, or new installed Stock ROM after your phone died or bootloop, and much more. Before we proceed to flash this Android OPPO JOY 3 Smartphone, let we know what is detail specification of this Android smartphone.OPPO JOY 3 was released On 2015, August. And OPPO JOY 3 is the smartphone that comes with 4,5 Inches IPS LCD capacitive touchscreen, 16M colors, Run on Android OS, v4.4 (KitKat) - ColorOS 2.0 UI as it Operating System and supported with Mediatek MT6582 Chipset, Quad-core 1.3 GHz Cortex-A7 CPU, GPU Mali-400MP2, combined with 1 GB of RAM as their engine. And you can enjoy exciting 5 MP on main camera, and 2 MP on secondary camera.
Now, we start to flash Stock ROM on Android OPPO JOY 3 Smartphone. Just follow this guide below carefully. take your own risk, a damage or broken phone by following this tutorial is not our responsibility.
Guide Flash Stock ROM OPPO JOY 3.
Before you flash OPPO JOY 3 you must read this instruction carefully, so. you can get best result at the end of your flash.
Preparation.
- Make sure you have enough battery capacity on your OPPO JOY 3. Its recomended you have at least 80% of battery capacity.
- Always backup your important file (contact, music, video, app) that stored on OPPO JOY 3,
- Prepare the Memory Card / SD Card which has a V-Gen Brand. For some reason OPPO JOY 3 does not recognized besides V-Gen Memory card.
- Then download OPPO JOY 3 Stock ROM.
- Oppo JOY 3
- Once download finish, now copy Stock ROM from computer to the phone memory or SD Card. but note that you copy this ROM at outside not to the public folder for easy finding. (if you download ROM Via PC)
- But, Stock ROM can be download directly from yourAndroid phone. And you must have a good and stable internet connection for it, such as Wi-Fi connection.
- Rom download directly from the Android phone located in the File Manager / phone / download.
http://assorted.downloads.oppo.com/firmware/A11w/A11wEX_11.A.06_OTA_INT_006_all_151022.zip
Flashing Stock ROM.
- To start flashing Stock ROM on OPPO JOY 3 you must enter Recovery Mode. how to do it ?
- Press and Hold Power Button + Volume Down.
- Then you will see menu like this picture. You can select English
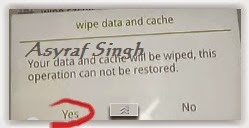
- Select Wipe data and cache by pressing the power button. for Up and down choice, use the volume keys Up / Down, on the next Popup screen select Wipe your data cache to make faster process.
- If appears confirmation you can select : "YES"
- Then you will bring to previous menu, and you can select Install form sd.
- Now you will see 2 options. From mobile phone storage & form SD,.
- Previously you have copy firmware file on SD Card, So. now you must select From SD. and now you can see your Firmware file name on this screen.(Stock rom name is similar as shown on the picture below)
- Select this file name using Power Button
- For Up or Down navigation you can use volume Up and Down Button.
- Then you will see a confirmation page, and you can select yes to proceed this flash on OPPO JOY 3
- Just wait the process finish updating system, and your OPPO JOY 3 will ask to you to reboot the device.
- Now you have finished flash Stock ROM on Android OPPO JOY 3 Smartphone.
 |
| Flash Bootloop OPPO JOY 3 |
 |
| Flash Bootloop OPPO JOY 3 |
 |
| Flash Bootloop OPPO JOY 3 |
 |
| Flash Bootloop OPPO JOY 3 |
 |
| Flash Bootloop OPPO JOY 3 |
 |
| Flash Bootloop OPPO JOY 3 |
 |
| Flash Bootloop OPPO JOY 3 |
 |
| Flash Bootloop OPPO JOY 3 |
China Tab A23 T736 MAINBOARD V2 3 Firmware Flash File 1000 Tested Without Password
A23-T736-MAINBOARD-V2.3 Flash File Firmware 100000% Tasted.
A23-T736-MAINBOARD-V2.3 Official Firmware Flash File Ok Dane
A23-T736-MAINBOARD-V2.3 Stock Room Free Download
A23-T736-MAINBOARD-V2.3 How To Hard Reset Maximus Max908 100% Tested Solution
A23-T736-MAINBOARD-V2.3 Flash File Hang Logo Full Flash Ok Dane
A23-T736-MAINBOARD-V2.3 Dead Recovery Full File Download Now
A23-T736-MAINBOARD-V2.3 Camera Fix After Full Flash Ok Dane
A23-T736-MAINBOARD-V2.3 Boot Recovery Flash File
A23-T736-MAINBOARD-V2.3 Lcd Fix Flash problem solving

Phone Tipes
Phone Battary 10% Under Not Use . Phone On Direct Battary Not Close. Charging Time Phone internet Not Browsing Toking Not Full Not Use . Full Night Battary Not Charging then Charging Phone Dath, Shote , Ic Waste. Phone Memory Not Full Sume Free Spess Or Memory Card Not Full Same Free Big Memory Not Use. Internet Use For Internet Security & Antivirus Use. All Time Wifi & Bluetooth Not Open Jast Use or Off . Google Play Stor Download Any Apps, Games. Other Site Apps & Gsmes Not Download Risk . Phone Apps, Games, Lancer, Locker, Thems, 20-25 install Over Not install, install After Phone Slow . Use Your Gsmes Apps Minimiz Close Your Apps Or Games Super Fast Your Phone .
Note: All Firend My All File Tested 99% File Upload Not Missing You Confroem Your Phone Model File Download . Android Any File Full Flash For Google Lock Parivcy Lock Not Work. File Not Find For Search You Phone File Tool Dirver Other File Find. Okfirmware Any File Other Site Not Copy Thank You.
Phone Details
Symphony W32 Phone Nice Big Battary 2600mAh Long Time Charging Save Camera 8MG Led Flash Light Front Camera 2 Mg Good 7” Lcd Good Light And Bast Color . High Reglison Games Saports . Led Flash Light
All 90% Games Support And Apps install Support. Google Looksion on is Find Your Looksion Yes . Otg Sapport Pendrive Memory Used . Up To 64 Memory Card Used. Fm Radio , Google Play Games, Youtube Other Used . Video Reglioson s3Gp ,Flv,Mkv,Mov, Mp4 320,420, 720, 1080, Avi , Date File Other Formate Video Used . Dual SIM (Micro SIM, dual stand-by. Network 2G(Gsm/Gprs/Edge 850/900/1800/1900 MHz). Memory 16Gb Rom 1Gb Ram. Os Android 5.1
Admin Flash problem solving
Hang Logo
Sw-Version : A23-T736-MAINBOARD-V2.3
A23-T736-MAINBOARD-V2.3 Download
Flash Tool Download
After Full Flash problem solving
Full Flash Complete Problem Solved Hang Logo, Auto Data And Wifi On, Saxey Apps Auto install , invalid imei Fix , No Baseband , Auto Re-start, Phone Hot, Phone Solow Flash For Super Fast. Full Phone Dath, Haking Software install. Other Problem Solving .
How to Root Nexus 6 Easily on Android N Developer Preview 3 NPD35K
The latest Android N Developer Preview 3 NPD35K is the next upcoming major firmware release by Google available for Nexus 6 . It brings some new features like multi-window mode, an enhanced doze mode, a revamped Settings screen and a quick toggle in the notifications panel. Other changes include improved notifications, improved multitasking and app switching, dark mode etc.

Now you Can Root Your Nexus 6 on Android N Developer Preview 3 NPD35K factory Image.
View my Flipboard Magazine.
÷ Prerequisites:
•This root method is only for Android N (NPD35K) installed on Nexus 6 and I am not sure if it will work on the other variants of the Nexus 6 on other carriers.
•Your Nexus 6 bootloader should be unlocked.
Nexus 6 should be on Android N NPD35K software version.
•Make a Nandroid backup of your previous phone set up before proceeding – for just in case anything goes wrong.
*Disclaimer:÷ Prerequisites:
•This root method is only for Android N (NPD35K) installed on Nexus 6 and I am not sure if it will work on the other variants of the Nexus 6 on other carriers.
•Your Nexus 6 bootloader should be unlocked.
Nexus 6 should be on Android N NPD35K software version.
•Make a Nandroid backup of your previous phone set up before proceeding – for just in case anything goes wrong.
Android Custom ROM fix ® provide various Firmware Updates and Rooting process along with Custom ROM,Modes,file are all belong to their owners/developers. The autor of this site or the developers are not responsible, if you damage or brick your device.Do it on your own risk and follow the instruction properly.
* Important:
Backup important files stored on your device before proceeding with the steps below, so that in case something goes wrong you’ll have backup of all your important files.

÷ How to Root Nexus 6 Easily on Android N Developer Preview 3 NPD35K .
Step 1 – Download Android SDK from the Android Developers website and install. Also set it up with downloading platform-tools and USB drivers package in SDK.
Step 2 – Enable USB Debugging mode in your Nexus 6.
Step 3 – Download Fastboot from the following links depending on your OS and extract it in android-sdk-windowsplatform-tools directory. Create directory if not already there.
Windows: Download here!
Mac: Download here!
Linux: Download here!
NOTE: Skip Steps 1, 2, 3 if you already have them.
Step 4 – Download SuperSU v2.71 for Nexus 6 on your PC, if you haven’t already.
Step 5 – Connect and mount your Nexus 6 USB memory on your computer using the USB cable.
Step 6 – Now copy/paste the BETA-SuperSU-v2.71-20160331103524.zip file to your SD card. Make sure the file is in the SD card / internal storage root (not in any folder).
Step 7 – Then turn OFF your phone.
Step 8 – twrp-3.0.0-0-shamu.img and save it to your android-sdk-windowsplatform-tools directory on your computer.
Step 9 – Now go into Fastboot/Bootloader Mode on Nexus 6. How? Press Volume Down + Power keys for a few seconds till you see some text on the screen. This is Bootloader Mode.
Step 10 – Navigate to android-sdk-windowsplatform-tools directory and open Command Prompt (Shift + Right-click > Open Command Prompt).
Step 11 – Type in the following command and press Enter.
fastboot flash recovery twrp-3.0.0-0-shamu.img
Step 12 – Once completed, choose RECOVERY from the Fastboot menu and enter Recovery Mode.
Step 13 – In ClockworkMod recovery, scroll down to “flash zip from SD card” and press the power button to select it.
Step 14 – Press the Power button again and select “choose zip from sdcard”.
Step 15 – Now using your volume keys, navigate to BETA-SuperSU-v2.71-20160331103524.zip and select it using the Power button. Confirm the installation on the next screen and the installation procedure should start now.
Step 16 – After the installation completes, go to “+++++Go Back” and reboot the phone by selecting “reboot system now” from the Recovery menu. The phone will boot now and it might take about 5 minutes to boot on your first time. So, please wait.

For More Nexus 6 Firmware, Root & More Keep Checking AndroidCustomROMFix ™®
Like this post? PLZ Hit the share buttons below to share this article with your friends on Facebook, Google + and Twitter.
PLZ Follow Us On Flipboard 4 More Latest Updates.
PLZ Use the comment box below to contribute more ideas & Suggestions .
Best Regards.


Wednesday, July 27, 2016
Download da Rom Oficial Stock Xperia Go ST27 GB 2 3 7 ICS 4 0 4 e Jelly Bean 4 1 2

Para Instalar a Rom, use este tutorial.
Rom Original genérica para o Xperia Go ICS 4.0.4 [6.1.1.B.1.54]
Formato : .ftf
Tamanho : 631Mb
Servidor : Google Drive
Download Aqui
Rom Original genérica para o Xperia Go Jelly Bean [6.2.A.1.100]
Formato : .ftf
Tamanho : 627Mb
Servidor : Google Drive
Download Aqui
Rom Original Genérica para o Xperia Go Gingerbread 2.3.7 [6.0.B.3.184]
Formato : .ftf
Tamanho : 627Mb
Servidor : Google Drive
Download Aqui
Download Rom Stock Oficial para Sony Ericsson Xperia Pro MK16a e MK16i Android 2 3 4 e 4 0 4 Firmware

Para fazer o downgrade (retorno para Android 2.3) do Sony Ericsson Xperia Pro MK16 Brasileiro ou Internacional / importado, ou apenas reinstalar a Rom por problemas e 100% livre de customizações de operadoras, aqui tem o download oficial e créditos ao Fórum XDA.
Para instalar a Rom, veja este método: Instalando uma Rom oficial em seu Xperia.
Downloads (Escolha a versão de seu aparelho):
MK16i 4.0.1.A.0.283 (1254-8131) (Android 2.3.4)
MK16i 4.0.2.A.0.42 (UK) (Android 2.3.4)
MK16i 4.0.2.A.0.42 (Generic DE) (Android 2.3.4)
MK16i 4.0.2.A.0.42 (Chinese) (Android 2.3.4)
MK16i 4.0.2.A.0.58 (1249-8108) , Link Alternativo 1 , Link Alternativo 2 , Link Alternativo 3 (Android 2.3.4)
MK16i 4.0.2.A.0.62 (1251-0386) (Android 2.3.4)
MK16i 4.1.B.0.431 (Teclado Físico Baltic / Europe Keyboard Layout) & (1251-0386 / Teclado Africa Keyboard Layout) (Android 4.0.4)
MK16i 4.1.B.0.431 (Teclado Físico Baltic / Europe Keyboard Layout) (Android 4.0.4)
MK16i 4.1.B.0.587 (Central Europe) (Android 4.0.4)
Para MK16a
MK16a 4.0.1.A.0.283 (Generic Brazil) (Android 2.3.4)
MK16a 4.0.2.A.0.42 (US) , Link Alternativo (Android 2.3.4)
MK16a 4.0.2.A.0.58 (Android 2.3.4)
MK16a 4.0.2.A.0.58 (Operadora Telcel Branded) (Android 2.3.4)
MK16a 4.1.B.0.431 (U.S) , Link Alternativo 1 , Link Alternativo 2 (Android 4.0.4)
MK16a 4.1.B.0.431 (Central Europe) (Android 4.0.4)
MK16a 4.1.B.0.431 (Brazil) (Android 4.0.4)
MK16a 4.1.B.0.587 (Generic) (Android 4.0.4)
MK16a 4.1.B.0.587 (Global US) (Android 4.0.4)
Tags:
Para degradar (Volver a Android 2.3) Sony Ericsson Xperia Pro MK16 brasileña o internacional / importación, o simplemente volver a instalar la ROM por los problemas y de 100% operadores personalizaciones gratis, aquí está la descarga.
To downgrade (Return to Android 2.3) Sony Ericsson Xperia Pro MK16 Brazilian or international / imported, or just reinstall the Rom by problems and 100% free customizations operators, heres the official download
How to Update Huawei Nexus 6P to Android N NPD35K Developer Preview 3 Factory Image
Android N Developer Preview Beta is now available for the Nexus 5X, Nexus 6P, Nexus 6, and Nexus 9 phones and tablets. These are the major changes in Developer Preview Beta release of Android N, as per Google:

The latest Android N Developer Preview Beta NPD35K is the next upcoming major firmware release by Google. It brings some new features like multi-window mode, an enhanced doze mode, a revamped Settings screen and a quick toggle in the notifications panel. Other changes include improved notifications, improved multitasking and app switching, dark mode etc.
Don’t worry we are going to share step by step guide to safely Update your Huawei Nexus 6P to Android N NPD35K Developer Preview 3 Factory Image
View my Flipboard Magazine.
÷ Prerequisites:
•This tutorial is only for Huawei Nexus 6P and we are not sure if it will work on the other variants of the Nexus 6P on other carriers.
•Your phone can be on any previous Android version or even on a custom ROM. It doesn’t matter at all. This tutorial will still work for installing Android N Developer Preview Beta.
*Disclaimer:
Android Custom ROM fix ® provide various Firmware Updates and Rooting process along with Custom ROM,Modes,file are all belong to their owners/developers. The autor of this site or the developers are not responsible, if you damage or brick your device.Do it on your own risk and follow the instruction properly.
* Important:
Backup important files stored on your device before proceeding with the steps below, so that in case something goes wrong you’ll have backup of all your important files.

÷ How to Update Huawei Nexus 6P to Android N NPD35K Developer Preview 3 Factory Image
Step 1 – Download Android N Factory Image (angler-npc56p-preview-85ffc1b1.tgz) for Nexus 6P on your PC, if you haven’t already.
Step 2 – Connect your Nexus 6P to your computer using the USB cable.
Step 3 – Please make sure Fastboot is configured and properly installed on your computer.
Step 4 – Turn OFF your phone.
Step 5 – Get into the Fastboot/Bootloader Mode on your phone. Turn ON the phone while pressing and holding the Volume Up + Volume Down + Power buttons till you see the Fastboot menu and START on top.
Step 6 – Now extract the downloaded file anywhere in your computer. Go to the folder angler-NPD35K and then copy/paste all the files to your Fastboot directory.
Note: If you followed our tutorial on setting up Fastboot on your computer, there is a 99% chance your Fastboot directory will be the platform-tools folder in your Android SDK directory.
Step 7 – From the factory image files in your Fastboot directory, do the following depending which OS you are on:
•On Windows: Run the file “flash-all.bat”.
•On Mac: Run the file “flash-all.sh” using Terminal.
•On Linux: Run the file “flash-all.sh”.
Step 8 – That’s pretty much that you had to do for flashing the stock factory image on your Nexus 6P. Now wait and watch as the process is completed — or follow the on-screen instructions on your phone if in case you have to unlock the bootloader.
Step 9 – After the installation completes, the phone will boot now and it might take about 5 minutes to boot on your first time. So, please wait with patience!

That’s it! Your Nexus 6P should now have the official Android N NPD35K Developer Preview Beta software update installed on your phone using the stock factory image from Google! Go to Settings >About phone to verify.
For More Nexus 6P latest updates Keep Checking AndroidCustomROM Fix ™®
Like this post? PLZ Hit the share buttons below to share this article with your friends on Facebook, Google + and Twitter.
PLZ Follow Us On Flipboard 4 More Latest Updates.
PLZ Use the comment box below to contribute more ideas & Suggestions .
Best Regards.
÷ Prerequisites:
•This tutorial is only for Huawei Nexus 6P and we are not sure if it will work on the other variants of the Nexus 6P on other carriers.
•Your phone can be on any previous Android version or even on a custom ROM. It doesn’t matter at all. This tutorial will still work for installing Android N Developer Preview Beta.
*Disclaimer:
Android Custom ROM fix ® provide various Firmware Updates and Rooting process along with Custom ROM,Modes,file are all belong to their owners/developers. The autor of this site or the developers are not responsible, if you damage or brick your device.Do it on your own risk and follow the instruction properly.
* Important:
Backup important files stored on your device before proceeding with the steps below, so that in case something goes wrong you’ll have backup of all your important files.
÷ How to Update Huawei Nexus 6P to Android N NPD35K Developer Preview 3 Factory Image
Step 1 – Download Android N Factory Image (angler-npc56p-preview-85ffc1b1.tgz) for Nexus 6P on your PC, if you haven’t already.
Step 2 – Connect your Nexus 6P to your computer using the USB cable.
Step 3 – Please make sure Fastboot is configured and properly installed on your computer.
Step 4 – Turn OFF your phone.
Step 5 – Get into the Fastboot/Bootloader Mode on your phone. Turn ON the phone while pressing and holding the Volume Up + Volume Down + Power buttons till you see the Fastboot menu and START on top.
Step 6 – Now extract the downloaded file anywhere in your computer. Go to the folder angler-NPD35K and then copy/paste all the files to your Fastboot directory.
Note: If you followed our tutorial on setting up Fastboot on your computer, there is a 99% chance your Fastboot directory will be the platform-tools folder in your Android SDK directory.
Step 7 – From the factory image files in your Fastboot directory, do the following depending which OS you are on:
•On Windows: Run the file “flash-all.bat”.
•On Mac: Run the file “flash-all.sh” using Terminal.
•On Linux: Run the file “flash-all.sh”.
Step 8 – That’s pretty much that you had to do for flashing the stock factory image on your Nexus 6P. Now wait and watch as the process is completed — or follow the on-screen instructions on your phone if in case you have to unlock the bootloader.
Step 9 – After the installation completes, the phone will boot now and it might take about 5 minutes to boot on your first time. So, please wait with patience!
That’s it! Your Nexus 6P should now have the official Android N NPD35K Developer Preview Beta software update installed on your phone using the stock factory image from Google! Go to Settings >About phone to verify.
For More Nexus 6P latest updates Keep Checking AndroidCustomROM Fix ™®
Like this post? PLZ Hit the share buttons below to share this article with your friends on Facebook, Google + and Twitter.
PLZ Follow Us On Flipboard 4 More Latest Updates.
PLZ Use the comment box below to contribute more ideas & Suggestions .
Best Regards.
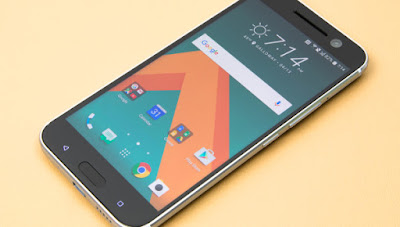
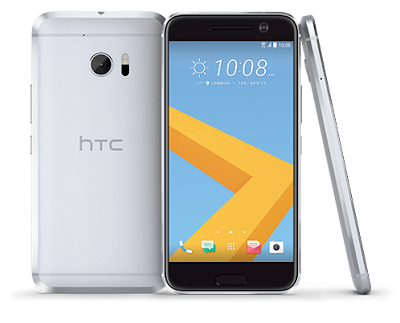
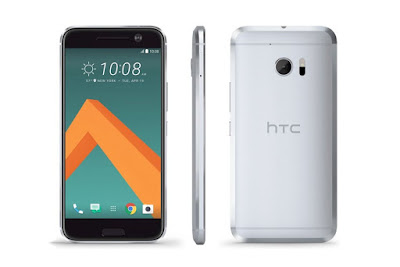
How to Install TWRP 3 0 2 Custom Recovery on HTC 10
HTC 10 Owners can now install latest TWRP 3.0.2 custom recovery on their smartphones by following the detailed tutorial given below.
TWRP 3.0.2 custom recovery will also allow you to easily gain root access as well. HTC 10 can be easily installed with TWRP 3.0.2 using our detailed guide which is listed right below. You can now easily install TWRP Touch Recovery on HTC 10 using our tutorial.
TWRP 3.0.2 custom recovery will also allow you to easily gain root access as well. HTC 10 can be easily installed with TWRP 3.0.2 using our detailed guide which is listed right below. You can now easily install TWRP Touch Recovery on HTC 10 using our tutorial.
View my Flipboard Magazine.
÷ Prerequisites:
•This TWRP Recovery tutorial is only for unlocked HTC 10. Please don’t try this on any other variants of the phone.
•Make sure you backup all your data in your phone before proceeding.
•This will void your warranty.
•HTC Sync should be installed with full working ADB/Fastboot before performing the tutorial.
•Bootloader should be unlocked.
*Disclaimer:
Android Custom ROM fix ® provide various Firmware Updates and Rooting process along with Custom ROM,Modes,file are all belong to their owners/developers. The autor of this site or the developers are not responsible, if you damage or brick your device.Do it on your own risk and follow the instruction properly.
* Important:
Backup important files stored on your device before proceeding with the steps below, so that in case something goes wrong you’ll have backup of all your important files.
÷ How to Install TWRP 3.0.2 Custom Recovery on HTC 10.
Step 1 – Make sure ADB and Fastboot is configured on your PC.
Step 2 – Connect HTC 10 to your PC with a USB cable and install ADB drivers.
Step 3 – Download TWRP (twrp-3.0.2-4-pme.img) and copy/paste it in the android-sdk-windowsplatform-tools directory.
Step 4 – Go to Fastboot/Bootloader mode now. How? Navigate to android-sdk-windowsplatform-tools directory and open Command Prompt (Shift + Right-click > Open Command Prompt).
Step 5 – Type in the following command and press Enter.
adb reboot bootloader
Step 6 – HTC 10 will switch OFF and then boot into the Fastboot Mode. Once the drivers are installed, proceed below.
NOTE: Alternatively, you can also enter Fastboot Mode by switching OFF your phone first. Then turn it ON by holding Volume Down + Power buttons together.
Step 7 – Then type the following command and press Enter.
fastboot flash recovery twrp-3.0.2-4-pme.img
Step 8 – Once completed, choose RECOVERY from the Fastboot menu and enter Recovery Mode. Navigate up and down using the volume keys.
Step 9 – If you see TWRP Recovery, then everything so far has been successfully performed and custom recovery is installed.
Step 10 – Since everything is going on well, you can go back to your normal phone by rebooting HTC 10. Select “reboot system now” from the recovery menu. The phone will boot now.
That’s it. Your HTC 10 has now been updated with a custom recovery like TWRP Recovery and is fully working on your phone.
How to access Recovery Mode? Turn OFF your phone. Switch ON your phone again by holding Volume Up + Power buttons together and you will be taken directly to the TWRP Touch Recovery menu.
For More HTC 10 Updates Keep Checking Android Custom ROM Fix ™
Like this post? PLZ Hit the share buttons below to share this article with your friends on Facebook, Google + and Twitter.
PLZ Follow Us On Flipboard 4 More Latest Updates.
PLZ Use the comment box below to contribute more ideas & Suggestions .
Best Regards.
Flash Bricked Bootloop LG G Pad 8 3 LTE LG VK810 Verizon Wireless Using LG Flash Tool KDZ method Guide
Flash Bricked - Bootloop LG G Pad 8.3 LTE (LG VK810 Verizon Wireless) Using LG Flash Tool (KDZ method) [Guide].
Flash LG G Pad 8.3 LTE (LG VK810 Verizon Wireless ). LG G Pad 8.3 LTE (LG VK810 Verizon Wireless ) is the android smartphone which announced in March 2014, and exactly released on 2014, March. Guidebelajar on this guide will explain to you how to flashing android device on LG G Pad 8.3 LTE (LG VK810 Verizon Wireless ) with easy and simple step. Flashing in android is the same way like fresh install on the windows PC, So by perform a flash on Android you will give a new performance like a new phone. One reason that you should perform a flash your android is because your android get bootloop or when you failed to install Stock ROM Mod.This LG G Pad 8.3 LTE (LG VK810 Verizon Wireless ) is the smartphone with 8.3 Inchi IPS LCD capacitive touchscreen, 16M colors, work on Android OS, v4.2.2 (Jelly Bean), planned upgrade to v5.0 (Lollipop) and supported with Quad-core 1.5 GHz Krait 300 CPU, Qualcomm APQ8064 Pro Snapdragon 600 chipset, combined with 2 GB of RAM and 5 MP of Main camera and 1,3 MP on secondary camera.
Now you can follow this guide if you have bootloop problems on LG G Pad 8.3 LTE (LG VK810 Verizon Wireless ) but accidental LG G Pad 8.3 LTE (LG VK810 Verizon Wireless ) is not installed recovery. In this guide Im not offering recovery twrp or Cwm. CMW is a recovery that already in recovery mode for customization of the device such that the LG G Pad 8.3 LTE (LG VK810 Verizon Wireless ) with a variety of additional functions in it such as backup / restore, installations and others that are not contained in the standard recovery mode. Generally, in case of a default recovery bootloop LG G Pad 8.3 LTE (LG VK810 Verizon Wireless ) will go missing in case of bootloop. whereas the original recvery cant help when there hardbrick.
Now, follow the instruction list bellow, do it with your own risk.
Requirement Tool For Flash LG G Pad 8.3 LTE (LG VK810 Verizon Wireless ) .
Before you perform flash or install your firmware on LG G Pad 8.3 LTE (LG VK810 Verizon Wireless ) ,
you must download all requirement tool below ;
you must download all requirement tool below ;
- Download Stock Rom LG G Pad 8.3 LTE (LG VK810 Verizon Wireless ).
- This Stock is KDZ file, remember to copy this KDZ file into LG Flash Tool 2014 folder
- Check the firmware that match with your phone version, for , below.
LG KDZ Firmware No.ModelSuffixVersionBuyerBuyer NameDownload1.LG VK810AVRZTNVK81035A_08VRZVerizon Wireless2.LG VK810AVRZTNVK81036B_00VRZVerizon Wireless3.LG VK810AVRZTNVK81035A_08VRZVerizon Wireless4.LG VK810AVRZTNVK81036B_00VRZVerizon Wireless5.LG VK810AVRZTNVK81035A_08VRZVerizon Wireless6.LG VK810AVRZTNVK81035A_08VRZVerizon Wireless7.LG VK810AVRZTNVK81036B_00VRZVerizon Wireless- Download Driver LG: Here
- Latest LG FlashTool : Here
#1. Guide To Flash LG G Pad 8.3 LTE (LG VK810 Verizon Wireless )
Please follow this guide carefully to flash LG G Pad 8.3 LTE (LG VK810 Verizon Wireless ) .
- Make sure you have download all requirement tool above
- Then Install the drivers with your phone connected with your Computer, when it finished disconnect your LG G Pad 8.3 LTE (LG VK810 Verizon Wireless ) phone from your computer.
- Now turn your LG G Pad 8.3 LTE (LG VK810 Verizon Wireless ) phone off, then continuously click on the volume up button and connect your phone to your PC,
- Now, enter your LG G Pad 8.3 LTE (LG VK810 Verizon Wireless ) into download mode. ( visit this guide or see at the end of this post)
- Run LGFlashTool2014.exe.
- If you cannot run LGFlashTool2014.exe, You must install Visual C++ Runtime Library, get here
- There are two options to flash your LG G Pad 8.3 LTE (LG VK810 Verizon Wireless ) .
- Normal Flash : You can select this option if you want Flash ROM without losing any data. Only use this when you need to fix system error.
- CSE Flash : You can choose this option when you need a fresh format. All data will be deleted. Its suitable for upgrading or downgrading ROM or simply use this when you need to back to Stock.

LG flash tool normal flash / CSE flash - Select Type: CDMA
- PhoneMode: DIAG
- Select KDZ file : browse your KDZ file in your drive
- Then you can Click on Normal Flash or CSE Flash (see step 7 to decide this option)
- Then click Start.

LG flash tool - start - Then click on Clear Phone Software update registry.

Lg flash tool - Clear Phone Software update registry. - No need to choose desired language, it automatically change to English as a default setting.
- Finally you can click OK.
- You must wait a minute for the LG Mobile Support tool to recognize the LG G Pad 8.3 LTE (LG VK810 Verizon Wireless ) device.
- When you wait this process, may take 5 minute the tool to recognize it.
- The software will start the extraction on your device.
- When the process reach 100% your LG G Pad 8.3 LTE (LG VK810 Verizon Wireless ) will reboot.
- Then, you must Unplug your LG G Pad 8.3 LTE (LG VK810 Verizon Wireless ) from your computer by remove USB Cable from it.,
- Finish,


#2. Guide To Flash LG G Pad 8.3 LTE (LG VK810 Verizon Wireless )
If #1 method is failed to flash your LG Android device, you can use this second method, flashing LG device using R&D Test Tool
Enter LG G Pad 8.3 LTE (LG VK810 Verizon Wireless ) To Download Mode.
To enter LG LG G Pad 8.3 LTE (LG VK810 Verizon Wireless ) in download mode, you can follow this guide :
- Remove battery from your phone
- Plug USB cable to your PC
- Press and Hold volume UP Button, while cable plugs USB Cable from PC to your Phone
- Then will appear white note on your LG G Pad 8.3 LTE (LG VK810 Verizon Wireless ) phone, if you see this you can releasa Volume UP button.
- Press and hold volume UP Button on your LG G Pad 8.3 LTE (LG VK810 Verizon Wireless ) phone again, until you see FIRMWARE UPDATE message.
- If your phone has been detected in your PC (to make sure, click the monitor icon beside Read Phone Information button, this action will open device manager windows. If your phone was detected you can see this at the top)
- Click START, and you will see dialogue box, just click OK
- Wait for the flash process, it will run in approximately 5 minute and your LG G Pad 8.3 LTE (LG VK810 Verizon Wireless ) will restart itself
- Then your LG G Pad 8.3 LTE (LG VK810 Verizon Wireless ) phone will boot up, if you can see Welcome Screen, its mean Flashing process is successfully.
- Unplug USB cable, and finish
- Now your LG G Pad 8.3 LTE (LG VK810 Verizon Wireless ) is installed new firmware.
Guide How to Hard Reset Factory Reset Android OPPO NEO 3 R831K
[Guide] How to Hard Reset / Factory Reset Android OPPO NEO 3 R831K.
Hard Reset OPPO NEO 3 R831K. On this guide guidebelajar will show you how to Hard Reset / Factory Reset Android OPPO NEO 3 R831K. Perform Hard reset on android device will wipe or deleted all data stored and App installed on internal phone memory, so you must backup all data before perform it. But data stored on MicroSD will not be affected. If you have set up device with your Google accounts, your contact and and email information is automatically backed up to the Gmail server.
OPPO NEO 3 R831K is the smartphone released on August, 2014. with 4,5 Inchi IPS LCD capacitive touchscreen, 16M colors, work on Android OS, v4.2.1 (Jelly Bean), and supported with Dual-core 1.3 GHz CPU, combined with 1 GB of RAM, 5 MP on primary camera and 2 MP on secondary camera.
Some People say that Hard reset process is call with master reset or factory reset. Many people asking why should we perform hard reset to our phone. The logical answer that can I say for this asking is :
- We want to remove all personal data and setting that was stored in OPPO NEO 3 R831K device.
- Restore OPPO NEO 3 R831K to Default Factory Setting.
- Because we will sell our OPPO NEO 3 R831K Android phones
- There are many bug on OPPO NEO 3 R831K.
- We have forgotten on PIN or Patern Lock at OPPO NEO 3 R831K.
- OPPO NEO 3 R831K has a persistent problem that cannot be solved.
- We will give our OPPO NEO 3 R831K away to some one else, and we dont want that one know everything about our secret data, so we have to erase all data before back up it.
- Our OPPO NEO 3 R831K has been lagging and stuck on android logo, this call with bootloop.
- and many other reason.
1st Methode. Hard Reset OPPO NEO 3 R831K Using Software Menu :
- Make sure your batery is fully charged, Recomended you have 80% of battery capacity
- Then Backup your OPPO NEO 3 R831K . see this guide
- Open the application tray, pointing up located in the middle at the bottom of the display screen
- Go to menu: Setting >
- Select Back Up and Reset>
- Factory Data Reset >
- Reset Phone
- Choose Erase everything to confirm that you already to perform hard reset on OPPO NEO 3 R831K
- OPPO NEO 3 R831K will continue to hard reset process to restore factory default.
- You can not use this methode to reset your phone if it lost or stolen.
2ndMethode. Hard Reset OPPO NEO 3 R831K Using Hardware Keys:
- Make sure your battery is fully charged, we recomended that your battery has 80% power
- Always BackUp your important data that store in OPPO NEO 3 R831K . see this guide
- Turn Off your OPPO NEO 3 R831K by hold and press Power Button for a second.
- Release any SIM card and SD card that was installed on your OPPO NEO 3 R831K smartphone.
- Then press and hold a combination key Power button + Volume Down.

hard reset OPPO NEO 3 R831K - The phone will vibrate and show Oppo Logo on screen, release only power button.

oppo logo - hard reset oppo NEO 3 R831K - Now, release All button when your phone show language choice on screen.

Hard Reset OPPO NEO 3 R831K - You can use volume Down and Volume Up to navigate all menu. and Power Button for confirm your choice. or you can tap menu on screen.
- Now select English to enter ColorOS Recovery.

ColorOS Recovery - Reset Android OPPO NEO 3 R831K - Then select Wipe Data and cache.

Hard Reset OPPO NEO 3 R831K - On the next screen select Wipe All Data and Removable Applications.

Wipe All Data and Removable Applications - On the next screen you will show a confirmation about Wipe All Data and Removable Applications, because All Data and Removable Applications will be wiped, this operation can not be undone. And now select OK.

Wipe All Data and Removable Applications - Now, you will see a wipe data and cache process to wipe all data stored on your OPPO NEO 3 R831K phone.

hard reset OPPO NEO 3 R831K - Wait untill everything finish,
- If you see a message that wiped data successfully appear o screen, its mean you have successfully perform hard reset on this OPPO NEO 3 R831K phone.

hard reset OPPO NEO 3 R831K - Now, select reboot, to reboot your device.

Hard Reset OPPO NEO 3 R831K. - Select OK to confirm reboot OPPO NEO 3 R831K .
- Finish, Now you have successfully Hard Reset / Factory Reset Android OPPO NEO 3 R831K.


Video Guide.
Subscribe to:
Posts (Atom)