Showing posts with label ultra. Show all posts
Showing posts with label ultra. Show all posts
Tuesday, July 26, 2016
Desbloqueio do Bootloader Sony SP ZQ ZL Z Z1 Z1 Compact Z Ultra Z Ultra Google Play Edition
Olá pessoal que acompanha a Stock Rom, sou um novo poster e esse é o meu primeiro tutorial, caso aja algum erro comente. Lembrando que esse procedimento só funciona nos aparelhos acima e nos modelos que foram lançados em 2013, modelos anteriores (2012) é outro método bem mais fácil que estarei postando depois.
OBS 1: Faça por sua conta e risco, não me responsabilizo por bricks, ou bugs, ocasionados pelo desbloqueio do mesmo.
OBS 2: Na versão 4.2 do Z1 a câmera para de funcionar, problema que foi consertado quando colocar a atualização para o 4.3.
OBS 3: Na versão 4.4.2 do Z1 Brasileiro se você desbloquear o Bootloader a TV Digital para de funcionar.
OBS 4: Para fazer o root no Z1 é necessário fazer o desbloqueio do Bootloader, tem um método para fazer o root com o Bootloader bloqueado só que eu não recomendo pois o procedimento é longo e minuncioso e enjoado de fazer.
OBS 5: Desbloqueando o Bootloader irá formatar o seu celular, por isso faça um Backup antes.
OBS 6: Em aparelhos de 2013 (ZQ, ZL, Z) tire seu cartão de memória antes de começar o procedimento, senão ele será formatado junto com o celular.
Vamos lá.
Passo 1
Primeiramente até esta pagina da Sony : http://unlockbootloader.sonymobile.com/ , desça até o final da pagina e clique na opção "Start unlocking the boot loader"
Depois disto pegue seu Sony e digite no discador *#*#7378423#*#*, irá aparecer uma tela de configuração, selecione Service info > Configuration > Rooting Status, caso apareça no rooting status a mensagem : "Bootloader unlock alowed : Yes" podemos continuar, mas caso apareça "Bootloader unlock alowed : No" não será possível desbloquear o Bootloader (Raramente ocorre isso), clique no final da pagina em "Continue", e na proxima pagina clique em "Yes, Im Sure", na próxima pagina você marca as 2 opções, e clica em "I accept". Na página seguinte, vai aparecer isto:

Você irá preencher o seguinte nessas abas:
Name: Você coloca o seu nome
IMEI or MEID or IDID: Você digita todos os números do seu IMEI com exceção do ultimo número,
EX: 2152465289825 (treze números)
OBS: Você pode achar o IMEI do seu celular no adesivo na caixa dele, ou digitando no discador *#06#.
E-mail: Você coloca o e-mail da sua preferência, ai é só clicar em Submit e no seu e-mail vai chegar um código, este será o código que vamos precisar para desbloquear o bootloader, e para rebloquear novamente irá precisar dele também, por isso salve e guarde-o a salvo.
Passo 2:
Feito o procedimento acima agora vamos colocar a mão na massa.
Baixe este pack ADB Bootloader e extraia o conteúdo do rar para sua Área de trabalho.
Link: MEGA
Selecione a pasta, segure a tecla Shift e clique com o botão direto do mouse, e selecione a opção "Abrir janela de comando aqui", e irá abrir o prompt de comando do windows automáticamente.
Desligue o seu telefone e conecte-o ao computador em modo fastboot (segure a tecla de volume + e plug o usb no pc, se acender um led azul e por que está em fastboot).
Copie e cole na janela do prompt de comando fastboot.exe -i 0x0fce getvar version
Se aparecer finish em ate 0.007s está tudo em ordem.
Agora copie e cole este outro comando fastboot.exe -i 0x0fce oem unlock 0x
depois do 0x, digite a chave que você recebeu em seu e-mail anteriormente e aperte enter, se ocorrer tudo bem aparecerar só um OK na tela do prompt. Pronto bootloader desbloqueado.
Não gostou de ter desbloqueado e quer rebloquear o bootloader ? Siga o procedimento abaixo:
Passo 1:
Abra o Flashtools (v0.9.15 ou superior), conecte o seu telefone em flashmode (desligue-o, segure a tecla de volume - e conect na usb).
Passo 2 :
Clique em BLU do lado do raio no flashtools, e irá aparecer uma outra janelinha

Clique em Relock e o procedimento vai ocorrer sozinho.
Quando aparecer na tela ending flash session e por que ocorreu tudo ok. Pronto seu Bootloader foi rebloqueado.
É indeciso e que desbloquear novamente o Bootloader ? Repita esse ultimo procedimento, só que no lugar de apertar "Relock" vai aparecer "Unlock", é só clicar e pronto. Seja feliz com seu Bootloader desbloqueado de novo.
Créditos
AbnerEC
Read more »
OBS 1: Faça por sua conta e risco, não me responsabilizo por bricks, ou bugs, ocasionados pelo desbloqueio do mesmo.
OBS 2: Na versão 4.2 do Z1 a câmera para de funcionar, problema que foi consertado quando colocar a atualização para o 4.3.
OBS 3: Na versão 4.4.2 do Z1 Brasileiro se você desbloquear o Bootloader a TV Digital para de funcionar.
OBS 4: Para fazer o root no Z1 é necessário fazer o desbloqueio do Bootloader, tem um método para fazer o root com o Bootloader bloqueado só que eu não recomendo pois o procedimento é longo e minuncioso e enjoado de fazer.
OBS 5: Desbloqueando o Bootloader irá formatar o seu celular, por isso faça um Backup antes.
OBS 6: Em aparelhos de 2013 (ZQ, ZL, Z) tire seu cartão de memória antes de começar o procedimento, senão ele será formatado junto com o celular.
Vamos lá.
Passo 1
Primeiramente até esta pagina da Sony : http://unlockbootloader.sonymobile.com/ , desça até o final da pagina e clique na opção "Start unlocking the boot loader"
Depois disto pegue seu Sony e digite no discador *#*#7378423#*#*, irá aparecer uma tela de configuração, selecione Service info > Configuration > Rooting Status, caso apareça no rooting status a mensagem : "Bootloader unlock alowed : Yes" podemos continuar, mas caso apareça "Bootloader unlock alowed : No" não será possível desbloquear o Bootloader (Raramente ocorre isso), clique no final da pagina em "Continue", e na proxima pagina clique em "Yes, Im Sure", na próxima pagina você marca as 2 opções, e clica em "I accept". Na página seguinte, vai aparecer isto:
Você irá preencher o seguinte nessas abas:
Name: Você coloca o seu nome
IMEI or MEID or IDID: Você digita todos os números do seu IMEI com exceção do ultimo número,
EX: 2152465289825 (treze números)
OBS: Você pode achar o IMEI do seu celular no adesivo na caixa dele, ou digitando no discador *#06#.
E-mail: Você coloca o e-mail da sua preferência, ai é só clicar em Submit e no seu e-mail vai chegar um código, este será o código que vamos precisar para desbloquear o bootloader, e para rebloquear novamente irá precisar dele também, por isso salve e guarde-o a salvo.
Passo 2:
Feito o procedimento acima agora vamos colocar a mão na massa.
Baixe este pack ADB Bootloader e extraia o conteúdo do rar para sua Área de trabalho.
Link: MEGA
Selecione a pasta, segure a tecla Shift e clique com o botão direto do mouse, e selecione a opção "Abrir janela de comando aqui", e irá abrir o prompt de comando do windows automáticamente.
Desligue o seu telefone e conecte-o ao computador em modo fastboot (segure a tecla de volume + e plug o usb no pc, se acender um led azul e por que está em fastboot).
Copie e cole na janela do prompt de comando fastboot.exe -i 0x0fce getvar version
Se aparecer finish em ate 0.007s está tudo em ordem.
Agora copie e cole este outro comando fastboot.exe -i 0x0fce oem unlock 0x
depois do 0x, digite a chave que você recebeu em seu e-mail anteriormente e aperte enter, se ocorrer tudo bem aparecerar só um OK na tela do prompt. Pronto bootloader desbloqueado.
Não gostou de ter desbloqueado e quer rebloquear o bootloader ? Siga o procedimento abaixo:
Passo 1:
Abra o Flashtools (v0.9.15 ou superior), conecte o seu telefone em flashmode (desligue-o, segure a tecla de volume - e conect na usb).
Passo 2 :
Clique em BLU do lado do raio no flashtools, e irá aparecer uma outra janelinha
Clique em Relock e o procedimento vai ocorrer sozinho.
Quando aparecer na tela ending flash session e por que ocorreu tudo ok. Pronto seu Bootloader foi rebloqueado.
É indeciso e que desbloquear novamente o Bootloader ? Repita esse ultimo procedimento, só que no lugar de apertar "Relock" vai aparecer "Unlock", é só clicar e pronto. Seja feliz com seu Bootloader desbloqueado de novo.
Créditos
AbnerEC

Saturday, July 23, 2016
How to Install CM13 0 Android 6 0 1 Marshmallow on Xperia Z Ultra LTE C6833
CyanogenMod 13 CM13.0 Unofficial Rom is released for Sony Xperia Z Ultra LTE C6833

CM13.0 will let Xperia Z Ultra LTE C6833 users taste the sweetness of Marshmallow 6.0.1 such as the battery saving ‘doze’ functionality and new permissions model, alongside the CM features you’d expect.
Follow our guide below to download the Unofficial CM13 and install it yourself.
View my Flipboard Magazine.
÷ Prerequisites:
•This tutorial is only for installing CyanogenMod 13 [CM13.0] ROM on Xperia Z Ultra LTE C6833 Please do not try on any other Xperia Z Ultra variants.
•Sony PC Companion will NOT detect your phone after installing this ROM because it is a custom firmware.
•Bootloader should be unlocked or you will not be able to install this ROM.
•Your phone should be rooted and haveClockworkMod recovery installed from before.
•This tutorial will wipe out all your data.Proceed at your own risk.Perform a Dalvik Cache wipe before proceeding from the recovery mode.
•Make sure you backup all your data in your phone before proceeding.
*Disclaimer:
Android Custom ROM fix ® provide various Firmware Updates and Rooting process along with Custom ROM,Modes,file are all belong to their owners/developers. The autor of this site or the developers are not responsible, if you damage or brick your device.Do it on your own risk and follow the instruction properly.
* Important:
Backup important files stored on your device before proceeding with the steps below, so that in case something goes wrong you’ll have backup of all your important files.

÷ How to Install CM13.0 Android 6.0.1 Marshmallow on Xperia Z Ultra LTE C6833
Step 1 – Download CM13.0 Android 6.0.1 Marshmallow and Google Apps for your Xperia Z Ultra LTE C6833 to your computer.
Step 2 – Connect and mount your Xperia Z Ultra LTE C6833 USB memory on your computer using the USB cable.
Step 3 – Now copy/paste the downloaded Android 6.0.1 ROM zip file and Google Appszip files to your SD card. Make sure the files are in the SD card root (not in any folder).
Step 4 – Then turn OFF your phone and disconnect from the USB cable.
Step 5 – Now to get in the Recovery Mode. Switch ON the phone while pressing and holding Volume Up + Home + Power buttons together
Step 6 – Once you are in ClockworkModRecovery, select perform a full data wipe by selecting “wipe data/factory reset”. Use the Power button to select everything while in the Recovery Mode.
Step 7 – Then, perform a cache wipe by selecting “wipe cache partition” .
Step 8 – Now this is optional, but it is recommended to perform a wipe of your dalvik cache as well. You will not get into boot loops or any other errors. From CWM recovery, go to ‘advanced’ and then select “wipe dalvik cache”.
Step 9 – Then go back to the main recovery screen and select “install zip from SD card”.
Step 10 – Now select “choose zip from sdcard”. Using your volume keys, navigate to the Android 6.0.1 ROM zip file that you copied to your SD card and select it using the Power button. Confirm the installation on the next screen and the installation procedure should start now.
Google Apps: Repeat the above step for the Gapps zip file as well and install it on your phone.
Step 11 – After the installation completes, go to “+++++Go Back+++++” and reboot the phone by selecting “reboot system now” from the recovery menu.

Your Sony Xperia Z Ultra LTE C6833 will boot now and it might take about 5 minutes to boot on your first time. So, please wait.
That’s it Your Sony Xperia Z Ultra LTE C6833 should now have CM13.0 Nightly Android 6.0.1 Marshmallow installed on your phone! Go to Settings > About phone to verify.
For More Xperia Z Ultra LTE C6833 Firmware & Custom ROM keep checking AndroidCustomROM Fix ™®
Like this post? PLZ Hit the share buttons below to share this article with your friends on Facebook, Google + and Twitter.
PLZ Follow Us On Flipboard 4 More Xperia Z Ultra latest custom ROM fix.
PLZ Use the comment box below to contribute more ideas & Suggestions .
Best Regards.
÷ Prerequisites:
•This tutorial is only for installing CyanogenMod 13 [CM13.0] ROM on Xperia Z Ultra LTE C6833 Please do not try on any other Xperia Z Ultra variants.
•Sony PC Companion will NOT detect your phone after installing this ROM because it is a custom firmware.
•Bootloader should be unlocked or you will not be able to install this ROM.
•Your phone should be rooted and haveClockworkMod recovery installed from before.
•This tutorial will wipe out all your data.Proceed at your own risk.Perform a Dalvik Cache wipe before proceeding from the recovery mode.
•Make sure you backup all your data in your phone before proceeding.
*Disclaimer:
Android Custom ROM fix ® provide various Firmware Updates and Rooting process along with Custom ROM,Modes,file are all belong to their owners/developers. The autor of this site or the developers are not responsible, if you damage or brick your device.Do it on your own risk and follow the instruction properly.
* Important:
Backup important files stored on your device before proceeding with the steps below, so that in case something goes wrong you’ll have backup of all your important files.
÷ How to Install CM13.0 Android 6.0.1 Marshmallow on Xperia Z Ultra LTE C6833
Step 1 – Download CM13.0 Android 6.0.1 Marshmallow and Google Apps for your Xperia Z Ultra LTE C6833 to your computer.
Step 2 – Connect and mount your Xperia Z Ultra LTE C6833 USB memory on your computer using the USB cable.
Step 3 – Now copy/paste the downloaded Android 6.0.1 ROM zip file and Google Appszip files to your SD card. Make sure the files are in the SD card root (not in any folder).
Step 4 – Then turn OFF your phone and disconnect from the USB cable.
Step 5 – Now to get in the Recovery Mode. Switch ON the phone while pressing and holding Volume Up + Home + Power buttons together
Step 6 – Once you are in ClockworkModRecovery, select perform a full data wipe by selecting “wipe data/factory reset”. Use the Power button to select everything while in the Recovery Mode.
Step 7 – Then, perform a cache wipe by selecting “wipe cache partition” .
Step 8 – Now this is optional, but it is recommended to perform a wipe of your dalvik cache as well. You will not get into boot loops or any other errors. From CWM recovery, go to ‘advanced’ and then select “wipe dalvik cache”.
Step 9 – Then go back to the main recovery screen and select “install zip from SD card”.
Step 10 – Now select “choose zip from sdcard”. Using your volume keys, navigate to the Android 6.0.1 ROM zip file that you copied to your SD card and select it using the Power button. Confirm the installation on the next screen and the installation procedure should start now.
Google Apps: Repeat the above step for the Gapps zip file as well and install it on your phone.
Step 11 – After the installation completes, go to “+++++Go Back+++++” and reboot the phone by selecting “reboot system now” from the recovery menu.
Your Sony Xperia Z Ultra LTE C6833 will boot now and it might take about 5 minutes to boot on your first time. So, please wait.
That’s it Your Sony Xperia Z Ultra LTE C6833 should now have CM13.0 Nightly Android 6.0.1 Marshmallow installed on your phone! Go to Settings > About phone to verify.
For More Xperia Z Ultra LTE C6833 Firmware & Custom ROM keep checking AndroidCustomROM Fix ™®
Like this post? PLZ Hit the share buttons below to share this article with your friends on Facebook, Google + and Twitter.
PLZ Follow Us On Flipboard 4 More Xperia Z Ultra latest custom ROM fix.
PLZ Use the comment box below to contribute more ideas & Suggestions .
Best Regards.
Friday, July 22, 2016
Hard Reset Android Sony Xperia C5 Ultra to Remove PIN Pattern Lock Password Guide
Hard Reset Android Sony Xperia C5 Ultra to Remove PIN, Pattern Lock, Password [Guide].
Reset Android Sony Xperia C5 Ultra. Sony Xperia C5 Ultra also known as Sony Xperia C5 E5553, E5506. Todays guidebelajar will explain to you how to perform hard reset on Sony Xperia C5 Ultra smartphone. Sony Xperia C5 Ultra is the smartphone with 6.0 Inchi IPS LCD capacitive touchscreen, 16M colors, work on Android OS, v5.0 (Lollipop), upgradable to v5.1 (Lollipop) and supported with Octa-core 1.7 GHz Cortex-A53 Processor, chipset Mediatek MT6752, GPU Mali-T760MP2. combined with 2 GB of RAM and 13 MP on Primary camera and 13 MP on secondary camera. This ony Xperia C5 Ultra is released on 2015, August.
On this guide guidebelajar will show you how to Hard Reset Android Sony Xperia C5 Ultra to Remove Password, PIN, Pattern Lock. So, if you have any problem such as forgotten password, or forgotten PIN, even forgotten Pattern lock you will enable to enter and use phone menu. You must remove forgotten password or PIN to use your Sony Xperia C5 Ultra normally. this is a simple guide you can follow. To remove any password or PIN stored on your Sony Xperia C5 Ultra, you must perform a hard reset or factory reset on this device. Perform hard reset on any android device will remove or erase or wipe all data stored on your device. So, you must always backup all data before lost it.
On this guide we use PC companion, you can download this PC companion from here. PC Companion will install the latest firmware on your phone and will reset it to the Factory setting.
You must meet a minumum system requirement to run PC Companion ;
On this guide guidebelajar will show you how to Hard Reset Android Sony Xperia C5 Ultra to Remove Password, PIN, Pattern Lock. So, if you have any problem such as forgotten password, or forgotten PIN, even forgotten Pattern lock you will enable to enter and use phone menu. You must remove forgotten password or PIN to use your Sony Xperia C5 Ultra normally. this is a simple guide you can follow. To remove any password or PIN stored on your Sony Xperia C5 Ultra, you must perform a hard reset or factory reset on this device. Perform hard reset on any android device will remove or erase or wipe all data stored on your device. So, you must always backup all data before lost it.
On this guide we use PC companion, you can download this PC companion from here. PC Companion will install the latest firmware on your phone and will reset it to the Factory setting.
You must meet a minumum system requirement to run PC Companion ;
- You must have at least 2 GB of RAM
- 5 GB of free hard disk space.
- Intel® Pentium® 4, 3.6 GHz or equivalent AMD processor.
- Stabil internet connection or Internet broadband connection.
- One available USB 2.0 or USB 3.0 port and USB cable.
- Windows Operating System, such as ;
- Microsoft® Windows XP™ SP3 (32 bit),
- Vista (32/64 bit),Windows 7 (32/64 bit),
- Windows 8/8.1 (32/64 bit) or
- Windows 10*
Guide to Hard Reset Android Sony Xperia C5 Ultra.
- Make sure your computer connect to internet.
- If possible, back up all data stored on your Sony Xperia C5 Ultra
- Install PC Companion on your computer or laptop.
- Then, Run this program, and you will see window with 3 options on screen.

Hard Reset Android Sony Xperia C5 Ultra - You can see the status is no phone connected, therefore you must connect yuor Sony Xperia C5 Ultra to the PC or computer using USB cable.
- Once it connected, PC companion willd detect your phone, and you should see picture shown below on your screen.

Hard Reset Android Sony Xperia C5 Ultra - If your phone have available update you will see this on your screen.

Hard Reset Android Sony Xperia C5 Ultra - If you do not want to update your Sony Xperia C5 Ultra just click remind me latter.
- Then the program will return to the main menu, now click Support Zone and click start.

Hard Reset Android Sony Xperia C5 Ultra - Now, Wait for the program to install the appropriate add-on.
- On the next window, you can click "Phone / Tablet Software Update" and click start.

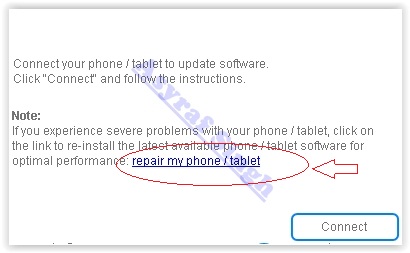
Hard Reset Android Sony Xperia C5 Ultra - Select "repair my phone / tablet".

Hard Reset Android Sony Xperia C5 Ultra - To continue the next step, you must tick on I understand that I need ... and then click Next.

Hard Reset Android Sony Xperia C5 Ultra - Now follow the instructions and accept all informations. you will be reminded the data stored in the phone memory will be lost and click Continue.

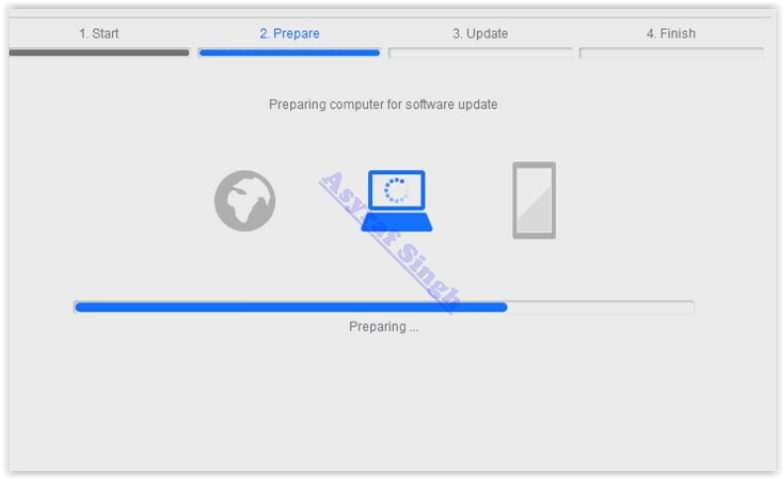
Hard Reset Android Sony Xperia C5 Ultra Dual - Please be patient and wait until preparing computer for software update is complete.

Hard Reset Android Sony Xperia C5 Ultra - Afterwards you can choose your phone / tablet model.

Hard Reset Android Sony Xperia C5 Ultra - Then click next.
- Now, Disconnect Sony Xperia C5 Ultra from computer.
- Make sure the battery is fully charged or minimum you have at least 80% of battery capacity.
- Then, Turn off the Sony Xperia C5 Ultra and wait for 5 seconds.
- Then, connect the USB cable to the computer again.
- While press and hold the volume down button on the Sony Xperia C5 Ultra.

Hard Reset Android Sony Xperia C5 Ultra - Now, the update of your Sony Xperia C5 Ultra has started.

Hard Reset Android Sony Xperia C5 Ultra - Just wait until update is complete.
- Once update finish, you can disconnect the phone from computer.
- Now, Turn On the Sony Xperia C5 Ultra.
- Note, that the first start of the phone after update may take a while.
- Finish.






Tuesday, July 19, 2016
How to Download Sony Xperia C5 Ultra Dual Firmware Using XperiFirm Guide
How to Download Sony Xperia C5 Ultra Dual Firmware Using XperiFirm [Guide].
Download Sony Xperia C5 Ultra Dual Firmware. This device also known as Sony Xperia C5 E5533, E5563, On this guide guidebelajar will show you how to download Sony Xperia C5 Ultra Dual Firmware Using XperiFirm. You can use this firmware to upgrade or downgrade the android system. Even you can fix Sony Xperia C5 Ultra Dual android from bootloop or bricked. XperiFirm is a suitable tool let you to download the current firmware for all Sony Xperia or Sony-Ericsson smartphones and tablets running Android operating system directly from your computer or laptop with internet connection. So you dont have to bother to find the Sony Xperia firmware on internet. Xperifirm is a free tool provided by IgorEisberg on XDA forum.
Sony Xperia C5 Ultra Dual has Dual SIM (Nano-SIM, dual stand-by), This device comes with 6.0 Inches IPS capacitive touchscreen, 16M colors LCD, Run on Android OS, v5.0 (Lollipop), upgradable to v5.1 (Lollipop), and supported with Mediatek MT6752, Octa-core 1.7 GHz Cortex-A53 CPU, GPU Mali-T760MP2, combined with 2 GB of RAM as their engine. And you can enjoy exciting 13 MP on main camera, and 13 MP on secondary camera to capture your best moments on your life. And this device released on 2015, August.
Sony Xperia C5 Ultra Dual has Dual SIM (Nano-SIM, dual stand-by), This device comes with 6.0 Inches IPS capacitive touchscreen, 16M colors LCD, Run on Android OS, v5.0 (Lollipop), upgradable to v5.1 (Lollipop), and supported with Mediatek MT6752, Octa-core 1.7 GHz Cortex-A53 CPU, GPU Mali-T760MP2, combined with 2 GB of RAM as their engine. And you can enjoy exciting 13 MP on main camera, and 13 MP on secondary camera to capture your best moments on your life. And this device released on 2015, August.
Basic Requirement to Run XperiFirm.
You need this file to run Xperia Firmware Downloader Tool based on your computer operating systems.
- Windows XP Service Pack 3.
- You must download and install .Net Framework 4.0 click here to get this file
- Windows Vista / 7
- You must download and install .Net Framework 4.6 RC click here to get this file
- Windows 8/8.1/10
- Pre installed
- Linux
- Enter the following lines once per computer:
- $ sudo apt-get install mono-complete
- $ sudo mozroots --import --machine --sync
- $ sudo certmgr -ssl -m https://software.sonymobile.com
- When asked you must enter Y, you should be asked to do so twice)
- Enter the following line to launch XperiFirm:
- $ mono XperiFirm.exe
- Apple OS X
- Install Mono for OS X:
- http://www.mono-project.com/download/
- Enter the following in Terminal:
- $ mono XperiFirm.exe
Guide To Download Sony Xperia C5 Ultra Dual Firmware.
If you have download all necessary file, now we need a primary tool to download Sony Xperia Firmware, follow this guide how to download Sony Xperia C5 Ultra Dual Firmware using Xperia Firmware Downloader Tool.
- Download Xperia Firmware Downloader Tool.
- When download finished extract and run this tool from your computer. Double click on Icon program shown below. to run this program your computer must be installed .NET framework 3.5 or above.
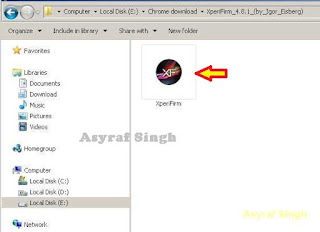
Xperia Firmware Downloader Tool icon - Then the program will open loading windows, to checking for update, requesting log in data, and downloading resource,
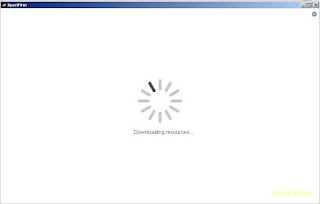
loading window xperifirm - When the program fully loaded, now you can select your Sony Xperia model and version in the left navigation windows. You can select Sony Xperia C5 Ultra Dual and then select the model (E5533 Dual).

Download Sony Xperia C5 Ultra Dual Firmware - See on the right panel window, and you will find all country and market which support your Sony Xperia devices.
- For an example we select market from Algeria, and we will know what is android version on the number shown at latest release. if available.

Download Sony Xperia C5 Ultra Dual Firmware - To start download this firmware you can navigate your pointer to the right above of this window, under link donate Paypal you can click firmware build number shown.

Download Sony Xperia C5 Ultra Dual Firmware - Then you will see xperia firmware downloader dialogue box appear on your screen. And click Download.

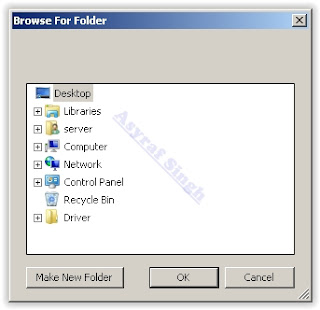
Download Sony Xperia C5 Ultra Dual Firmware - This action will open a new windows browse for folder, you will be asked where will you save your firmware file on your computer. Usually directly go to desktop. But you can change to save to another folder, Once finish decide the folder you can click OK.
Download Sony Xperia C5 Ultra Dual Firmware - And download process will start now, It will take a minute or hour depending your firmware file size.

Download Sony Xperia C5 Ultra Dual Firmware - Once your download complete, you will see the following pop message “Unpacked Successfully!” Cl ick OK.

Unpacked Successfully xperia firmware download tool - The same “Unpacked successfully!” message will appear on the download dialog. Now you can Click “Close”.

Unpacked Successfully xperia firmware download tool - Now check your download location and you will find a new folder that contains your firmware files.
- Inside the folder download, you should find a number of files that look similar to the picture below.
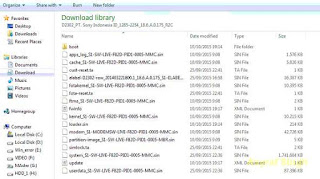
content firmware file - If your list of firmware files includes “fwinfo.xml” as shown below you can manually delete it before continuing to the FlashTool steps. You MUST delete this file otherwise your FTF firmware file will corrupt.

delete fwinfo.xml file - Good luck and feel free to download Sony Xperia C5 Ultra Dual Firmware


Subscribe to:
Posts (Atom)