Showing posts with label z1. Show all posts
Showing posts with label z1. Show all posts
Wednesday, July 27, 2016
Download Stock Rom Original Sony XPERIA Z1 C6903 4 2 2 Sem logo de operadora

Baixar Stock Rom Original para Xperia Z1 C6903
Voltar Sony Xperia Z1 para Android 4.2.2
Modelo: Sony Xperia Z1 C6903
Número da versão: 14.1.G.2.257
Região - America / Europa
Idioma - Multi Linguagem
Versão do Android : 4.2.2
Procedimento: flash pelo flashtool
Tamanho: 778 mb
Download Da Rom Aqui
Creditos: http://xperiadownload.cz

Download Android Lollipop 5 1 stock firmware for Lenovo Zuk Z1 smartphone

Download Android Lollipop 5.1 stock firmware for Lenovo Zuk Z1 smartphone from here or here. Download another Lenovo firmware from here.
Firmware details
Archive: Lenovo Zuk Z1 Android 5.1 Snapdragon 801 Firmware 160224 191240
Archive size: 596 MB
Support: Qualcomm Snapdragon 801
MBM File: prog_emmc_firehose_8974.mbn
Caution: Please do not update firmware unless you know what you are doing, you really want it or it is absolutely necessary. Firmware updates may occasionally have bad results, like bricking your device, temporarily or permanently. The firmware update process is done entirely at your own risk. Before attempting to update the firmware, back up your data.
Don’t miss any of our future video tutorials, follow us on Youtube. Like us on Facebook. Add us in your circles on Google+. Watch our photo albums on Flickr. Subscribe now to our newsletter.
Tuesday, July 26, 2016
Download Stock Rom Original Sony XPERIA Z1 C6903 Modelo Internacional 4 4 2 KitKat Sem logo de operadora
Número da versão: 14.3.A.0.757
Idioma - Multi Linguagem
Procedimento: flash pelo flashtool
Tamanho: 940 mb
Download Da Rom Aqui
Desbloqueio do Bootloader Sony SP ZQ ZL Z Z1 Z1 Compact Z Ultra Z Ultra Google Play Edition
Olá pessoal que acompanha a Stock Rom, sou um novo poster e esse é o meu primeiro tutorial, caso aja algum erro comente. Lembrando que esse procedimento só funciona nos aparelhos acima e nos modelos que foram lançados em 2013, modelos anteriores (2012) é outro método bem mais fácil que estarei postando depois.
OBS 1: Faça por sua conta e risco, não me responsabilizo por bricks, ou bugs, ocasionados pelo desbloqueio do mesmo.
OBS 2: Na versão 4.2 do Z1 a câmera para de funcionar, problema que foi consertado quando colocar a atualização para o 4.3.
OBS 3: Na versão 4.4.2 do Z1 Brasileiro se você desbloquear o Bootloader a TV Digital para de funcionar.
OBS 4: Para fazer o root no Z1 é necessário fazer o desbloqueio do Bootloader, tem um método para fazer o root com o Bootloader bloqueado só que eu não recomendo pois o procedimento é longo e minuncioso e enjoado de fazer.
OBS 5: Desbloqueando o Bootloader irá formatar o seu celular, por isso faça um Backup antes.
OBS 6: Em aparelhos de 2013 (ZQ, ZL, Z) tire seu cartão de memória antes de começar o procedimento, senão ele será formatado junto com o celular.
Vamos lá.
Passo 1
Primeiramente até esta pagina da Sony : http://unlockbootloader.sonymobile.com/ , desça até o final da pagina e clique na opção "Start unlocking the boot loader"
Depois disto pegue seu Sony e digite no discador *#*#7378423#*#*, irá aparecer uma tela de configuração, selecione Service info > Configuration > Rooting Status, caso apareça no rooting status a mensagem : "Bootloader unlock alowed : Yes" podemos continuar, mas caso apareça "Bootloader unlock alowed : No" não será possível desbloquear o Bootloader (Raramente ocorre isso), clique no final da pagina em "Continue", e na proxima pagina clique em "Yes, Im Sure", na próxima pagina você marca as 2 opções, e clica em "I accept". Na página seguinte, vai aparecer isto:

Você irá preencher o seguinte nessas abas:
Name: Você coloca o seu nome
IMEI or MEID or IDID: Você digita todos os números do seu IMEI com exceção do ultimo número,
EX: 2152465289825 (treze números)
OBS: Você pode achar o IMEI do seu celular no adesivo na caixa dele, ou digitando no discador *#06#.
E-mail: Você coloca o e-mail da sua preferência, ai é só clicar em Submit e no seu e-mail vai chegar um código, este será o código que vamos precisar para desbloquear o bootloader, e para rebloquear novamente irá precisar dele também, por isso salve e guarde-o a salvo.
Passo 2:
Feito o procedimento acima agora vamos colocar a mão na massa.
Baixe este pack ADB Bootloader e extraia o conteúdo do rar para sua Área de trabalho.
Link: MEGA
Selecione a pasta, segure a tecla Shift e clique com o botão direto do mouse, e selecione a opção "Abrir janela de comando aqui", e irá abrir o prompt de comando do windows automáticamente.
Desligue o seu telefone e conecte-o ao computador em modo fastboot (segure a tecla de volume + e plug o usb no pc, se acender um led azul e por que está em fastboot).
Copie e cole na janela do prompt de comando fastboot.exe -i 0x0fce getvar version
Se aparecer finish em ate 0.007s está tudo em ordem.
Agora copie e cole este outro comando fastboot.exe -i 0x0fce oem unlock 0x
depois do 0x, digite a chave que você recebeu em seu e-mail anteriormente e aperte enter, se ocorrer tudo bem aparecerar só um OK na tela do prompt. Pronto bootloader desbloqueado.
Não gostou de ter desbloqueado e quer rebloquear o bootloader ? Siga o procedimento abaixo:
Passo 1:
Abra o Flashtools (v0.9.15 ou superior), conecte o seu telefone em flashmode (desligue-o, segure a tecla de volume - e conect na usb).
Passo 2 :
Clique em BLU do lado do raio no flashtools, e irá aparecer uma outra janelinha

Clique em Relock e o procedimento vai ocorrer sozinho.
Quando aparecer na tela ending flash session e por que ocorreu tudo ok. Pronto seu Bootloader foi rebloqueado.
É indeciso e que desbloquear novamente o Bootloader ? Repita esse ultimo procedimento, só que no lugar de apertar "Relock" vai aparecer "Unlock", é só clicar e pronto. Seja feliz com seu Bootloader desbloqueado de novo.
Créditos
AbnerEC
Read more »
OBS 1: Faça por sua conta e risco, não me responsabilizo por bricks, ou bugs, ocasionados pelo desbloqueio do mesmo.
OBS 2: Na versão 4.2 do Z1 a câmera para de funcionar, problema que foi consertado quando colocar a atualização para o 4.3.
OBS 3: Na versão 4.4.2 do Z1 Brasileiro se você desbloquear o Bootloader a TV Digital para de funcionar.
OBS 4: Para fazer o root no Z1 é necessário fazer o desbloqueio do Bootloader, tem um método para fazer o root com o Bootloader bloqueado só que eu não recomendo pois o procedimento é longo e minuncioso e enjoado de fazer.
OBS 5: Desbloqueando o Bootloader irá formatar o seu celular, por isso faça um Backup antes.
OBS 6: Em aparelhos de 2013 (ZQ, ZL, Z) tire seu cartão de memória antes de começar o procedimento, senão ele será formatado junto com o celular.
Vamos lá.
Passo 1
Primeiramente até esta pagina da Sony : http://unlockbootloader.sonymobile.com/ , desça até o final da pagina e clique na opção "Start unlocking the boot loader"
Depois disto pegue seu Sony e digite no discador *#*#7378423#*#*, irá aparecer uma tela de configuração, selecione Service info > Configuration > Rooting Status, caso apareça no rooting status a mensagem : "Bootloader unlock alowed : Yes" podemos continuar, mas caso apareça "Bootloader unlock alowed : No" não será possível desbloquear o Bootloader (Raramente ocorre isso), clique no final da pagina em "Continue", e na proxima pagina clique em "Yes, Im Sure", na próxima pagina você marca as 2 opções, e clica em "I accept". Na página seguinte, vai aparecer isto:
Você irá preencher o seguinte nessas abas:
Name: Você coloca o seu nome
IMEI or MEID or IDID: Você digita todos os números do seu IMEI com exceção do ultimo número,
EX: 2152465289825 (treze números)
OBS: Você pode achar o IMEI do seu celular no adesivo na caixa dele, ou digitando no discador *#06#.
E-mail: Você coloca o e-mail da sua preferência, ai é só clicar em Submit e no seu e-mail vai chegar um código, este será o código que vamos precisar para desbloquear o bootloader, e para rebloquear novamente irá precisar dele também, por isso salve e guarde-o a salvo.
Passo 2:
Feito o procedimento acima agora vamos colocar a mão na massa.
Baixe este pack ADB Bootloader e extraia o conteúdo do rar para sua Área de trabalho.
Link: MEGA
Selecione a pasta, segure a tecla Shift e clique com o botão direto do mouse, e selecione a opção "Abrir janela de comando aqui", e irá abrir o prompt de comando do windows automáticamente.
Desligue o seu telefone e conecte-o ao computador em modo fastboot (segure a tecla de volume + e plug o usb no pc, se acender um led azul e por que está em fastboot).
Copie e cole na janela do prompt de comando fastboot.exe -i 0x0fce getvar version
Se aparecer finish em ate 0.007s está tudo em ordem.
Agora copie e cole este outro comando fastboot.exe -i 0x0fce oem unlock 0x
depois do 0x, digite a chave que você recebeu em seu e-mail anteriormente e aperte enter, se ocorrer tudo bem aparecerar só um OK na tela do prompt. Pronto bootloader desbloqueado.
Não gostou de ter desbloqueado e quer rebloquear o bootloader ? Siga o procedimento abaixo:
Passo 1:
Abra o Flashtools (v0.9.15 ou superior), conecte o seu telefone em flashmode (desligue-o, segure a tecla de volume - e conect na usb).
Passo 2 :
Clique em BLU do lado do raio no flashtools, e irá aparecer uma outra janelinha
Clique em Relock e o procedimento vai ocorrer sozinho.
Quando aparecer na tela ending flash session e por que ocorreu tudo ok. Pronto seu Bootloader foi rebloqueado.
É indeciso e que desbloquear novamente o Bootloader ? Repita esse ultimo procedimento, só que no lugar de apertar "Relock" vai aparecer "Unlock", é só clicar e pronto. Seja feliz com seu Bootloader desbloqueado de novo.
Créditos
AbnerEC
Atualização Xperia Z1 C6943 Android 4 4 4
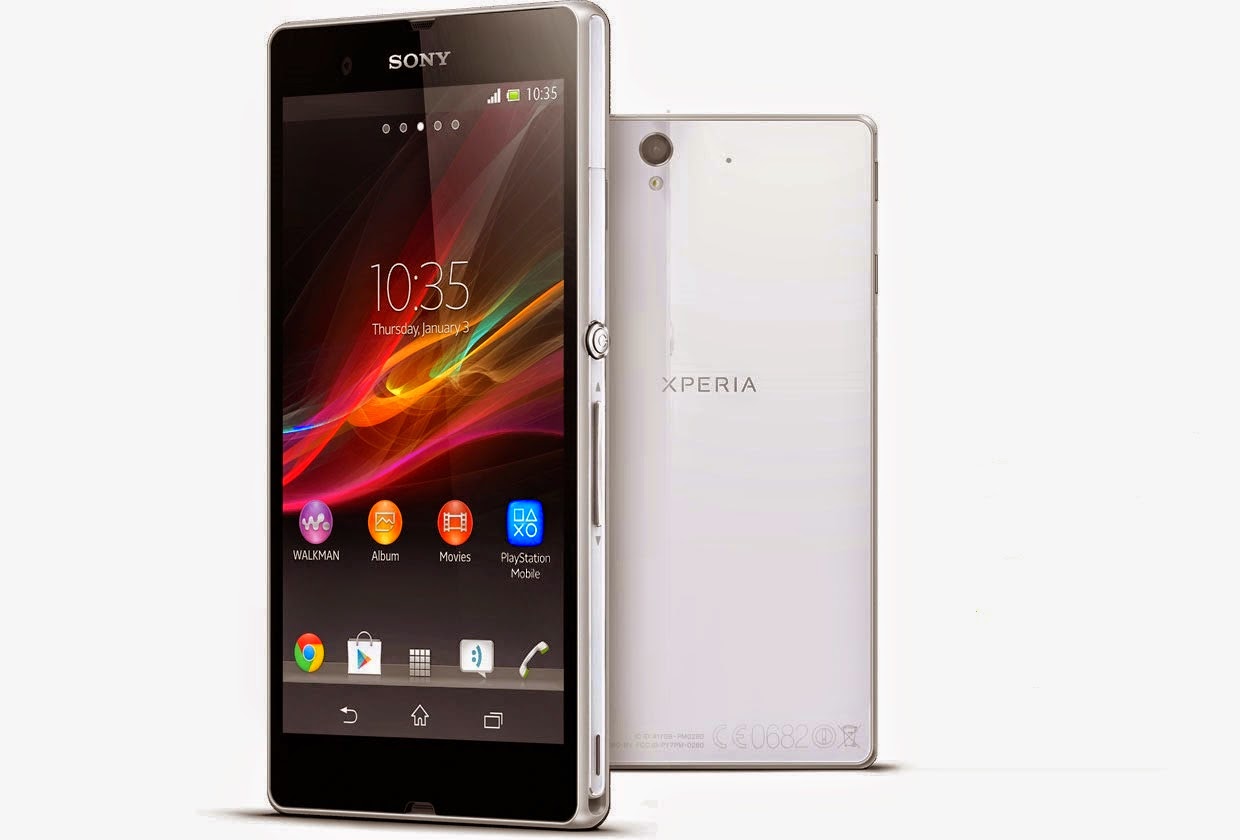
As mudanças que tiveram foi : Xperia Launcher foi atualizado e agora é o mesmo do Xperia Z2, a ROM está mais fluida e leve, o consumo da bateria diminuiu um pouco (agora demora 20 min para abaixar 1 % de bateria, antes demorava 8 minutos com uso continuo), algumas atualizações de egines do sistema, atualização de alguns aplicativos internos.
Quem tiver medo de instalar via Flashtools pode atualizar via SUS (Sony Update Service).
Link: MEGA
Créditos : by AbnerEC (Extraído do meu aparelho)
Monday, July 25, 2016
How to Install CM13 Android 6 0 1 Marshmallow on Sony Xperia Z1 Compact D5503
According to XDA Member CLINTZ9, Android 6.0.1 Marshmallow CyanogenMod 13 [CM13] unofficial ROM is released for Sony Xperia Z1 Compact D5503. CM13 will let D5503 users taste the sweetness of Marshmallow 6.0.1 on Sony Xperia Z1 Compact D5503.

Follow our guide below to download the Unofficial CM13 and install it yourself.
View my Flipboard Magazine.
÷ Prerequisites:
•This tutorial is only for installing Android 6.0.1 Marshmallow Unofficial CM13 ROM on Sony Xperia Z1 Compact D5503. Please do not try on any other Sony Xperia Z1 Compact variants.
•Your phone should be rooted and haveClockworkMod recovery installed from before.
•This tutorial will wipe out all your data.Proceed at your own risk.Perform a Dalvik Cache wipe before proceeding from the recovery mode.
Make sure you backup all your data in your phone before proceeding.
*Disclaimer:
Android Custom ROM fix ® provide various Firmware Updates and Rooting process along with Custom ROM,Modes,file are all belong to their owners/developers. The autor of this site or the developers are not responsible, if you damage or brick your device.Do it on your own risk and follow the instruction properly.
* Important:
Backup important files stored on your device before proceeding with the steps below, so that in case something goes wrong you’ll have backup of all your important files.

÷ How to Install CM13 Android 6.0.1 Marshmallow on Sony Xperia Z1 Compact D5503.
Step 1 – Download CM13 Android 6.0.1 Marshmallow and Google Apps for your Xperia Z1 Compact D5503 to your computer.
Step 2 – Connect and mount your Sony Xperia Z1 Compact D5503 USB memory on your computer using the USB cable.
Step 3 – Now copy/paste the downloaded Android 6.0.1 ROM zip file and Google Apps zip files to your SD card. Make sure the files are in the SD card root (not in any folder).
Step 4 – Then turn OFF your phone and disconnect from the USB cable.
Step 5 – Now to get in the Recovery Mode. Switch ON the phone while pressing and holding Volume Up + Home + Power buttons together
Step 6 – Once you are in ClockworkModRecovery, select perform a full data wipe by selecting “wipe data/factory reset”. Use the Power button to select everything while in the Recovery Mode.
Step 7 – Then, perform a cache wipe by selecting “wipe cache partition” .
Step 8 – Now this is optional, but it is recommended to perform a wipe of your dalvik cache as well. You will not get into boot loops or any other errors. From CWM recovery, go to ‘advanced’ and then select “wipe dalvik cache”.
Step 9 – Then go back to the main recovery screen and select “install zip from SD card”.
Step 10 – Now select “choose zip from sdcard”. Using your volume keys, navigate to the Android 6.0.1 ROM zip file that you copied to your SD card and select it using the Power button. Confirm the installation on the next screen and the installation procedure should start now.
Google Apps: Repeat the above step for the Gapps zip file as well and install it on your phone.
Step 11 – After the installation completes, go to “+++++Go Back+++++” and reboot the phone by selecting “reboot system now” from the recovery menu.

Your Sony Xperia Z1 Compact D5503 will boot now and it might take about 5 minutes to boot on your first time. So, please wait.
That’s it! Your Sony Xperia Z1 Compact D5503 should now have unofficial CM13 Android 6.0.1 Marshmallow installed on your phone! Go to Settings > About phone to verify.
Like this post? PLZ Hit the share buttons below to share this article with your friends on Facebook, Google + and Twitter.
PLZ Follow Us On Flipboard 4 More Xperia Z1 Compact D5503 latest custom ROM fix.
PLZ Use the comment box below to contribute more ideas & Suggestions .
Best Regards.
÷ Prerequisites:
•This tutorial is only for installing Android 6.0.1 Marshmallow Unofficial CM13 ROM on Sony Xperia Z1 Compact D5503. Please do not try on any other Sony Xperia Z1 Compact variants.
•Your phone should be rooted and haveClockworkMod recovery installed from before.
•This tutorial will wipe out all your data.Proceed at your own risk.Perform a Dalvik Cache wipe before proceeding from the recovery mode.
Make sure you backup all your data in your phone before proceeding.
*Disclaimer:
Android Custom ROM fix ® provide various Firmware Updates and Rooting process along with Custom ROM,Modes,file are all belong to their owners/developers. The autor of this site or the developers are not responsible, if you damage or brick your device.Do it on your own risk and follow the instruction properly.
* Important:
Backup important files stored on your device before proceeding with the steps below, so that in case something goes wrong you’ll have backup of all your important files.
÷ How to Install CM13 Android 6.0.1 Marshmallow on Sony Xperia Z1 Compact D5503.
Step 1 – Download CM13 Android 6.0.1 Marshmallow and Google Apps for your Xperia Z1 Compact D5503 to your computer.
Step 2 – Connect and mount your Sony Xperia Z1 Compact D5503 USB memory on your computer using the USB cable.
Step 3 – Now copy/paste the downloaded Android 6.0.1 ROM zip file and Google Apps zip files to your SD card. Make sure the files are in the SD card root (not in any folder).
Step 4 – Then turn OFF your phone and disconnect from the USB cable.
Step 5 – Now to get in the Recovery Mode. Switch ON the phone while pressing and holding Volume Up + Home + Power buttons together
Step 6 – Once you are in ClockworkModRecovery, select perform a full data wipe by selecting “wipe data/factory reset”. Use the Power button to select everything while in the Recovery Mode.
Step 7 – Then, perform a cache wipe by selecting “wipe cache partition” .
Step 8 – Now this is optional, but it is recommended to perform a wipe of your dalvik cache as well. You will not get into boot loops or any other errors. From CWM recovery, go to ‘advanced’ and then select “wipe dalvik cache”.
Step 9 – Then go back to the main recovery screen and select “install zip from SD card”.
Step 10 – Now select “choose zip from sdcard”. Using your volume keys, navigate to the Android 6.0.1 ROM zip file that you copied to your SD card and select it using the Power button. Confirm the installation on the next screen and the installation procedure should start now.
Google Apps: Repeat the above step for the Gapps zip file as well and install it on your phone.
Step 11 – After the installation completes, go to “+++++Go Back+++++” and reboot the phone by selecting “reboot system now” from the recovery menu.
Your Sony Xperia Z1 Compact D5503 will boot now and it might take about 5 minutes to boot on your first time. So, please wait.
That’s it! Your Sony Xperia Z1 Compact D5503 should now have unofficial CM13 Android 6.0.1 Marshmallow installed on your phone! Go to Settings > About phone to verify.
Like this post? PLZ Hit the share buttons below to share this article with your friends on Facebook, Google + and Twitter.
PLZ Follow Us On Flipboard 4 More Xperia Z1 Compact D5503 latest custom ROM fix.
PLZ Use the comment box below to contribute more ideas & Suggestions .
Best Regards.
4K Video e Timeshift Video no Xperia Z1 tutorial passo a passo

Fala pessoal que acompanha a Stock Rom.net, hoje eu irei postar um tutorial muito legal pra quem tem o Xperia Z1 e o Z1 Compact, e vai ser como adicionar os recursos de câmera do Xperia Z2 ou seja o Timeshift (Slow Motion Video) e a Gravação de vídeos em 4k ou seja o novíssimo formato Ultra HD. Bom antes de começar devo lhes informar que é necessário ter acesso "Root". Caso o seu aparelho não tenha o Root clique aqui para saber como fazer o root no Xperia Z1.
OBS: Não me responsabilizo por brick na câmera, siga o tutorial a risca e nada de anormal irá acontecer.
Considerações iniciais feitas vamos ao que interessa.
Passo 1:
Primeiro de tudo você irá baixar o pacote 4K do Xperia Z1:
DOWNLOAD
Senha: stockrom.netPasso 2:
Bom agora é que realmente vai começar, primeiro extraia o "Pacote 4K Xperia Z1" para a sua área de trabalho ou pasta de preferência, dentro da pasta você irá copiar todos os arquivos para a memória interna do aparelho ou para o cartão SD.
Passo 3: Instalando os aplicativos.
Agora você vai no gerenciador de tarefas do celular e instala o aplicativo chamado "Xposed Installer_v32_de4f0d.apk" que você copiou para a memória interna do celular no passo anterior.
Após instalado não abra-o. Agora instale o segundo aplicativo chamado "Serajr.xperia.xposed.kk_v2_97b569.apk", aguarde a instalação do mesmo e saia.
Passo 4: Configurando os aplicativos.
Agora vamos a parte delicada do tutorial, leia-o com bastante atenção pois esta etapa é crucial para o mod ser instalado sem erros.
Primeiro abra o aplicativo no seu menu chamado "Xposed Installer"

Depois selecione a opção "Módulos"


Passo 5: Fazendo o flash do "4K e Timeshift Video"
Bom após ter feito o procedimento acima reinicie o seu aparelho e entre no recovery (quando aparecer um led rosa aperte a tecla de volume -).

Selecione a opção "install zip"
Depois selecione a opção "choose zip from /sdcard"

Agora selecione a opção 0/

Em seguida selecione o arquivo 4K-HFRv1.3.zip.
Agora navegue até a opção Go Back" e em seguida de um wipe no cache. Depois de um "reboot system now" e abra a câmera, navegue pelas opções de efeitos e veja se ativou as configurações para selecionar o modo de gravação 4K e o Timeshift Video.
Espero que tenham gostado do tutorial que eu trouxe em primeira mão para habilitar essas opções exclusivas do Xperia Z2 que foram portadas para o Xperia Z1. Duvidas postem nos comentários.
Atualização do post:
Funciona na nova atualização do Android 4.4.4.
Créditos:
Tutorial feito por Abner Vilela (AbnerEC: Poster e Editor)
Aplicativos portados e códigos de programação dos mesmos, e aplicativos MOD: XDA Developers
Sunday, July 24, 2016
Duração de Bateria 1000 melhor no Xperia Z1

Fala pessoal da Stock Rom, hoje voupostar uma super dica pra quem tem o Z1/Z1 Compact,e sofre com o rápido descarregamento desde que atualizou o telefone para o Android Kitkat nas versões 4.4.2 ou 4.4.4, bom a dica é simples e vamos apenas precisar de 1 único a aplicativo é ter root no celular.
1ºPasso: Instalando o Titanium Backup
Download
Bom pessoal este é o aplicativo, vocês podem me perguntar: "Mas pra que o Titanium Backup?". Bom a gente vai usar ele para desinstalar os 4 aplicativos que consomem a sua bateria e nenhum aplicativo que limpa processos os fecha.
Indo direto ao ponto instale o aplicativo, dê permissões de Root para ele e aperte na aba Backup/Restauração.

Procure os aplicativos : Hangouts, Google+, Play Filmes, Play Livros. Faça backup deles pelo AndroZip, ou pelo próprio Titanium Backup, em seguida desinstale-os. Pronto dê uma reiniciada no seu aparelho após isso.
2º Passo: Testando
Bom após ter feito essas desinstalações e reiniciado carregue seu aparelho até ficar em 100%, agora use ele normalmente e compare o consumo de energia com o de antes de ser realizado o procedimento. No meu aparelho eu notei uma mudança significativa no consumo. Bom é só isso caso queiram os aplicativos de volta é só restaurar pelo backup feito ou podem baixar pela Play Store.
OBS: Quem tiver outro aparelho da linha Xperia de 2013/2014 (SP, ZQ, ZL, Z Ulltra), e está com o mesmo problema de bateria descarregando rápido tente fazer esse método, talvez possa resolver o problema.
OBS: Quem tiver outro aparelho da linha Xperia de 2013/2014 (SP, ZQ, ZL, Z Ulltra), e está com o mesmo problema de bateria descarregando rápido tente fazer esse método, talvez possa resolver o problema.
Créditos:
Aplicativo: Agradeço a equipe do gamesandroidhvga.com por disponibilizar o link.
Tutorial by AbnerEC
Wednesday, July 20, 2016
Download Stock Rom Original Sony XPERIA Z1 C6903 4 3 Sem logo de operadora LINK OFF
Baixar Stock Rom Original para Xperia Z1 C6903
Atualizar Sony Xperia Z1 para Android 4.3
Modelo: Sony Xperia Z1 C6903
Número da versão: 14.2.A.1.136
Região - America / Europa
Idioma - Multi Linguagem
Versão do Android : 4.3
Procedimento: flash pelo flashtool
Tamanho: 838 mb
Download Da Rom Aqui
Creditos: http://xperiadownload.cz
Monday, July 18, 2016
How to Install CM13 0 Android 6 0 1 Marshmallow on Xperia Z1 C69002 L39h
According to XDA member drakonizer
CyanogenMod 13 CM13.0 Unofficial Rom is released for Sony Xperia Z1 C69002 L39h.

CM13.0 will let Xperia Z1 C69002 L39h users taste the sweetness of Marshmallow 6.0.1 such as the battery saving ‘doze’ functionality and new permissions model, alongside the CM features you’d expect.
÷Features:
These builds are completely based on CyanogenMod sources, and contain no modification of framework from my end.
÷WORKING:
Mostly Everything
÷NOT WORKING/BUGGY:
Camera, although present, is laggy and a WIP (like all other MM ROMs)
Follow our guide below to download the Unofficial CM13 and install it yourself.
CyanogenMod 13 CM13.0 Unofficial Rom is released for Sony Xperia Z1 C69002 L39h.
CM13.0 will let Xperia Z1 C69002 L39h users taste the sweetness of Marshmallow 6.0.1 such as the battery saving ‘doze’ functionality and new permissions model, alongside the CM features you’d expect.
÷Features:
These builds are completely based on CyanogenMod sources, and contain no modification of framework from my end.
÷WORKING:
Mostly Everything
÷NOT WORKING/BUGGY:
Camera, although present, is laggy and a WIP (like all other MM ROMs)
Follow our guide below to download the Unofficial CM13 and install it yourself.
View my Flipboard Magazine.
÷ Prerequisites:
•This tutorial is only for installing CyanogenMod 13 [CM13.0] ROM on Xperia Z1 C69002 L39h . Please do not try on any other Xperia Z1 variants.
•Sony PC Companion will NOT detect your phone after installing this ROM because it is a custom firmware.
•Bootloader should be unlocked or you will not be able to install this ROM.
•Your phone should be rooted and haveClockworkMod recovery installed from before.
•This tutorial will wipe out all your data.Proceed at your own risk.Perform a Dalvik Cache wipe before proceeding from the recovery mode.
•Make sure you backup all your data in your phone before proceeding.
*Disclaimer:
Android Custom ROM fix ® provide various Firmware Updates and Rooting process along with Custom ROM,Modes,file are all belong to their owners/developers. The autor of this site or the developers are not responsible, if you damage or brick your device.Do it on your own risk and follow the instruction properly.
* Important:
Backup important files stored on your device before proceeding with the steps below, so that in case something goes wrong you’ll have backup of all your important files.

÷ How to Install CM13.0 Android 6.0.1 Marshmallow on Xperia Z1 C69002 L39h.
Step 1 – Download CM13.0 Android 6.0.1 Marshmallow and Google Apps for your Xperia Z1 C69002 L39h to your computer.
Step 2 – Connect and mount your Xperia Z1 C69002 L39h USB memory on your computer using the USB cable.
Step 3 – Now copy/paste the downloaded Android 6.0.1 ROM zip file and Google Appszip files to your SD card. Make sure the files are in the SD card root (not in any folder).
Step 4 – Then turn OFF your phone and disconnect from the USB cable.
Step 5 – Now to get in the Recovery Mode. Switch ON the phone while pressing and holding Volume Up + Home + Power buttons together
Step 6 – Once you are in ClockworkModRecovery, select perform a full data wipe by selecting “wipe data/factory reset”. Use the Power button to select everything while in the Recovery Mode.
Step 7 – Then, perform a cache wipe by selecting “wipe cache partition” .
Step 8 – Now this is optional, but it is recommended to perform a wipe of your dalvik cache as well. You will not get into boot loops or any other errors. From CWM recovery, go to ‘advanced’ and then select “wipe dalvik cache”.
Step 9 – Then go back to the main recovery screen and select “install zip from SD card”.
Step 10 – Now select “choose zip from sdcard”. Using your volume keys, navigate to the Android 6.0.1 ROM zip file that you copied to your SD card and select it using the Power button. Confirm the installation on the next screen and the installation procedure should start now.
Google Apps: Repeat the above step for the Gapps zip file as well and install it on your phone.
Step 11 – After the installation completes, go to “+++++Go Back+++++” and reboot the phone by selecting “reboot system now” from the recovery menu.

Your Xperia Z1 C69002 L39h will boot now and it might take about 15 minutes to boot on your first time. So, please wait.
That’s it Your Sony Xperia Z1 C69002 L39h should now have CM13.0 Nightly Android 6.0.1 Marshmallow installed on your phone! Go to Settings > About phone to verify.
For more HTC One M9 Brand New Firmware & Custom ROM keep checking AndroidCustomROM Fix ™®
Like this post? PLZ Hit the share buttons below to share this article with your friends on Facebook, Google + and Twitter.
PLZ Follow Us On Flipboard 4 More Xperia Z1 latest custom ROM fix.
PLZ Use the comment box below to contribute more ideas & Suggestions .
Best Regards.
÷ Prerequisites:
•This tutorial is only for installing CyanogenMod 13 [CM13.0] ROM on Xperia Z1 C69002 L39h . Please do not try on any other Xperia Z1 variants.
•Sony PC Companion will NOT detect your phone after installing this ROM because it is a custom firmware.
•Bootloader should be unlocked or you will not be able to install this ROM.
•Your phone should be rooted and haveClockworkMod recovery installed from before.
•This tutorial will wipe out all your data.Proceed at your own risk.Perform a Dalvik Cache wipe before proceeding from the recovery mode.
•Make sure you backup all your data in your phone before proceeding.
*Disclaimer:
Android Custom ROM fix ® provide various Firmware Updates and Rooting process along with Custom ROM,Modes,file are all belong to their owners/developers. The autor of this site or the developers are not responsible, if you damage or brick your device.Do it on your own risk and follow the instruction properly.
* Important:
Backup important files stored on your device before proceeding with the steps below, so that in case something goes wrong you’ll have backup of all your important files.
÷ How to Install CM13.0 Android 6.0.1 Marshmallow on Xperia Z1 C69002 L39h.
Step 1 – Download CM13.0 Android 6.0.1 Marshmallow and Google Apps for your Xperia Z1 C69002 L39h to your computer.
Step 2 – Connect and mount your Xperia Z1 C69002 L39h USB memory on your computer using the USB cable.
Step 3 – Now copy/paste the downloaded Android 6.0.1 ROM zip file and Google Appszip files to your SD card. Make sure the files are in the SD card root (not in any folder).
Step 4 – Then turn OFF your phone and disconnect from the USB cable.
Step 5 – Now to get in the Recovery Mode. Switch ON the phone while pressing and holding Volume Up + Home + Power buttons together
Step 6 – Once you are in ClockworkModRecovery, select perform a full data wipe by selecting “wipe data/factory reset”. Use the Power button to select everything while in the Recovery Mode.
Step 7 – Then, perform a cache wipe by selecting “wipe cache partition” .
Step 8 – Now this is optional, but it is recommended to perform a wipe of your dalvik cache as well. You will not get into boot loops or any other errors. From CWM recovery, go to ‘advanced’ and then select “wipe dalvik cache”.
Step 9 – Then go back to the main recovery screen and select “install zip from SD card”.
Step 10 – Now select “choose zip from sdcard”. Using your volume keys, navigate to the Android 6.0.1 ROM zip file that you copied to your SD card and select it using the Power button. Confirm the installation on the next screen and the installation procedure should start now.
Google Apps: Repeat the above step for the Gapps zip file as well and install it on your phone.
Step 11 – After the installation completes, go to “+++++Go Back+++++” and reboot the phone by selecting “reboot system now” from the recovery menu.
Your Xperia Z1 C69002 L39h will boot now and it might take about 15 minutes to boot on your first time. So, please wait.
That’s it Your Sony Xperia Z1 C69002 L39h should now have CM13.0 Nightly Android 6.0.1 Marshmallow installed on your phone! Go to Settings > About phone to verify.
For more HTC One M9 Brand New Firmware & Custom ROM keep checking AndroidCustomROM Fix ™®
Like this post? PLZ Hit the share buttons below to share this article with your friends on Facebook, Google + and Twitter.
PLZ Follow Us On Flipboard 4 More Xperia Z1 latest custom ROM fix.
PLZ Use the comment box below to contribute more ideas & Suggestions .
Best Regards.
Como fazer o Root no Xperia Z1 C69xx C6903 C6943 com Android 4 4 2 14 3 A 0 757

Bom pessoal estarei ensinando como realizar o Root no Xperia Z1 com Android 4.4.2
Não me responsabilizo por bricks, ou bugs, faça por sua conta e risco.
Obs: Fazendo o root você está anulando a sua garantia, porém há como remover o root pelo próprio aplicativo do SuperSU.
Chance de dar zica = 0,000000000001% se o procedimento for seguido passo a passo.
Pré-requisitos:
Bootloader desbloqueado (Veja aqui como desbloquear)
Android 4.4.2 (14.3.A.0.757) instalado (Baixe a Rom aqui).
Paciência e atenção para realizar o procedimento.
Começando o procedimento:
Passo 1
Baixe o pacote de Root para o Z1 aqui
Em seguida o extraia para a pasta de sua preferência (recomendo a Área de Trabalho para facilitar as coisas).
Dentro da pasta "Root Z1 by AbnerEC", procure e copie ara a memória interna do seu celular o arquivo chamado "UPDATE-SuperSU-v1.94" .
Feito isso desligue o seu telefone e vamos para o Flashtools.
Passo 2:
Abra o Flashtools (v 0.9.15 ou superior), e conecte o seu celular em modo fastboot (desligue-o, segure o botão de volume + e conecte-o no computador), clique no ícone de raio no Flashtools e selecione a opção fastboot mode.
Agora clique em "Select Kernel to Flash"

Na janela que aparecer você procura o arquivo "boot.img" dentro da pasta "Root Z1 by AbnerEC" que você extraiu (não se esqueça de mudar o formato da kernel que por padrão está ".sin", mude para a opção ".img").

Depois você clica na opção "Reboot into fastboot mode"

Desconecte o seu celular e inicie ele. Quando um led Rosa aparecer você aperta a tecla de volume - e ele vai entrar no Recovery.
Para navegar entre as opções é só usar as teclas de volume, e o botão de ligar você usa para selecionar a opção.
Selecione a opção "install zip"
Depois selecione a opção "choose zip from /sdcard"
Passo 3: Instalando a versão atualizada do SuperSU Pro.
Agora que o seu celular já está com o root feito vamos atualizar o aplicativo do SuperSU e instalar a licença pro.
Primeiro vá no menu principal e procure o aplicativo SuperSU e espere ele atualizar os binários.

Depois vá em configurações e em seguida na Opção Reisntalar.

Após isso o aplicativo vai fechar e desaparecer do menu. Reinicie o seu celular e copie para a memória interna dele os dois aplicativos da pasta "Super SU 1.99 atualizado pro" que está no pacote de root.
Instale primeiro o aplicativo "SuperSU_Pro_1.00.apk", e logo em seguida o aplicativo "SuperSU-1.99r2.apk".
Vá no menu de aplicativos abra o novo SuperSU deixe ele atualizar os binários e depois veja se a versão está assim.

Pronto seu Xperia Z1 está com root feito e com o aplicativo na versão PRO atualizada.
Fim do tutorial.
Créditos:
AbnerEC
Subscribe to:
Posts (Atom)