Showing posts with label twrp. Show all posts
Showing posts with label twrp. Show all posts
Thursday, July 28, 2016
Guide How to Install TWRP Recovery and Root Android Lenovo Vibe K5 K5 Plus
[Guide] How to Install TWRP Recovery and Root Android Lenovo Vibe K5 | K5 Plus.
Install TWRP Recovery and Root Vibe Lenovo K5. This guide will show you how to Install TWRP Recovery and Root Android Lenovo Vibe K5 | K5 Plus. If you want root the Lenovo Vibe K5 or K5 plus you must install TWRP Recovery first on this device. We know that TWRP is custom recovery image for Android-based devices, and this recovery provided GUI interface or with touchscreen enabled, by using TWRP we allows users to install third-party firmware and backup the current system. therefore, TWRP often installed when rooting Android smartphone devices.
Lenovo Vibe K5 is the smartphone released on February, 2016. with 5,0 Inchi IPS capacitive touchscreen, 16M colors, work on Android OS, v5.1 (Lollipop), and supported with Quad-core 1.5 GHz Cortex-A53 & quad-core 1.2 GHz Cortex-A53 CPU, Qualcomm MSM8929 Snapdragon 415 chipset, Adreno 405 GPU, combined with 2 GB of RAM, 13 MP on primary camera and 5 MP on secondary camera.
Lenovo Vibe K5 is the smartphone released on February, 2016. with 5,0 Inchi IPS capacitive touchscreen, 16M colors, work on Android OS, v5.1 (Lollipop), and supported with Quad-core 1.5 GHz Cortex-A53 & quad-core 1.2 GHz Cortex-A53 CPU, Qualcomm MSM8929 Snapdragon 415 chipset, Adreno 405 GPU, combined with 2 GB of RAM, 13 MP on primary camera and 5 MP on secondary camera.
Install TWRP on Lenovo Vibe K5.
Here is the guide started. Now follow all step carefully.
- Make sure Minimal ADB and fastboot installed on your compuer. you can see this guide.
- Make sure your battery is not empty or at least has 70% of battery capacity.
- Now, switch on your Lenovo Vibe K5.
- Then enable the Developer Options.
- Go to Setting -> About Phone -> Phone Information -> tap 7 times at Build Number,
- Then, Enable USB Debugging
- Go to Settings -> Developer -> USB Debugging
- Now, Enable OEM unlock.
- Go to Settings -> Developer -> Unlock OEM
- Make sure driver for Lenovo Vibe K5 installed correctly on your computer, you can find the driver that come on the CD cell partition
- Now, connect your Lenovo Vibe K5 to the computer using original USB cable.
- Then, Download the TWRP recovery, and copy it to the folder where adb is installed on your computer.
- Download link
- Cretaed by Shreps
- TWRP version : 3.0.2.0
- File name : twrp-k5-3.0.2-r1_shreps.img
- Open a command prompt from within your fastboot folder.
- To start this command prompt just hold shift + right click, select open command prompt here.

Run ADB on computer - Now type,
- adb devices
- This command used to confirm the connection between Lenovo Vibe K5 and the computer.
- Once the connection confirmed. Now type.
- adb reboot bootloader
- If you want to temporarily boot this recovery type ,
- fastboot boot TWRP-k5-3.0.2-r1_shreps.img
- If you want to permanently flash it, type ;
- fastboot flash recovery TWRP-k5-3.0.2-r1_shreps.img
- Finish.
Root on Lenovo Vibe K5.
- This step will show you how to root Lenovo Vibe K5
- To start it, you must Download the ZIP file SuperSU v2.46
- Then save it in the micro SD card.
- Now turn off your Lenovo Vibe K5.
- Then enter to recovery mode.
- Press and hold Power Button and Volume Up button
- Then follow instruction appear on screen.
- Select recovery to install SuperSu from SD Card.

Wednesday, July 27, 2016
How to Install TWRP 3 0 2 Custom Recovery on HTC 10
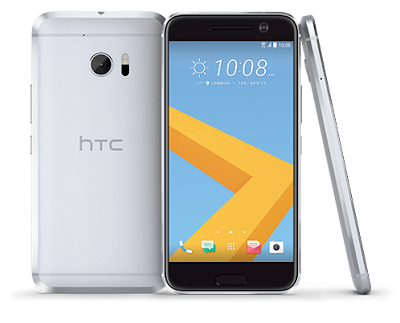
HTC 10 Owners can now install latest TWRP 3.0.2 custom recovery on their smartphones by following the detailed tutorial given below.
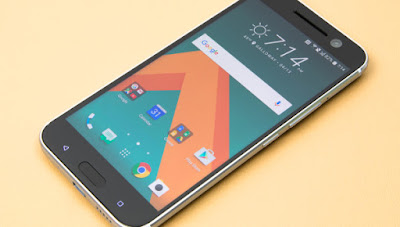
TWRP 3.0.2 custom recovery will also allow you to easily gain root access as well. HTC 10 can be easily installed with TWRP 3.0.2 using our detailed guide which is listed right below. You can now easily install TWRP Touch Recovery on HTC 10 using our tutorial.
TWRP 3.0.2 custom recovery will also allow you to easily gain root access as well. HTC 10 can be easily installed with TWRP 3.0.2 using our detailed guide which is listed right below. You can now easily install TWRP Touch Recovery on HTC 10 using our tutorial.
View my Flipboard Magazine.
÷ Prerequisites:
•This TWRP Recovery tutorial is only for unlocked HTC 10. Please don’t try this on any other variants of the phone.
•Make sure you backup all your data in your phone before proceeding.
•This will void your warranty.
•HTC Sync should be installed with full working ADB/Fastboot before performing the tutorial.
•Bootloader should be unlocked.
*Disclaimer:
Android Custom ROM fix ® provide various Firmware Updates and Rooting process along with Custom ROM,Modes,file are all belong to their owners/developers. The autor of this site or the developers are not responsible, if you damage or brick your device.Do it on your own risk and follow the instruction properly.
* Important:
Backup important files stored on your device before proceeding with the steps below, so that in case something goes wrong you’ll have backup of all your important files.
÷ How to Install TWRP 3.0.2 Custom Recovery on HTC 10.
Step 1 – Make sure ADB and Fastboot is configured on your PC.
Step 2 – Connect HTC 10 to your PC with a USB cable and install ADB drivers.
Step 3 – Download TWRP (twrp-3.0.2-4-pme.img) and copy/paste it in the android-sdk-windowsplatform-tools directory.
Step 4 – Go to Fastboot/Bootloader mode now. How? Navigate to android-sdk-windowsplatform-tools directory and open Command Prompt (Shift + Right-click > Open Command Prompt).
Step 5 – Type in the following command and press Enter.
adb reboot bootloader
Step 6 – HTC 10 will switch OFF and then boot into the Fastboot Mode. Once the drivers are installed, proceed below.
NOTE: Alternatively, you can also enter Fastboot Mode by switching OFF your phone first. Then turn it ON by holding Volume Down + Power buttons together.
Step 7 – Then type the following command and press Enter.
fastboot flash recovery twrp-3.0.2-4-pme.img
Step 8 – Once completed, choose RECOVERY from the Fastboot menu and enter Recovery Mode. Navigate up and down using the volume keys.
Step 9 – If you see TWRP Recovery, then everything so far has been successfully performed and custom recovery is installed.
Step 10 – Since everything is going on well, you can go back to your normal phone by rebooting HTC 10. Select “reboot system now” from the recovery menu. The phone will boot now.
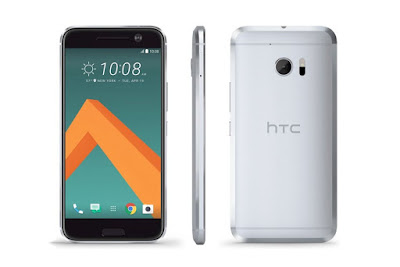
That’s it. Your HTC 10 has now been updated with a custom recovery like TWRP Recovery and is fully working on your phone.
How to access Recovery Mode? Turn OFF your phone. Switch ON your phone again by holding Volume Up + Power buttons together and you will be taken directly to the TWRP Touch Recovery menu.
For More HTC 10 Updates Keep Checking Android Custom ROM Fix ™
Like this post? PLZ Hit the share buttons below to share this article with your friends on Facebook, Google + and Twitter.
PLZ Follow Us On Flipboard 4 More Latest Updates.
PLZ Use the comment box below to contribute more ideas & Suggestions .
Best Regards.
÷ Prerequisites:
•This TWRP Recovery tutorial is only for unlocked HTC 10. Please don’t try this on any other variants of the phone.
•Make sure you backup all your data in your phone before proceeding.
•This will void your warranty.
•HTC Sync should be installed with full working ADB/Fastboot before performing the tutorial.
•Bootloader should be unlocked.
*Disclaimer:
Android Custom ROM fix ® provide various Firmware Updates and Rooting process along with Custom ROM,Modes,file are all belong to their owners/developers. The autor of this site or the developers are not responsible, if you damage or brick your device.Do it on your own risk and follow the instruction properly.
* Important:
Backup important files stored on your device before proceeding with the steps below, so that in case something goes wrong you’ll have backup of all your important files.
÷ How to Install TWRP 3.0.2 Custom Recovery on HTC 10.
Step 1 – Make sure ADB and Fastboot is configured on your PC.
Step 2 – Connect HTC 10 to your PC with a USB cable and install ADB drivers.
Step 3 – Download TWRP (twrp-3.0.2-4-pme.img) and copy/paste it in the android-sdk-windowsplatform-tools directory.
Step 4 – Go to Fastboot/Bootloader mode now. How? Navigate to android-sdk-windowsplatform-tools directory and open Command Prompt (Shift + Right-click > Open Command Prompt).
Step 5 – Type in the following command and press Enter.
adb reboot bootloader
Step 6 – HTC 10 will switch OFF and then boot into the Fastboot Mode. Once the drivers are installed, proceed below.
NOTE: Alternatively, you can also enter Fastboot Mode by switching OFF your phone first. Then turn it ON by holding Volume Down + Power buttons together.
Step 7 – Then type the following command and press Enter.
fastboot flash recovery twrp-3.0.2-4-pme.img
Step 8 – Once completed, choose RECOVERY from the Fastboot menu and enter Recovery Mode. Navigate up and down using the volume keys.
Step 9 – If you see TWRP Recovery, then everything so far has been successfully performed and custom recovery is installed.
Step 10 – Since everything is going on well, you can go back to your normal phone by rebooting HTC 10. Select “reboot system now” from the recovery menu. The phone will boot now.
That’s it. Your HTC 10 has now been updated with a custom recovery like TWRP Recovery and is fully working on your phone.
How to access Recovery Mode? Turn OFF your phone. Switch ON your phone again by holding Volume Up + Power buttons together and you will be taken directly to the TWRP Touch Recovery menu.
For More HTC 10 Updates Keep Checking Android Custom ROM Fix ™
Like this post? PLZ Hit the share buttons below to share this article with your friends on Facebook, Google + and Twitter.
PLZ Follow Us On Flipboard 4 More Latest Updates.
PLZ Use the comment box below to contribute more ideas & Suggestions .
Best Regards.
Tuesday, July 26, 2016
How to Install TWRP Image on OnePlus 3
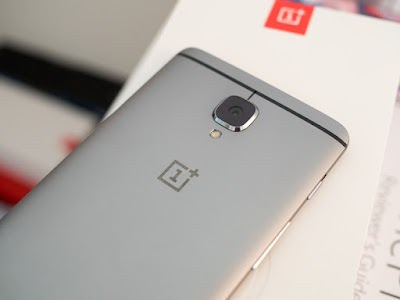
OnePlus 3 was released on June 14th, 2016.The phone sports all the high-end features and specification but has a very budget friendly price tag which definitely attracts buyers.Now OnePlus 3 has a full metal body and one of the most important updates is RAM.OnePlus 3 now has 6GB of RAM which is unbelievable
Thanks to XDA Developer "Naman Bhalla" for sharing the recovery file.Now users can easily flash the TWRP recovery file using fastboot commands.Then they can flash the latest SuperSu root file to get root access on OnePlus 3.Donot worry we are going to share step by step guide on How to Install TWRP Recovery on OnePlus 3.
View my Flipboard Magazine.
÷ Prerequisites:
•Make sure bootloader of OnePlus 3 is unlocked
•Warranty may be void of your device if you follow the procedures given on this page. You only are responsible for your device. We won’t be liable if any damage occurs to your device and/or its components.
•Make sure your device has more than 50% battery life
•The TWRP version is not tested yet.

*Disclaimer:
Android Custom ROM fix ® provide various Firmware Updates and Rooting process along with Custom ROM,Modes,file are all belong to their owners/developers. The autor of this site or the developers are not responsible, if you damage or brick your device.Do it on your own risk and follow the instruction properly.
* Important:
Backup important files stored on your device before proceeding with the steps below, so that in case something goes wrong you’ll have backup of all your important files.
÷ How to Install TWRP Image on OnePlus 3:
1- First Download a TWRP recovery .img file for your for OnePlus 3.
2- Setup ADB and Fastboot on your PC.
3- Enable USB debugging on your device.
4- Open the folder where your TWRP Recovery .img file is saved.
5- Now open a command window inside that folder. To do that, “Shift + Right click” on any empty white space inside the folder and then select “Open command window here” from the context menu.
6- Connect your device to the PC. And type the following into the command window we opened in step 4 above to boot your device into bootloader/fastboot mode:
adb reboot bootloader
? If your asks for permission to “Allow USB debugging”, tap OK.
7- Once your device boots into bootloader mode, issue the following command into command window to flash the TWRP recovery .img file:
fastboot flash recovery twrp-2.8.x.x-xxx.img
? Here modify twrp.img with the name of your TWRP recovery .img file, OR change your TWRP recovery filename to twrp.img and use the ]
command above.
8- Once TWRP is successfully flashed on your device, issue the following command to reboot:
fastboot reboot
Done!!! Now you have TWRP on your OnePlus 3.
For More OnePlus 3 Updates Keep Checking Android Custom ROM Fix ™®
That’s all. We hope this guide serves you well. If there’s anything you’d like to be added/changed on this page, PLZ Use the comment box below to contribute more ideas & Suggestions .
Like this post? PLZ Hit the share buttons below to share this article with your friends on Facebook, Google + and Twitter.
Want the latest Updates Sign up for our newsletters!
PLZ Follow Us On Flipboard 4 More Latest Updates.
Best Regards.™
÷ Prerequisites:
•Make sure bootloader of OnePlus 3 is unlocked
•Warranty may be void of your device if you follow the procedures given on this page. You only are responsible for your device. We won’t be liable if any damage occurs to your device and/or its components.
•Make sure your device has more than 50% battery life
•The TWRP version is not tested yet.
*Disclaimer:
Android Custom ROM fix ® provide various Firmware Updates and Rooting process along with Custom ROM,Modes,file are all belong to their owners/developers. The autor of this site or the developers are not responsible, if you damage or brick your device.Do it on your own risk and follow the instruction properly.
* Important:
Backup important files stored on your device before proceeding with the steps below, so that in case something goes wrong you’ll have backup of all your important files.
÷ How to Install TWRP Image on OnePlus 3:
1- First Download a TWRP recovery .img file for your for OnePlus 3.
2- Setup ADB and Fastboot on your PC.
3- Enable USB debugging on your device.
4- Open the folder where your TWRP Recovery .img file is saved.
5- Now open a command window inside that folder. To do that, “Shift + Right click” on any empty white space inside the folder and then select “Open command window here” from the context menu.
6- Connect your device to the PC. And type the following into the command window we opened in step 4 above to boot your device into bootloader/fastboot mode:
adb reboot bootloader
? If your asks for permission to “Allow USB debugging”, tap OK.
7- Once your device boots into bootloader mode, issue the following command into command window to flash the TWRP recovery .img file:
fastboot flash recovery twrp-2.8.x.x-xxx.img
? Here modify twrp.img with the name of your TWRP recovery .img file, OR change your TWRP recovery filename to twrp.img and use the ]
command above.
8- Once TWRP is successfully flashed on your device, issue the following command to reboot:
fastboot reboot
Done!!! Now you have TWRP on your OnePlus 3.
For More OnePlus 3 Updates Keep Checking Android Custom ROM Fix ™®
That’s all. We hope this guide serves you well. If there’s anything you’d like to be added/changed on this page, PLZ Use the comment box below to contribute more ideas & Suggestions .
Like this post? PLZ Hit the share buttons below to share this article with your friends on Facebook, Google + and Twitter.
Want the latest Updates Sign up for our newsletters!
PLZ Follow Us On Flipboard 4 More Latest Updates.
Best Regards.™
Friday, July 22, 2016
How to Install TWRP Recovery 3 0 2 2 on Moto G4 Plus
The Moto G4 Plus takes up the mantle of the best camera phone under 15k With a 5.5-inch bright-looking display the Moto G4 Plus is ideal for watching movies and gaming.

If you own the Moto G4 Plus folks over at xda already have the latest version of TWRP recovery ready for installation.
Developer yeshwanthvshenoy at xda has just released TWRP recovery 3.0.2-2 for the Moto G4 Plus. Since it’s the first release for the device, the dev has released the recovery as a testing build only for now, but no bugs or issues are mentioned, so you’re good to go ahead and load it up on your Moto G4 Plus.
View my Flipboard Magazine.
÷ Prerequisites:
•This tutorial is only for installing TWRP recovery 3.0.2-2 for the Moto G4 Plus.
•Make sure you backup all your data in your phone before proceeding.

*Disclaimer:
Android Custom ROM fix ® provide various Firmware Updates and Rooting process along with Custom ROM,Modes,file are all belong to their owners/developers. The autor of this site or the developers are not responsible, if you damage or brick your device.Do it on your own risk and follow the instruction properly.
* Important:
Backup important files stored on your device before proceeding with the steps below, so that in case something goes wrong you’ll have backup of all your important files.
TWRP recovery 3.0.2-2 Download & Installation Instructions via XDA.
For More Moto G4 plus Keep Checking Android Custom ROM Fix ®÷ Prerequisites:
•This tutorial is only for installing TWRP recovery 3.0.2-2 for the Moto G4 Plus.
•Make sure you backup all your data in your phone before proceeding.
*Disclaimer:
Android Custom ROM fix ® provide various Firmware Updates and Rooting process along with Custom ROM,Modes,file are all belong to their owners/developers. The autor of this site or the developers are not responsible, if you damage or brick your device.Do it on your own risk and follow the instruction properly.
* Important:
Backup important files stored on your device before proceeding with the steps below, so that in case something goes wrong you’ll have backup of all your important files.
TWRP recovery 3.0.2-2 Download & Installation Instructions via XDA.
Like this post? PLZ Hit the share buttons below to share this article with your friends on Facebook, Google + and Twitter.
PLZ Follow Us On Flipboard 4 More Latest Updates.
PLZ Use the comment box below to contribute more ideas & Suggestions .
Best Regards.
Thursday, July 21, 2016
How to Install TWRP Recovery 3 0 2 0 on Xiaomi Mi Max
Xiaomi Mi Max TWRP 3.0.2-0 is now available for download over at TeamWin’s official website. You can grab the recovery’s .img file from there and simply flash it via Fastboot.

Don’t worry we are going to share step by step guide to safely How to Install TWRP Recovery 3.0.2-0 on your Xiaomi Mi Max.
Don’t worry we are going to share step by step guide to safely How to Install TWRP Recovery 3.0.2-0 on your Xiaomi Mi Max.
View my Flipboard Magazine.
÷ Prerequisites:
•Make sure you’ve an unlocked bootloader on your Mi Max.
•This tutorial is only for installing TWRP Recovery 3.0.2-0 on Xiaomi Mi Max only.
*Disclaimer:
Android Custom ROM fix ® provide various Firmware Updates and Rooting process along with Custom ROM,Modes,file are all belong to their owners/developers. The autor of this site or the developers are not responsible, if you damage or brick your device.Do it on your own risk and follow the instruction properly.
* Important:
Backup important files stored on your device before proceeding with the steps below, so that in case something goes wrong you’ll have backup of all your important files.

÷ How to Install TWRP Recovery 3.0.2-0 on Xiaomi Mi Max:
1- Download Xiaomi Mi Max TWRP Recovery 3.0.2-0.
2- Setup ADB and Fastboot on your PC, follow this link .
3- Enable USB debugging on your device:
Open Settings on your device.
4- Go to About phone and tap seven times on Build number, this will enable Developer options.
5- Now go back to Settings and you’ll see “Developer options” there, open it.
6- Tick the USB Debugging checkbox.
7- Open the folder where your TWRP Recovery .img file is saved.
8- Now open a command window inside that folder. To do that, “Shift + Right click” on any empty white space inside the folder and then select “Open command window here” from the context menu.
9- Connect your device to the PC. And type the following into the command window we opened in step 4 above to boot your device into bootloader/fastboot mode:
adb reboot bootloader
? If your asks for permission to “Allow USB debugging”, tap OK.
10- Once your device boots into bootloader mode, issue the following command into command window to flash the TWRP recovery .img file:
fastboot flash twrp-3.0.2-0-hydrogen.img
? Here modify twrp.img with the name of your TWRP recovery .img file, OR change your TWRP recovery filename to twrp.img and use the command above.
11- Once TWRP is successfully flashed on your device, issue the following command to reboot:
fastboot reboot.

For More Xiaomi Mi Max Updates Keep Checking Android Custom ROM Fix™®
That’s all. We hope this guide serves you well. If there’s anything you’d like to be added/changed on this page, let us know about it in the comments section below
Like this post? PLZ Hit the share buttons below to share this article with your friends on Facebook, Google + and Twitter.
PLZ Follow Us On Flipboard 4 More Latest Updates.
PLZ Use the comment box below to contribute more ideas & Suggestions .
Best Regards.
÷ Prerequisites:
•Make sure you’ve an unlocked bootloader on your Mi Max.
•This tutorial is only for installing TWRP Recovery 3.0.2-0 on Xiaomi Mi Max only.
*Disclaimer:
Android Custom ROM fix ® provide various Firmware Updates and Rooting process along with Custom ROM,Modes,file are all belong to their owners/developers. The autor of this site or the developers are not responsible, if you damage or brick your device.Do it on your own risk and follow the instruction properly.
* Important:
Backup important files stored on your device before proceeding with the steps below, so that in case something goes wrong you’ll have backup of all your important files.
÷ How to Install TWRP Recovery 3.0.2-0 on Xiaomi Mi Max:
1- Download Xiaomi Mi Max TWRP Recovery 3.0.2-0.
2- Setup ADB and Fastboot on your PC, follow this link .
3- Enable USB debugging on your device:
Open Settings on your device.
4- Go to About phone and tap seven times on Build number, this will enable Developer options.
5- Now go back to Settings and you’ll see “Developer options” there, open it.
6- Tick the USB Debugging checkbox.
7- Open the folder where your TWRP Recovery .img file is saved.
8- Now open a command window inside that folder. To do that, “Shift + Right click” on any empty white space inside the folder and then select “Open command window here” from the context menu.
9- Connect your device to the PC. And type the following into the command window we opened in step 4 above to boot your device into bootloader/fastboot mode:
adb reboot bootloader
? If your asks for permission to “Allow USB debugging”, tap OK.
10- Once your device boots into bootloader mode, issue the following command into command window to flash the TWRP recovery .img file:
fastboot flash twrp-3.0.2-0-hydrogen.img
? Here modify twrp.img with the name of your TWRP recovery .img file, OR change your TWRP recovery filename to twrp.img and use the command above.
11- Once TWRP is successfully flashed on your device, issue the following command to reboot:
fastboot reboot.
For More Xiaomi Mi Max Updates Keep Checking Android Custom ROM Fix™®
That’s all. We hope this guide serves you well. If there’s anything you’d like to be added/changed on this page, let us know about it in the comments section below
Like this post? PLZ Hit the share buttons below to share this article with your friends on Facebook, Google + and Twitter.
PLZ Follow Us On Flipboard 4 More Latest Updates.
PLZ Use the comment box below to contribute more ideas & Suggestions .
Best Regards.
Subscribe to:
Posts (Atom)