Either that you need to create custom recovery for backup or maintenance purposes or for precautionary reasons, ClockWorkMOD recovery is a good choice for your MTK android device.
ClockWorkMOD recovery is probably the commonest custom recovery for all android devices. It is the simplest custom recovery yet available in the android world and it has all the features expected of all other custom recovery.Before proceeding further, I give Credit to Aryk.co for its assistance over this publication.
In this tutorial, I explain the step by step guide to creating custom recovery for any MTK android devices. This process helps you create ClockWorkMOD recovery for your MTK android and automatically flash the recovery on your phone.
How to Create Custom Recovery for your MTK Android Device
For one reason or another, MTK android devices have yet receive adequate attentions from developers and as a result of this; not much could be done on your MTK android devices yet, especially; in the event that it crashed.
Meanwhile, custom recovery which is the stronghold of android devices maintenance, is probably the first thing you should try to flash on your MTK android device in order to prevent possible loss of either the phone due to crash (break) or your files.
In this regard, if you cant find a custom recovery for your MTK android device, this article will put you through the step by step processes of creating custom clockworkmod recovery for your MTK android device.
Requirements:1-
Windows PC: a PC running Windows XP or Windows 7 is ok. Windows Vista may not be used for some drivers compatibility issues.
2-
MTK Android USB Drivers: MTK android drivers should be installed on the PC. You may download PDanet+ here or Mobogenie here. Both of them could be used as universal MTK android USB drivers.
3-
MTK Droid Tools: MTK Droid Tools does 95% of this work. You may download MTK Droid Tools from here.
4-
Root Access on the Android Device: the android device to be used or for which the Custom ClockWorkMOD recovery is to be created has to be rooted and optionally have busybox installed.
5-
Compatible USB Cable: here, I mean a USB cable that actually work with the phone and that does not malfunction.
Steps for Creating Custom Recovery for MTK Androids
NOTE: this tutorial teaches you how to create custom recovery for your MTK android devices. The custom recovery to be created are clockworkmod recovery.
Now, lets move on to the subject matter of this tutorial, creating custom recovery for MTK android device.
1-
Install And Open MTK Droid Tools: install the MTK Droid Tools you may have downloaded from the link above on to your PC. If the MTK Droid Tools is downloaded in .ZIP or .RAR file, simply UNZIP/decompress it using
WinRAR,
WinZIP or any other compatible Windows PC program for decompressing zip, rar and other similar file formats.
Tidbit:
To Open MTK Droid Tools;
Navigate to the folder where you extracted MTK Droid Tools, open the folder and locate MTKDroidTools then; double-click to open it. See the image below.
2-
Install MTK Android USB Drivers: if you have yet installed the MTK android drivers on your PC, download any of the options given above and install it on your PC.
The MTK Android USB drivers aids the interaction between the PC and your MTK android devices and eases the communication.
3-
Connect your Android Device: now is the time to connect your rooted android device to the PC. Although, MTK Droid Tools can be used to root android devices as well but not many therefore; it is advised that you root your android device before you proceed.
If your android device is already rooted, simply connect to the PC.
Also, do not forget to install busybox on your android device. You may download busybox from the Play Store or better still, you may use the direct link here.
4-
Watch MTK Droid Tools Detect your Device: now, you just have to wait few seconds for MTK Droid Tools to detect your connected MTK android device and display the details of the phone.
NOTE: if MTK Droid Tools displays green colour in the box behind your device name,it means the device is ready for the operation. If otherwise, you may have to install busybox on the device first.
5-
Click "root, backup, recovery" tab: you may now proceed to the next step by clicking on the "root, backup, recovery" tab on the uper side behind phone information tab.
6-
Click "To use boot from phone": select this option from the three options shown to you then, click "
Recovery And Boot" just behind the options.
7-
Watch MTK Droid Tools Prepare the Phone: now, MTK Droid Tools would prepare the phone for some minutes. It would patch the phones boot and a few more other things.
8-
Click "Yes" to the "To Make CWM Recovery Automatically?": after few seconds when the phones boot have been patched MTK Droid Tools would ask "Make CWM Recovery Automatically?". Just click "Yes" and proceed.
9-
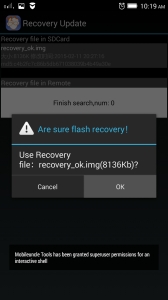
Click "Yes" to the "Install Created Recovery to Phone": after few seconds when the phones boot have been patched and a custom clockworkMOD recovery had been creatd, MTK Droid Tools would as this question. Just click "Yes" and proceed.
10-
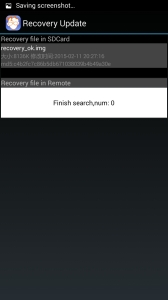
Final Stage, Reboot Phone: you now have to wait for some seconds for MTK Droid Tools to flash the created CWM (ClockWorkMOD) recovery on the phone.
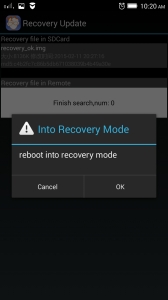
When the flashing process is complete, MTK Droid Tools would ask "
Reboot phone in recovery?", you may click "
yes" or "
no".
But I suggest you click "
Yes" to boot to the newly flashed ClockWorkMOD recovery to try out the recovery.
NOTE:The ClockWorkMOD recovery replaces your MTK Android Stock recovery and changes the MTK android recovery combo to a personalised one.
Therefore; to boot your phone to the recovery subsequently; you will now have to use:
Volume Up +
Power together until ClockWorkMOD recovery comes up.
If you have any question, use the comment box below and also, to share your opinions.
Click here to SUBSCRIBE to this Blog to Receive future updates..