In the settings, you can enable touches to show up on the screen, enable or disable audio recording, set time limits for recording, as well as change the resolution and bitrate of video captured. The output format will be MP4 file, and you can select the default folder where the file will be saved, although it will automatically appear in your gallery app. The app is completely free to use, but as mentioned above, you need to have Android 5.0 Lollipop installed. If you have a prior version, your best bet is to root your Android device and install a screen recorder app called Shou.TV from Google play store.
Showing posts with label easily. Show all posts
Showing posts with label easily. Show all posts
Thursday, July 28, 2016
How to Root Nexus 6 Easily on Android N Developer Preview 3 NPD35K
The latest Android N Developer Preview 3 NPD35K is the next upcoming major firmware release by Google available for Nexus 6 . It brings some new features like multi-window mode, an enhanced doze mode, a revamped Settings screen and a quick toggle in the notifications panel. Other changes include improved notifications, improved multitasking and app switching, dark mode etc.

Now you Can Root Your Nexus 6 on Android N Developer Preview 3 NPD35K factory Image.
View my Flipboard Magazine.
÷ Prerequisites:
•This root method is only for Android N (NPD35K) installed on Nexus 6 and I am not sure if it will work on the other variants of the Nexus 6 on other carriers.
•Your Nexus 6 bootloader should be unlocked.
Nexus 6 should be on Android N NPD35K software version.
•Make a Nandroid backup of your previous phone set up before proceeding – for just in case anything goes wrong.
*Disclaimer:÷ Prerequisites:
•This root method is only for Android N (NPD35K) installed on Nexus 6 and I am not sure if it will work on the other variants of the Nexus 6 on other carriers.
•Your Nexus 6 bootloader should be unlocked.
Nexus 6 should be on Android N NPD35K software version.
•Make a Nandroid backup of your previous phone set up before proceeding – for just in case anything goes wrong.
Android Custom ROM fix ® provide various Firmware Updates and Rooting process along with Custom ROM,Modes,file are all belong to their owners/developers. The autor of this site or the developers are not responsible, if you damage or brick your device.Do it on your own risk and follow the instruction properly.
* Important:
Backup important files stored on your device before proceeding with the steps below, so that in case something goes wrong you’ll have backup of all your important files.

÷ How to Root Nexus 6 Easily on Android N Developer Preview 3 NPD35K .
Step 1 – Download Android SDK from the Android Developers website and install. Also set it up with downloading platform-tools and USB drivers package in SDK.
Step 2 – Enable USB Debugging mode in your Nexus 6.
Step 3 – Download Fastboot from the following links depending on your OS and extract it in android-sdk-windowsplatform-tools directory. Create directory if not already there.
Windows: Download here!
Mac: Download here!
Linux: Download here!
NOTE: Skip Steps 1, 2, 3 if you already have them.
Step 4 – Download SuperSU v2.71 for Nexus 6 on your PC, if you haven’t already.
Step 5 – Connect and mount your Nexus 6 USB memory on your computer using the USB cable.
Step 6 – Now copy/paste the BETA-SuperSU-v2.71-20160331103524.zip file to your SD card. Make sure the file is in the SD card / internal storage root (not in any folder).
Step 7 – Then turn OFF your phone.
Step 8 – twrp-3.0.0-0-shamu.img and save it to your android-sdk-windowsplatform-tools directory on your computer.
Step 9 – Now go into Fastboot/Bootloader Mode on Nexus 6. How? Press Volume Down + Power keys for a few seconds till you see some text on the screen. This is Bootloader Mode.
Step 10 – Navigate to android-sdk-windowsplatform-tools directory and open Command Prompt (Shift + Right-click > Open Command Prompt).
Step 11 – Type in the following command and press Enter.
fastboot flash recovery twrp-3.0.0-0-shamu.img
Step 12 – Once completed, choose RECOVERY from the Fastboot menu and enter Recovery Mode.
Step 13 – In ClockworkMod recovery, scroll down to “flash zip from SD card” and press the power button to select it.
Step 14 – Press the Power button again and select “choose zip from sdcard”.
Step 15 – Now using your volume keys, navigate to BETA-SuperSU-v2.71-20160331103524.zip and select it using the Power button. Confirm the installation on the next screen and the installation procedure should start now.
Step 16 – After the installation completes, go to “+++++Go Back” and reboot the phone by selecting “reboot system now” from the Recovery menu. The phone will boot now and it might take about 5 minutes to boot on your first time. So, please wait.

For More Nexus 6 Firmware, Root & More Keep Checking AndroidCustomROMFix ™®
Like this post? PLZ Hit the share buttons below to share this article with your friends on Facebook, Google + and Twitter.
PLZ Follow Us On Flipboard 4 More Latest Updates.
PLZ Use the comment box below to contribute more ideas & Suggestions .
Best Regards.

Sunday, July 24, 2016
How to easily record screen on Android Lollipop Device
The native screen recording was initially introduced on Android 4.4 KitKat but the functionality required either a rooted device with a Screen Recording app installed or a non-rooted device with some Android Debug Bridge (ADB) commands. Luckily, on Android 5.0 Lollipop, the process is much, much easier, as the new OS version released with a new API that allows developers to build apps that can record screen without the need of root access or any ADB knowhow.
Currently, there are few apps which have taken advantage of the new API and let’s users to record screen on their lollipop smartphones or tablets. If you’re looking for a great screen recording app, then you should give AZ Screen Recorder a try. It’s by far one of the best app to record a video of your Android screen. The best part of this app is that it has no recording time limit and there’s no watermark or logo of the creator will be displayed on your videos.

Moreover, it also allows you to pause and resume while recording. After you install and launch the app, a small toolbar will appear in the middle of your screen. The toolbar contains four different controls like Recording, Settings, File Manager and Exit button. When you start recording for the first time, a few prompts will explain how the recording feature works. You will always be able to access the recording panel in your notification bar. On the recording panel you can pause, stop, and start new recordings.
Friday, July 22, 2016
How to Root HTC 10 Easily on Marshmallow 6 0 1
SuperSU is one of our favourite rooting package as it comes with all the binaries needed to gain root access on your HTC 10 Android phone. Even the SuperSU app has more features than SuperUser. Other than this rooting tutorial, you might also want to install a custom recovery for installing custom ROMs on your phone.

Don’t worry we are going to share step by step guide to safely How to Root your HTC 10 Easily on Marshmallow 6.0.1.
View my Flipboard Magazine.
÷ Prerequisites:
• HTC 10 bootloader should be unlocked.
•TWRP Recovery should already be installed on your HTC 10.
•As mentioned previously, all firmwares are supported.
•Make a Nandroid backup of your previous phone set up before proceeding – for just in case anything goes wrong.
*Disclaimer:÷ Prerequisites:
• HTC 10 bootloader should be unlocked.
•TWRP Recovery should already be installed on your HTC 10.
•As mentioned previously, all firmwares are supported.
•Make a Nandroid backup of your previous phone set up before proceeding – for just in case anything goes wrong.
Android Custom ROM fix ® provide various Firmware Updates and Rooting process along with Custom ROM,Modes,file are all belong to their owners/developers. The autor of this site or the developers are not responsible, if you damage or brick your device.Do it on your own risk and follow the instruction properly.
* Important:
Backup important files stored on your device before proceeding with the steps below, so that in case something goes wrong you’ll have backup of all your important files.

÷ How to Root HTC 10 Easily on Marshmallow 6.0.1:
Step 1 – Download SuperSU v2.74 (BETA-SuperSU-v2.74-2-20160519174328.zip) for HTC 10 on your PC.
Step 2 – Connect and mount your HTC 10 USB memory on your computer using the USB cable.
Step 3 – Now copy/paste the BETA-SuperSU-v2.74-2-20160519174328.zip file to your SD card. Make sure the file is in the SD card root (not in any folder).
Step 4 – Enter TWRP Custom recovery by typing the following command. (Phone should be connected and USB debugging enabled.)
adb reboot recovery.
Step 5 – In TWRP recovery, scroll down to “flash zip from SD card” and press the power button to select it.
Step 6 – Press the Power button again and select “choose zip from sdcard”.
Step 7 – Now using your volume keys, navigate to BETA-SuperSU-v2.74-2-20160519174328.zip and select it using the Power button. Confirm the installation on the next screen and the installation procedure should start now.
Step 8 – After the installation completes, go to “+++++Go Back” and reboot the phone by selecting “reboot system now” from the Recovery menu. The phone will boot now and it might take about 5 minutes to boot on your first time. So, please wait.

That’s it! Your HTC 10 is now rooted! Check for the SuperSU app in your apps list to verify.
For More HTC 10 Firmware & UpdatesKeep Checking AndroidCustomROM Fix ™®
Like this post? PLZ Hit the share buttons below to share this article with your friends on Facebook, Google + and Twitter.
PLZ Follow Us On Flipboard 4 More Latest Updates.
PLZ Use the comment box below to contribute more ideas & Suggestions .
Best Regards.
Monday, July 18, 2016
How to Root Easily Moto G4 Plus
Rooting Moto G4 Plus is easier with the TWRP recovery, all you need to do is flash the latest build of SuperSU zip onto your G4 Plus via TWRP and you’ll be rooted. That simple! Just Follow our guide below

÷ Prerequisites:
•This tutorial is only for rooting your moto G4 plus.
•Bootloader should be unlocked or you will not be able to install this ROM.
•Your phone should have ClockworkMod recovery installed from before.
•Make sure you backup all your data in your phone before proceeding.
*Disclaimer:
Android Custom ROM fix ® provide various Firmware Updates and Rooting process along with Custom ROM,Modes,file are all belong to their owners/developers. The autor of this site or the developers are not responsible, if you damage or brick your device.Do it on your own risk and follow the instruction properly.
* Important:
Backup important files stored on your device before proceeding with the steps below, so that in case something goes wrong you’ll have backup of all your important files.
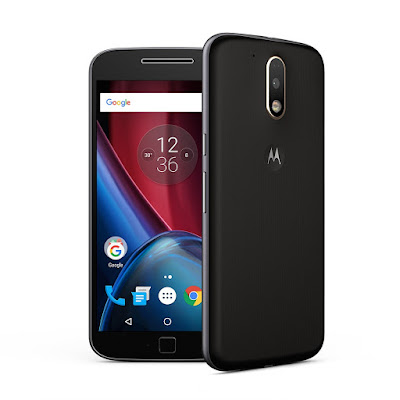
÷ How to Root Easily Moto G4 Plus:
1- Download SuperSU v2.71 and transfer the SuperSU zip file from the download link above to your device’s storage.
2- Boot your device into TWRP recovery.
3- Tap on “Install” and select the SuperSU zip file that you transferred to your device in Step 1.
4- After selecting the .zip file, do “Swipe to Confirm Flash” on the bottom of screen to begin the flashing process.
5- Once SuperSU is flashed, you’ll get “Reboot System” option, select it.
Congratulations! Your Moto G4 plus should be rooted now. Look for the SuperSU app in app drawer.
For More Moto G4 Plus update Keep Checking Android Custom ROM Fix ™®
Like this post? PLZ Hit the share buttons below to share this article with your friends on Facebook, Google + and Twitter.
PLZ Follow Us On Flipboard 4 More Latest Updates.
PLZ Use the comment box below to contribute more ideas & Suggestions .
Best Regards.
÷ Prerequisites:
•This tutorial is only for rooting your moto G4 plus.
•Bootloader should be unlocked or you will not be able to install this ROM.
•Your phone should have ClockworkMod recovery installed from before.
•Make sure you backup all your data in your phone before proceeding.
*Disclaimer:
Android Custom ROM fix ® provide various Firmware Updates and Rooting process along with Custom ROM,Modes,file are all belong to their owners/developers. The autor of this site or the developers are not responsible, if you damage or brick your device.Do it on your own risk and follow the instruction properly.
* Important:
Backup important files stored on your device before proceeding with the steps below, so that in case something goes wrong you’ll have backup of all your important files.
÷ How to Root Easily Moto G4 Plus:
1- Download SuperSU v2.71 and transfer the SuperSU zip file from the download link above to your device’s storage.
2- Boot your device into TWRP recovery.
3- Tap on “Install” and select the SuperSU zip file that you transferred to your device in Step 1.
4- After selecting the .zip file, do “Swipe to Confirm Flash” on the bottom of screen to begin the flashing process.
5- Once SuperSU is flashed, you’ll get “Reboot System” option, select it.
Congratulations! Your Moto G4 plus should be rooted now. Look for the SuperSU app in app drawer.
For More Moto G4 Plus update Keep Checking Android Custom ROM Fix ™®
Like this post? PLZ Hit the share buttons below to share this article with your friends on Facebook, Google + and Twitter.
PLZ Follow Us On Flipboard 4 More Latest Updates.
PLZ Use the comment box below to contribute more ideas & Suggestions .
Best Regards.
Sunday, July 17, 2016
How to Root Easily OnePlus 3
Thanks to XDA Member "Naman Bhallas" Now OnePlus 3 users they can easily flash the latest SuperSu root file to get root access on OnePlus 3.Dont worry we are going to share step by step guide on How to Root OnePlus 3.

View my Flipboard Magazine.
÷ Prerequisites:
•Make sure TWRP Installed on your OnePlus 3.
•Warranty may be void of your device if you follow the procedures given on this page. You only are responsible for your device. We won’t be liable if any damage occurs to your device and/or its components.
•Make sure your device has more than 50% battery life
*Disclaimer:
Android Custom ROM fix ® provide various Firmware Updates and Rooting process along with Custom ROM,Modes,file are all belong to their owners/developers. The autor of this site or the developers are not responsible, if you damage or brick your device.Do it on your own risk and follow the instruction properly.
* Important:
Backup important files stored on your device before proceeding with the steps below, so that in case something goes wrong you’ll have backup of all your important files.

÷ How to Root Easily OnePlus 3:
1- Download SuperSU v2.74 to your device internal memory.
2- Now Boot your device into TWRP recovery.
3- Then Just Select Install and flash the SuperSUfile that you transferred in the Previous step
4- Once flashing is done. Reboot your device.
Done!!!
Your OnePlus 3 is now rooted.
For confirmation, install Root Checker from Google Play Store and confirm the root privileges in your smartphone.

For More OnePlus 3 Updates Keep Checking Android Custom ROM Fix ™®
That’s all. We hope this guide serves you well. If there’s anything you’d like to be added/changed on this page, PLZ Use the comment box below to contribute more ideas & Suggestions .
Like this post? PLZ Hit the share buttons below to share this article with your friends on Facebook, Google + and Twitter.
Want the latest Updates Sign up for our newsletters!
PLZ Follow Us On Flipboard 4 More Latest Updates.
Best Regards.™
÷ Prerequisites:
•Make sure TWRP Installed on your OnePlus 3.
•Warranty may be void of your device if you follow the procedures given on this page. You only are responsible for your device. We won’t be liable if any damage occurs to your device and/or its components.
•Make sure your device has more than 50% battery life
*Disclaimer:
Android Custom ROM fix ® provide various Firmware Updates and Rooting process along with Custom ROM,Modes,file are all belong to their owners/developers. The autor of this site or the developers are not responsible, if you damage or brick your device.Do it on your own risk and follow the instruction properly.
* Important:
Backup important files stored on your device before proceeding with the steps below, so that in case something goes wrong you’ll have backup of all your important files.
÷ How to Root Easily OnePlus 3:
1- Download SuperSU v2.74 to your device internal memory.
2- Now Boot your device into TWRP recovery.
3- Then Just Select Install and flash the SuperSUfile that you transferred in the Previous step
4- Once flashing is done. Reboot your device.
Done!!!
Your OnePlus 3 is now rooted.
For confirmation, install Root Checker from Google Play Store and confirm the root privileges in your smartphone.
For More OnePlus 3 Updates Keep Checking Android Custom ROM Fix ™®
That’s all. We hope this guide serves you well. If there’s anything you’d like to be added/changed on this page, PLZ Use the comment box below to contribute more ideas & Suggestions .
Like this post? PLZ Hit the share buttons below to share this article with your friends on Facebook, Google + and Twitter.
Want the latest Updates Sign up for our newsletters!
PLZ Follow Us On Flipboard 4 More Latest Updates.
Best Regards.™
Subscribe to:
Posts (Atom)