Showing posts with label nexus. Show all posts
Showing posts with label nexus. Show all posts
Thursday, July 28, 2016
How to Root Nexus 6 Easily on Android N Developer Preview 3 NPD35K
The latest Android N Developer Preview 3 NPD35K is the next upcoming major firmware release by Google available for Nexus 6 . It brings some new features like multi-window mode, an enhanced doze mode, a revamped Settings screen and a quick toggle in the notifications panel. Other changes include improved notifications, improved multitasking and app switching, dark mode etc.

Now you Can Root Your Nexus 6 on Android N Developer Preview 3 NPD35K factory Image.
View my Flipboard Magazine.
÷ Prerequisites:
•This root method is only for Android N (NPD35K) installed on Nexus 6 and I am not sure if it will work on the other variants of the Nexus 6 on other carriers.
•Your Nexus 6 bootloader should be unlocked.
Nexus 6 should be on Android N NPD35K software version.
•Make a Nandroid backup of your previous phone set up before proceeding – for just in case anything goes wrong.
*Disclaimer:÷ Prerequisites:
•This root method is only for Android N (NPD35K) installed on Nexus 6 and I am not sure if it will work on the other variants of the Nexus 6 on other carriers.
•Your Nexus 6 bootloader should be unlocked.
Nexus 6 should be on Android N NPD35K software version.
•Make a Nandroid backup of your previous phone set up before proceeding – for just in case anything goes wrong.
Android Custom ROM fix ® provide various Firmware Updates and Rooting process along with Custom ROM,Modes,file are all belong to their owners/developers. The autor of this site or the developers are not responsible, if you damage or brick your device.Do it on your own risk and follow the instruction properly.
* Important:
Backup important files stored on your device before proceeding with the steps below, so that in case something goes wrong you’ll have backup of all your important files.

÷ How to Root Nexus 6 Easily on Android N Developer Preview 3 NPD35K .
Step 1 – Download Android SDK from the Android Developers website and install. Also set it up with downloading platform-tools and USB drivers package in SDK.
Step 2 – Enable USB Debugging mode in your Nexus 6.
Step 3 – Download Fastboot from the following links depending on your OS and extract it in android-sdk-windowsplatform-tools directory. Create directory if not already there.
Windows: Download here!
Mac: Download here!
Linux: Download here!
NOTE: Skip Steps 1, 2, 3 if you already have them.
Step 4 – Download SuperSU v2.71 for Nexus 6 on your PC, if you haven’t already.
Step 5 – Connect and mount your Nexus 6 USB memory on your computer using the USB cable.
Step 6 – Now copy/paste the BETA-SuperSU-v2.71-20160331103524.zip file to your SD card. Make sure the file is in the SD card / internal storage root (not in any folder).
Step 7 – Then turn OFF your phone.
Step 8 – twrp-3.0.0-0-shamu.img and save it to your android-sdk-windowsplatform-tools directory on your computer.
Step 9 – Now go into Fastboot/Bootloader Mode on Nexus 6. How? Press Volume Down + Power keys for a few seconds till you see some text on the screen. This is Bootloader Mode.
Step 10 – Navigate to android-sdk-windowsplatform-tools directory and open Command Prompt (Shift + Right-click > Open Command Prompt).
Step 11 – Type in the following command and press Enter.
fastboot flash recovery twrp-3.0.0-0-shamu.img
Step 12 – Once completed, choose RECOVERY from the Fastboot menu and enter Recovery Mode.
Step 13 – In ClockworkMod recovery, scroll down to “flash zip from SD card” and press the power button to select it.
Step 14 – Press the Power button again and select “choose zip from sdcard”.
Step 15 – Now using your volume keys, navigate to BETA-SuperSU-v2.71-20160331103524.zip and select it using the Power button. Confirm the installation on the next screen and the installation procedure should start now.
Step 16 – After the installation completes, go to “+++++Go Back” and reboot the phone by selecting “reboot system now” from the Recovery menu. The phone will boot now and it might take about 5 minutes to boot on your first time. So, please wait.

For More Nexus 6 Firmware, Root & More Keep Checking AndroidCustomROMFix ™®
Like this post? PLZ Hit the share buttons below to share this article with your friends on Facebook, Google + and Twitter.
PLZ Follow Us On Flipboard 4 More Latest Updates.
PLZ Use the comment box below to contribute more ideas & Suggestions .
Best Regards.

Guide How to Install Custom Recovery on Android LG Nexus 5X
[Guide] How to Install Custom Recovery on Android LG Nexus 5X.
Install Custom Recovery LG Nexus 5X. This guide will explain to you How to Install Custom Recovery on Android LG Nexus 5X. By installing custom recovery on your LG Nexus 5X device youll able to create and restore device backups, also you can install custom ROMs on this device. To install custom recovery on LG Nexus 5X your bootloader must unlocked.You can see this guide to Unlock Bootloader on Android LG Nexus 5X. Before we do it, I would to introduce what is detail spesification and feature of this device. LG Nexus 5X is the smartphone released on September, 2015. with 5,2 Inchi wide IPS LCD capacitive touchscreen, 16M colors, work on Android OS, v6.0 (Marshmallow) and supported with chipset Qualcomm MSM8992 Snapdragon 808, Processor Quad-core 1.44 GHz Cortex-A53 & dual-core 1.82 GHz Cortex-A57, GPU Adreno 418, combined with 2 GB of RAM, 12,3 MP on primary camera and 5 MP on secondary camera.
How to Install Custom Recovery on Android LG Nexus 5X.
- Make sure ADB or fastboot installed correctly on your computer. See this guide for more instruction.
- Download the TWRP Recovery.
- twrp-3.0.2-0-bullhead.img 16.1M
- twrp-3.0.1-0-bullhead.img 16M
- twrp-3.0.0-1-bullhead.img 16M
- twrp-3.0.0-0-bullhead.img 16M
- twrp-2.8.7.2-bullhead.img 15.9M
- twrp-2.8.7.0-bullhead.img 15.9M
- Make sure your Bootloader Unlocked. see this guide.
- Make sure you check the md5 to verify its integrity.
- Then, put your file into your fastboot folder.
- Fastboot folder is where the fastboot.exe located in your computer.
- Then, Open a command prompt from within your fastboot folder.
- To start this command prompt just hold shift + right click, select open command prompt here.
- Now type this command.
- fastboot flash recovery <filename>.img
- You can change filename depending on which recovery youre flashing.
- Now, use volume button to scroll and power button to select the Reboot Bootloader option.
- Now your LG Nexus 5X booted, then back into the bootloader.
- Now, you can use the volume button to scroll and the power button to boot into your newly flashed recovery.
- Once everything finished, its now safe to disconnect your LG Nexus 5X device from computer.
- At the first TWRP boot up, youll be asked whether you want to allow.
- system modifications or
- keep it read-only.
- Therefore, choose to allow system modifications.
- Finish.
Wednesday, July 27, 2016
How to Install Android 6 0 1 Marshmallow Hellspawn N4 r12 Kernel ROM on LG Nexus 4 E960
According to XDA member spezi77, Android 6.0.1 Marshmallow Hellspawn-N4 r12 Kernel ROM is now available for LG Nexus 4 E960 [ mako].

÷ ROM Features:
Linux 3.4.112 based on sources of hells-Core N4 kernel b88-M (hats off to hellsgod) and tweaks from other kernels, e.g. Quanta-Mako (thanks zaclimon), TaUrUs_Kernel (thanks txuki2005), Unleashed (thanks ion-storm) and Mirage (thanks mgr666)
Compiled with the latest Cortex-A15 optimized UberTC 5.3.x & UberTC 7.0.0 (experimental) with some kernel based optimizations: 03, graphite, NEON
AOSP/BeanStalk/CM compatible
MultiROM compatible (has Kexec patch)
Mako-hotplug (franciscofranco)
Alucard-hotplug (alucard)
Zen Decision Hotplug (bbedward)
AutoSMP-hotplug set as default (Mgr666)
msm-sleeper: upgrade to version 2 (thanks flar2)
CPU Governors: hellsactive (default), conservative, ondemand, interactive, performance, elementalX (flar2), pegasusQ (ByungChang Cha), alucard (alucard), smartmax (maxwen), intelliminmax (faux123), impulse (Experimental) (neobuddy89)
GPU Governors: ondemand, performance, simple, conservative
GPU Overclocking to 487.5MHz
Simplified thermal driver (franciscofranco) until r05

Bricked thermal driver (showp1984)
AOSP and BS version is powered by Gamma control by franciscofranco; CM version uses Gamma control by faux123
Userspace Voltage Control (faux123)
Sound Control (faux123)
USB fast charging (Chad Froebel/faux123)
DT2W support and Touch wake (Stratosk)
Exponential brightness driver (Statosk)
USB-OTG Support (ziddey/faux123)
Support for android-keyboard-gadget (You can use your device as a keyboard/mouse for your PC) (zaclimon)
Knob for Fsync on/off (franciscofranco)
Knobs for Arch Power and Gentle Fair Sleepers
Knobs for preventing wakeups: bluesleep wakelock, bluedroid_timer wakelock, wlan wakelocks and msm_hsic_host wakelock
Qualcomm Slimbus driver incl. tweaks
Partial-resume framework & quickwakeup driver
No F2FS support (dont ask me for adding it)..
÷ Prerequisites:
•This tutorial is only for Installing Android 6.0.1 Marshmallow Hellspawn-N4 r12 Kernel ROM is now available for LG Nexus 4 E960 [ mako].Please do not try on any other LG Nexus 4 variants.
•Your phone should be rooted and haveClockworkMod recovery installed from before.
•This tutorial will wipe out all your data.Proceed at your own risk.Perform a Dalvik Cache wipe before proceeding from the recovery mode.
•Make sure you backup all your data in your phone before proceeding.
÷ ROM Features:
Linux 3.4.112 based on sources of hells-Core N4 kernel b88-M (hats off to hellsgod) and tweaks from other kernels, e.g. Quanta-Mako (thanks zaclimon), TaUrUs_Kernel (thanks txuki2005), Unleashed (thanks ion-storm) and Mirage (thanks mgr666)
Compiled with the latest Cortex-A15 optimized UberTC 5.3.x & UberTC 7.0.0 (experimental) with some kernel based optimizations: 03, graphite, NEON
AOSP/BeanStalk/CM compatible
MultiROM compatible (has Kexec patch)
Mako-hotplug (franciscofranco)
Alucard-hotplug (alucard)
Zen Decision Hotplug (bbedward)
AutoSMP-hotplug set as default (Mgr666)
msm-sleeper: upgrade to version 2 (thanks flar2)
CPU Governors: hellsactive (default), conservative, ondemand, interactive, performance, elementalX (flar2), pegasusQ (ByungChang Cha), alucard (alucard), smartmax (maxwen), intelliminmax (faux123), impulse (Experimental) (neobuddy89)
GPU Governors: ondemand, performance, simple, conservative
GPU Overclocking to 487.5MHz
Simplified thermal driver (franciscofranco) until r05
Bricked thermal driver (showp1984)
AOSP and BS version is powered by Gamma control by franciscofranco; CM version uses Gamma control by faux123
Userspace Voltage Control (faux123)
Sound Control (faux123)
USB fast charging (Chad Froebel/faux123)
DT2W support and Touch wake (Stratosk)
Exponential brightness driver (Statosk)
USB-OTG Support (ziddey/faux123)
Support for android-keyboard-gadget (You can use your device as a keyboard/mouse for your PC) (zaclimon)
Knob for Fsync on/off (franciscofranco)
Knobs for Arch Power and Gentle Fair Sleepers
Knobs for preventing wakeups: bluesleep wakelock, bluedroid_timer wakelock, wlan wakelocks and msm_hsic_host wakelock
Qualcomm Slimbus driver incl. tweaks
Partial-resume framework & quickwakeup driver
No F2FS support (dont ask me for adding it)..
÷ Prerequisites:
•This tutorial is only for Installing Android 6.0.1 Marshmallow Hellspawn-N4 r12 Kernel ROM is now available for LG Nexus 4 E960 [ mako].Please do not try on any other LG Nexus 4 variants.
•Your phone should be rooted and haveClockworkMod recovery installed from before.
•This tutorial will wipe out all your data.Proceed at your own risk.Perform a Dalvik Cache wipe before proceeding from the recovery mode.
•Make sure you backup all your data in your phone before proceeding.
View my Flipboard Magazine.
*Disclaimer:
Android Custom ROM fix ® provide various Firmware Updates and Rooting process along with Custom ROM,Modes,file are all belong to their owners/developers. The autor of this site or the developers are not responsible, if you damage or brick your device.Do it on your own risk and follow the instruction properly.
* Important:
Backup important files stored on your device before proceeding with the steps below, so that in case something goes wrong you’ll have backup of all your important files.
ROM Download & Installation Instructions via XDA.

For More Nexus 4 Updates Keep Checking Android Custom ROM Fix™®
Like this post? PLZ Hit the share buttons below to share this article with your friends on Facebook, Google + and Twitter.
PLZ Follow Us On Flipboard 4 More Latest Updates.
PLZ Use the comment box below to contribute more ideas & Suggestions .
Best Regards.
*Disclaimer:
Android Custom ROM fix ® provide various Firmware Updates and Rooting process along with Custom ROM,Modes,file are all belong to their owners/developers. The autor of this site or the developers are not responsible, if you damage or brick your device.Do it on your own risk and follow the instruction properly.
* Important:
Backup important files stored on your device before proceeding with the steps below, so that in case something goes wrong you’ll have backup of all your important files.
ROM Download & Installation Instructions via XDA.
For More Nexus 4 Updates Keep Checking Android Custom ROM Fix™®
Like this post? PLZ Hit the share buttons below to share this article with your friends on Facebook, Google + and Twitter.
PLZ Follow Us On Flipboard 4 More Latest Updates.
PLZ Use the comment box below to contribute more ideas & Suggestions .
Best Regards.
How to Update Huawei Nexus 6P to Android N NPD35K Developer Preview 3 Factory Image
Android N Developer Preview Beta is now available for the Nexus 5X, Nexus 6P, Nexus 6, and Nexus 9 phones and tablets. These are the major changes in Developer Preview Beta release of Android N, as per Google:
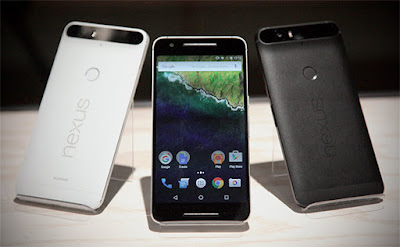
The latest Android N Developer Preview Beta NPD35K is the next upcoming major firmware release by Google. It brings some new features like multi-window mode, an enhanced doze mode, a revamped Settings screen and a quick toggle in the notifications panel. Other changes include improved notifications, improved multitasking and app switching, dark mode etc.
Don’t worry we are going to share step by step guide to safely Update your Huawei Nexus 6P to Android N NPD35K Developer Preview 3 Factory Image
The latest Android N Developer Preview Beta NPD35K is the next upcoming major firmware release by Google. It brings some new features like multi-window mode, an enhanced doze mode, a revamped Settings screen and a quick toggle in the notifications panel. Other changes include improved notifications, improved multitasking and app switching, dark mode etc.
Don’t worry we are going to share step by step guide to safely Update your Huawei Nexus 6P to Android N NPD35K Developer Preview 3 Factory Image
View my Flipboard Magazine.
÷ Prerequisites:
•This tutorial is only for Huawei Nexus 6P and we are not sure if it will work on the other variants of the Nexus 6P on other carriers.
•Your phone can be on any previous Android version or even on a custom ROM. It doesn’t matter at all. This tutorial will still work for installing Android N Developer Preview Beta.
*Disclaimer:
Android Custom ROM fix ® provide various Firmware Updates and Rooting process along with Custom ROM,Modes,file are all belong to their owners/developers. The autor of this site or the developers are not responsible, if you damage or brick your device.Do it on your own risk and follow the instruction properly.
* Important:
Backup important files stored on your device before proceeding with the steps below, so that in case something goes wrong you’ll have backup of all your important files.
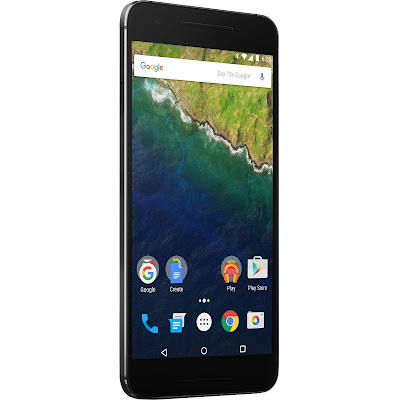
÷ How to Update Huawei Nexus 6P to Android N NPD35K Developer Preview 3 Factory Image
Step 1 – Download Android N Factory Image (angler-npc56p-preview-85ffc1b1.tgz) for Nexus 6P on your PC, if you haven’t already.
Step 2 – Connect your Nexus 6P to your computer using the USB cable.
Step 3 – Please make sure Fastboot is configured and properly installed on your computer.
Step 4 – Turn OFF your phone.
Step 5 – Get into the Fastboot/Bootloader Mode on your phone. Turn ON the phone while pressing and holding the Volume Up + Volume Down + Power buttons till you see the Fastboot menu and START on top.
Step 6 – Now extract the downloaded file anywhere in your computer. Go to the folder angler-NPD35K and then copy/paste all the files to your Fastboot directory.
Note: If you followed our tutorial on setting up Fastboot on your computer, there is a 99% chance your Fastboot directory will be the platform-tools folder in your Android SDK directory.
Step 7 – From the factory image files in your Fastboot directory, do the following depending which OS you are on:
•On Windows: Run the file “flash-all.bat”.
•On Mac: Run the file “flash-all.sh” using Terminal.
•On Linux: Run the file “flash-all.sh”.
Step 8 – That’s pretty much that you had to do for flashing the stock factory image on your Nexus 6P. Now wait and watch as the process is completed — or follow the on-screen instructions on your phone if in case you have to unlock the bootloader.
Step 9 – After the installation completes, the phone will boot now and it might take about 5 minutes to boot on your first time. So, please wait with patience!
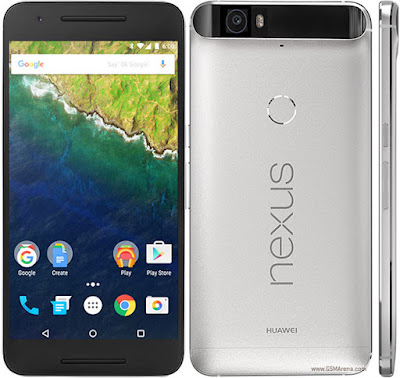
That’s it! Your Nexus 6P should now have the official Android N NPD35K Developer Preview Beta software update installed on your phone using the stock factory image from Google! Go to Settings >About phone to verify.
For More Nexus 6P latest updates Keep Checking AndroidCustomROM Fix ™®
Like this post? PLZ Hit the share buttons below to share this article with your friends on Facebook, Google + and Twitter.
PLZ Follow Us On Flipboard 4 More Latest Updates.
PLZ Use the comment box below to contribute more ideas & Suggestions .
Best Regards.
÷ Prerequisites:
•This tutorial is only for Huawei Nexus 6P and we are not sure if it will work on the other variants of the Nexus 6P on other carriers.
•Your phone can be on any previous Android version or even on a custom ROM. It doesn’t matter at all. This tutorial will still work for installing Android N Developer Preview Beta.
*Disclaimer:
Android Custom ROM fix ® provide various Firmware Updates and Rooting process along with Custom ROM,Modes,file are all belong to their owners/developers. The autor of this site or the developers are not responsible, if you damage or brick your device.Do it on your own risk and follow the instruction properly.
* Important:
Backup important files stored on your device before proceeding with the steps below, so that in case something goes wrong you’ll have backup of all your important files.
÷ How to Update Huawei Nexus 6P to Android N NPD35K Developer Preview 3 Factory Image
Step 1 – Download Android N Factory Image (angler-npc56p-preview-85ffc1b1.tgz) for Nexus 6P on your PC, if you haven’t already.
Step 2 – Connect your Nexus 6P to your computer using the USB cable.
Step 3 – Please make sure Fastboot is configured and properly installed on your computer.
Step 4 – Turn OFF your phone.
Step 5 – Get into the Fastboot/Bootloader Mode on your phone. Turn ON the phone while pressing and holding the Volume Up + Volume Down + Power buttons till you see the Fastboot menu and START on top.
Step 6 – Now extract the downloaded file anywhere in your computer. Go to the folder angler-NPD35K and then copy/paste all the files to your Fastboot directory.
Note: If you followed our tutorial on setting up Fastboot on your computer, there is a 99% chance your Fastboot directory will be the platform-tools folder in your Android SDK directory.
Step 7 – From the factory image files in your Fastboot directory, do the following depending which OS you are on:
•On Windows: Run the file “flash-all.bat”.
•On Mac: Run the file “flash-all.sh” using Terminal.
•On Linux: Run the file “flash-all.sh”.
Step 8 – That’s pretty much that you had to do for flashing the stock factory image on your Nexus 6P. Now wait and watch as the process is completed — or follow the on-screen instructions on your phone if in case you have to unlock the bootloader.
Step 9 – After the installation completes, the phone will boot now and it might take about 5 minutes to boot on your first time. So, please wait with patience!
That’s it! Your Nexus 6P should now have the official Android N NPD35K Developer Preview Beta software update installed on your phone using the stock factory image from Google! Go to Settings >About phone to verify.
For More Nexus 6P latest updates Keep Checking AndroidCustomROM Fix ™®
Like this post? PLZ Hit the share buttons below to share this article with your friends on Facebook, Google + and Twitter.
PLZ Follow Us On Flipboard 4 More Latest Updates.
PLZ Use the comment box below to contribute more ideas & Suggestions .
Best Regards.
Tuesday, July 26, 2016
How to Install Android 6 0 1 Marshmallow CyanideM ROM on Nexus 4
Nexus4 CyanideM custom ROM comes with tons of new features and is based on Android 6.0.1 Marshmallow.

Don’t worry we are going to share step by step guide to safely Install Android 6.0.1 Marshmallow CyanideM ROM on Nexus 4.
Don’t worry we are going to share step by step guide to safely Install Android 6.0.1 Marshmallow CyanideM ROM on Nexus 4.
View my Flipboard Magazine.
÷ Prerequisites:
•This Android 6.0.1 CyanideM ROM tutorial is only for Nexus 4 (occam) and I am not sure if it will work on the other variants of the Nexus 4 on other carriers.
•Make sure your phone is rooted and has a custom recovery like ClockworkMod installed.
•Make a Nandroid backup of your previous phone set up before proceeding – for just in case anything goes wrong.
•Install the Google Apps package if you want the usual Google apps (Gmail, Maps, Play Store, Calendar etc.) on your phone.
*Disclaimer:
Android Custom ROM fix ® provide various Firmware Updates and Rooting process along with Custom ROM,Modes,file are all belong to their owners/developers. The autor of this site or the developers are not responsible, if you damage or brick your device.Do it on your own risk and follow the instruction properly.
* Important:
Backup important files stored on your device before proceeding with the steps below, so that in case something goes wrong you’ll have backup of all your important files.

÷ How to Install Android 6.0.1 Marshmallow CyanideM ROM on Nexus 4:
Step 1 – Download Android 6.0.1 CyanideM ROM and Google Apps for Nexus 4 on your PC, if you haven’t already.
Step 2 – Connect and mount your Nexus 4 USB memory on your computer using the USB cable.
Step 3 – Now copy/paste the downloaded Android 6.0.1 ROM zip and Google Apps zip files to your internal SD card. Make sure the files are in the SD card root (not in any folder).
Step 4 – Then turn OFF your phone and disconnect from the USB cable.
Step 5 – Now to get in the Bootloader Mode. Turn ON the phone while pressing and holding the Volume Up + Volume Down and Power buttons.
Step 6 – Follow the navigation instructions on the screen. Select BOOTLOADER and then go to RECOVERY.
Step 7 – Once you are in ClockworkMod Recovery, select perform a full data wipe by selecting “wipe data/factory reset. Use the Power button to select everything while in the Recovery Mode.
Step 8 – Then, perform a cache wipe by selecting “wipe cache partition” .
Step 9 – Now this is optional, but it is recommended to perform a wipe of your dalvik cache as well. You will not get into boot loops or any other errors. From CWM recovery, go to ‘advanced’ and then select “wipe dalvik cache”.
Step 10 – Then go back to the main recovery screen and select “install zip from SD card”.
Step 11 – Now select “choose zip from sdcard”. Using your volume keys, navigate to the Android 6.0.1 ROM zip file that you copied to your SD card and select it using the Power button. Confirm the installation on the next screen and the installation procedure should start now.
Google Apps: Repeat the above step for the Gapps zip file as well and install it on your phone.
Step 12 – After the installation completes, go to “+++++Go Back+++++” and reboot the phone by selecting “reboot system now” from the recovery menu .

Your Nexus 4 will boot now and it might take about 5 minutes to boot on your first time. So, please wait.
That’s it! Your Nexus 4 should now have Android 6.0.1 CyanideM Marshmallow custom ROM installed on your phone! Go to Settings > About phone to verify.
For More Nexus 4 Updates Keep Checking Android Custom ROM Fix ™®
That’s all. We hope this guide serves you well. If there’s anything you’d like to be added/changed on this page, PLZ Use the comment box below to contribute more ideas & Suggestions .
Like this post? PLZ Hit the share buttons below to share this article with your friends on Facebook, Google + and Twitter.
PLZ Follow Us On Flipboard 4 More Latest Updates.
Best Regards.™
÷ Prerequisites:
•This Android 6.0.1 CyanideM ROM tutorial is only for Nexus 4 (occam) and I am not sure if it will work on the other variants of the Nexus 4 on other carriers.
•Make sure your phone is rooted and has a custom recovery like ClockworkMod installed.
•Make a Nandroid backup of your previous phone set up before proceeding – for just in case anything goes wrong.
•Install the Google Apps package if you want the usual Google apps (Gmail, Maps, Play Store, Calendar etc.) on your phone.
*Disclaimer:
Android Custom ROM fix ® provide various Firmware Updates and Rooting process along with Custom ROM,Modes,file are all belong to their owners/developers. The autor of this site or the developers are not responsible, if you damage or brick your device.Do it on your own risk and follow the instruction properly.
* Important:
Backup important files stored on your device before proceeding with the steps below, so that in case something goes wrong you’ll have backup of all your important files.
÷ How to Install Android 6.0.1 Marshmallow CyanideM ROM on Nexus 4:
Step 1 – Download Android 6.0.1 CyanideM ROM and Google Apps for Nexus 4 on your PC, if you haven’t already.
Step 2 – Connect and mount your Nexus 4 USB memory on your computer using the USB cable.
Step 3 – Now copy/paste the downloaded Android 6.0.1 ROM zip and Google Apps zip files to your internal SD card. Make sure the files are in the SD card root (not in any folder).
Step 4 – Then turn OFF your phone and disconnect from the USB cable.
Step 5 – Now to get in the Bootloader Mode. Turn ON the phone while pressing and holding the Volume Up + Volume Down and Power buttons.
Step 6 – Follow the navigation instructions on the screen. Select BOOTLOADER and then go to RECOVERY.
Step 7 – Once you are in ClockworkMod Recovery, select perform a full data wipe by selecting “wipe data/factory reset. Use the Power button to select everything while in the Recovery Mode.
Step 8 – Then, perform a cache wipe by selecting “wipe cache partition” .
Step 9 – Now this is optional, but it is recommended to perform a wipe of your dalvik cache as well. You will not get into boot loops or any other errors. From CWM recovery, go to ‘advanced’ and then select “wipe dalvik cache”.
Step 10 – Then go back to the main recovery screen and select “install zip from SD card”.
Step 11 – Now select “choose zip from sdcard”. Using your volume keys, navigate to the Android 6.0.1 ROM zip file that you copied to your SD card and select it using the Power button. Confirm the installation on the next screen and the installation procedure should start now.
Google Apps: Repeat the above step for the Gapps zip file as well and install it on your phone.
Step 12 – After the installation completes, go to “+++++Go Back+++++” and reboot the phone by selecting “reboot system now” from the recovery menu .
Your Nexus 4 will boot now and it might take about 5 minutes to boot on your first time. So, please wait.
That’s it! Your Nexus 4 should now have Android 6.0.1 CyanideM Marshmallow custom ROM installed on your phone! Go to Settings > About phone to verify.
For More Nexus 4 Updates Keep Checking Android Custom ROM Fix ™®
That’s all. We hope this guide serves you well. If there’s anything you’d like to be added/changed on this page, PLZ Use the comment box below to contribute more ideas & Suggestions .
Like this post? PLZ Hit the share buttons below to share this article with your friends on Facebook, Google + and Twitter.
PLZ Follow Us On Flipboard 4 More Latest Updates.
Best Regards.™
Monday, July 25, 2016
How to Install Android 6 0 1 Marshmallow ResurrectionRemix ROM on Nexus 4
Nexus 4 ResurrectionRemix custom ROM comes with tons of new features and is based on Android 6.0.1 Marshmallow. A quick list of the main features in ResurrectionRemix is given below and we are sure you’d love to use this on your Nexus 4:

Based On Latest Google Android 6.0.1 Release
Based On Cyanogenmod 13 Sources
RR Customizations
Navigation Bar
Enable/Disable Navbar
Navbar Button Customization
Navbar Slim Dim
Animate Dim
Dim Timeout Duration
Dim Alpha
Double Tap To sleep navbar
Navigation Bar left/Right handed mode Switch for landscape...
View my Flipboard Magazine.
÷ Prerequisites:
•This Android 6.0.1 ResurrectionRemix ROM tutorial is only for Nexus 4 (occam) and I am not sure if it will work on the other variants of the Nexus 4 on other carriers.
•Make sure your phone is rooted and has a custom recovery like ClockworkMod installed.
•Make a Nandroid backup of your previous phone set up before proceeding – for just in case anything goes wrong.
•Install the Google Apps package if you want the usual Google apps (Gmail, Maps, Play Store, Calendar etc.) on your phone.
*Disclaimer:
Android Custom ROM fix ® provide various Firmware Updates and Rooting process along with Custom ROM,Modes,file are all belong to their owners/developers. The autor of this site or the developers are not responsible, if you damage or brick your device.Do it on your own risk and follow the instruction properly.
* Important:
Backup important files stored on your device before proceeding with the steps below, so that in case something goes wrong you’ll have backup of all your important files.

÷ How to Install Android 6.0.1 Marshmallow ResurrectionRemix ROM on Nexus 4 :
Step 1 – Download Android 6.0.1 ResurrectionRemix ROM and Google Apps for Nexus 4 on your PC, if you haven’t already.
Step 2 – Connect and mount your Nexus 4 USB memory on your computer using the USB cable.
Step 3 – Now copy/paste the downloaded Android 6.0.1 ROM zip and Google Apps zip files to your internal SD card. Make sure the files are in the SD card root (not in any folder).
Step 4 – Then turn OFF your phone and disconnect from the USB cable.
Step 5 – Now to get in the Bootloader Mode. Turn ON the phone while pressing and holding the Volume Up + Volume Down and Power buttons.
Step 6 – Follow the navigation instructions on the screen. Select BOOTLOADER and then go to RECOVERY.
Step 7 – Once you are in ClockworkMod Recovery, select perform a full data wipe by selecting “wipe data/factory reset” as shown below. Use the Power button to select everything while in the Recovery Mode.
Step 8 – Then, perform a cache wipe by selecting “wipe cache partition” .
Step 9 – Now this is optional, but it is recommended to perform a wipe of your dalvik cache as well. You will not get into boot loops or any other errors. From CWM recovery, go to ‘advanced’ and then select “wipe dalvik cache”.
Step 10 – Then go back to the main recovery screen and select “install zip from SD card”.
Step 11 – Now select “choose zip from sdcard”. Using your volume keys, navigate to the Android 6.0.1 ROM zip file that you copied to your SD card and select it using the Power button. Confirm the installation on the next screen and the installation procedure should start now.
Google Apps: Repeat the above step for the Gapps zip file as well and install it on your phone.
Step 12 – After the installation completes, go to “+++++Go Back+++++” and reboot the phone by selecting “reboot system now” from the recovery menu .
Your Nexus 4 will boot now and it might take about 5 minutes to boot on your first time. So, please wait.

That’s it! Your Nexus 4 should now have Android 6.0.1 ResurrectionRemix Marshmallow custom ROM installed on your phone! Go to Settings > About phone to verify.
For More Nexus 4 Latest Updates keep checking AndroidCustomROM Fix™®
Like this post? PLZ Hit the share buttons below to share this article with your friends on Facebook, Google + and Twitter.
PLZ Follow Us On Flipboard 4 More Latest Updates.
PLZ Use the comment box below to contribute more ideas & Suggestions .
Best Regards.
÷ Prerequisites:
•This Android 6.0.1 ResurrectionRemix ROM tutorial is only for Nexus 4 (occam) and I am not sure if it will work on the other variants of the Nexus 4 on other carriers.
•Make sure your phone is rooted and has a custom recovery like ClockworkMod installed.
•Make a Nandroid backup of your previous phone set up before proceeding – for just in case anything goes wrong.
•Install the Google Apps package if you want the usual Google apps (Gmail, Maps, Play Store, Calendar etc.) on your phone.
*Disclaimer:
Android Custom ROM fix ® provide various Firmware Updates and Rooting process along with Custom ROM,Modes,file are all belong to their owners/developers. The autor of this site or the developers are not responsible, if you damage or brick your device.Do it on your own risk and follow the instruction properly.
* Important:
Backup important files stored on your device before proceeding with the steps below, so that in case something goes wrong you’ll have backup of all your important files.
÷ How to Install Android 6.0.1 Marshmallow ResurrectionRemix ROM on Nexus 4 :
Step 1 – Download Android 6.0.1 ResurrectionRemix ROM and Google Apps for Nexus 4 on your PC, if you haven’t already.
Step 2 – Connect and mount your Nexus 4 USB memory on your computer using the USB cable.
Step 3 – Now copy/paste the downloaded Android 6.0.1 ROM zip and Google Apps zip files to your internal SD card. Make sure the files are in the SD card root (not in any folder).
Step 4 – Then turn OFF your phone and disconnect from the USB cable.
Step 5 – Now to get in the Bootloader Mode. Turn ON the phone while pressing and holding the Volume Up + Volume Down and Power buttons.
Step 6 – Follow the navigation instructions on the screen. Select BOOTLOADER and then go to RECOVERY.
Step 7 – Once you are in ClockworkMod Recovery, select perform a full data wipe by selecting “wipe data/factory reset” as shown below. Use the Power button to select everything while in the Recovery Mode.
Step 8 – Then, perform a cache wipe by selecting “wipe cache partition” .
Step 9 – Now this is optional, but it is recommended to perform a wipe of your dalvik cache as well. You will not get into boot loops or any other errors. From CWM recovery, go to ‘advanced’ and then select “wipe dalvik cache”.
Step 10 – Then go back to the main recovery screen and select “install zip from SD card”.
Step 11 – Now select “choose zip from sdcard”. Using your volume keys, navigate to the Android 6.0.1 ROM zip file that you copied to your SD card and select it using the Power button. Confirm the installation on the next screen and the installation procedure should start now.
Google Apps: Repeat the above step for the Gapps zip file as well and install it on your phone.
Step 12 – After the installation completes, go to “+++++Go Back+++++” and reboot the phone by selecting “reboot system now” from the recovery menu .
Your Nexus 4 will boot now and it might take about 5 minutes to boot on your first time. So, please wait.
That’s it! Your Nexus 4 should now have Android 6.0.1 ResurrectionRemix Marshmallow custom ROM installed on your phone! Go to Settings > About phone to verify.
For More Nexus 4 Latest Updates keep checking AndroidCustomROM Fix™®
Like this post? PLZ Hit the share buttons below to share this article with your friends on Facebook, Google + and Twitter.
PLZ Follow Us On Flipboard 4 More Latest Updates.
PLZ Use the comment box below to contribute more ideas & Suggestions .
Best Regards.
Sunday, July 24, 2016
Guide How to Flash the Factory Images and Return to Stock LG Nexus 5X
[Guide] How to Flash the Factory Images and Return to Stock LG Nexus 5X.
Flash the Factory Images LG Nexus 5X. This guide will explain how to Flash the Factory Images and Return to Stock LG Nexus 5X, by following this guide you can return the phone to be like it was when it came out of the box. Make sure always backup your personal data and file stored on your internal memory, cause this action will erase or wipe everything. Actually you can flash your LG Nexus 5X without wiping your personal data, but it would be written in the next article. Now following this guide below carefully, to avoid damage or broken your LG Nexus 5X device.
Prerequisite.
Before you perform this task, make sure your Bootloader is Unlocked. for more instruction guide you can see this guide.
Guide to flash LG Nexus 5X.
- Switch On your LG Nexus 5X device.
- Then perform factory data reset.
- Go to Settings
- Then Backup and Reset.
- Then follow all instruction shown on screen.
- Be ware. This action will remove all of your user data from the LG Nexus 5X device (apps, settings, photos, music, etc).
- Once it done, now download the appropriate factory images for your model here.
- Extract the bullhead-xxxxxx-factory-xxxxxxxx (xs replace variables) into a directory on your computer. You can use 7zip to extract this file.
- You can create folder on drive C:
- C: ullhead
- Once extract finished, Open it and move the following files to a new directory.
- C: ullheadimages:
- This is your file content.
- bootloader-bullhead-bullhead-xx.xx.img
- radio-bullhead-bullhead-xx.xx.img
- flash-al-sh
- flash-base.sh
- flash-al

Flash the Factory Images and Return to Stock LG Nexus 5X - Within C: ullhead ullhead-xxxxxx youll see another zip archive named image-bullhead-xxxxxx.

Flash the Factory Images and Return to Stock LG Nexus 5X - Now, extract the content of zip into folder.
- C: ullheadimages
- Then, within C: ullheadimages you should have the following files:
- android-info.txt
- boot.img
- bootloader-bullhead-bullhead-xx.xx.img
- cache.img
- radio-bullhead-bullhead-xx.xx.img
- recovery.img
- system.img
- userdata.img
- vendor.img

Flash the Factory Images and Return to Stock LG Nexus 5X - Connect your LG Nexus 5X device to the computer using USB cable.
- Now, Open a command prompt from within your fastboot folder.
- To start this command prompt just hold shift + right click, select open command prompt here.
- Then type;
- adb reboot bootloader
- Now, enter this command to flash your LG Nexus 5X device.
fastboot flash bootloader C: ullheadimages ootloader-bullhead-bullhead-xx.xx.img
fastboot reboot-bootloader
fastboot flash radio C: ullheadimages adio-bullhead-bullhead-xx.xx.img
fastboot reboot-bootloader
fastboot flash boot C: ullheadimages oot.img
fastboot erase cache
fastboot flash cache C: ullheadimagescache.img
fastboot flash recovery C: ullheadimages ecovery.img
fastboot flash system C: ullheadimagessystem.img
fastboot flash vendor C: ullheadimagesvendor.img- Once all commands or flashes process are complete you can reboot the LG Nexus 5X device:
- To reboot this device, type.
- fastboot reboot
- Finish.


Thursday, July 21, 2016
Guide how to Unlock Bootloader Android LG Nexus 5X
[Guide] how to Unlock Bootloader Android LG Nexus 5X.
Unlock Bootloader LG Nexus 5X. On this guide we will show you how to Unlock Bootloader Android LG Nexus 5X. By unlocking your bootloader allows you to put custom ROMs on your device. LG Nexus 5X is the smartphone released on September, 2015. with 5,2 Inchi wide IPS LCD capacitive touchscreen, 16M colors, work on Android OS, v6.0 (Marshmallow) and supported with chipset Qualcomm MSM8992 Snapdragon 808, Processor Quad-core 1.44 GHz Cortex-A53 & dual-core 1.82 GHz Cortex-A57, GPU Adreno 418, combined with 2 GB of RAM, 12,3 MP on primary camera and 5 MP on secondary camera.
Now following this guide carefully,
Unlock Bootloader LG Nexus 5X.
- Make sure ADB or fastboot installed correctly on your PC. see this guide.
- From your LG Nexus 5X device.
- Go to Settings.
- About phone.
- Scroll down and tap on “build number" continuously (7 times).
- Then you will see a notifications that say youve enabled Developer Options.
- Now, go back to your Settings menu and tap Developer Options.
- Then, scroll down and tap on the “Enable OEM Unlock” checkbox.
- Also make sure youve enable USB Debugging.
- Now, Power Off your LG Nexus 5X device.
- Then, boot your device into bootloader,
- How to boot your device into bootloader ?
- Power Off your device.
- Then press and hold power + volume down (its should work on most android device)
- Now, connect your LG Nexus 5X device to your PC via original USB cable.
- Open a command prompt from within your fastboot folder.
- To start this command prompt just hold shift + right click, select open command prompt here.
- Now type,
- fastboot devices
- The result, It should return your device serial number, if so, fastboot is working. if not, make sure ADB or fastboot installed correctly.
- Once youve confirmed your fastboot connection. Now type.
- fastboot oem unlock
- Warning. This command will erase/delete all user data on your LG Nexus 5X device.
- On your LG Nexus 5X screen you will also see a notification that ask you to confirm this action.
- use the volume button to scroll
- use the power button to confirm if youre sure you want to proceed.
- Now type this command to complete this task.
- fastboot reboot
- Once everything is done, you can disconnect your LG Nexus 5X device from computer.
- Finish.
Wednesday, July 20, 2016
Generasi Nexus Selanjutnya Dilengkapi Penyimpanan Hingga 128GB

Handset yang akan diproduksi oleh Huawei ini juga memiliki tiga varian, Selain versi 128GB Nexus berikutnya juga memiliki versi 64GB dan 32GB, Tetapi ada yang disayangkan dari smartphone ini dimana untuk slot SDcard tidak terdapat pada handset andalan Google ini.
Untuk Spesifikasi dari smartphone ini dikabarkan mempunyai 5,7 inch QHD serta prosesor Qualcomm Snapdragon 810 ditambah dengan RAM 3GB, Perangkat Nexus pertama Dari Huawei ini juga akan rilis bersama dengan LG Nexus 5x pada akhir bulan ini.
Monday, July 18, 2016
How to Root Nexus 6P on Android 6 0 1 MTC19V June 2016 Security Patch
Android 6.0.1 Marshmallow MTC19V June 2016 Security Patch is now available for the Nexus 5X, Nexus 6P, Nexus 5, Nexus 6, Nexus 7 and Nexus 9 phones and tablets.
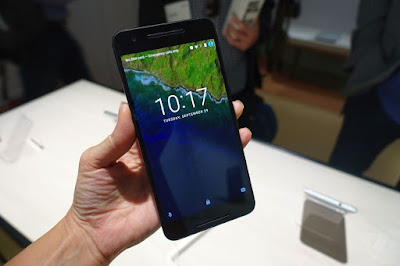
Don’t worry we are going to share step by step guide to safely Root your Nexus 6P on Android 6.0.1 MTC19V June 2016 Security Patch:
View my Flipboard Magazine.
÷ Prerequisites:
•This root method is only for Android 6.0.1 (MTC19V) installed on Nexus 6P and I am not sure if it will work on the other variants of the Nexus 6P on other carriers.
•Your Nexus 6P bootloader should be unlocked.
Nexus 6P should be on Android 6.0.1 MTC19V software version.
•Make a Nandroid backup of your previous phone set up before proceeding – for just in case anything goes wrong.
*Disclaimer:
Android Custom ROM fix ® provide various Firmware Updates and Rooting process along with Custom ROM,Modes,file are all belong to their owners/developers. The autor of this site or the developers are not responsible, if you damage or brick your device.Do it on your own risk and follow the instruction properly.
* Important:
Backup important files stored on your device before proceeding with the steps below, so that in case something goes wrong you’ll have backup of all your important files.
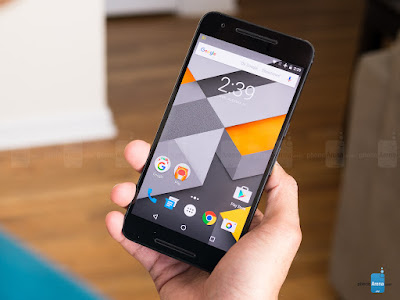
÷ How to Root Nexus 6P on Android 6.0.1 MTC19V June 2016 Security Patch:
Step 1 – Download Android SDK from the Android Developers website and install. Also set it up with downloading platform-tools and USB drivers package in SDK.
Step 2 – Enable USB Debugging mode in your Nexus 6P.
Step 3 – Download Fastboot from the following links depending on your OS and extract it in android-sdk-windowsplatform-tools directory. Create directory if not already there.
Windows: Download here.
Mac: Download here.
Linux: Download here
NOTE: Skip Steps 1, 2, 3 if you already have them.
Step 4 – Download SuperSU v2.74 BETA for Nexus 6P on your PC, if you haven’t already.
Step 5 – Connect and mount your Nexus 6P USB memory on your computer using the USB cable.
Step 6 – Now copy/paste the BETA-SuperSU-v2.74-2-20160519174328.zip file to your SD card. Make sure the file is in the SD card / internal storage root (not in any folder).
Step 7 – Then turn OFF your phone.
Step 8 – Download twrp-3.0.2-0-angler.img and save it to your android-sdk-windowsplatform-tools directory on your computer.
Step 9 – Now go into Fastboot/Bootloader Mode on Nexus 6P. How? Press Volume Down + Power keys for a few seconds till you see some text on the screen. This is Bootloader Mode.
Step 10 – Navigate to android-sdk-windowsplatform-tools directory and open Command Prompt (Shift + Right-click > Open Command Prompt).
Step 11 – Type in the following command and press Enter.
fastboot flash recovery twrp-3.0.2-0-angler.img
Step 12 – Once completed, choose RECOVERY from the Fastboot menu and enter Recovery Mode.
Step 13 – In ClockworkMod recovery, scroll down to “flash zip from SD card” and press the power button to select it.
Step 14 – Press the Power button again and select “choose zip from sdcard”.
Step 15 – Now using your volume keys, navigate to BETA-SuperSU-v2.74-2-20160519174328.zip and select it using the Power button. Confirm the installation on the next screen and the installation procedure should start now.
Step 16 – After the installation completes, go to “+++++Go Back” and reboot the phone by selecting “reboot system now” from the Recovery menu. The phone will boot now and it might take about 5 minutes to boot on your first time. So, please wait.
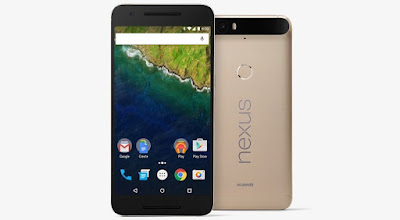
That’s it! Your Nexus 6P is now rooted on Android 6.0.1 Marshmallow firmware on your phone! Check for the SuperSU app in your apps list to verify.
For More Nexus 6P Updates Keep Checking Android Custom ROM Fix ®
That’s all. We hope this guide serves you well. If there’s anything you’d like to be added/changed on this page, PLZ Use the comment box below to contribute more ideas & Suggestions .
Like this post? PLZ Hit the share buttons below to share this article with your friends on Facebook, Google + and Twitter.
PLZ Follow Us On Flipboard 4 More Latest Updates.
Best Regards.™
÷ Prerequisites:
•This root method is only for Android 6.0.1 (MTC19V) installed on Nexus 6P and I am not sure if it will work on the other variants of the Nexus 6P on other carriers.
•Your Nexus 6P bootloader should be unlocked.
Nexus 6P should be on Android 6.0.1 MTC19V software version.
•Make a Nandroid backup of your previous phone set up before proceeding – for just in case anything goes wrong.
*Disclaimer:
Android Custom ROM fix ® provide various Firmware Updates and Rooting process along with Custom ROM,Modes,file are all belong to their owners/developers. The autor of this site or the developers are not responsible, if you damage or brick your device.Do it on your own risk and follow the instruction properly.
* Important:
Backup important files stored on your device before proceeding with the steps below, so that in case something goes wrong you’ll have backup of all your important files.
÷ How to Root Nexus 6P on Android 6.0.1 MTC19V June 2016 Security Patch:
Step 1 – Download Android SDK from the Android Developers website and install. Also set it up with downloading platform-tools and USB drivers package in SDK.
Step 2 – Enable USB Debugging mode in your Nexus 6P.
Step 3 – Download Fastboot from the following links depending on your OS and extract it in android-sdk-windowsplatform-tools directory. Create directory if not already there.
Windows: Download here.
Mac: Download here.
Linux: Download here
NOTE: Skip Steps 1, 2, 3 if you already have them.
Step 4 – Download SuperSU v2.74 BETA for Nexus 6P on your PC, if you haven’t already.
Step 5 – Connect and mount your Nexus 6P USB memory on your computer using the USB cable.
Step 6 – Now copy/paste the BETA-SuperSU-v2.74-2-20160519174328.zip file to your SD card. Make sure the file is in the SD card / internal storage root (not in any folder).
Step 7 – Then turn OFF your phone.
Step 8 – Download twrp-3.0.2-0-angler.img and save it to your android-sdk-windowsplatform-tools directory on your computer.
Step 9 – Now go into Fastboot/Bootloader Mode on Nexus 6P. How? Press Volume Down + Power keys for a few seconds till you see some text on the screen. This is Bootloader Mode.
Step 10 – Navigate to android-sdk-windowsplatform-tools directory and open Command Prompt (Shift + Right-click > Open Command Prompt).
Step 11 – Type in the following command and press Enter.
fastboot flash recovery twrp-3.0.2-0-angler.img
Step 12 – Once completed, choose RECOVERY from the Fastboot menu and enter Recovery Mode.
Step 13 – In ClockworkMod recovery, scroll down to “flash zip from SD card” and press the power button to select it.
Step 14 – Press the Power button again and select “choose zip from sdcard”.
Step 15 – Now using your volume keys, navigate to BETA-SuperSU-v2.74-2-20160519174328.zip and select it using the Power button. Confirm the installation on the next screen and the installation procedure should start now.
Step 16 – After the installation completes, go to “+++++Go Back” and reboot the phone by selecting “reboot system now” from the Recovery menu. The phone will boot now and it might take about 5 minutes to boot on your first time. So, please wait.
That’s it! Your Nexus 6P is now rooted on Android 6.0.1 Marshmallow firmware on your phone! Check for the SuperSU app in your apps list to verify.
For More Nexus 6P Updates Keep Checking Android Custom ROM Fix ®
That’s all. We hope this guide serves you well. If there’s anything you’d like to be added/changed on this page, PLZ Use the comment box below to contribute more ideas & Suggestions .
Like this post? PLZ Hit the share buttons below to share this article with your friends on Facebook, Google + and Twitter.
PLZ Follow Us On Flipboard 4 More Latest Updates.
Best Regards.™
How to Root Huawei Nexus 6P on Android N Developer Preview 3 NPD35K
Android N Developer Preview Beta is now available for the Nexus 5X, Nexus 6P, Nexus 6, and Nexus 9 phones and tablets. These are the major changes in Developer Preview Beta release of Android N, as per Google.

The latest Android N Developer Preview Beta NPD35K is the next upcoming major firmware release by Google. It brings some new features like multi-window mode, an enhanced doze mode, a revamped Settings screen and a quick toggle in the notifications panel. Other changes include improved notifications, improved multitasking and app switching, dark mode etc...
Meanwhile, you can Root your Nexus 6P on latest Android N Developer Preview 3 NPD35K.
Don’t worry we are going to share step by step guide to safely Root your Nexus 6P on latest Android N Developer Preview 3 NPD35K Factory Image.
The latest Android N Developer Preview Beta NPD35K is the next upcoming major firmware release by Google. It brings some new features like multi-window mode, an enhanced doze mode, a revamped Settings screen and a quick toggle in the notifications panel. Other changes include improved notifications, improved multitasking and app switching, dark mode etc...
Meanwhile, you can Root your Nexus 6P on latest Android N Developer Preview 3 NPD35K.
Don’t worry we are going to share step by step guide to safely Root your Nexus 6P on latest Android N Developer Preview 3 NPD35K Factory Image.
View my Flipboard Magazine.
÷ Prerequisites:
•This root method is only for Android N (NPD35K) installed on Nexus 6P and I am not sure if it will work on the other variants of the Nexus 6P on other carriers.
•Your Nexus 6P bootloader should be unlocked.
Nexus 6P should be on Android N NPD35K software version.
•Make a Nandroid backup of your previous phone set up before proceeding – for just in case anything goes wrong.
*Disclaimer:
Android Custom ROM fix ® provide various Firmware Updates and Rooting process along with Custom ROM,Modes,file are all belong to their owners/developers. The autor of this site or the developers are not responsible, if you damage or brick your device.Do it on your own risk and follow the instruction properly.
* Important:
Backup important files stored on your device before proceeding with the steps below, so that in case something goes wrong you’ll have backup of all your important files.

÷ How to Root Huawei Nexus 6P on Android N Developer Preview 3 NPD35K :
Step 1 – Download Android SDK from the Android Developers website and install. Also set it up with downloading platform-tools and USB drivers package in SDK.
Step 2 – Enable USB Debugging mode in your Nexus 6P.
Step 3 – Download Fastboot from the following links depending on your OS and extract it in android-sdk-windowsplatform-tools directory. Create directory if not already there.
Windows: Download here!
Mac: Download here!
Linux: Download here!
NOTE: Skip Steps 1, 2, 3 if you already have them.
Step 4 – Download SuperSU v2.71 for Nexus 6P on your PC, if you haven’t already.
Step 5 – Connect and mount your Nexus 6P USB memory on your computer using the USB cable.
Step 6 – Now copy/paste the BETA-SuperSU-v2.71-20160331103524.zip file to your SD card. Make sure the file is in the SD card / internal storage root (not in any folder).
Step 7 – Then turn OFF your phone.
Step 8 – twrp-2.8.7.0-angler.img and save it to your android-sdk-windowsplatform-tools directory on your computer.
Step 9 – Now go into Fastboot/Bootloader Mode on Nexus 6P. How? Press Volume Down + Power keys for a few seconds till you see some text on the screen. This is Bootloader Mode.
Step 10 – Navigate to android-sdk-windowsplatform-tools directory and open Command Prompt (Shift + Right-click > Open Command Prompt).
Step 11 – Type in the following command and press Enter.
fastboot flash recovery twrp-2.8.7.0-angler.img
Step 12 – Once completed, choose RECOVERY from the Fastboot menu and enter Recovery Mode.
Step 13 – In ClockworkMod recovery, scroll down to “flash zip from SD card” and press the power button to select it.
Step 14 – Press the Power button again and select “choose zip from sdcard”.
Step 15 – Now using your volume keys, navigate to BETA-SuperSU-v2.71-20160331103524.zip and select it using the Power button. Confirm the installation on the next screen and the installation procedure should start now.
Step 16 – After the installation completes, go to “+++++Go Back” and reboot the phone by selecting “reboot system now” from the Recovery menu. The phone will boot now and it might take about 5 minutes to boot on your first time. So, please wait.

That’s it! Your Nexus 6P is now rooted on Android N Developer Preview 3 firmware on your phone! Check for the SuperSU app in your apps list to verify.
For More Nexus 6P Firmware, Custom ROM ect... Keep Checking Android Custom ROM Fix ™®
Like this post? PLZ Hit the share buttons below to share this article with your friends on Facebook, Google + and Twitter.
PLZ Follow Us On Flipboard 4 More Latest Updates.
PLZ Use the comment box below to contribute more ideas & Suggestions .
Best Regards.
÷ Prerequisites:
•This root method is only for Android N (NPD35K) installed on Nexus 6P and I am not sure if it will work on the other variants of the Nexus 6P on other carriers.
•Your Nexus 6P bootloader should be unlocked.
Nexus 6P should be on Android N NPD35K software version.
•Make a Nandroid backup of your previous phone set up before proceeding – for just in case anything goes wrong.
*Disclaimer:
Android Custom ROM fix ® provide various Firmware Updates and Rooting process along with Custom ROM,Modes,file are all belong to their owners/developers. The autor of this site or the developers are not responsible, if you damage or brick your device.Do it on your own risk and follow the instruction properly.
* Important:
Backup important files stored on your device before proceeding with the steps below, so that in case something goes wrong you’ll have backup of all your important files.
÷ How to Root Huawei Nexus 6P on Android N Developer Preview 3 NPD35K :
Step 1 – Download Android SDK from the Android Developers website and install. Also set it up with downloading platform-tools and USB drivers package in SDK.
Step 2 – Enable USB Debugging mode in your Nexus 6P.
Step 3 – Download Fastboot from the following links depending on your OS and extract it in android-sdk-windowsplatform-tools directory. Create directory if not already there.
Windows: Download here!
Mac: Download here!
Linux: Download here!
NOTE: Skip Steps 1, 2, 3 if you already have them.
Step 4 – Download SuperSU v2.71 for Nexus 6P on your PC, if you haven’t already.
Step 5 – Connect and mount your Nexus 6P USB memory on your computer using the USB cable.
Step 6 – Now copy/paste the BETA-SuperSU-v2.71-20160331103524.zip file to your SD card. Make sure the file is in the SD card / internal storage root (not in any folder).
Step 7 – Then turn OFF your phone.
Step 8 – twrp-2.8.7.0-angler.img and save it to your android-sdk-windowsplatform-tools directory on your computer.
Step 9 – Now go into Fastboot/Bootloader Mode on Nexus 6P. How? Press Volume Down + Power keys for a few seconds till you see some text on the screen. This is Bootloader Mode.
Step 10 – Navigate to android-sdk-windowsplatform-tools directory and open Command Prompt (Shift + Right-click > Open Command Prompt).
Step 11 – Type in the following command and press Enter.
fastboot flash recovery twrp-2.8.7.0-angler.img
Step 12 – Once completed, choose RECOVERY from the Fastboot menu and enter Recovery Mode.
Step 13 – In ClockworkMod recovery, scroll down to “flash zip from SD card” and press the power button to select it.
Step 14 – Press the Power button again and select “choose zip from sdcard”.
Step 15 – Now using your volume keys, navigate to BETA-SuperSU-v2.71-20160331103524.zip and select it using the Power button. Confirm the installation on the next screen and the installation procedure should start now.
Step 16 – After the installation completes, go to “+++++Go Back” and reboot the phone by selecting “reboot system now” from the Recovery menu. The phone will boot now and it might take about 5 minutes to boot on your first time. So, please wait.
That’s it! Your Nexus 6P is now rooted on Android N Developer Preview 3 firmware on your phone! Check for the SuperSU app in your apps list to verify.
For More Nexus 6P Firmware, Custom ROM ect... Keep Checking Android Custom ROM Fix ™®
Like this post? PLZ Hit the share buttons below to share this article with your friends on Facebook, Google + and Twitter.
PLZ Follow Us On Flipboard 4 More Latest Updates.
PLZ Use the comment box below to contribute more ideas & Suggestions .
Best Regards.
Guide How to Root Android LG Nexus 5X
[Guide] How to Root Android LG Nexus 5X.
Root LG Nexus 5X. On this guide we will show you how to to Root Android LG Nexus 5X. By performing root on your LG Nexus 5X device you can get some of these benefit, Unlock Hidden Features and Install "Incompatible" Apps, Boost Your Phones Speed and Battery Life, Block Ads in Any App, Remove Preinstalled Crapware, Flash a Custom Kernel, and many other benefits. So, if now you want try to root your LG Nexus 5X device, you can follow this guide below.
Before we proceed to root this device, here is some detail spesifications of LG Nexus 5X, this device is the smartphone released on September, 2015. with 5,2 Inchi wide IPS LCD capacitive touchscreen, 16M colors, work on Android OS, v6.0 (Marshmallow) and supported with chipset Qualcomm MSM8992 Snapdragon 808, Processor Quad-core 1.44 GHz Cortex-A53 & dual-core 1.82 GHz Cortex-A57, GPU Adreno 418, combined with 2 GB of RAM, 12,3 MP on primary camera and 5 MP on secondary camera. And special thanks to Heisenbergs on XDA for this guide.
Prerequisites.
- Unlock Bootloader LG Nexus 5X device. see here
- Install TWRP Recovery on this device. see this guide.
How to Root Android LG Nexus 5X.
- Download the latest SuperSU.
- Put the SuperSU file into internal storage of your device.
- Now, Boot into TWRP recovery and enter the install menu.How to do it ?
- Power Off your LG Nexus 5X device.
- Then, hold simultaneously the Power button and the Volume down button for a few seconds.
- Then, release all button if you see a list with options.

twrp - Root Android LG Nexus 5X. - Then, Navigate to where you have SuperSU stored on your internal storage and select it.
- Now, Swipe to install.
- Then choose wipe cache/dalvik
- Now, choose reboot to reboot system
- Once your Nexus 5 has rebooted, go to the Google Play Store and install Root Checker to verify you now have root.
- When you get a green pass message, youre done.

root checker- root lg nexus 5x - Finish.


Guide Flash the Factory Images and Return to Stock LG Nexus 5X Without Wiping Your Personal Data
[Guide] Flash the Factory Images and Return to Stock LG Nexus 5X (Without Wiping Your Personal Data).
Flash the Factory Images LG Nexus 5X. This guide will explain [Guide] Flash the Factory Images and Return to Stock LG Nexus 5X (Without Wiping Your Personal Data), by following this guide you can return the phone to be like it was when it came out of the box. This is a second method you can use to flash LG Nexus 5X device, on this method your personal data is safe, because the process is Leaving Internal Storage Intact. So you dont need to worry if your personal data is lost.
Prerequisite.
- Before you perform this task, make sure your Bootloader is Unlocked. for more instruction guide you can see this guide.
- TWRP Recovery installed on your LG Nexus 5X device. see this guide
Guide to flash LG Nexus 5X.
- Switch On your LG Nexus 5X device.
- Then perform factory data reset.
- Go to Settings
- Then Backup and Reset.
- Then follow all instruction shown on screen.
- Be ware. This action will remove all of your user data from the LG Nexus 5X device (apps, settings, photos, music, etc).
- Once it done, now download the appropriate factory images for your model here.
- Extract the bullhead-xxxxxx-factory-xxxxxxxx (xs replace variables) into a directory on your computer. You can use 7zip to extract this file.
- You can create folder on drive C:
- C: ullhead
- Once extract finished, Open it and move the following files to a new directory.
- C: ullheadimages:
- This is your file content.
- bootloader-bullhead-bullhead-xx.xx.img
- radio-bullhead-bullhead-xx.xx.img
- flash-al-sh
- flash-base.sh
- flash-al
Flash the Factory Images and Return to Stock LG Nexus 5X - Within C: ullhead ullhead-xxxxxx youll see another zip archive named image-bullhead-xxxxxx.
Flash the Factory Images and Return to Stock LG Nexus 5X - Now, extract the content of zip into folder.
- C: ullheadimages
- Then, within C: ullheadimages you should have the following files:
- android-info.txt
- boot.img
- bootloader-bullhead-bullhead-xx.xx.img
- cache.img
- radio-bullhead-bullhead-xx.xx.img
- recovery.img
- system.img
- userdata.img
- vendor.img
Flash the Factory Images and Return to Stock LG Nexus 5X - Now, Boot into TWRP recovery and enter the wipe menu,
- Then select advanced wipe, check only the data box and swipe to wipe.
- Now, Go to the TWRP main menu,
- Then, enter the reboot menu, select bootloader.
- The LG Nexus 5X device will now boot into the bootloader.
- Its time to connect your LG Nexus 5X device to the computer using USB cable.
- Now, Open a command prompt from within your fastboot folder.
- To start this command prompt just hold shift + right click, select open command prompt here.
- Now, enter this command to flash your LG Nexus 5X device without Wiping Your Personal Data.
fastboot flash bootloader C: ullheadimages ootloader-bullhead-bullhead-xx.xx.img
fastboot reboot-bootloader
fastboot flash radio C: ullheadimages adio-bullhead-bullhead-xx.xx.img
fastboot reboot-bootloader
fastboot flash boot C: ullheadimages oot.img
fastboot erase cache
fastboot flash cache C: ullheadimagescache.img
fastboot flash recovery C: ullheadimages ecovery.img
fastboot flash system C: ullheadimagessystem.img
fastboot flash vendor C: ullheadimagesvendor.img- Once all commands or flashes process are complete you can reboot the LG Nexus 5X device:
- To reboot this device, type.
- fastboot reboot
- Finish.
Subscribe to:
Posts (Atom)