Showing posts with label factory. Show all posts
Showing posts with label factory. Show all posts
Friday, July 29, 2016
Cherry Mobile FlareXL Factory Firmware

How to flash this rom using sp flash tool, sorry we didnt teach or post any tutorial here this blog exclusively for the people having a experience on smartphone flashing a mobile tech as well. if you dont know how you doing much better stay away. or you wanna try or explore from it read first here our DISCLAIMER.
Factory Firmware Code:
MT6592__CherryMobile__X340__FlareXL__4.4.4__FlareXL_X340_V07_20150326
Download Cherry Mobile FlareXL Factory Rom
Download Flasher
Guide Hard Reset Samsung Galaxy A7 2016 To Restore Factory Setting Remove Forgot Pattern PIN Password
[Guide] Hard Reset Samsung Galaxy A7 2016 To Restore Factory Setting & Remove Forgot Pattern/PIN/Password.
Hard Reset Samsung Galaxy A7 2016. Samsung Galaxy A7 2016 has this version (A7100 (Hong Kong), A710M (Latin America), A710FD (Southeast Asia), A710Y (Taiwan), A710F (Europe)), and this Android Smartphone Also known as Samsung Galaxy A7 (2016) Duos with dual-SIM card slots. This device is released on December, 2015. And todays guidebelajar will explain to you how to perform hard reset on Samsung Galaxy A7 2016 smartphone. Please keep in mind, this tutorial will erase all data saved on your internal memory. Samsung Galaxy A7 2016 is the smartphone with 5,5 Inchi Super AMOLED capacitive touchscreen, 16M colors, work on Android OS, v5.1.1 (Lollipop), and supported with Processor Quad-core 1.2 GHz Cortex-A53 & Quad-core 1.5 GHz Cortex-A53, Qualcomm MSM8939 Snapdragon 615 chipset, Adreno 405 GPU, combined with 3 GB of RAM, 13 MP on primary camera and 5 MP on secondary camera to capture best moment and make a selfie on your life.
Most of Android user say that Hard reset process is call with master reset or factory reset. Many people asking why shoud we perform hard reset to our phone. The logical answer that can I say for this asking is :
Most of Android user say that Hard reset process is call with master reset or factory reset. Many people asking why shoud we perform hard reset to our phone. The logical answer that can I say for this asking is :
- Samsung Galaxy A7 2016 has a persistent problem that cannot be solved.
- Because we will sell our Samsung Galaxy A7 2016 Android phones
- We want to remove all personal data and setting that was stored in Samsung Galaxy A7 2016.device.
- There are many bug on Samsung Galaxy A7 2016.
- Our Samsung Galaxy A7 2016 has been lagging and stuck on android logo, this call with bootloop
- We have forgotten on PIN or Patern Lock at Samsung Galaxy A7 2016.
- We will give our Samsung Galaxy A7 2016 away to some one else, and we dont want that one know everything about our secret data, so we have to erase all data before back up it.
- and many other reason.
1st Methode. Hard Reset Samsung Galaxy A7 2016 Using Menu :
- Make sure your batery is fully charged, Recomended you have 80% of battery capacity
- Then Backup your Samsung Galaxy A7 2016. See This Guide
- Go to menu: System Setting >
- Select Backup and Reset >
- Factory Data Reset >
- Reset Phone
- Choose Erase everything to confirm that you already to perform hard reset on Samsung Galaxy A7 2016
- Samsung Galaxy A7 2016 will continue to hard reset process to restore factory default.
2ndMethode. Hard Reset Samsung Galaxy A7 2016 Using Hardware Keys:
- Make sure your battery is fully charged, we recomended that your battery has 80% power
- Always BackUp your important data that store in Samsung Galaxy A7 2016. see this guide
- Turn Off your Samsung Galaxy A7 2016 by hold and press Power Button for a second.
- Release any SIM card and SD card that was installed on your Samsung Galaxy A7 2016 smartphone.
- Then press and hold together a combination button Volume Up + Home Button + Power button at same time for a seconds.

Hard Reset Samsung Galaxy A7 2016 - Then you will see Samsung Galaxy J7 Logo. On this step release Power Button only, while keep holding Volume Up and Home Button.

Samsung Galaxy A7 2016 Logo - When Android Logo appear on your screen. You must release all button.

Android Logo - hard reset samsung galaxy A7 2016 - And now you will enter, Android System Recovery.

Android System Recovery - Scroll down using Power Down button, and you can select "wipe data/factory reset" and confirm it using Power Button.

wipe data - Hard Reset - Then select "Yes ---Delete All User Data". use volume down button to choice menu, and again confirm it using Power Button. Please be ware, on this this step you will be lost everything stored on your phone. So, make sure to always backup all data before performing hard reset.

yes delete all user data - Now, wait the process untill you see data wipe complete appear on screen.

wipe data process - After a few minute hard reset process will finished, and your screen will be back to Android System recovery screen.
- Now, Select Reboot System Now to reboot your device.

Reboot System Now - You can wait a while for Samsung Galaxy A7 2016 to reboot system
- Done, your hard reset process success now.


Video Guide.
Guide Hard Reset Samsung Galaxy S7 EDGE To Restore Factory Setting Remove Forgot Pattern Password PIN
[Guide] Hard Reset Samsung Galaxy S7 EDGE To Restore Factory Setting & Remove Forgot Pattern/Password/PIN.
Hard Reset Samsung Galaxy S7 EDGE. Samsung Galaxy S7 EDGE has many version, among them are G935 (USA); G935F (Global); G935FD (Southeast Asia), and this smartphone Also known as Samsung Galaxy S7 EDGE Duos with dual-SIM card slots. This device is released on March, 2016. And todays guidebelajar will explain to you how to perform hard reset on Samsung Galaxy S7 EDGE smartphone. Please keep in mind, this tutorial will erase all data saved on your internal memory. Samsung Galaxy S7 EDGE is the smartphone with 5,5 Inchi Super AMOLED capacitive touchscreen, 16M colors, work on Android OS, v6.0 (Marshmallow), and supported with Processor Dual-core 2.15 GHz Kryo & dual-core 1.6 GHz Kryo, Qualcomm MSM8996 Snapdragon 820 chipset, Adreno 530 GPU, combined with 4 GB of RAM, 12 MP on primary camera and 5 MP on secondary camera to capture best moment and make a selfie on your life.
Most of Android user say that Hard reset process is call with master reset or factory reset. Many people asking why shoud we perform hard reset to our phone. The logical answer that can I say for this asking is :
Most of Android user say that Hard reset process is call with master reset or factory reset. Many people asking why shoud we perform hard reset to our phone. The logical answer that can I say for this asking is :
- We will give our Samsung Galaxy S7 EDGE away to some one else, and we dont want that one know everything about our secret data, so we have to erase all data before back up it.
- We have forgotten on PIN or Patern Lock at Samsung Galaxy S7 EDGE.
- Samsung Galaxy S7 EDGE has a persistent problem that cannot be solved.
- Because we will sell our Samsung Galaxy S7 EDGE Android phones.
- Our Samsung Galaxy S7 EDGE has been lagging and stuck on android logo, this call with bootloop
- There are many bug on Samsung Galaxy S7 EDGE.
- We want to remove all personal data and setting that was stored in Samsung Galaxy S7 EDGE.device.
- and many other reason.
1st Methode. Hard Reset Samsung Galaxy S7 EDGE Using Menu :
- Make sure your batery is fully charged, Recomended you have 80% of battery capacity
- Then Backup your Samsung Galaxy S7 EDGE. See This Guide
- Go to menu: System Setting >
- Select Backup and Reset >
- Factory Data Reset >
- Reset Phone
- Choose Erase everything to confirm that you already to perform hard reset on Samsung Galaxy S7 EDGE
- Samsung Galaxy S7 EDGE will continue to hard reset process to restore factory default.
2ndMethode. Hard Reset Samsung Galaxy S7 EDGE Using Hardware Keys:
- Make sure your battery is fully charged, we recomended that your battery has 80% power
- Always BackUp your important data that store in Samsung Galaxy S7 EDGE. see this guide
- Turn Off your Samsung Galaxy S7 EDGE by hold and press Power Button for a second.
- Release any SIM card and SD card that was installed on your Samsung Galaxy S7 EDGE smartphone.
- Then press and hold together a combination button Volume Up + Home Button + Power button at same time for a seconds.

Hard Reset Samsung Galaxy S7 EDGE - Release Power Button, and keep holding volume up and home button for a few minute. Then release All button.

samsung galaxy S7 Edge - android logo - And now you will enter, Android System Recovery.
- Scroll down using Power Down button, and you can select "wipe data/factory reset" and confirm it using Power Button.

wipe data - Hard Reset - Then select "Yes". use volume down button to choice menu, and again confirm it using Power Button. Please be ware, on this this step you will be lost everything stored on your phone. So, make sure to always backup all data before performing hard reset.

- Now, wait the process untill you see data wipe complete appear on screen.

wipe data process - After a few minute hard reset process will finished, and your screen will be back to Android System recovery screen.
- Now, Select Reboot System Now to reboot your device.

Reboot System Now - You can wait a while for Samsung Galaxy S7 EDGE to reboot system
- Done, your hard reset process success now.


 |
| Android System Recovery |


Video Guide.
Thursday, July 28, 2016
How to Hard Reset Factory Reset MICROSOFT LUMIA 950 XL Guide
How to Hard Reset / Factory Reset MICROSOFT LUMIA 950 XL [Guide].
Hard Reset MICROSOFT LUMIA 950 XL. MICROSOFT LUMIA 950 XL is the smartphone released on November, 2015. with 5,7 Inchi AMOLED capacitive touchscreen, 16M colors, work on Microsoft Windows 10 OS, and supported with Quad-core 1.5 GHz Cortex-A53 & Quad-core 2.0 GHz Cortex-A57 CPU, Qualcomm MSM8994 Snapdragon 810 chipset, Adreno 430 GPU, combined with 1 GB of RAM, 8 MP on primary camera and 2 MP on secondary camera.
Performing a factory data reset on MICROSOFT LUMIA 950 XL will erase / wipe or delete all data stored and App installed from the device, its recommended that you backup all data before perform hard reset or factory reset.
Performing a factory data reset on MICROSOFT LUMIA 950 XL will erase / wipe or delete all data stored and App installed from the device, its recommended that you backup all data before perform hard reset or factory reset.
A hard reset, also known as a factory reset or master reset, And below are some reason why we need perform hard reset or factory reset on our MICROSOFT LUMIA 950 XL.
- We want to remove all personal data and setting that was stored in MICROSOFT LUMIA 950 XL device.
- MICROSOFT LUMIA 950 XL has a persistent problem that cannot be solved.
- Restore MICROSOFT LUMIA 950 XL to Default Factory Setting.
- There are many bug on MICROSOFT LUMIA 950 XL.
- Because we will sell our MICROSOFT LUMIA 950 XL phones.
- We have forgotten on PIN or Patern Lock at MICROSOFT LUMIA 950 XL.
- We will give our MICROSOFT LUMIA 950 XL away to some one else, and we dont want that one know everything about our secret data, so we have to erase all data before back up it.
- Our MICROSOFT LUMIA 950 XL has been lagging and stuck on logo, this call with bootloop.
- and many other reason.
1st Method. Hard Reset MICROSOFT LUMIA 950 XL Using Software Menu :
- Make sure your batery is fully charged, Recomended you have 80% of battery capacity
- Then Backup your MICROSOFT LUMIA 650 . see this guide
- Open the application tray,
- Go to menu: Windows Phone Setting >
- Select About>
- Reset Your Phone >
- MICROSOFT LUMIA 650 will continue to hard reset process to restore factory default.
2nd Method. Hard Reset MICROSOFT LUMIA 950 XL Using Hardware Keys:
- Make sure your battery is fully charged, we recommended that your battery has 80% power
- Always Back Up your important data that store in MICROSOFT LUMIA 950 XL . see this guide
- Turn Off your MICROSOFT LUMIA 950 XL by hold and press Power Button for a second.
- Release any SIM card and SD card that was installed on your MICROSOFT LUMIA 950 XL smartphone.
- Now press and hold Power button and Volume Down Button until MICROSOFT LUMIA 950 XL device vibrates and release Power Button only, and you will see Microsoft logo on screen.

Reset / Factory Reset MICROSOFT LUMIA 950 XL - Then release all button when you see exclamation sign on screen.

exclamation sign hard reset microsoft lumia 950 XL - Now press the button in this order ;
- Volume UP Button.
- Volume Down Button.
- Power Button.
- Volume Down Button. (long press on this button)
- And you will see a Microsoft Logo appear on screen.

Microsoft Logo - hard reset microsoft lumia 950 XL - Now, wait until the hard reset or factory reset ends, and the MICROSOFT LUMIA 950 XL will reboot. it will take a while.

hard reset process - microsoft lumia 950 xl - Then your MICROSOFT LUMIA 950 XL will boot up automatically.
- Now you must set up your device for the first time.
- Finish.


Video Guide.
Wednesday, July 27, 2016
Guide How to Hard Reset Factory Reset MICROSOFT LUMIA 650
[Guide] How to Hard Reset / Factory Reset MICROSOFT LUMIA 650.
Hard Reset MICROSOFT LUMIA 650. MICROSOFT LUMIA 650 is the smartphone released on February, 2016. with 5,0 Inchi OLED capacitive touchscreen, 16M colors, work on Microsoft Windows 10 OS, and supported with Quad-core 1.3 GHz Cortex-A7 CPU, Qualcomm Snapdragon 212 chipset, Adreno 304 GPU, combined with 1 GB of RAM, 8 MP on primary camera and 5 MP on secondary camera.
Performing a factory data reset on MICROSOFT LUMIA 650 will erase / wipe or delete all data stored and App installed from the device, its recommended that you backup all data before perform hard reset or factory reset.
Performing a factory data reset on MICROSOFT LUMIA 650 will erase / wipe or delete all data stored and App installed from the device, its recommended that you backup all data before perform hard reset or factory reset.
A hard reset, also known as a factory reset or master reset, And below are some reason why we need perform hard reset or factory reset on our MICROSOFT LUMIA 650.
- Because we will sell our MICROSOFT LUMIA 650 phones.
- MICROSOFT LUMIA 650 has a persistent problem that cannot be solved.
- Our MICROSOFT LUMIA 650 has been lagging and stuck on logo, this call with bootloop.
- Restore MICROSOFT LUMIA 650 to Default Factory Setting.
- There are many bug on MICROSOFT LUMIA 650.
- We want to remove all personal data and setting that was stored in MICROSOFT LUMIA 650 device.
- We have forgotten on PIN or Patern Lock at MICROSOFT LUMIA 650.
- We will give our MICROSOFT LUMIA 650 away to some one else, and we dont want that one know everything about our secret data, so we have to erase all data before back up it.
- and many other reason.
1st Method. Hard Reset MICROSOFT LUMIA 650 Using Software Menu :
- Make sure your batery is fully charged, Recomended you have 80% of battery capacity
- Then Backup your MICROSOFT LUMIA 650 . see this guide
- Open the application tray,
- Go to menu: Windows Phone Setting >
- Select About>
- Reset Your Phone >
- MICROSOFT LUMIA 650 will continue to hard reset process to restore factory default.
2nd Method. Hard Reset MICROSOFT LUMIA 650 Using Hardware Keys:
- Make sure your battery is fully charged, we recommended that your battery has 80% power
- Always Back Up your important data that store in MICROSOFT LUMIA 650 . see this guide
- Turn Off your MICROSOFT LUMIA 650 by hold and press Power Button for a second.
- Release any SIM card and SD card that was installed on your MICROSOFT LUMIA 650 smartphone.
- Now, press and hold Volume Down Button, while connect the MICROSOFT LUMIA 650 device to the computer via USB cable.

Hard Reset / Factory Reset MICROSOFT LUMIA 650. - Release Volume Down when you see Microsoft logo on screen. Then you will see exclamation sign on screen.
- Now press the button in this order ;
- Volume UP Button.
- Volume Down Button.
- Power Button.
- Volume Down Button. (long press on this button)
- And you will see a Microsoft Logo appear on screen.
Microsoft Logo - hard reset microsoft lumia 650 - Now, wait until the hard reset or factory reset ends, and the MICROSOFT LUMIA 650 will reboot. it will take a while.
hard reset process - microsoft lumia 650 - Then your MICROSOFT LUMIA 650 will boot up automatically.
- Now you must set up your device for the first time.
- Finish.

 |
| exclamation sign hard reset microsoft lumia 650 |
Video Guide.
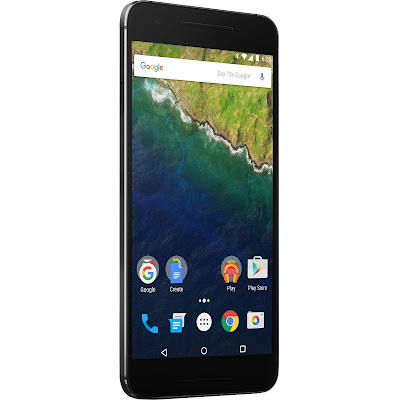
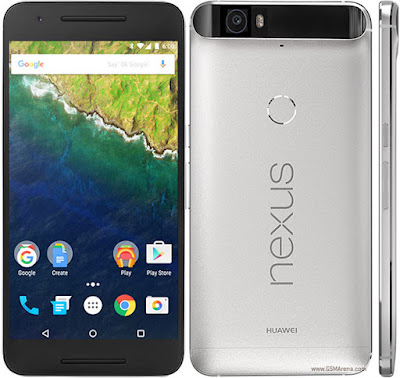
How to Update Huawei Nexus 6P to Android N NPD35K Developer Preview 3 Factory Image
Android N Developer Preview Beta is now available for the Nexus 5X, Nexus 6P, Nexus 6, and Nexus 9 phones and tablets. These are the major changes in Developer Preview Beta release of Android N, as per Google:

The latest Android N Developer Preview Beta NPD35K is the next upcoming major firmware release by Google. It brings some new features like multi-window mode, an enhanced doze mode, a revamped Settings screen and a quick toggle in the notifications panel. Other changes include improved notifications, improved multitasking and app switching, dark mode etc.
Don’t worry we are going to share step by step guide to safely Update your Huawei Nexus 6P to Android N NPD35K Developer Preview 3 Factory Image
View my Flipboard Magazine.
÷ Prerequisites:
•This tutorial is only for Huawei Nexus 6P and we are not sure if it will work on the other variants of the Nexus 6P on other carriers.
•Your phone can be on any previous Android version or even on a custom ROM. It doesn’t matter at all. This tutorial will still work for installing Android N Developer Preview Beta.
*Disclaimer:
Android Custom ROM fix ® provide various Firmware Updates and Rooting process along with Custom ROM,Modes,file are all belong to their owners/developers. The autor of this site or the developers are not responsible, if you damage or brick your device.Do it on your own risk and follow the instruction properly.
* Important:
Backup important files stored on your device before proceeding with the steps below, so that in case something goes wrong you’ll have backup of all your important files.
÷ How to Update Huawei Nexus 6P to Android N NPD35K Developer Preview 3 Factory Image
Step 1 – Download Android N Factory Image (angler-npc56p-preview-85ffc1b1.tgz) for Nexus 6P on your PC, if you haven’t already.
Step 2 – Connect your Nexus 6P to your computer using the USB cable.
Step 3 – Please make sure Fastboot is configured and properly installed on your computer.
Step 4 – Turn OFF your phone.
Step 5 – Get into the Fastboot/Bootloader Mode on your phone. Turn ON the phone while pressing and holding the Volume Up + Volume Down + Power buttons till you see the Fastboot menu and START on top.
Step 6 – Now extract the downloaded file anywhere in your computer. Go to the folder angler-NPD35K and then copy/paste all the files to your Fastboot directory.
Note: If you followed our tutorial on setting up Fastboot on your computer, there is a 99% chance your Fastboot directory will be the platform-tools folder in your Android SDK directory.
Step 7 – From the factory image files in your Fastboot directory, do the following depending which OS you are on:
•On Windows: Run the file “flash-all.bat”.
•On Mac: Run the file “flash-all.sh” using Terminal.
•On Linux: Run the file “flash-all.sh”.
Step 8 – That’s pretty much that you had to do for flashing the stock factory image on your Nexus 6P. Now wait and watch as the process is completed — or follow the on-screen instructions on your phone if in case you have to unlock the bootloader.
Step 9 – After the installation completes, the phone will boot now and it might take about 5 minutes to boot on your first time. So, please wait with patience!
That’s it! Your Nexus 6P should now have the official Android N NPD35K Developer Preview Beta software update installed on your phone using the stock factory image from Google! Go to Settings >About phone to verify.
For More Nexus 6P latest updates Keep Checking AndroidCustomROM Fix ™®
Like this post? PLZ Hit the share buttons below to share this article with your friends on Facebook, Google + and Twitter.
PLZ Follow Us On Flipboard 4 More Latest Updates.
PLZ Use the comment box below to contribute more ideas & Suggestions .
Best Regards.
Cloudfone Excite 451tv factory firmware

Please read our "Disclaimer" before flashing devices on any firmware of this blog. Like here some of them they fix their phone perfectly with our firmware.
Factory Firmware Code: MT6572__CellPrime__Cloudfone Excite 451tv__Cloudfone_Excite_451tv__4.2.2__Cloudfone_Excite_451tv_SK20140111_V02
Download Firmware: Cloudfone Excite 451tv Android 4.2.2
Download Flasher: Sp Flash Tool Android
SPECIFICATION Overview Cloudfone Excite 451tv:
1.3GHz Dual Core Processor
512 RAM
4GB internal memory expandable up to 32GB
Dual Sim – Dual Standby
4.5 inch FMVGA touchscreen
5MP rear camera with LED flash
VGA front camera
HSDPA+, Wifi, Bluetooth
1730mAH
OS: Android 4.2 JB
Guide How to Hard Reset Factory Reset Android OPPO F1 PLUS
Guide How to Hard Reset / Factory Reset Android OPPO F1 PLUS.
Hard Reset OPPO F1 PLUS. On this guide guidebelajar will show you how to Hard Reset / Factory Reset Android OPPO F1 PLUS. Perform Hard reset on android device will wipe or deleted all data stored and App installed on internal phone memory, so you must backup all data before perform it. But data stored on MicroSD will not be affected. If you have set up device with your Google accounts, your contact and and email information is automatically backed up to the Gmail server.
OPPO F1 PLUS is the smartphone released on March, 2016. with 5,5 Inchi wide AMOLED capacitive touchscreen, 16M colors, work on Android OS, v5.1 (Lollipop), and supported with Mediatek MT6755 Helio P10 chipset, Processor Octa-core 2.0 GHz Cortex-A53, combined with 4 GB of RAM, 13 MP on primary camera and 16 MP on secondary camera.
Some People say that Hard reset process is call with master reset or factory reset. Many people asking why shoud we perform hard reset to our phone. The logical answer that can I say for this asking is :
- Restore OPPO F1 PLUS to Default Factory Setting.
- Because we will sell our OPPO F1 PLUS Android phones
- There are many bug on OPPO F1 PLUS.
- We have forgotten on PIN or Patern Lock at OPPO F1 PLUS.
- We want to remove all personal data and setting that was stored in OPPO F1 PLUS device.
- OPPO F1 PLUS has a persistent problem that cannot be solved.
- We will give our OPPO F1 PLUS away to some one else, and we dont want that one know everything about our secret data, so we have to erase all data before back up it.
- Our OPPO F1 PLUS has been lagging and stuck on android logo, this call with bootloop.
- and many other reason.
What to do for Solve and Recovery if OPPO F1 PLUS get hang or not responding or malfunctions or hang or stuck or freezing or bricked problem ?
OPPO F1 PLUS has included some factory default applications to make this phone can work well when first used. OPPO F1 PLUS use OPPO user interface version 3.0. So we can add the other applications from the Google Play Store like WhatsApp, BBM, LINE, Facebook, Path, Skype, Instagram and more. But we have to know that some of the applications in Google Play Store are not always compatible with OPPO F1 PLUS , this application can make our mobile phone into a problem like hang or stuck or brick or frozen or broken. Sometimes the phone is always booting only show the Oppo logo or LCD touch screen does not respond to our fingers touch. When the phone gets an issue, then we have to force a soft reset or shutdown or reboot to clean up temporary files and cache. If this problem still occurs then we have to do a hard reset or reformat. You should always perform the necessary backup before performing a hard reset, because all data and applications installed will be deleted after performing a hard reset on this OPPO F1 PLUS devices.
1st Methode. Hard Reset OPPO F1 PLUS Using Software Menu :
- Make sure your batery is fully charged, Recomended you have 80% of battery capacity
- Then Backup your OPPO F1 PLUS . see this guide
- Open the application tray, pointing up located in the middle at the bottom of the display screen
- Go to menu: Setting >
- Select Back Up and Reset>
- Factory Data Reset >
- Reset Phone
- Choose Erase everything to confirm that you already to perform hard reset on OPPO F1 PLUS
- OPPO F1 PLUS will continue to hard reset process to restore factory default.
- You can not use this methode to reset your phone if it lost or stolen.
2ndMethode. Hard Reset OPPO F1 PLUS Using Hardware Keys:
- Make sure your battery is fully charged, we recomended that your battery has 80% power
- Always BackUp your important data that store in OPPO F1 PLUS . see this guide
- Turn Off your OPPO F1 PLUS by hold and press Power Button for a second.
- Release any SIM card and SD card that was installed on your OPPO F1 PLUS smartphone.
- Then press and hold a combination key Power button + Volume Down.

hard reset oppo F1 PLUS - The phone will vibrate and show Oppo Logo on screen, but all button are still pressed.

oppo logo - hard reset oppo F1 PLUS - Now, release All button when your phone show language choice on screen.

Hard Reset OPPO F1 PLUS - You can use volume Down and Volume Up to navigate all menu. and Power Button for confirm your choice. or you can tap menu on screen.
- Now select English to enter ColorOS Recovery.

ColorOS Recovery - Reset Android OPPO F1 PLUS - Then select Wipe Data and cache.

Hard Reset OPPO F1 PLUS - On the next screen select Wipe All Data and Removable Applications.

Wipe All Data and Removable Applications - On the next screen you will show a confirmation about Wipe All Data and Removable Applications, because All Data and Removable Applications will be wiped, this operation can not be undone. And now select OK.

Wipe All Data and Removable Applications - Now, you will see a wipe data and cache process to wipe all data stored on your OPPO F1 PLUS phone.

- Wait untill everything finish,
- If you see a message that wiped data successfully appear o screen, its mean you have successfully perform hard reset on this OPPO F1 PLUS phone.

- Now, select reboot, to reboot your device.

Hard Reset OPPO F1 PLUS. - Select OK to confirm reboot OPPO F1 PLUS .
- Finish, Now you have successfully Hard Reset / Factory Reset Android OPPO F1 PLUS.


Video Guide.
Guide How to Hard Reset Factory Reset Android OPPO NEO 3 R831K
[Guide] How to Hard Reset / Factory Reset Android OPPO NEO 3 R831K.
Hard Reset OPPO NEO 3 R831K. On this guide guidebelajar will show you how to Hard Reset / Factory Reset Android OPPO NEO 3 R831K. Perform Hard reset on android device will wipe or deleted all data stored and App installed on internal phone memory, so you must backup all data before perform it. But data stored on MicroSD will not be affected. If you have set up device with your Google accounts, your contact and and email information is automatically backed up to the Gmail server.
OPPO NEO 3 R831K is the smartphone released on August, 2014. with 4,5 Inchi IPS LCD capacitive touchscreen, 16M colors, work on Android OS, v4.2.1 (Jelly Bean), and supported with Dual-core 1.3 GHz CPU, combined with 1 GB of RAM, 5 MP on primary camera and 2 MP on secondary camera.
Some People say that Hard reset process is call with master reset or factory reset. Many people asking why should we perform hard reset to our phone. The logical answer that can I say for this asking is :
- We want to remove all personal data and setting that was stored in OPPO NEO 3 R831K device.
- Restore OPPO NEO 3 R831K to Default Factory Setting.
- Because we will sell our OPPO NEO 3 R831K Android phones
- There are many bug on OPPO NEO 3 R831K.
- We have forgotten on PIN or Patern Lock at OPPO NEO 3 R831K.
- OPPO NEO 3 R831K has a persistent problem that cannot be solved.
- We will give our OPPO NEO 3 R831K away to some one else, and we dont want that one know everything about our secret data, so we have to erase all data before back up it.
- Our OPPO NEO 3 R831K has been lagging and stuck on android logo, this call with bootloop.
- and many other reason.
1st Methode. Hard Reset OPPO NEO 3 R831K Using Software Menu :
- Make sure your batery is fully charged, Recomended you have 80% of battery capacity
- Then Backup your OPPO NEO 3 R831K . see this guide
- Open the application tray, pointing up located in the middle at the bottom of the display screen
- Go to menu: Setting >
- Select Back Up and Reset>
- Factory Data Reset >
- Reset Phone
- Choose Erase everything to confirm that you already to perform hard reset on OPPO NEO 3 R831K
- OPPO NEO 3 R831K will continue to hard reset process to restore factory default.
- You can not use this methode to reset your phone if it lost or stolen.
2ndMethode. Hard Reset OPPO NEO 3 R831K Using Hardware Keys:
- Make sure your battery is fully charged, we recomended that your battery has 80% power
- Always BackUp your important data that store in OPPO NEO 3 R831K . see this guide
- Turn Off your OPPO NEO 3 R831K by hold and press Power Button for a second.
- Release any SIM card and SD card that was installed on your OPPO NEO 3 R831K smartphone.
- Then press and hold a combination key Power button + Volume Down.

hard reset OPPO NEO 3 R831K - The phone will vibrate and show Oppo Logo on screen, release only power button.
oppo logo - hard reset oppo NEO 3 R831K - Now, release All button when your phone show language choice on screen.
Hard Reset OPPO NEO 3 R831K - You can use volume Down and Volume Up to navigate all menu. and Power Button for confirm your choice. or you can tap menu on screen.
- Now select English to enter ColorOS Recovery.
ColorOS Recovery - Reset Android OPPO NEO 3 R831K - Then select Wipe Data and cache.
Hard Reset OPPO NEO 3 R831K - On the next screen select Wipe All Data and Removable Applications.
Wipe All Data and Removable Applications - On the next screen you will show a confirmation about Wipe All Data and Removable Applications, because All Data and Removable Applications will be wiped, this operation can not be undone. And now select OK.
Wipe All Data and Removable Applications - Now, you will see a wipe data and cache process to wipe all data stored on your OPPO NEO 3 R831K phone.
hard reset OPPO NEO 3 R831K - Wait untill everything finish,
- If you see a message that wiped data successfully appear o screen, its mean you have successfully perform hard reset on this OPPO NEO 3 R831K phone.
hard reset OPPO NEO 3 R831K - Now, select reboot, to reboot your device.
Hard Reset OPPO NEO 3 R831K. - Select OK to confirm reboot OPPO NEO 3 R831K .
- Finish, Now you have successfully Hard Reset / Factory Reset Android OPPO NEO 3 R831K.

Video Guide.
Tuesday, July 26, 2016
Arc Mobile Velocity Android 4 2 2 factory Firmware
ProdName : Velocity
ProdModel : Velocity
Device : Velocity
AndroidVer: 4.2.2
MTKxCPU : MT6592
MTKxPRJ : Arc_Velocity_V007
Download Rom
Download Flasher
password: 13freakbyjhunpanabo
Flashing of any smart Phones or Feature Phone is not always safe. Kindly read our disclaimer, before proceeding or else you can getting any problems towards.
Disclaimer: Flashing a firmware is not without any risks.
If you dont do it properly, you might render your phone inoperable.
If you decide to proceed we wont be liable to whatever might get wrong "neither we could provide technical support" just leave a comment or contact us on our google mail.
Factory Firmware Code:
MT6592__wing__Velocity__Velocity__4.2.2__Arc_Velocity_V007
Note:enter without quote for password.. 13freakbyjhunpanabo
Monday, July 25, 2016
Alcatel One Touch 7047E Android 4 2 2 Factory Firmware

ProdName : ALCATEL_ONE_TOUCH_7047E
ProdModel : ALCATEL ONE TOUCH 7047E
Device : YARIS_55
AndroidVer: 4.2.2
MTKxCPU : MT6582
MTKxPRJ : ALPS.JB5.MP.V1.1
Download Rom
Download Flasher
Flashing of any smart Phones or Feature Phone is not always safe. Kindly read our disclaimer, before proceeding or else you can getting any problems towards.
Disclaimer: Flashing a firmware is not without any risks.
If you dont do it properly, you might render your phone inoperable.
If you decide to proceed we wont be liable to whatever might get wrong "neither we could provide technical support" just leave a comment or contact us on our google mail.
Factory Firmware Code:
MT6582__TCT__ALCATEL ONE TOUCH 7047E__YARIS_55__4.2.2__ALPS.JB5.MP.V1.1
Subscribe to:
Posts (Atom)