Showing posts with label edge. Show all posts
Showing posts with label edge. Show all posts
Friday, July 29, 2016
Guide Hard Reset Samsung Galaxy S7 EDGE To Restore Factory Setting Remove Forgot Pattern Password PIN
[Guide] Hard Reset Samsung Galaxy S7 EDGE To Restore Factory Setting & Remove Forgot Pattern/Password/PIN.
Hard Reset Samsung Galaxy S7 EDGE. Samsung Galaxy S7 EDGE has many version, among them are G935 (USA); G935F (Global); G935FD (Southeast Asia), and this smartphone Also known as Samsung Galaxy S7 EDGE Duos with dual-SIM card slots. This device is released on March, 2016. And todays guidebelajar will explain to you how to perform hard reset on Samsung Galaxy S7 EDGE smartphone. Please keep in mind, this tutorial will erase all data saved on your internal memory. Samsung Galaxy S7 EDGE is the smartphone with 5,5 Inchi Super AMOLED capacitive touchscreen, 16M colors, work on Android OS, v6.0 (Marshmallow), and supported with Processor Dual-core 2.15 GHz Kryo & dual-core 1.6 GHz Kryo, Qualcomm MSM8996 Snapdragon 820 chipset, Adreno 530 GPU, combined with 4 GB of RAM, 12 MP on primary camera and 5 MP on secondary camera to capture best moment and make a selfie on your life.
Most of Android user say that Hard reset process is call with master reset or factory reset. Many people asking why shoud we perform hard reset to our phone. The logical answer that can I say for this asking is :
Most of Android user say that Hard reset process is call with master reset or factory reset. Many people asking why shoud we perform hard reset to our phone. The logical answer that can I say for this asking is :
- We will give our Samsung Galaxy S7 EDGE away to some one else, and we dont want that one know everything about our secret data, so we have to erase all data before back up it.
- We have forgotten on PIN or Patern Lock at Samsung Galaxy S7 EDGE.
- Samsung Galaxy S7 EDGE has a persistent problem that cannot be solved.
- Because we will sell our Samsung Galaxy S7 EDGE Android phones.
- Our Samsung Galaxy S7 EDGE has been lagging and stuck on android logo, this call with bootloop
- There are many bug on Samsung Galaxy S7 EDGE.
- We want to remove all personal data and setting that was stored in Samsung Galaxy S7 EDGE.device.
- and many other reason.
1st Methode. Hard Reset Samsung Galaxy S7 EDGE Using Menu :
- Make sure your batery is fully charged, Recomended you have 80% of battery capacity
- Then Backup your Samsung Galaxy S7 EDGE. See This Guide
- Go to menu: System Setting >
- Select Backup and Reset >
- Factory Data Reset >
- Reset Phone
- Choose Erase everything to confirm that you already to perform hard reset on Samsung Galaxy S7 EDGE
- Samsung Galaxy S7 EDGE will continue to hard reset process to restore factory default.
2ndMethode. Hard Reset Samsung Galaxy S7 EDGE Using Hardware Keys:
- Make sure your battery is fully charged, we recomended that your battery has 80% power
- Always BackUp your important data that store in Samsung Galaxy S7 EDGE. see this guide
- Turn Off your Samsung Galaxy S7 EDGE by hold and press Power Button for a second.
- Release any SIM card and SD card that was installed on your Samsung Galaxy S7 EDGE smartphone.
- Then press and hold together a combination button Volume Up + Home Button + Power button at same time for a seconds.

Hard Reset Samsung Galaxy S7 EDGE - Release Power Button, and keep holding volume up and home button for a few minute. Then release All button.

samsung galaxy S7 Edge - android logo - And now you will enter, Android System Recovery.
- Scroll down using Power Down button, and you can select "wipe data/factory reset" and confirm it using Power Button.
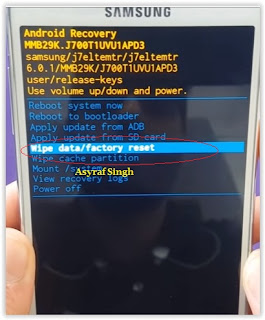
wipe data - Hard Reset - Then select "Yes". use volume down button to choice menu, and again confirm it using Power Button. Please be ware, on this this step you will be lost everything stored on your phone. So, make sure to always backup all data before performing hard reset.

- Now, wait the process untill you see data wipe complete appear on screen.

wipe data process - After a few minute hard reset process will finished, and your screen will be back to Android System recovery screen.
- Now, Select Reboot System Now to reboot your device.

Reboot System Now - You can wait a while for Samsung Galaxy S7 EDGE to reboot system
- Done, your hard reset process success now.


 |
| Android System Recovery |


Video Guide.

Guide Flash Update Firmware Samsung GALAXY S7 EDGE SM G935F Using ODIN v3 11 1
[Guide] Flash / Update Firmware Samsung GALAXY S7 EDGE SM-G935F Using ODIN v3.11.1.
Flash Stock Firmware On Samsung GALAXY S7 EDGE SM-G935F. This guide show you how to flash a stock ROM on Samsung GALAXY S7 EDGE SM-G935F using Odin V3.11.1 software. Before you decide to use this guide, we recommend using Samsung’s own utilities, Samsung Kies and OTA (Over-the-air). Only use this guide if you are 100% sure about the risks involved in flashing your device. guidebelajar is not responsible for any damage caused by following this guide.
This Samsung android device is released on 2016, March. and available on USA, Global and Southeast Asia. Samsung GALAXY S7 EDGE SM-G935F is the smartphone with 5,1 Inchi Super AMOLED capacitive touchscreen, 16M colors, work on Android OS, v6.0 (Marshmallow), with Quad-core 1.8 GHz CDual-core 2.15 GHz Kryo & dual-core 1.6 GHz Kryo CPU, Qualcomm MSM8996 Snapdragon 820 chipset, Adreno 530 GPU, combined with 4 GB of RAM and 12 MP of Main camera and 5 MP on secondary camera.
This Samsung android device is released on 2016, March. and available on USA, Global and Southeast Asia. Samsung GALAXY S7 EDGE SM-G935F is the smartphone with 5,1 Inchi Super AMOLED capacitive touchscreen, 16M colors, work on Android OS, v6.0 (Marshmallow), with Quad-core 1.8 GHz CDual-core 2.15 GHz Kryo & dual-core 1.6 GHz Kryo CPU, Qualcomm MSM8996 Snapdragon 820 chipset, Adreno 530 GPU, combined with 4 GB of RAM and 12 MP of Main camera and 5 MP on secondary camera.
Flashing process in android Smartphone is like reinstall process on windows computer PC, with flash your Samsung GALAXY S7 EDGE SM-G935F android device you can unbrick, downgrade, manually upgrade (instead of updating via OTA or Samsung Smart Switch), or restore Samsungs stock firmware instead of custom ROM. I make this guide just for you as user all Samsung GALAXY S7 EDGE SM-G935F variant.
You need to read this guide carefully, so you can get the best result flashing on your Samsung GALAXY S7 EDGE SM-G935F. Cause you need to download necessary file, you must ensure that you have good internet connection in your computer device, this guide using a windows computer.
Initial Step To Flash Samsung GALAXY S7 EDGE SM-G935F
Now, we have reached on beginning guide, so you must to do initial step to ensure everything run smoothly.
- Make sure your Samsung GALAXY S7 EDGE SM-G935F battery is not in a low battery state, a minimum of 80%. If the battery runs out in the middle of the Root, it can lead to failure
- Always perform backup your important data before flashing process, Cause this process will delete or erase the data in memory.
- Make sure you have installed a Latest of Driver Samsung that support with your Smartphone, If you dont have, please download here
- Original USB cable driver for your Samsung GALAXY S7 EDGE SM-G935F
- Download Samsung Smart Switch, Here
- Download Odin V3.11.1, Here
- Download Official firmware file for the model number of your device, download it from - SamMobile, or you can visit the other site, Here
Main Guide To Flash Samsung GALAXY S7 EDGE SM-G935F
- You must download all necessary file.(Samsung USB driver or Smart Switch and Odin)
- Then you must install all driver or samsung smart switch to your computer or PC.
- Extraxt Odin V3.11.1. file on the destination folder.
- To download Samsung firmware you must visit this link, you can download specific firmware file for your device model number. you must Log In with your registered account on this website.

sammobile website Log In - On the row menu at the top of page, you can select firmware.

sammobile website GALAXY S7 EDGE SM-G935F - Then you must enter in search bar with your phone model number.

Firmware Samsung GALAXY S7 EDGE SM-G935F - Then select your country/carrier.

select country or carrier for samsung firmware - Then you click on available country link.
- For Non-Premium member you can Select regular download.

sammobile download non premium member - And Donwload button again. Approximately file size is 1,9 GB
- Wait untill your file finish downloaded, after that you must extract all firmware file on specific folder on your computer.
- This is your file.

Flash Stock Firmware On Samsung GALAXY S7 EDGE SM-G935F - Switch Off your Samsung GALAXY S7 EDGE SM-G935F to start flashing process.
- Then, you must run Odin3 v3.11.1 by right click on Odin.exe and select Run as Administrator.

Flash Stock Firmware On Samsung GALAXY S7 EDGE SM-G935F - When program is running, now you can click AP, and navigate to the *.tar or *.tar.md5 firmware file.

Flash Stock Firmware On Samsung GALAXY S7 EDGE SM-G935F - Now your firmware file has been inserted in Odin3

Flash Stock Firmware On Samsung GALAXY S7 EDGE SM-G935F - Then, Enter download mode your Samsung GALAXY S7 EDGE SM-G935F by pressing and hold Volume Down Button + Home Button + Power Button. Hold and press all button untill your phone vibrate and LCD show menu.

download mode Samsung GALAXY S7 EDGE SM-G935F - And you will see picture like this on your LCD screen.
- On this mode, now you must connect your Samsung GALAXY S7 EDGE SM-G935F to your PC / laptop using a USB cable.
- After your phone connected, you will see a message appear that show your device added and there is info on the ID: COM at top left corner. Keep in mind for this COM vary depending on the PC / Laptop. Just Ignore all, in this picture you will see that your device is detected on (COM 5)
Port Com samsung GALAXY S7 EDGE SM-G935F - Make sure re-partition is NOT ticked
- When everything already you can click Start Button. at the bottom left corner
- Just wait for the process to run about 2-5 minutes, and make sure there is no interference in this process.
- When complete it will display a notification PASS and your smartphone Samsung GALAXY S7 EDGE SM-G935F will automatically restart.
- Wait your device to boot up, it will take a while.
- When your Samsung GALAXY S7 EDGE SM-G935F is ready to use, you can check your firmware update version by dial *#1234# on dial pad.

dial pad samsung GALAXY S7 EDGE SM-G935F - And you will see your new firmware version.

firmware version samsung GALAXY S7 EDGE SM-G935F - Finish.


 |
| Download Mode GALAXY S7 EDGE SM-G935F |


Warning.
Never disconnect the USB cable while flashing process is running.
Install Samsung Mobile Driver or Samsung Smart Switch if you dont see a sign in Odin.
Flash your Samsung GALAXY S7 EDGE SM-G935F device at your own risk.
Flashing firmwares which contains more than one *.tar.md5 file will wipe all data on internal storage. Flashing official/stock firmware wont increase the binary flash nor KNOX WARRANTY VOID counter and wont cancel the Samsung GALAXY S7 EDGE SM-G935F devices warranty.
Thursday, July 28, 2016
How to Install Android 6 0 1 Marshmallow Renegade v4 PD2 Aroma ROM on Sprint Galaxy S6 Edge SM G925P
If you are looking to install a new custom ROM on your Sprint Samsung Galaxy S6 Edge SM- G925P then we have here as usual the best Custom ROMs for you.

According to XDA member nyfly2004, Android 6.0 Marshmallow Renegade v4 [PD2] [ Aroma] ROM is now available for Sprint Samsung Galaxy S6 Edge SM- G925P.
÷ ROM Features:
- Deodexed
- [Added] 5 Way Reboot Menu
- [Added] DirtyMM Kernel (G925P)
- [Added] Extra Fonts
- [Added] Custom Boot Animation
- [Added] Custom Shutdown Animation
- [Added] Show Data Usage in Expanded Status Bar
- [Added] Custom Splash Screen
- [Added] Multi-User
- [Added] Center Clock Aroma Option
- [Added] Viper4Android
- [Added] Divine Beats
- [Added] Dolby Atmos
- [Added] Sony Music Player
- [Added] Aroma Installer
- [Added] Knox Removed
- [Enabled] Smart Manager Dual Dashboard with Call Block
- [Enabled] MTP Connection Default
- [Enabled] Display Scaling
- [Enabled] Outdoor mode
- [Enabled] Touchkey Light Duration
- [Enabled] Private Mode
- [Enabled] Shutter Sound On/Off in Camera Menu
- [Enabled] Camera During Call
- [Enabled] Native call recording & call block
- [Enabled] WiFi & USB Tethering
- [Enabled] Native Hotspot
- [Enabled] Mobile Data Toggle
- [Enabled] Camera during call
- [Removed] ItsOn
- More stuff cant remember..
Follow our guide below to download the Unofficial CM13 and install it yourself.
View my Flipboard Magazine.
÷ Prerequisites:
•This tutorial is only for installing Renegade v4 [PD2] [ Aroma] ROM on Sprint Samsung Galaxy S6 Edge SM- G925P. Please do not try on any other Moto G variants.
•Your phone should be rooted and haveClockworkMod recovery installed from before.
•This tutorial will wipe out all your data.Proceed at your own risk.Perform a Dalvik Cache wipe before proceeding from the recovery mode.
•Make sure you backup all your data in your phone before proceeding.
•Samsung KIES will NOT detect your phone after installing this ROM because it is a custom firmware
*Disclaimer:
Android Custom ROM fix ® provide various Firmware Updates and Rooting process along with Custom ROM,Modes,file are all belong to their owners/developers. The autor of this site or the developers are not responsible, if you damage or brick your device.Do it on your own risk and follow the instruction properly.
* Important:
Backup important files stored on your device before proceeding with the steps below, so that in case something goes wrong you’ll have backup of all your important files.

÷ How to Install Android 6.0.1 Marshmallow Renegade v4 [PD2] [ Aroma] ROM on Sprint Galaxy S6 Edge SM- G925P.
Step 1 – Download CM13.0 Android 6.0.1 Marshmallow and Google Apps for your Sprint Samsung Galaxy S6 Edge SM- G925P to your computer.
Step 2 – Connect and mount your Sprint Galaxy S6 Edge SM- G925P USB memory on your computer using the USB cable.
Step 3 – Now copy/paste the downloaded Android 6.0.1 ROM zip file and Google Appszip files to your SD card. Make sure the files are in the SD card root (not in any folder).
Step 4 – Then turn OFF your phone and disconnect from the USB cable.
Step 5 – Now to get in the Recovery Mode. Switch ON the phone while pressing and holding Volume Up + Home + Power buttons together
Step 6 – Once you are in ClockworkModRecovery, select perform a full data wipe by selecting “wipe data/factory reset”. Use the Power button to select everything while in the Recovery Mode.
Step 7 – Then, perform a cache wipe by selecting “wipe cache partition” .
Step 8 – Now this is optional, but it is recommended to perform a wipe of your dalvik cache as well. You will not get into boot loops or any other errors. From CWM recovery, go to ‘advanced’ and then select “wipe dalvik cache”.
Step 9 – Then go back to the main recovery screen and select “install zip from SD card”.
Step 10 – Now select “choose zip from sdcard”. Using your volume keys, navigate to the Android 6.0.1 ROM zip file that you copied to your SD card and select it using the Power button. Confirm the installation on the next screen and the installation procedure should start now.
Google Apps: Repeat the above step for the Gapps zip file as well and install it on your phone.
Step 11 – After the installation completes, go to “+++++Go Back+++++” and reboot the phone by selecting “reboot system now” from the recovery menu.

Your Sprint Samsung Galaxy S6 Edge SM- G925P. will boot now and it might take about 5 minutes to boot on your first time. So, please wait.
That’s it Your Sprint Galaxy S6 Edge SM- G925P should now have Android 6.0.1 Marshmallow Renegade v4 [PD2] [ Aroma] ROM latest build installed on your phone! Go to Settings > About phone to verify.
For More Samsung Galaxy S6 Edge Brand New Firmware & Custom ROM keep checking AndroidCustomROM Fix ™®
Like this post? PLZ Hit the share buttons below to share this article with your friends on Facebook, Google + and Twitter.
PLZ Follow Us On Flipboard 4 More latest custom ROM fix.
PLZ Use the comment box below to contribute more ideas & Suggestions .
Best Regards.
÷ Prerequisites:
•This tutorial is only for installing Renegade v4 [PD2] [ Aroma] ROM on Sprint Samsung Galaxy S6 Edge SM- G925P. Please do not try on any other Moto G variants.
•Your phone should be rooted and haveClockworkMod recovery installed from before.
•This tutorial will wipe out all your data.Proceed at your own risk.Perform a Dalvik Cache wipe before proceeding from the recovery mode.
•Make sure you backup all your data in your phone before proceeding.
•Samsung KIES will NOT detect your phone after installing this ROM because it is a custom firmware
*Disclaimer:
Android Custom ROM fix ® provide various Firmware Updates and Rooting process along with Custom ROM,Modes,file are all belong to their owners/developers. The autor of this site or the developers are not responsible, if you damage or brick your device.Do it on your own risk and follow the instruction properly.
* Important:
Backup important files stored on your device before proceeding with the steps below, so that in case something goes wrong you’ll have backup of all your important files.
÷ How to Install Android 6.0.1 Marshmallow Renegade v4 [PD2] [ Aroma] ROM on Sprint Galaxy S6 Edge SM- G925P.
Step 1 – Download CM13.0 Android 6.0.1 Marshmallow and Google Apps for your Sprint Samsung Galaxy S6 Edge SM- G925P to your computer.
Step 2 – Connect and mount your Sprint Galaxy S6 Edge SM- G925P USB memory on your computer using the USB cable.
Step 3 – Now copy/paste the downloaded Android 6.0.1 ROM zip file and Google Appszip files to your SD card. Make sure the files are in the SD card root (not in any folder).
Step 4 – Then turn OFF your phone and disconnect from the USB cable.
Step 5 – Now to get in the Recovery Mode. Switch ON the phone while pressing and holding Volume Up + Home + Power buttons together
Step 6 – Once you are in ClockworkModRecovery, select perform a full data wipe by selecting “wipe data/factory reset”. Use the Power button to select everything while in the Recovery Mode.
Step 7 – Then, perform a cache wipe by selecting “wipe cache partition” .
Step 8 – Now this is optional, but it is recommended to perform a wipe of your dalvik cache as well. You will not get into boot loops or any other errors. From CWM recovery, go to ‘advanced’ and then select “wipe dalvik cache”.
Step 9 – Then go back to the main recovery screen and select “install zip from SD card”.
Step 10 – Now select “choose zip from sdcard”. Using your volume keys, navigate to the Android 6.0.1 ROM zip file that you copied to your SD card and select it using the Power button. Confirm the installation on the next screen and the installation procedure should start now.
Google Apps: Repeat the above step for the Gapps zip file as well and install it on your phone.
Step 11 – After the installation completes, go to “+++++Go Back+++++” and reboot the phone by selecting “reboot system now” from the recovery menu.
Your Sprint Samsung Galaxy S6 Edge SM- G925P. will boot now and it might take about 5 minutes to boot on your first time. So, please wait.
That’s it Your Sprint Galaxy S6 Edge SM- G925P should now have Android 6.0.1 Marshmallow Renegade v4 [PD2] [ Aroma] ROM latest build installed on your phone! Go to Settings > About phone to verify.
For More Samsung Galaxy S6 Edge Brand New Firmware & Custom ROM keep checking AndroidCustomROM Fix ™®
Like this post? PLZ Hit the share buttons below to share this article with your friends on Facebook, Google + and Twitter.
PLZ Follow Us On Flipboard 4 More latest custom ROM fix.
PLZ Use the comment box below to contribute more ideas & Suggestions .
Best Regards.
Wednesday, July 27, 2016
How To Update GALAXY Note Edge SM N915FY to Marshmallow 6 0 1 Stock Firmware XXU1DPE1 Security Patches Bug Fixes
Today Samsung Currently Pushing XXU1DPE1 Update to the GALAXY Note Edge - SM-N915FY on its network (France) that includes a security update, as well as now displaying which security patch your phone has and bug fixes. It is recommended you keep your device updated to the latest software so that you don’t experience any flaws or drops in reliability.
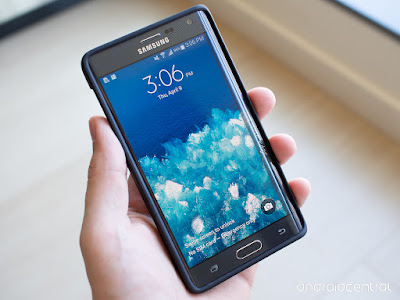
N915FYXXU1DPE1 is based on the latest Marshmallow 6.0.1 for the GALAXY Note Edge - SM-N915FY.
Follow our guide below to download the update and install it yourself.
The Update brings the following changes:
•The security of your device has been improved.
•Device stability improvements, bug fixes.
•New and / or enhanced features.
•Further improvements to performance.
| Model | SM-N915FY |
| Model name | GALAXY Note Edge |
| Country | France |
| Version | Android 6.0.1 |
| Changelist | 7652285 |
| Build date | Tue, 03 May 2016 04:54:48 +0000 |
| Product code | XEF |
| PDA | N915FYXXU1DPE1 |
| CSC | N915FYOXX1DPE1 |
View my Flipboard Magazine.
*Disclaimer:
Custom ROM fix ® provide various Firmware Updates and Rooting process along with Custom ROM,Modes,file are all belong to their owners/developers. The autor of this site or the developers are not responsible, if you damage or brick your device.Do it on your own risk and follow the instruction properly.
* Important:
Backup important files stored on your device before proceeding with the steps below, so that in case something goes wrong you’ll have backup of all your important files.
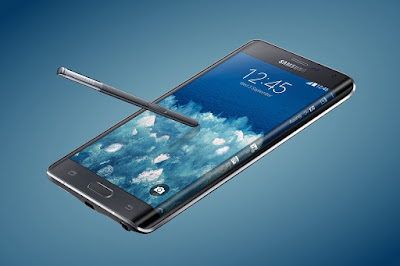
How To Update GALAXY Note Edge - SM-N915FY to Marshmallow 6.0.1 Stock Firmware XXU1DPE1 [Security Patches / Bug Fixes]
Download Samsung GALAXY Note Edge - SM-N915FY XXU1DPE1 Firmware .
1- Extract (unzip) the firmware file
2- Download Odin v3.10.7
3- Extract Odin ZIP file
4- Open Odin v.3.10.6
5- Reboot Phone in Download Mode (press and hold Home + Power + Volume Down buttons)
6- Connect phone and wait until you get a blue sign in Odin
7- Add the firmware file to AP / PDA
Make sure re-partition is NOT ticked
8- Click the start button, sit back and wait few minutes.
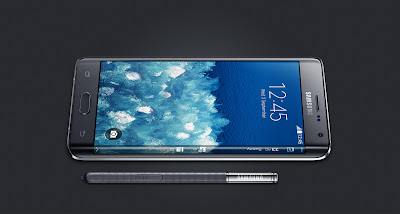
That’s it! Your GALAXY Note Edge - SM-N915FY should now have Marshmallow 6.0.1 on your phone! Go to Settings > About phone to verify.
Like this post? PLZ Hit the share buttons below to share this article with your friends on Facebook, Google + and Twitter.
PLZ Follow Us On Flipboard 4 More GALAXY Note Edge - SM-N915FY Latest Updates.
PLZ Use the comment box below to contribute more ideas & Suggestions .
Best Regards.
*Disclaimer:
Custom ROM fix ® provide various Firmware Updates and Rooting process along with Custom ROM,Modes,file are all belong to their owners/developers. The autor of this site or the developers are not responsible, if you damage or brick your device.Do it on your own risk and follow the instruction properly.
* Important:
Backup important files stored on your device before proceeding with the steps below, so that in case something goes wrong you’ll have backup of all your important files.
How To Update GALAXY Note Edge - SM-N915FY to Marshmallow 6.0.1 Stock Firmware XXU1DPE1 [Security Patches / Bug Fixes]
Download Samsung GALAXY Note Edge - SM-N915FY XXU1DPE1 Firmware .
1- Extract (unzip) the firmware file
2- Download Odin v3.10.7
3- Extract Odin ZIP file
4- Open Odin v.3.10.6
5- Reboot Phone in Download Mode (press and hold Home + Power + Volume Down buttons)
6- Connect phone and wait until you get a blue sign in Odin
7- Add the firmware file to AP / PDA
Make sure re-partition is NOT ticked
8- Click the start button, sit back and wait few minutes.
That’s it! Your GALAXY Note Edge - SM-N915FY should now have Marshmallow 6.0.1 on your phone! Go to Settings > About phone to verify.
Like this post? PLZ Hit the share buttons below to share this article with your friends on Facebook, Google + and Twitter.
PLZ Follow Us On Flipboard 4 More GALAXY Note Edge - SM-N915FY Latest Updates.
PLZ Use the comment box below to contribute more ideas & Suggestions .
Best Regards.
Tuesday, July 26, 2016
How to Root Galaxy S6 Edge SM G925F on Android 6 0 1 on XXU3DPDP Update
Samsung Galaxy S6 Edge SM- G925F Running on XXU3DPDP Android 6.0.1 Marshmallow firmware can be rooted through this quick and easy guide. To root Galaxy S6 Edge, the utilities involved will be Auto-Root from Chainfire as well as ODIN software.

Follow our guide below to Root your Samsung Galaxy S6 Edge Running on XXU3DPDP Android 6.0.1 Marshmallow update .
View my Flipboard Magazine.
÷ Prerequisites:
•This root method tutorial is only for Galaxy S6 Edge SM-G925F. Please do not try on any other Galaxy S6 Edge LTE variants.
•Make sure you backup all your data in your phone before proceeding as a precaution.
•Your Galaxy S6 Edge should be on an official firmware by Samsung, not a custom ROM.
•Your phone should be on XXU3DPDP Android 6.0.1 firmware.
*Disclaimer:
Android Custom ROM fix ® provide various Firmware Updates and Rooting process along with Custom ROM,Modes,file are all belong to their owners/developers. The autor of this site or the developers are not responsible, if you damage or brick your device.Do it on your own risk and follow the instruction properly.
* Important:
Backup important files stored on your device before proceeding with the steps below, so that in case something goes wrong you’ll have backup of all your important files.

÷ How to Root Galaxy S6 Edge G925F on Android 6.0.1 on XXU3DPDP Update.
Step 1 – Download CF-Auto-Root Android 6.0.1 Package for Samsung Galaxy S6 Edge LTE to your computer and extract the zip file.
Step 2 – Download ODIN v3.09 which will help you to root Android 6.0.1 on Samsung Samsung Galaxy S6 Edge LTE G925F.
Step 3 – Switch OFF your phone. Now go to Download Mode. How? Press and hold the Volume Down + Home buttons together, and then press the Power button till you see the construction Android robot and a triangle. Press Power again to confirm to enter into Download Mode.
Step 4 – Make sure you have your Samsung Galaxy S6 Edge LTE USB drivers installed on your computer.
Step 5 – Open ODIN on your computer. Connect your phone to your computer while your phone is in the Download Mode.
Step 6 – If your phone is connected successfully, one of the ID:COM boxes will turn yellow with the COM port number. This step might take some time.
Step 7 – Now select the file that you have to flash/install on your phone. This file will be found from the extracted file in Step 1.
Click on ‘PDA’ / ‘AP’ and select the file ‘CF-Auto-Root-zerolte-zeroltexx-smg925f.tar.md5‘.
Step 8 – In ODIN, check the Auto Reboot and F. Reset Time options, if not already.
Step 9 – Now click on the Start button in ODIN. Installation process will start and would take a few minutes to complete.
Step 10 – After the installation is completed, your phone will reboot into Recovery Mode automatically and install the root package / files. Your ID:COM box will also turn green.
Step 11 – After you see the home screen, unplug your phone from the computer.

That’s it! Your Samsung Galaxy S6 Edge has now been rooted on Android 6.0.1 official software update. Check for the SuperSU app in your apps list to verify.
Like this post? PLZ Hit the share buttons below to share this article with your friends on Facebook, Google + and Twitter.
PLZ Follow Us On Flipboard 4 More Latest Updates.
PLZ Use the comment box below to contribute more ideas & Suggestions .
Best Regards
÷ Prerequisites:
•This root method tutorial is only for Galaxy S6 Edge SM-G925F. Please do not try on any other Galaxy S6 Edge LTE variants.
•Make sure you backup all your data in your phone before proceeding as a precaution.
•Your Galaxy S6 Edge should be on an official firmware by Samsung, not a custom ROM.
•Your phone should be on XXU3DPDP Android 6.0.1 firmware.
*Disclaimer:
Android Custom ROM fix ® provide various Firmware Updates and Rooting process along with Custom ROM,Modes,file are all belong to their owners/developers. The autor of this site or the developers are not responsible, if you damage or brick your device.Do it on your own risk and follow the instruction properly.
* Important:
Backup important files stored on your device before proceeding with the steps below, so that in case something goes wrong you’ll have backup of all your important files.
÷ How to Root Galaxy S6 Edge G925F on Android 6.0.1 on XXU3DPDP Update.
Step 1 – Download CF-Auto-Root Android 6.0.1 Package for Samsung Galaxy S6 Edge LTE to your computer and extract the zip file.
Step 2 – Download ODIN v3.09 which will help you to root Android 6.0.1 on Samsung Samsung Galaxy S6 Edge LTE G925F.
Step 3 – Switch OFF your phone. Now go to Download Mode. How? Press and hold the Volume Down + Home buttons together, and then press the Power button till you see the construction Android robot and a triangle. Press Power again to confirm to enter into Download Mode.
Step 4 – Make sure you have your Samsung Galaxy S6 Edge LTE USB drivers installed on your computer.
Step 5 – Open ODIN on your computer. Connect your phone to your computer while your phone is in the Download Mode.
Step 6 – If your phone is connected successfully, one of the ID:COM boxes will turn yellow with the COM port number. This step might take some time.
Step 7 – Now select the file that you have to flash/install on your phone. This file will be found from the extracted file in Step 1.
Click on ‘PDA’ / ‘AP’ and select the file ‘CF-Auto-Root-zerolte-zeroltexx-smg925f.tar.md5‘.
Step 8 – In ODIN, check the Auto Reboot and F. Reset Time options, if not already.
Step 9 – Now click on the Start button in ODIN. Installation process will start and would take a few minutes to complete.
Step 10 – After the installation is completed, your phone will reboot into Recovery Mode automatically and install the root package / files. Your ID:COM box will also turn green.
Step 11 – After you see the home screen, unplug your phone from the computer.
That’s it! Your Samsung Galaxy S6 Edge has now been rooted on Android 6.0.1 official software update. Check for the SuperSU app in your apps list to verify.
Like this post? PLZ Hit the share buttons below to share this article with your friends on Facebook, Google + and Twitter.
PLZ Follow Us On Flipboard 4 More Latest Updates.
PLZ Use the comment box below to contribute more ideas & Suggestions .
Best Regards
Monday, July 25, 2016
How to Install Android 6 0 1 Marshmallow Yoyo ROM on Galaxy Note 3 LTE N9005 Full Galaxy S7 Edge Features
Samsung Galaxy Note 3 LTE N9005 Yoyo custom ROM comes with tons of new features and is based on Android 6.0.1 Marshmallow. A quick list of the main features in Yoyo is given below and we are sure you’d love to use this on your Galaxy Note 3 LTE N9005:

base on Galaxy S7 edge G935FXXU1APD3
rooted / deodexed / zipaligned / busybox / deknoxed
multi languages
android 6.0.1
full Galaxy S7 edge features
full Galaxy Note5 features..
View my Flipboard Magazine.
÷ Prerequisites:
•This tutorial is only for installing Yoyo Android 6.0.1 ROM on Samsung Galaxy Note 3 LTE N9005. Please do not try on any other Galaxy Note 3 variants.
•Your phone should be rooted and have ClockworkMod recovery installed from before.
This tutorial will wipe out all your data. Proceed at your own risk.
•Perform a Dalvik Cache wipe before proceeding from the recovery mode.
•Samsung KIES will NOT detect your phone after installing this ROM because it is a custom firmware.
•Make sure you backup all your data in your phone before proceeding.
*Disclaimer:
Android Custom ROM fix ® provide various Firmware Updates and Rooting process along with Custom ROM,Modes,file are all belong to their owners/developers. The autor of this site or the developers are not responsible, if you damage or brick your device.Do it on your own risk and follow the instruction properly.
* Important:
Backup important files stored on your device before proceeding with the steps below, so that in case something goes wrong you’ll have backup of all your important files.

÷ How to Install Android 6.0.1 Marshmallow Yoyo ROM on Galaxy Note 3 LTE N9005 [ Full Galaxy S7 Edge Features].
Step 1 – Download Yoyo Android 6.0.1 ROM for Galaxy Note 3 to your computer.
Step 2 – Connect and mount your Galaxy Note 3 USB memory on your computer using the USB cable.
Step 3 – Now copy/paste the downloaded Android 6.0.1 ROM zip file to your SD card. Make sure the file is in the SD card root (not in any folder).
Step 4 – Then turn OFF your phone and disconnect from the USB cable.
Step 5 – Now to get in the Recovery Mode. Switch ON the phone while pressing and holding Volume Up + Home + Power buttons together.
Step 6 – Once you are in ClockworkMod Recovery, select perform a full data wipe by selecting “wipe data/factory reset” . Use the Power button to select everything while in the Recovery Mode.
Step 7 – Then, perform a cache wipe by selecting “wipe cache partition”.
Step 8 – Now this is optional, but it is recommended to perform a wipe of your dalvik cache as well. You will not get into boot loops or any other errors. From CWM recovery, go to ‘advanced’ and then select “wipe dalvik cache”.
Step 9 – Then go back to the main recovery screen and select “install zip from SD card”.
Step 10 – Now select “choose zip from sdcard”. Using your volume keys, navigate to the Android 6.0.1 ROM zip file that you copied to your SD card and select it using the Power button. Confirm the installation on the next screen and the installation procedure should start now.
Step 11 – After the installation completes, go to “+++++Go Back+++++” and reboot the phone by selecting “reboot system now” from the recovery menu .

Your Galaxy Note 3 LTE N9005 will boot now and it might take about 5 minutes to boot on your first time. So, please wait.
That’s it! Your Galaxy Note 3 should now have Yoyo Android 6.0.1 Marshmallow custom ROM installed on your phone! Go to Settings > About phone to verify.
For More Samsung Galaxy Note 3 LTE N9005 keep checking AndroidCustomROM Fix™®
Like this post? PLZ Hit the share buttons below to share this article with your friends on Facebook, Google + and Twitter.
PLZ Follow Us On Flipboard 4 More Latest Updates.
PLZ Use the comment box below to contribute more ideas & Suggestions .
Best Regards.
÷ Prerequisites:
•This tutorial is only for installing Yoyo Android 6.0.1 ROM on Samsung Galaxy Note 3 LTE N9005. Please do not try on any other Galaxy Note 3 variants.
•Your phone should be rooted and have ClockworkMod recovery installed from before.
This tutorial will wipe out all your data. Proceed at your own risk.
•Perform a Dalvik Cache wipe before proceeding from the recovery mode.
•Samsung KIES will NOT detect your phone after installing this ROM because it is a custom firmware.
•Make sure you backup all your data in your phone before proceeding.
*Disclaimer:
Android Custom ROM fix ® provide various Firmware Updates and Rooting process along with Custom ROM,Modes,file are all belong to their owners/developers. The autor of this site or the developers are not responsible, if you damage or brick your device.Do it on your own risk and follow the instruction properly.
* Important:
Backup important files stored on your device before proceeding with the steps below, so that in case something goes wrong you’ll have backup of all your important files.
÷ How to Install Android 6.0.1 Marshmallow Yoyo ROM on Galaxy Note 3 LTE N9005 [ Full Galaxy S7 Edge Features].
Step 1 – Download Yoyo Android 6.0.1 ROM for Galaxy Note 3 to your computer.
Step 2 – Connect and mount your Galaxy Note 3 USB memory on your computer using the USB cable.
Step 3 – Now copy/paste the downloaded Android 6.0.1 ROM zip file to your SD card. Make sure the file is in the SD card root (not in any folder).
Step 4 – Then turn OFF your phone and disconnect from the USB cable.
Step 5 – Now to get in the Recovery Mode. Switch ON the phone while pressing and holding Volume Up + Home + Power buttons together.
Step 6 – Once you are in ClockworkMod Recovery, select perform a full data wipe by selecting “wipe data/factory reset” . Use the Power button to select everything while in the Recovery Mode.
Step 7 – Then, perform a cache wipe by selecting “wipe cache partition”.
Step 8 – Now this is optional, but it is recommended to perform a wipe of your dalvik cache as well. You will not get into boot loops or any other errors. From CWM recovery, go to ‘advanced’ and then select “wipe dalvik cache”.
Step 9 – Then go back to the main recovery screen and select “install zip from SD card”.
Step 10 – Now select “choose zip from sdcard”. Using your volume keys, navigate to the Android 6.0.1 ROM zip file that you copied to your SD card and select it using the Power button. Confirm the installation on the next screen and the installation procedure should start now.
Step 11 – After the installation completes, go to “+++++Go Back+++++” and reboot the phone by selecting “reboot system now” from the recovery menu .
Your Galaxy Note 3 LTE N9005 will boot now and it might take about 5 minutes to boot on your first time. So, please wait.
That’s it! Your Galaxy Note 3 should now have Yoyo Android 6.0.1 Marshmallow custom ROM installed on your phone! Go to Settings > About phone to verify.
For More Samsung Galaxy Note 3 LTE N9005 keep checking AndroidCustomROM Fix™®
Like this post? PLZ Hit the share buttons below to share this article with your friends on Facebook, Google + and Twitter.
PLZ Follow Us On Flipboard 4 More Latest Updates.
PLZ Use the comment box below to contribute more ideas & Suggestions .
Best Regards.
Thursday, July 21, 2016
How to Install Android 6 0 1 Marshmallow CRISSCROSS ROM on Galaxy S6 Edge G925I
Samsung Galaxy S6 Edge SM-G925I CRISSCROSS custom ROM comes with tons of new features and is based on Android 6.0.1 Marshmallow.

Follow our guide below to download the CRISSCROSS custom ROM and install it yourself.
View my Flipboard Magazine.
÷ Prerequisites:
•This tutorial is only for installing Android 6.0.1 CRISSCROSS ROM on Samsung Galaxy S6 Edge G925I. Please do not try on any other Galaxy S6 Edge variants.
•Your phone should have a custom recovery installed in order to install this CRISSCROSS ROM on your phone.
•We will be using TWRP Recovery for this tutorial.
•This tutorial will wipe out all your data. Make sure you backup all your data in your phone before proceeding.
•Samsung KIES will NOT detect your phone after installing this ROM because it is a custom firmware.
•Perform a Dalvik Cache wipe before proceeding from the Recovery Mode.
*Disclaimer:
Android Custom ROM fix ® provide various Firmware Updates and Rooting process along with Custom ROM,Modes,file are all belong to their owners/developers. The autor of this site or the developers are not responsible, if you damage or brick your device.Do it on your own risk and follow the instruction properly.
* Important:
Backup important files stored on your device before proceeding with the steps below, so that in case something goes wrong you’ll have backup of all your important files.

÷ How to Install Android 6.0.1 Marshmallow CRISSCROSS ROM on Galaxy S6 Edge G925I:
Step 1 – Download Android 6.0.1 CRISSCROSS ROM for Galaxy S6 Edge to your computer.
Step 2 – Connect and mount your Galaxy S6 Edge USB memory to your computer using the USB cable.
Step 3 – Now copy/paste the downloaded Android 6.0.1 ROM zip file to your phone memory / SD card. Make sure the file is in the phone memory / SD card root (not in any folder).
Step 4 – Then turn OFF your phone and disconnect from the USB cable.
Step 5 – Now to get in the Recovery Mode. Switch ON the phone while pressing and holding Volume Up + Home + Power buttons together.
Step 6 – Once you are in TWRP Recovery, perform a full data wipe by tapping on the ‘Wipe’ button. Then swipe on the “Swipe to Factory Reset” option at the bottom.
Step 7 – Now go back to the main menu and then tap on the ‘Install’ button. From the list, choose the ZIP file that you copied to your phone memory in Step 3.
Step 8 – Confirm installation on the next screen by swiping on the “Swipe to Confirm Flash” option. The installation procedure should start now.
Step 9 – Once the installation is completed.
Step 10 – Tap on the “Wipe cache/dalvik” button if you get into any boot loops or other issues.
Step 11 – You can now reboot your phone by selecting the “Reboot System” button.
Your Samsung Galaxy S6 Edge will boot now and it might take about 5 minutes to boot on your first time after flashing a new ROM. So, please wait.

That’s it! Your Samsung Galaxy S6 Edge should now have Android 6.0.1 CRISSCROSS Marshmallow custom ROM installed on your phone! Go to Settings > About phone to verify.
For More Samsung Galaxy S6 Edge latest updates Keep Checking Android Custom ROM Fix ™®
Like this post? PLZ Hit the share buttons below to share this article with your friends on Facebook, Google + and Twitter.
PLZ Follow Us On Flipboard 4 More Latest Updates.
PLZ Use the comment box below to contribute more ideas & Suggestions .
Best Regards.
÷ Prerequisites:
•This tutorial is only for installing Android 6.0.1 CRISSCROSS ROM on Samsung Galaxy S6 Edge G925I. Please do not try on any other Galaxy S6 Edge variants.
•Your phone should have a custom recovery installed in order to install this CRISSCROSS ROM on your phone.
•We will be using TWRP Recovery for this tutorial.
•This tutorial will wipe out all your data. Make sure you backup all your data in your phone before proceeding.
•Samsung KIES will NOT detect your phone after installing this ROM because it is a custom firmware.
•Perform a Dalvik Cache wipe before proceeding from the Recovery Mode.
*Disclaimer:
Android Custom ROM fix ® provide various Firmware Updates and Rooting process along with Custom ROM,Modes,file are all belong to their owners/developers. The autor of this site or the developers are not responsible, if you damage or brick your device.Do it on your own risk and follow the instruction properly.
* Important:
Backup important files stored on your device before proceeding with the steps below, so that in case something goes wrong you’ll have backup of all your important files.
÷ How to Install Android 6.0.1 Marshmallow CRISSCROSS ROM on Galaxy S6 Edge G925I:
Step 1 – Download Android 6.0.1 CRISSCROSS ROM for Galaxy S6 Edge to your computer.
Step 2 – Connect and mount your Galaxy S6 Edge USB memory to your computer using the USB cable.
Step 3 – Now copy/paste the downloaded Android 6.0.1 ROM zip file to your phone memory / SD card. Make sure the file is in the phone memory / SD card root (not in any folder).
Step 4 – Then turn OFF your phone and disconnect from the USB cable.
Step 5 – Now to get in the Recovery Mode. Switch ON the phone while pressing and holding Volume Up + Home + Power buttons together.
Step 6 – Once you are in TWRP Recovery, perform a full data wipe by tapping on the ‘Wipe’ button. Then swipe on the “Swipe to Factory Reset” option at the bottom.
Step 7 – Now go back to the main menu and then tap on the ‘Install’ button. From the list, choose the ZIP file that you copied to your phone memory in Step 3.
Step 8 – Confirm installation on the next screen by swiping on the “Swipe to Confirm Flash” option. The installation procedure should start now.
Step 10 – Tap on the “Wipe cache/dalvik” button if you get into any boot loops or other issues.
Step 11 – You can now reboot your phone by selecting the “Reboot System” button.
Your Samsung Galaxy S6 Edge will boot now and it might take about 5 minutes to boot on your first time after flashing a new ROM. So, please wait.
That’s it! Your Samsung Galaxy S6 Edge should now have Android 6.0.1 CRISSCROSS Marshmallow custom ROM installed on your phone! Go to Settings > About phone to verify.
For More Samsung Galaxy S6 Edge latest updates Keep Checking Android Custom ROM Fix ™®
Like this post? PLZ Hit the share buttons below to share this article with your friends on Facebook, Google + and Twitter.
PLZ Follow Us On Flipboard 4 More Latest Updates.
PLZ Use the comment box below to contribute more ideas & Suggestions .
Best Regards.
Wednesday, July 20, 2016
How to Install Android 6 0 1 Marshmallow Mystery OS Reloaded V8 Rom on Galaxy S6 Edge SM G925F

According to XDA member Hybirdmax, Android 6.0.1 Marshmallow Mystery OS Reloaded V8 ROM now is released for Samsung Galaxy S6 Edge SM-G925F.
÷ ROM Base :
Model: SM-G935F
Model name: Galaxy S7 edge
Country: Germany
Version: Android: 6.0.1
Changelist: 110166628
Build Date: Mon, 14 Mar 2016 15:03:53 +0000
Product code: DBT
PDA: G935FXXU1APC8
CSC: G935FDBT1APB1
÷ ROM Information :
Mostly stock System for best experience
Odex System
Latest Busybox Version
Support stock kernel by su (system-less)
Removed knox and fota client
Latest SuperSU Beta.

÷ ROM Features :
- Odex System
- Busybox
- Debloated
- DSP+ Sound Mod
- Floating Message
- USSD
- Rom Control
- 3Minit Battery Mod
- Potato Clock Mod
- Potato Startusbar Mod
- Power Off Battery Mod
- 5 Way Reboot
- Smooth Spinner Framework
- Update Power Profile Framework
- Windowanimation default: 0.5
- Mystery Kernel
- 5 Way Reboot
- SuperSU 2.68 Systemless
- OTA System (Offline)
View my Flipboard Magazine.
÷ Prerequisites:
This tutorial is only for installing Android 6.0.1 Marshmallow Renegade ROM on Samsung Galaxy S6 Edge SM- G925F . Please do not try on any other Galaxy S6 Edge variants.
•Your phone should be rooted and have ClockworkMod recovery installed from before.
•This tutorial will wipe out all your data. Proceed at your own risk.
•Perform a Dalvik Cache wipe before proceeding from the recovery mode.
•Samsung KIES will NOT detect your phone after installing this ROM because it is a custom firmware.
•Make sure you backup all your data in your phone before proceeding
*Disclaimer:
Android Custom ROM fix ® provide various Firmware Updates and Rooting process along with Custom ROM,Modes,file are all belong to their owners/developers. The autor of this site or the developers are not responsible, if you damage or brick your device.Do it on your own risk and follow the instruction properly.
* Important:
Backup important files stored on your device before proceeding with the steps below, so that in case something goes wrong you’ll have backup of all your important files.
ROM Download & Installation Instructions via XDA.

For More Samsung Galaxy S6 Edge updates Keep Checking Android Custom ROM Fix™®
Like this post? PLZ Hit the share buttons below to share this article with your friends on Facebook, Google + and Twitter.
PLZ Follow Us On Flipboard 4 More Latest Updates.
PLZ Use the comment box below to contribute more ideas & Suggestions .
Best Regards.
÷ Prerequisites:
This tutorial is only for installing Android 6.0.1 Marshmallow Renegade ROM on Samsung Galaxy S6 Edge SM- G925F . Please do not try on any other Galaxy S6 Edge variants.
•Your phone should be rooted and have ClockworkMod recovery installed from before.
•This tutorial will wipe out all your data. Proceed at your own risk.
•Perform a Dalvik Cache wipe before proceeding from the recovery mode.
•Samsung KIES will NOT detect your phone after installing this ROM because it is a custom firmware.
•Make sure you backup all your data in your phone before proceeding
*Disclaimer:
Android Custom ROM fix ® provide various Firmware Updates and Rooting process along with Custom ROM,Modes,file are all belong to their owners/developers. The autor of this site or the developers are not responsible, if you damage or brick your device.Do it on your own risk and follow the instruction properly.
* Important:
Backup important files stored on your device before proceeding with the steps below, so that in case something goes wrong you’ll have backup of all your important files.
ROM Download & Installation Instructions via XDA.
For More Samsung Galaxy S6 Edge updates Keep Checking Android Custom ROM Fix™®
Like this post? PLZ Hit the share buttons below to share this article with your friends on Facebook, Google + and Twitter.
PLZ Follow Us On Flipboard 4 More Latest Updates.
PLZ Use the comment box below to contribute more ideas & Suggestions .
Best Regards.
Having Issues with your Samsung Galaxy S6 And S6 Edge
The Samsung Galaxy S6 and S6 edge are inarguably beautiful smartphones with stunning looks and feel accompanied by wonderful features. However, virtually every user of the Samsung Galaxy S6 and S6 Edge complains of the phones battery issues.

Unlike most other Samsung android devices, the Samsung Galaxy S6 and S6 Edge are bundled with fairly small battery as against the functionalities of these devices.
Meanwhile, in response to the complaints from the users, Samsung, as seen on the Sammobile.com website, it is argued that the blame could be shared by both Google and Samsung.
Also Check: How to Root Any Samsung Android
Although, this is Samsungs views; it is not enough an excuse for the die-hard and loyal Samsung fans. This is probably because the Samsung Galaxy S6 and S6 edge are not the first smartphones from Samsung that are bundled with fairly small or rather poor batteries.
Samsung Grand and perhaps, the Galaxy Grand 2 are bundled with disappointing batteries, too.
Related Article: How to Change Samsung Android IMEI
On the other hand, on Lollipop androids, there have been reports that some apps are continuing to keep the mobile data connection active even when they are done communicating which is not supposed to be.
Google Play services and Google Now probably contribute mostly to the poor battery performance and power management of the android Lollipop devices.
Since the battery issues are supposedly from the Lollipop, Google is hopefully working on sorting things out, perhaps; the effect might be seen on the Android M, which might arrive later this year.
Noticed any issues with your battery?
Have you noticed some other apps consuming more battery than usual on your Android Lollipop device? Do let us know in the comment. We might be able to proffer solutions to minimising the battery span.
Read more »
Unlike most other Samsung android devices, the Samsung Galaxy S6 and S6 Edge are bundled with fairly small battery as against the functionalities of these devices.
Meanwhile, in response to the complaints from the users, Samsung, as seen on the Sammobile.com website, it is argued that the blame could be shared by both Google and Samsung.
Samsung might have made a mistake putting rather small batteries inside the Galaxy S6 and Galaxy S6 edge, but it seems part of the battery issues users are facing – on both existing devices and the S6 duo – are because of issues on Android 5.0 itself. One of the biggest issues with Lollipop seems to be one that keeps the mobile data connection active far longer than it needs to be, something a lot of users have complained about over on the official Android Open Source Project issue tracker. -SourceIt is said that the battery issues of the Samsung Galaxy S6 and S6 Egde are also affected by the Lollipop build which keeps mobile data connection far longer than it should be.
Also Check: How to Root Any Samsung Android
Although, this is Samsungs views; it is not enough an excuse for the die-hard and loyal Samsung fans. This is probably because the Samsung Galaxy S6 and S6 edge are not the first smartphones from Samsung that are bundled with fairly small or rather poor batteries.
Samsung Grand and perhaps, the Galaxy Grand 2 are bundled with disappointing batteries, too.
Related Article: How to Change Samsung Android IMEI
On the other hand, on Lollipop androids, there have been reports that some apps are continuing to keep the mobile data connection active even when they are done communicating which is not supposed to be.
Google Play services and Google Now probably contribute mostly to the poor battery performance and power management of the android Lollipop devices.
Since the battery issues are supposedly from the Lollipop, Google is hopefully working on sorting things out, perhaps; the effect might be seen on the Android M, which might arrive later this year.
Noticed any issues with your battery?
Have you noticed some other apps consuming more battery than usual on your Android Lollipop device? Do let us know in the comment. We might be able to proffer solutions to minimising the battery span.
How to Root Galaxy S7 Edge SM G935F On XXU1APE9 Update
Samsung Recently Rolling out XXU1APE9 Android 6.0.1 Marshmallow firmware and through this guide you can root it. This new update brings a newer security patch level as well as some other new features like Condensed Text scaling to better optimize the phone.

Don’t worry we are going to share step by step guide to safely Root your Samsung Galaxy S7 Edge SM-G935F On XXU1APE9 Marshmallow 6.0.1 Update:
Don’t worry we are going to share step by step guide to safely Root your Samsung Galaxy S7 Edge SM-G935F On XXU1APE9 Marshmallow 6.0.1 Update:
View my Flipboard Magazine.
÷ Prerequisites:
•This root method tutorial is only for Samsung Galaxy S7 Edge SM-G935F. Please do not try on any other Galaxy S7 Edge LTE variants.
•Make sure you backup all your data in your phone before proceeding as a precaution.
•Your Galaxy S7 Edge should be on an official firmware by Samsung, not a custom ROM.
•Your phone should be on XXU1APE9 Android 6.0.1 firmware.
*Disclaimer:
Android Custom ROM fix ® provide various Firmware Updates and Rooting process along with Custom ROM,Modes,file are all belong to their owners/developers. The autor of this site or the developers are not responsible, if you damage or brick your device.Do it on your own risk and follow the instruction properly.
* Important:
Backup important files stored on your device before proceeding with the steps below, so that in case something goes wrong you’ll have backup of all your important files.

÷ How to Root Galaxy S7 Edge SM-G935F On XXU1APE9 Update:
Step 1 – Download CF-Auto-Root Android 6.0.1 Package for Samsung Galaxy S7 Edge to your computer and extract the zip file.
Step 2 – Download ODIN v3.09 which will help you to root Android 6.0.1 on Samsung Galaxy S7 Edge G935F.
Step 3 – Switch OFF your phone. Now go to Download Mode. How? Press and hold the Volume Down + Home buttons together, and then press the Power button till you see the construction Android robot and a triangle. Press Power again to confirm to enter into Download Mode.
Step 4 – Make sure you have your Samsung Galaxy S7 Edge USB drivers installed on your computer.
Step 5 – Open ODIN on your computer. Connect your phone to your computer while your phone is in the Download Mode.
Step 6 – If your phone is connected successfully, one of the ID:COM boxes will turn yellow with the COM port number. This step might take some time.
Step 7 – Now select the file that you have to flash/install on your phone. This file will be found from the extracted file in Step 1.
Click on ‘AP’ and select the file CF-Auto-Root-hero2lte-hero2ltexx-smg935f.zip
Step 8 – In ODIN, check the Auto Reboot and F. Reset Time options, if not already.
Step 9 – Now click on the Start button in ODIN. Installation process will start and would take a few minutes to complete.

Step 10 – After the installation is completed, your phone will reboot into Recovery Mode automatically and install the root package / files. Your ID:COM box will also turn green.
Step 11 – After you see the home screen, unplug your phone from the computer.
Step 11 – Pull out the battery to turn OFF the phone forcefully.
Step 12 – Now boot (turn ON your phone) with Volume Up + Home + Power buttons to go directly into Recovery Mode manually. This will start the install process of rooting your phone.
That’s it. Your Galaxy S7 Edge has now been rooted on Android 6.0.1 Marshmallow with CF-Auto-Root package. Check for the SuperSU app in your apps list to verify.
For More Samsung Galaxy S7 Edge updates Keep Checking Android Custom ROM Fix ™®
Like this post? PLZ Hit the share buttons below to share this article with your friends on Facebook, Google + and Twitter.
PLZ Follow Us On Flipboard 4 More Latest Updates.
PLZ Use the comment box below to contribute more ideas & Suggestions .
Best Regards.
÷ Prerequisites:
•This root method tutorial is only for Samsung Galaxy S7 Edge SM-G935F. Please do not try on any other Galaxy S7 Edge LTE variants.
•Make sure you backup all your data in your phone before proceeding as a precaution.
•Your Galaxy S7 Edge should be on an official firmware by Samsung, not a custom ROM.
•Your phone should be on XXU1APE9 Android 6.0.1 firmware.
*Disclaimer:
Android Custom ROM fix ® provide various Firmware Updates and Rooting process along with Custom ROM,Modes,file are all belong to their owners/developers. The autor of this site or the developers are not responsible, if you damage or brick your device.Do it on your own risk and follow the instruction properly.
* Important:
Backup important files stored on your device before proceeding with the steps below, so that in case something goes wrong you’ll have backup of all your important files.
÷ How to Root Galaxy S7 Edge SM-G935F On XXU1APE9 Update:
Step 1 – Download CF-Auto-Root Android 6.0.1 Package for Samsung Galaxy S7 Edge to your computer and extract the zip file.
Step 2 – Download ODIN v3.09 which will help you to root Android 6.0.1 on Samsung Galaxy S7 Edge G935F.
Step 3 – Switch OFF your phone. Now go to Download Mode. How? Press and hold the Volume Down + Home buttons together, and then press the Power button till you see the construction Android robot and a triangle. Press Power again to confirm to enter into Download Mode.
Step 4 – Make sure you have your Samsung Galaxy S7 Edge USB drivers installed on your computer.
Step 5 – Open ODIN on your computer. Connect your phone to your computer while your phone is in the Download Mode.
Step 6 – If your phone is connected successfully, one of the ID:COM boxes will turn yellow with the COM port number. This step might take some time.
Step 7 – Now select the file that you have to flash/install on your phone. This file will be found from the extracted file in Step 1.
Click on ‘AP’ and select the file CF-Auto-Root-hero2lte-hero2ltexx-smg935f.zip
Step 8 – In ODIN, check the Auto Reboot and F. Reset Time options, if not already.
Step 9 – Now click on the Start button in ODIN. Installation process will start and would take a few minutes to complete.
Step 10 – After the installation is completed, your phone will reboot into Recovery Mode automatically and install the root package / files. Your ID:COM box will also turn green.
Step 11 – After you see the home screen, unplug your phone from the computer.
Step 11 – Pull out the battery to turn OFF the phone forcefully.
Step 12 – Now boot (turn ON your phone) with Volume Up + Home + Power buttons to go directly into Recovery Mode manually. This will start the install process of rooting your phone.
That’s it. Your Galaxy S7 Edge has now been rooted on Android 6.0.1 Marshmallow with CF-Auto-Root package. Check for the SuperSU app in your apps list to verify.
For More Samsung Galaxy S7 Edge updates Keep Checking Android Custom ROM Fix ™®
Like this post? PLZ Hit the share buttons below to share this article with your friends on Facebook, Google + and Twitter.
PLZ Follow Us On Flipboard 4 More Latest Updates.
PLZ Use the comment box below to contribute more ideas & Suggestions .
Best Regards.
How to Update Galaxy S6 Edge SM G928P to Marshmallow 6 0 1 June VPU2BPD2 OTA Security Patch Enhanced Features
Today Samsung Currently Pushing VPU2BPD2 Update to the Galaxy S6 edge+ - SM-G928P on its network that includes a security update, as well as now displaying which security patch your phone has and bug fixes. It is recommended you keep your device updated to the latest software so that you don’t experience any flaws or drops in reliability.
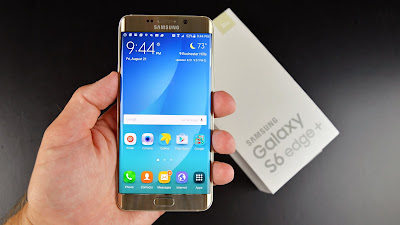
G928PVPU2BPD2 is based on the latest Marshmallow 6.0.1 for the Galaxy S6 edge+ - SM-G928P
Follow our guide below to download the update and install it yourself.
The Update brings the following changes:
•The security of your device has been improved.
•Device stability improvements, bug fixes.
•New and / or enhanced features.
•Further improvements to performance.
| Model | SM-G928P |
| Model name | Galaxy S6 edge+ |
| Country | Spint (cdma) |
| Version | Android 6.0.1 |
| Changelist | 7231607 |
| Build date | Fri, 22 Apr 2016 05:30:27 +0000 |
| Security Patch Level | 2016-05-01 |
| Product code | SPR |
| PDA | G928PVPU2BPD2 |
| CSC | G928PSPT2BPD2 |
View my Flipboard Magazine.
*Disclaimer:
Custom ROM fix ® provide various Firmware Updates and Rooting process along with Custom ROM,Modes,file are all belong to their owners/developers. The autor of this site or the developers are not responsible, if you damage or brick your device.Do it on your own risk and follow the instruction properly.
* Important:
Backup important files stored on your device before proceeding with the steps below, so that in case something goes wrong you’ll have backup of all your important files.
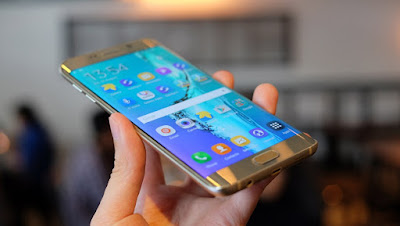
÷ How To Update Galaxy S6 edge+ - SM-G928P to Marshmallow 6.0.1 Stock Firmware DDU2BPD3 [Security Patches / Bug Fixes]
Download Samsung Galaxy S6 edge+ - SM-G928P UVU2APD7 Firmware .
1- Extract (unzip) the firmware file
2- Download Odin v3.10.7
3- Extract Odin ZIP file
4- Open Odin v.3.10.6
5- Reboot Phone in Download Mode (press and hold Home + Power + Volume Down buttons)
6- Connect phone and wait until you get a blue sign in Odin
7- Add the firmware file to AP / PDA
Make sure re-partition is NOT ticked
8- Click the start button, sit back and wait few minutes.
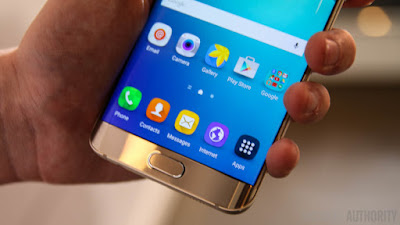
That’s it! Your Galaxy S6 edge+ - SM-G928P should now have Marshmallow 6.0.1 June update on your phone! Go to Settings > About phone to verify.
Like this post? PLZ Hit the share buttons below to share this article with your friends on Facebook, Google + and Twitter.
PLZ Follow Us On Flipboard 4 More Samsung Galaxy S6 edge+ Latest Updates.
PLZ Use the comment box below to contribute more ideas & Suggestions .
Best Regards.
*Disclaimer:
Custom ROM fix ® provide various Firmware Updates and Rooting process along with Custom ROM,Modes,file are all belong to their owners/developers. The autor of this site or the developers are not responsible, if you damage or brick your device.Do it on your own risk and follow the instruction properly.
* Important:
Backup important files stored on your device before proceeding with the steps below, so that in case something goes wrong you’ll have backup of all your important files.
÷ How To Update Galaxy S6 edge+ - SM-G928P to Marshmallow 6.0.1 Stock Firmware DDU2BPD3 [Security Patches / Bug Fixes]
Download Samsung Galaxy S6 edge+ - SM-G928P UVU2APD7 Firmware .
1- Extract (unzip) the firmware file
2- Download Odin v3.10.7
3- Extract Odin ZIP file
4- Open Odin v.3.10.6
5- Reboot Phone in Download Mode (press and hold Home + Power + Volume Down buttons)
6- Connect phone and wait until you get a blue sign in Odin
7- Add the firmware file to AP / PDA
Make sure re-partition is NOT ticked
8- Click the start button, sit back and wait few minutes.
That’s it! Your Galaxy S6 edge+ - SM-G928P should now have Marshmallow 6.0.1 June update on your phone! Go to Settings > About phone to verify.
Like this post? PLZ Hit the share buttons below to share this article with your friends on Facebook, Google + and Twitter.
PLZ Follow Us On Flipboard 4 More Samsung Galaxy S6 edge+ Latest Updates.
PLZ Use the comment box below to contribute more ideas & Suggestions .
Best Regards.
Subscribe to:
Posts (Atom)